An underground greenhouse is a popular design that allows you to grow fresh fruit and herbs throughout the year. The devices are used for personal households and commercial purposes. You can build the structure with your own hands. The main thing is to select the necessary materials, tools, drawings, and follow the recommendations of specialists.
Underground greenhouse
What is the structure
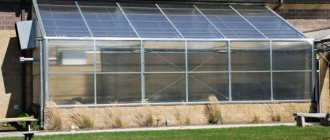
An underground greenhouse is a structure, the main part of which is located below the horizon line. At the same time, the roof rises above the ground. It is made transparent so that the roof does not interfere with the penetration of sunlight. Under their influence, the space heats up. In this case, the heat does not leave the structure, but a thermos effect is created.
An underground greenhouse is a structure, the main part of which is located below the horizon line
Main advantages
The author of this simple but very effective idea was Vladimir Antropov. Since then, Antropov's trench greenhouses have been used everywhere. Their main advantage is simplicity and ease of construction. Such a greenhouse can be easily built with your own hands without extra costs.
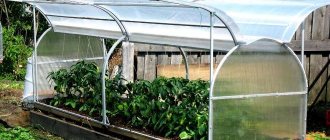
The simplest trench-type greenhouse
Antropov's simple trench greenhouses are a deep trench, one and a half meters in size, covered with insulating material on top. It helps protect plantings from the negative effects of external factors.
In the construction of a greenhouse, inexpensive and simplest materials are used, which are currently available on the construction market. Anyone can build a trench greenhouse with their own hands. The upper dome can be removed for storage for the winter, easily dismantling the structure. Additional light devices in the trench greenhouse, ventilation and others, then the greenhouse can be fully used for growing various crops even in winter. During mild frosts, the greenhouse can operate even without heating.
Features of the structure
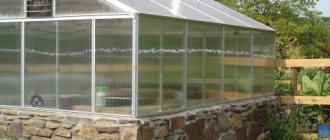
An underground greenhouse is a structure located in a recess at a depth of up to 2.5 m. The structure is usually built on a strip foundation. The base is made of timber, stone or brick.
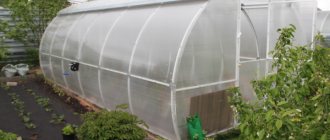
Polymer is used for roofing. The material does not prevent the penetration of sunlight and also disperses them. This increases the thermal efficiency of the structure several times.
Polymer is used to arrange the roof of an underground greenhouse
The design maintains the optimal temperature necessary for plant growth and development throughout the year without the need for a heating system.
DIY dugout greenhouse. Drawings and photos of structures
All pit greenhouses, depending on the depth and height of the walls, are divided into two groups: buried and underground.
Recessed greenhouses are partially immersed in the soil - to a depth of about 50-80 cm. The height of the ground walls reaches 110-150 cm and higher. Building a greenhouse underground with your own hands comes down to preparing a pit and installing a traditional structure. The presence of ground walls makes the building more vulnerable to cold weather.
Partially buried thermos greenhouse
Drawing of a gable recessed building
An underground greenhouse requires the presence of only a shelter and a supporting horizontal beam in the above-ground part. The construction is painstaking in its arrangement and requires a special approach to lighting.
Underground greenhouse for year-round gardening
Assembly diagram of an underground “thermos”
Depending on the height of the opposite walls, horizontal and inclined greenhouses are distinguished. In the first case, the support beams on the longitudinal sides are identical. This thermos greenhouse is suitable for areas with flat terrain.
Horizontal model of an underground greenhouse
Inclined models are used mainly on slopes. An interesting option is to add a greenhouse to the house. The main requirement here is the choice of the sunny side and the optimal angle of inclination of the roof.
Sloping version of the greenhouse
When building a Walipini “thermos” (an American development for cold mountainous areas), the most rational angle is considered to be 39°, which provides maximum illumination due to perpendicular sunlight hitting the plants.
Based on the shape of the roof, underground year-round greenhouses are:
- gable;
- single-pitched;
- tunnel (arched).
Walipini thermos greenhouse diagram
Gable - the classic “house” model. The roof slope angle is 30°-40°, but in regions with snowy winters an increase in this parameter is permissible. The main advantage is exposure to the sun for as long as possible during the day.
Lean-to greenhouses are quite compact, but are limited in receiving natural light, especially in winter. Artificial lighting is often used to support plant growth and fruiting.
An example of a solution for a lean-to underground greenhouse
Tunnel frames are constructed from metal arcs and covered with film or polycarbonate. Pros: Easy to assemble and all-round illumination. Minus - compared to gable greenhouses, arched greenhouses are more susceptible to gusts of wind.
How does it work
The operation of the greenhouse is based on the principle of light transmission. To equip the structure, technology is used that allows you to maintain the optimal temperature not only during the day, but also at night. Temperature changes at night are insignificant. The difference with daily values is only 5-7 degrees.
At the same time, during hot weather, the temperature in the greenhouse does not change. So, if outside the indicator is +450C, then inside the building it is +25-300C.
The recessed greenhouse is characterized by good lighting. This figure is several times better than that of a conventional above-ground greenhouse.
The recessed greenhouse is characterized by good lighting
Thanks to this, the microclimate necessary for the growth and development of plants is created in the building. It is underground greenhouses that help to obtain a rich harvest.
Further construction work
The walls of the greenhouse are erected from any heat-resistant material. For example, from polystyrene foam. To add rigidity, greenhouse walls are additionally reinforced. Even at the stage of their rise, take care of the necessary hydro- and heat-insulating procedures. Lubricate the openings between the blocks with a special solution and fill the cavities with foam. It is recommended to cover the inside of the wall with a foil-based thermal protective film.
Polycarbonate is optimal for the roof. It retains heat best. Sheets of material are laid in 2 layers, between which a wooden profile is placed. Pre-treat the wood with anti-rot impregnation.
Work progress:
- Connect the components of the lumber skeleton using the half-tree method.
- Paint the finished structure white.
- Fasten polycarbonate sheets with self-tapping screws. First - the inner layer, then - the outer one.
The proposed option for a recessed greenhouse is basic. Craftsmen complicate it at their own discretion:
- organize additional lighting;
- pour the heated floor mechanism under the screed;
- place plastic bottles or a barrel of water in the middle to slow down heat transfer;
- warm up the atmosphere using vermicompost and “warm” beds technology.
A greenhouse buried half a meter will allow its owners to significantly extend the gardening season. However, in the cold, even a technologically advanced design cannot cope on its own. She needs painstaking care, temperature and humidity control, and care for plant health.
Advantages and disadvantages
Recessed greenhouse
A buried greenhouse has the following advantages:
- the ability to grow plants in any weather conditions, regardless of the time of year;
- functionality;
- obtaining a rich harvest in season;
- high thermal efficiency, light transmittance;
- long operational period;
- You can grow exotic, heat-loving plants in the central regions - pineapples, melons, etc.;
- protecting plants from the scorching sun;
- Frequent irrigation is not required, since the earth warms up moderately and retains moisture well.
Minuses:
- difficulty of construction. To build a greenhouse, a foundation and trench are required. If groundwater lies nearby, a drainage system is also necessary. Therefore, to make a greenhouse, you need to have experience in construction and relevant knowledge.
- The construction of the structure is associated with high costs. You can only save money if you do the construction yourself. However, material costs will still be high.
- if the structure is used throughout the year, a heating system is required.
Video - Pros and cons of a winter in-depth greenhouse
Chronology of construction. 2018
This is what the greenhouse looked like in the spring of 2022: a hole filled to the brim with water.
Drainage made it possible to cut off groundwater from the greenhouse.
At the same time, our user welded a heat accumulator tank with a volume of 6 cubic meters from sheets of low-pressure polyethylene in order to provide the ability to accumulate energy and conduct various experiments in the future. Subsequently, he will bury it in the greenhouse, level with the floor.
alexv_1967FORUMHOUSE Member
Making the tank took a lot of time. I still haven't gained confidence that I really need it. So far this is a whim.
In the summer, Alex and two assistants began building a greenhouse.
Design requirements
The main requirement for underground greenhouses is a depth of 2-2.4 m. This is what will help create the effect of a thermos. At this depth, the temperature is maintained throughout the year. If the structure is built at a shallower depth, strong temperature changes will occur. The fluctuations will be 3-14 degrees. Therefore, the thermos effect cannot be created. As a result, a buried greenhouse will be ineffective.
The main requirement for underground greenhouses is a depth of 2-2.4 m
Lighting system
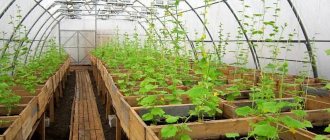
The main amount of light reaches the plants through the transparent coating of the top layer of the greenhouse. However, during winter and autumn, the number of natural rays of light is reduced significantly. In this case, lamps with throttles or devices with electronic ballast are used, which are installed so that the light hits the plants from different directions.
Electrical networks are installed without grounding. Reviews from experienced gardeners claim that lamps can dramatically increase yields in a trench greenhouse even in winter.
How to build a greenhouse: step-by-step instructions
To make a structure with your own hands, you must follow the step-by-step instructions.
Selecting a location
Before starting work, you need to choose a suitable location. To do this, take into account:
- Direction of the wind. If it constantly blows towards the greenhouse, a draft occurs. As a result, you will have to install a heating system, and if it was originally planned, then heat costs will increase.
- relief of the site. It is best to build a structure on a hillside. This will save on the arrangement of walls and heating.
- lighting. It is unacceptable to place a greenhouse close to other structures or trees. They create shaded areas, which impairs the illumination of the structure.
- location of groundwater. You cannot build a greenhouse in flooded areas.
Attention! An underground greenhouse is a stationary structure. For this reason, it is important to choose the right place for it, since it will not be possible to move the structure.
Choosing a suitable location for the greenhouse
Blueprints
Creating a design project is a complex and responsible process. If you do not have the appropriate knowledge and experience, it is best to contact a specialized company. Here you can purchase a standard project or order an individual drawing, but it will cost more. Schemes are also available on the Internet. This allows you to choose the appropriate option without investing money.
Greenhouse assembly diagram
Necessary equipment, materials
To work you will need:
- cement and sand or cement mixture;
- shovels;
- fasteners;
- screwdriver;
- industrial level;
- Master OK;
- container for mixing the working solution;
- drill with mixer attachment or industrial mixer;
- thermal film;
- construction tape;
- standard thermoblocks;
- sheet polycarbonate;
- wooden lumber for the frame;
- impregnation for wood that prevents rotting, protects against mold and mildew;
- wood paint and varnish.
Pit preparation
If you plan to build a large structure, then special equipment will be required to construct the pit. Recess requirements:
- depth – 2.2-2.4 m, optimal length – 5 m, width – depends on the free area of the site;
- shape – rectangular;
- orientation - from west to east.
Pit preparation
After forming the pit, all surfaces inside are leveled and compacted. This will help to avoid problems with the arrangement of walls and roofing.
Foundation arrangement
A simple foundation is required for construction. The base is arranged as follows:
- The perimeter of the structure is laid out with thermoblocks.
- Prepare a solution. To do this, the cement mixture is combined with water and mixed with an industrial mixer or a drill with a mixer attachment. The device is used until a mixture of homogeneous consistency without lumps is obtained.
- The blocks are poured with the prepared solution.
The perimeter of the underground greenhouse structure is laid out with thermoblocks
After this, work is suspended until the foundation hardens. Usually the base gains strength within a month.
Frame installation
To build the frame use:
- wooden beams;
- profile made of polyvinyl chloride.
Usually they take the first option. The material is treated with an antiseptic and dried.
The frame is made of three rows of racks. A strap is made from the bottom and top. The beams are strengthened with bevels and braces. They are installed between rafters and posts.
Underground greenhouse frame
The frame is coated with paint and varnish. Take a break to allow the material to dry.
Wall arrangement
The walls cannot be left earthen. After some time, they may collapse, which will lead to sad consequences, especially if there are people in the greenhouse at that moment. Brick is usually used to build walls. The material is placed in one row. You can also make walls from thermoblocks. This material has increased thermal insulation properties, due to which heat is retained for a long time.
Thermoblocks are reinforced with metal. This increases their strength and increases the reliability of the structure.
Thermoblocks are reinforced with metal
Roof arrangement
There are two types of roofs for underground greenhouses:
- gable;
- single-pitched.
If the first option is used, a ridge beam is additionally installed. It is connected to the rafters.
Polycarbonate sheets are installed on the prepared frame. Take material of such a size that there are as few joints as possible. On each sheet, a hole for fastening elements is formed in advance with a drill. This avoids the occurrence of cracks on the surface during installation.
The sheets are attached to the frame. To do this, screw the fasteners into the prepared holes using a screwdriver. Construction tape is applied to the joints of the material.
Polycarbonate sheets are installed on the prepared frame
Design improvement
To use the greenhouse throughout the year in the northern regions, the walls are insulated and a heating system is installed. Procedure:
- The joints between the blocks are treated with a waterproofing solution. If the gaps are large, they are sealed with polyurethane foam. Uneven edges are trimmed.
- A thermal insulation film is fixed to the walls, the base of which is foil.
- Heaters are installed. Electrical devices are usually used taking into account safety regulations.
Chronology of construction. 2017
Having decided on the dimensions, our user began digging a pit measuring 5x10 meters. For work I bought an electric hoist with an electric carriage; poured earth onto the site, raising its level. I dug all summer, in my free time.
Here it must be said that there is another reason why Alex chose the ditch greenhouse: he wanted to use a geothermal heat pump for heating.
alexv_1967FORUMHOUSE Member
I plan to pump heat from the geocontour in “pulse” mode. Take it at night, around 10 kW, and during the day so that it is restored.
Therefore, having dug a five-meter wide ditch, he began to think about how to drill a geocontour from this hole for a heat pump 20-30 meters long (he could not dig ordinary trenches, the area was planted and built up). After a series of experiments, I came to the conclusion that it was necessary to assemble a drilling rig and an installation for rotating the casing. And collected it.
From late September to December, Alex and his assistant carried out drilling work, installed foundation columns, internal drainage wells and air ducts to collect solar energy in the summer and direct it through the air ducts into the ground.
alexv_1967FORUMHOUSE Member
By the end of December 2022, drilling work was completed, 7 loops of 32 HDPE pipes of 50 meters were laid - the ends stick out into the ditch, and 12 foundation columns were poured inside the ditch (six pairs every two meters). We drilled from the greenhouse to the house and laid a 32 HDPE pipe to supply water to the greenhouse and an armored cable to supply electricity.
By this point, our user already understood where the boundaries of the greenhouse would be, what the shape of the roof and walls would be, and where the highest point would be.
Therefore, I made drainage wells and air ducts in the right places and installed poles on which the ridge would later rest - they should have been placed strictly on the edge of the bed, and not in the center of the bed and not on the path, but, as the owner of the greenhouse says, this is possible if several evenings to sit and count.
A reinforced concrete ring under the drainage pump was buried to the left of the entrance: a technical corner was planned there. The floor of the greenhouse is located at a depth of 0.7 m from the level of the neighbor’s fence, and the bottom of the reinforced concrete drainage ring is at a depth of two meters. A pump installed in the ring lifts the water and sends it forty meters further along the drainage pipe, and there it flows by gravity towards the lake. Also buried in the greenhouse are four homemade drainage catch basins connected by a pipe: the frames are welded from waste corners 40x40x100 cm and wrapped in filter fabric.
Autumn was greeted with completed drilling work and laid underground communications.
Advice from professionals
To improve the efficiency of an underground greenhouse, when arranging it, it is recommended to listen to the advice of professionals:
- When designing a structure, it is necessary to provide for a drainage system, waterproofing, and ventilation. This is to improve the microclimate inside the building.
- The northern wall must be made so that it rises above the southern one. This will protect the building from cold winds and drafts.
- To organize a heating system, you can use electric heaters or a water heated floor system. These devices are safe to use, reliable, and efficient.
Ventilation system
Ventilation in a trench greenhouse for citrus fruits and other crops is considered one of the main life support systems for plants. Even if the greenhouse is not heated, it must have a ventilation system so that there is a change in air masses.
The simplest option would be ordinary vents at the top of the greenhouse. The gardener will be able to open and close them at his discretion for ventilation. A more expensive type of ventilation system will be a supply and exhaust system. It will provide independent control of the climate in the greenhouse.
Numerous reviews from satisfied gardeners indicate that trench greenhouses are truly unique structures that make it possible to grow various crops throughout the year. If necessary, the upper part of the greenhouse can be easily dismantled and stored for winter.
Source of the article: https://propolikarbonat.ru/transhejnaya-teplica
Gabled earthen greenhouses with brick walls
Such designs are universal, suitable even for areas with fairly harsh climatic conditions. The capital structure will allow you to grow not only garden plants. It can also freely accommodate garden crops.
The construction of such a greenhouse is quite expensive. But the structure turns out to be convenient and will become economical to use for many years to come. When constructing such a greenhouse, the following premises are provided:
- Tambour.
- Storage area for materials and equipment.
- Work zone.
- Greenhouse.
