Any summer resident or owner of a small country house who is at least a little interested in farming must have at his disposal a mini greenhouse made of polycarbonate. A standard plot of 4-6 acres does not allow for the installation of a more substantial structure, and if you do not consider gardening as a small business, then a “mobile” frame greenhouse is quite enough to grow seedlings and get a fairly decent harvest of early vegetables or flowers by a certain date. And the “miniaturization” of greenhouses and the use of modern plant growing technologies have led to the fact that some models can even be installed directly in the house.
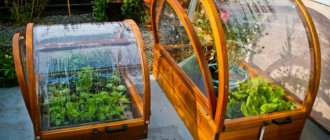
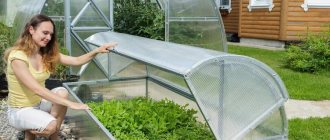
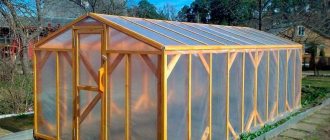
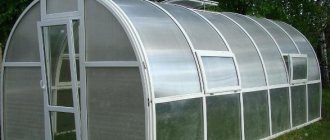
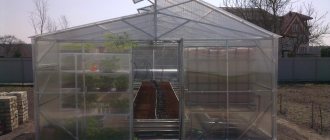
Polycarbonate mini-greenhouse on the site Source dipris-studio.ru
The nuances of the differences between a greenhouse and a greenhouse
If we consider only the design, and not the technical equipment, then a greenhouse differs from a greenhouse in size and method of arrangement.
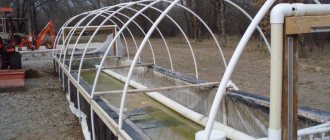
An ordinary greenhouse literally “spreads” above the ground and has a temporary frame of separate sections without a base, which is installed directly on the ground. Its task is to ensure the growth of greens, vegetables and root crops in the spring, when the probability of night frosts is high. More often the frame is covered with film, less often with sheet transparent materials. Maintenance of the greenhouse and care of seedlings occurs “from above” with the covering partially removed. When stable warmth arrives, the greenhouse is dismantled until the next season, and the plants remain in the open ground.
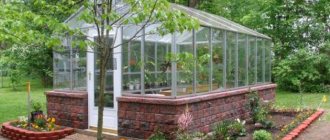
A conventional greenhouse has a more solid design. It may have a small foundation and a stationary place assigned to it on the site. The dimensions of the greenhouse in length and width can be any; the shape and type of the roof also differ for different models, but at the highest point its height should ensure free movement of a person. The most “advanced” samples can have their own heating, lighting, ventilation and irrigation systems, with automatic temperature control and regulation, a timer for turning on the fan, lamps and automatic watering.
The difference between a greenhouse (left) and a greenhouse (right) Source ogorod.radiomoon.ru
The mini greenhouse occupies an “intermediate place”. It is also low and compact, like a greenhouse, and is served “from above” or “from the side”. The translucent material can be film, cellular polycarbonate or glass. Its design is more rigid, although even when assembled it is “mobile” and can be easily moved.
The differences from a greenhouse in the simplest models for a summer house and plot are so insignificant that many manufacturers and sellers call this category a “mini-greenhouse greenhouse.”
A technically equipped mini greenhouse can have its own “life support” systems, including growing plants using hydroponics and aeroponics technology.
How to make a small greenhouse with your own hands
To get an early harvest or protect it from bad weather, you can build a small polycarbonate greenhouse with your own hands. Before starting work, it is important to choose a suitable location for the greenhouse, consider design features, the possibility of ventilation, lighting, and also calculate the number of sections and arcs.
Site selection and preparation
When choosing a location for a future polycarbonate greenhouse, consider:
- location relative to cardinal directions;
- soil features;
- landscape, presence of buildings and trees nearby.
The best options for installing a greenhouse in relation to the cardinal directions:
- from east to west;
- from North to South.
The first option is considered more preferable. It allows you to provide planting with light throughout the day.
The soil should be smooth and dry, without clay content. Ideally, the site of the future structure is filled with sand gravel, a sand cushion, and then a fertile layer.
Advice! If groundwater lies at a depth of less than 1.2 m, you should consider installing a drainage system.
The greenhouse should not be positioned in such a way that shadows from nearby buildings or trees fall on it, or falling leaves, ice or snow.
Required materials and tools
When installing a small polycarbonate greenhouse, in addition to the main material, you will need:
- materials for waterproofing;
- frame: metal profile, wooden beams, slats or plastic pipes;
- construction corners;
- anchor type bolts and self-tapping screws.
The following tools will be useful during installation:
- drill;
- electric jigsaw;
- hammer;
- screwdriver;
- knife;
- building level.
Drawing and calculations
To assemble a small greenhouse with your own hands, you start by drawing up a drawing and making calculations. You can use standard solutions or develop your own project, look at the best projects of small greenhouses with your own hands.
To do this, it is important to do the following:
- Calculate the base of the structure, select the material and dimensions of the frame and covering.
- Calculate the loads that the structure will have to withstand.
- Consider at what distance the beds will be located.
- Calculate how many windows, sashes, doors need to be installed.
All these parameters are reflected in the drawing. During the calculations, some nuances should be taken into account. For example, the dimensions of a greenhouse with a wooden frame often turn out to be larger than planned, since the wood swells from moisture. In this regard, polyvinyl chloride pipes are considered a more practical material. The higher cost is offset by a long service life. When planning a small seasonal greenhouse, the design should be such that it can be easily and quickly disassembled.
Assembly and installation of a small greenhouse
To assemble a small greenhouse for a summer residence, several stages go through:
- Leveling the area, removing the grass layer.
- When making a concrete foundation - creating formwork according to the size of the greenhouse, making a row of brickwork or a base of boards.
- Assembling the frame: cutting pipes of the required parameters, connecting them taking into account the pitch between the arches, attaching the pipes to the profile.
- Installation of the door frame, fastening it to concrete with anchor bolts or self-tapping screws to wood.
- Sheathing with polycarbonate sheets - fastening at the ends, cutting out vents, doors and installing fittings.
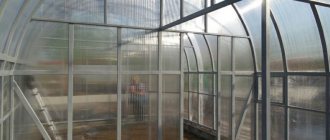
To properly install polycarbonate sheets, you need to remove the protective coating from them, then take one sheet and carefully place it on the greenhouse frame and level it. Extend the polycarbonate to the end by 2-3 cm, level it again, and then attach it to the arc using roofing screws.
Next, take galvanized metal tape, lay it on top of the polycarbonate sheet, and secure it with self-tapping screws, starting from the second arc. They begin laying the next sheet, install the remaining part of the metal tape, and make the constriction. The tape is pulled from the first sheet from the second arc, the last one is pulled off the overlapping sheets.
You can see how to quickly assemble a small greenhouse with a removable roof with your own hands in the video:
Mini greenhouse for a summer residence
Country models of factory-produced mini greenhouses are made from aluminum or steel profiles. The covered area usually does not exceed 3 m², and the height of a “single-story” structure is within 1 m. The aluminum profile does not require coating; the steel profile is galvanized and a layer of powder paint is applied. For ventilation and air access, part of the translucent coating can be removed, and the method of ventilation depends on the materials of the fence.
Mini-greenhouses are also used as greenhouses Source cs.decorexpro.com
See also: Catalog of companies that specialize in the installation of metal structures.
Soft covering for mini greenhouses
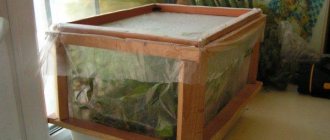
The most inexpensive mini greenhouses for summer cottages use polyethylene film 200 microns thick. The disadvantage of such covering material is low strength and wear resistance. Plastic film lasts no more than two seasons, and sometimes it is changed every year. Another drawback is that it is inconvenient to ventilate such mini greenhouses - each time you need to roll up or fold back part of the film from one side of the frame
Unlike polyethylene, transparent PVC film is more durable and lasts for several seasons. It is used to make a covering in the form of a cover, in which there are vents for ventilation. The cost of PVC film is more than that of polyethylene, but not much. And since the cost of the frame makes up most of the price, this covering material dominates the market for film mini greenhouses.
For reference! Many manufacturers sell PVC film covers separately for their models. This is attractive for two reasons - you can replace the old coating with a new one or “copy” the frame design from scrap materials and get another mini greenhouse.
Mini-greenhouse covered with polyethylene Source pinterest.com
Another popular soft material is spunbond. This is a type of non-woven textile that has a very wide specialization. For greenhouses and mini greenhouses, white translucent material is used, which contains special stabilizers that quench ultraviolet radiation (SUF marking). The advantage of spunbond is its porous structure. This ensures the breathable properties of the shelter, capillary penetration of precipitation and natural maintenance of an optimal microclimate.
Analogs of spunbond - lutrasil, agril, agrin, agrospan. They also belong to non-woven synthetic agrotextiles, have similar properties and are used in crop production as a cover for seedlings and in the manufacture of mini greenhouses.
Spandball on a mini-greenhouse Source gardencatalog.ru
Comparison of glass, polycarbonate and film greenhouses: all the pros and cons
Glass greenhouses
Advantages of glass greenhouses
- Glass greenhouses are simply the most beautiful: English greenhouses make everything glass,
- They are the lightest (in such greenhouses, natural daylight is used to the maximum!),
- They have a lower incidence of plant diseases,
- Good and easy to clean.
Greenhouse for grapes: secrets of growing grapes in the northern regions from Victor Deryugin
Cons of glass greenhouses
- Glass breaks, and the use of tempered glass greatly increases the cost of the greenhouse,
- Glass greenhouses are heavy.
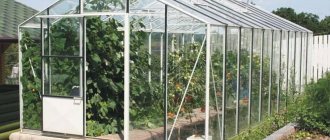
Tomatoes in a glass greenhouse
Polycarbonate heifers
Advantages of polycarbonate greenhouses
- The warmest greenhouses,
- Light greenhouses,
- They wash well. How and with what to wash a polycarbonate greenhouse so that it does not become dull,
- Polycarbonate is easily replaced with a new one.
Cons of polycarbonate greenhouses
- Over time, polycarbonate breaks down and darkens. High-quality cellular polycarbonate contains a special layer of ultraviolet stabilizers. Cellular polycarbonate, which has a UV layer, will last you longer than the one without a UV layer. This one will fade in the sun in 2 - maximum 3 years. The presence of a UV layer is evidenced by a protective film on the outside of the sheet, the presence of manufacturer contacts (company name, address and telephone number) and quality guarantees.
Film greenhouse
Advantages of film greenhouses
- The cheapest greenhouse.
- The easiest greenhouse to assemble is usually assembled using the “pipe-to-pipe” principle and does not require the use of special tools for installation. The cost of 6 arcs is approximately 600-800 rubles,
- The system is collapsible, i.e. for the winter it can be easily assembled and stored in the shed, and next year installed in another place.
- Light weight of the entire structure.
- Suitable if you need to cover 1 bed.
A small tunnel greenhouse can be purchased in parts: separately purchase plastic arcs, separately tees, separately lutrasil, spunbond or film, if desired. All this can be calculated in advance on site. This is probably the only case when a greenhouse is prepared for a place, and not a place for a greenhouse. In all other cases, before installing a greenhouse, you need to prepare a place for it. This one can be collected in existing conditions, without redoing or moving the beds, without removing flowers and trees.
Temporary tunnel with lutrasil
Disadvantages of film greenhouses
- Film is the darkest and coldest material,
- Suitable only as a temporary shelter, from the end of May to August (the shortest period of application). For example, small film greenhouses are used for rooting tree and perennial garden crops: School for seedlings, cuttings and cuttings
Greenhouse for home
It would seem that in order to grow seedlings of ordinary vegetable crops at home, apart from boxes and pots, no additional shelter is needed. But this is the case if the optimal level of humidity is maintained in the house, and in winter in the heated premises of the living rooms the air is a little “dry” for tender shoots. Two more mandatory conditions for normal growth are good lighting and the absence of drafts. In winter and early spring, if you do not use phytolights, there is a lot of natural light only near the window (on a table, shelf or windowsill), but when ventilating the room, drafts are inevitable. And in order to create normal conditions, it is better to use a home greenhouse, in which plants are grown not on the ground, but in boxes and pots.
Previously, home craftsmen themselves made mini greenhouses for their homes. Now this possibility cannot be ruled out, but there are many ready-made models on sale to suit every taste and budget.
If desired, such a greenhouse can be installed on a veranda or terrace Source akitasmexico.com And you won’t have to go far for fertilizer Source marzevit.co.il
Advantages of small greenhouses
Mini-greenhouses made of polycarbonate have many advantages compared to large-area buildings. First of all, this is the ability to install structures even in small areas.
Other advantages of small polycarbonate greenhouses include:
- The building can be quickly dismantled for the winter and reassembled in the spring and rebuilt. They store structural elements in utility blocks or even on the balcony.
- There is no need to install expensive and complex lighting and heating systems. The only requirement is free ventilation of the greenhouse, which saves the plants from drying out on hot days.
- Due to the small area, weeding, pruning, and watering of plants are carried out while being in the center of the greenhouse or outside its walls, from the outside.
- The structure can be freely moved to a new location if the previous territory turns out to be unsuitable for some reason.
- The cost of a small polycarbonate greenhouse is much lower than larger structures.
Small greenhouses, with the ability to move around the site
Many owners prefer to make portable greenhouses themselves. Such compact structures can be assembled easily and quickly. It is good to use them for growing greenery in boxes and hardening off seedlings.
- When the bottom of the transferred plants is not covered with mesh raw materials, the greenhouse can be adapted for plants that love warmth and are planted in the soil - in order to protect them from returning cold weather.
- Small portable greenhouses have effective lighting. In addition, with their use, the approach to everything planted will become free and convenient, which is important when properly caring for plantings.
- It should be noted that a small-sized, portable greenhouse will be inexpensive for owners of a summer cottage, since its construction will require little material. Portable options, covered at the top with polyethylene or polycarbonate sheets.
There is no need to create a foundation for such structures, so they are mobile. When arranging such a product, it is worth considering the reliability of the fasteners.
Materials used
The frame is made of wood, aluminum, plastic and galvanized iron:
- Wood is an inexpensive, environmentally friendly material and easy to work with. Disadvantage: it quickly deteriorates due to humidity.
- Aluminum is a lightweight, durable material. Minus - it is deformed.
- Plastic – light weight, affordable price, no corrosion or rotting. Disadvantage: sensitive to mechanical stress.
- Galvanized iron is a reliable material that can withstand heavy snowfalls and strong winds. Cons - expensive.
The coating can be made of film, glass, agrofibre and cellular polycarbonate. Each material has a different effect on the climate in a mini-greenhouse:
| Coating material | pros | Minuses |
| Film | - a light weight; - cheapness; — easy installation; — good light transmittance with material thickness up to 200 microns; - Maintains moisture and warmth. | - short-lived; — quickly wears out and breaks (service life is 1-2 seasons); — creates a membrane effect (inhibits the penetration of air and moisture); — condensation accumulates on the surface. |
| Reinforced film | — increased resistance to mechanical loads; — shelf life – up to 3 years. | - more difficult to fit onto the frame; — low light transmission for options with a cellular structure; - costs more than the greenhouse version. |
| Agrofibre (polypropylene) | — good light and moisture permeability; - a light weight; — eliminates sudden temperature changes; — shelf life – about 3 years. | — poor thermal insulation; - high price. |
| Glass | — high light transmission; — good thermal insulation (only with glass thickness from 4 mm). | - high cost; - heavy weight; - fragility; - complex installation; — quickly heats the air inside the greenhouse on sunny days. |
| Cellular polycarbonate (polymer sheets with longitudinal jumpers - stiffeners). | — excellent thermal insulation; — good light transmission; - resistance to mechanical stress, fire and damage (stronger than glass); - a light weight; — service life from 10 years. | - deforms when cooled and heated; — light transmission deteriorates over time; - it's not cheap. |
Small greenhouse made of wood
The purpose of this small greenhouse is determined by its size. It can be used to germinate seeds, small seedlings, and also put house plants there.
You can make a greenhouse yourself from wood slats and glass.
You need to calculate the dimensions in advance and draw a picture. First milestone in bottom formation:
- Using a milling cutter on a drill, grooves are created for the glass on two adjacent sides;
- The slats are sanded with emery cloth or a special nozzle;
- The slats are cut at the joints at an angle of 45 degrees;
- The edges and joints are polished;
- Treated slats are coated with an antiseptic or stain;
- The area where the glass is inserted is coated with glue or sealant;
- The glass is inserted into the rail and time is given for the glue to dry;
- The remaining slats are mounted in a similar manner, gluing the joints;
- The frame is dried.
The second milestone is the installation of walls and tops:
- Like the walls, slats for the walls with a lid are prepared;
- The folding frame folds;
- The frame of the triangular sides of the roof is folded;
- Glass is placed in them;
- The side walls are folded;
- Triangular roof sides are mounted;
- A sloping roof of the greenhouse is installed and a hinged lid is attached to it on the awnings;
- If required, LED lighting can be installed on the inner part of the roof.
Plantings in honeycombs or flowerpots are placed inside.
Homemade mini greenhouses on the windowsill
At home, you can use a simple greenhouse for the windowsill. It has exactly the same design principle as the arched design. Just stick several wire arches into a box with seedlings or seeds and cover everything on top with film. Such a greenhouse can hide several boxes at once if you place them next to each other.
Cut bottles or jars can also become a home mini-greenhouse - they simply cover each plant on top. This is their disadvantage - they require too many containers.
DIY mini-greenhouse for seedlings from a plastic bottle
Another option for a miniature greenhouse for a windowsill
A multi-tiered greenhouse for a loggia can be easily built from an old shelving unit or cabinet. To do this, remove the back wall and doors from the latter, cover it with a film at the back, fixing it, and make a polyethylene sliding door on the front with Velcro or magnets, or simply hang a piece of polyethylene with a strip at the bottom, which will help, if necessary, roll up the covering material.
Scheme of a multi-tiered balcony greenhouse
Mini-greenhouse from an old barrel
Mini-greenhouse made from window frames
Straw greenhouse
You have become familiar with the different types of mini-greenhouses and have probably already decided which one you will have next spring. The main thing is that any of these structures can be made without much effort, but they bring a lot of benefits. There are also purchased structures for home and garden, made from various materials, but why spend money if you can do everything yourself?
— Tell us how your work began? What were the challenges?
— Any company is, first of all, a well-coordinated and strong team of like-minded people. February 2022 can be considered the beginning of our project’s journey. We set ourselves the task of developing completely new equipment for growing various crops, the key parameters of which were to be mobility, all-weather capability, the ability to operate throughout the year and the most efficient use of space. With full confidence on behalf of the team, I am ready to say that we managed to implement this task - we created a mobile greenhouse complex.
Basic design requirements
A mini-greenhouse is a small and lightweight structure. As a rule, frame. The design is used to provide plantings in a warm and bright place, as well as to protect from environmental conditions. In early spring, when the air has not yet fully warmed up and the soil has not thawed, it is best to use a covered structure that will prevent the future harvest from dying.
A mini-greenhouse built with your own hands must meet the basic requirements:
- Maximum illumination. Fruits and vegetables growing in it should not lack light.
- Attention! Poor or weak lighting can cause seedlings to stretch upward and the stems to weaken and become overly elongated and thin.
- The structure should provide access to seedlings. Don't forget about the need for regular watering and weeding.
- Durability and reliability are one of the main criteria for choosing a mini-greenhouse.
- Attractiveness of the building. The construction should bring moral and aesthetic satisfaction. A beautiful and practical greenhouse will become a place for agricultural experiments.
Good lighting in a greenhouse is very important for plants.
Why is it needed?
Every gardener needs a mini-greenhouse, and why is not difficult to guess.
Mini-greenhouse made of polycarbonate
The main functions and advantages of this structure:
- protects seedlings from negative influences, including drafts in the apartment (if there is a panic at home), rain and wind outside;
- does not block sunlight, but provides the correct microclimate for seedlings (the required level of humidity, temperature);
- allows you to carefully harden off seedlings;
- does not interfere with plant care procedures;
- It is low cost and can be installed in just a few minutes.
Film mini-greenhouse
On a note! By the way, many people build mini-greenhouses even on the balcony, and not just in the garden.
Mini-greenhouse LawnCity Dacha with peat tablets
Smart vegetable garden AeroGarden
The principle of operation of a greenhouse is easy to understand - it provides plants with heat due to the fact that it covers them on all sides from wind and drafts and is installed in a well-lit place. The warm air accumulated under the film is not carried away by air currents in an unknown direction, and therefore the temperature in the greenhouse is much higher than in the open space. This is very important for plants that love warmth and cannot tolerate excessive coolness. And a structure that is small in size will warm up faster and with better quality - a mini-greenhouse fully meets all these criteria.
Greenhouse options
One of the types of greenhouses
What is recommended to grow in mini-greenhouses? First of all, these are, as already mentioned, seedlings of various garden crops that need warmth and careful treatment. As a rule, containers with seeds for germination are placed in home greenhouses, which are built on window sills. Cucumbers, tomatoes, peppers, eggplants, and some types of flowers respond very well to the use of a mini-greenhouse. In spring, the plants can be moved to an outdoor mini-greenhouse for hardening. Thanks to the use of these facilities for germination and growing seedlings, crops will begin to bear fruit earlier than usual.
Miniature home greenhouse
GrowBox - greenhouse for home
On a note! A home mini-greenhouse is, in fact, a structure that performs almost the same functions as regular film stretched over boxes with future seedlings. However, working in it is much easier and more convenient.
By the way, another advantage of using garden mini-greenhouses is that their miniature size allows you to install them in a small garden area. However, when the seedlings grow up, they will have to be moved to a greenhouse or open ground. But a mini-sized greenhouse will not be empty - other crops that do not require large spaces for growth and development can be planted in it.
Mini-greenhouses
Ordinary radishes can produce 3 or more batches of harvest per season, since in a mini-greenhouse you can start planting them very early and finish growing them much later.
In early spring or late autumn, onions, dill and other greens will feel great in a greenhouse, which will decorate your table and add vitamins to culinary dishes. In a small greenhouse you can even grow strawberries, which will bear fruit throughout the summer.
Small Belgian greenhouse
A mini-greenhouse will also help with the rooting of certain types of plants. For example, it has all the conditions for cuttings of raspberries, currants and roses to take root and take root at the dacha.
On a note! In order to root shrub plants in the garden, it is best to make a separate mini-greenhouse, since this process is far from quick and lasts about a year, and a greenhouse may be needed for new seedlings.
Small greenhouse made of plastic pipes
An unusual lightweight design of a small greenhouse for covering seedlings during spring frosts and inclement weather. It can be installed on beds or inside a stationary greenhouse.
The frame is made of PVC pipes with glue, and for covering you can take a film or sew a cover. Here is the assembly progress:
- A drawing is made and the required raw materials are calculated: pipes and connecting elements;
- The pipes are cut to size. The length increases as needed and is connected with glue using sections of larger cross-section tubes;
- The parts are connected with glue using special fittings for plastic pipes;
- Special clamps are prepared for fastening the film;
- The structure is installed on the soil or on a greenhouse shelf;
- The film is cut to size;
- The film is attached to the frame;
- To create protection from the night cold, you can add an additional layer of thick, black film;
- Seedlings or other plantings are planted.
— How were the products sold? What difficulties did you have to face?
— In the Omsk region there are a small number of producers of high-quality green and salad products, but the demand for them is quite high. Most of this fresh product in the region is imported, and it is delivered in transit through Moscow and St. Petersburg. For these reasons, we quite easily managed to find our buyer in the form of restaurants and wholesale suppliers of green products. Our partners value freshness, and the goods reach them almost within a couple of hours after the plants are cut and packaged.
What a greenhouse in an apartment requires: tips for beginners
Regardless of what types of flowers or other plants you plan to grow, having a well-glazed balcony is mandatory. In addition, green spaces need a constant influx of sunlight. This means that the greenhouse needs to be built on the sunny side.
It is advisable not to go too far. Excessive amounts of solar heat will not have the best effect on the development of flora.
The gardener's further actions largely depend on the type of structure that will be used.
The following options exist:
- The garden-dacha option involves the construction of a smaller copy of a traditional greenhouse in the apartment;
- Multi-tiered greenhouse - the lower part of the structure is made more durable, otherwise it is impossible to fully place the seedlings on the second floor;
- A seasonal winter or spring-summer greenhouse involves insulation or supplying the structure with an irrigation system.
Moderate temperature conditions, absence of drafts and sun heat are the key to the constant development of flowers, vegetables and berries. The main thing is to place the structure correctly so that the seedlings feel comfortable at any time.
— What successes has the company achieved? What are the results of work in 2022?
— Our primary task was not only to introduce a high-tech product to the market in the form of new greenhouse complexes, but also to confirm its economic feasibility, which took us two years. During the period of justification of the effectiveness of the equipment, we also actively made adjustments to its design, that is, we empirically tested and improved the complex. It should be noted that we are still using a pre-production sample to develop new agricultural techniques for working with green and spice crops, since the operation of multi-tier plants requires amendments and modifications to existing agricultural techniques. As a result, in 2022, we completed long-term tests of improved technology for cultivating lettuce, arugula, chard, and spinach, and also developed a direction that has not yet been developed on a large scale by Russian agricultural producers - growing edible flowers. In addition, we have developed new types of installations.
Greenhouse installation (step by step instructions)
First of all, clear the place where the foundation will be located. Install the base. Starting from the end, assemble the base. Install each door or window frame on hinges. Start sheathing the greenhouse from the end as well.
- The greenhouse must have a window; most often it is installed in the door. Then the fittings are installed.
- Now assemble the second end part of the greenhouse. Install arcs for jumpers, measuring a distance of ninety centimeters.
- Next comes the installation of each cross element and the installation of arches and jumpers. Attach the ends.
- Make holes every forty centimeters and sheathe the remaining parts of the greenhouse.
A correct assessment of the site and the purpose of the future greenhouse will allow you to select the right materials and design model.
And by installing the product correctly and following the operating instructions, you will be able to grow all kinds of crops in it for a very long time.
