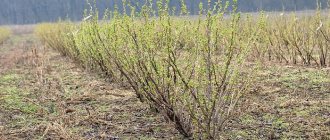
Currants are a popular garden berry that is used for canning and making jam, as well as for freezing for future use and making desserts. In order for the berry plants to bear fruit every year and produce a rich harvest, caring for currants should begin in early spring, but it is very important to take into account the climatic conditions of the region where your garden plot is located. This article is all about caring for currants in the spring.
Treatment of currant bushes from diseases and pests
The most harmful pest on currants is the bud mite; it can affect large areas in the berry garden. An increase in the pest population significantly reduces annual currant yields; over time, the berry plant degenerates.
In March, the female bud mite lays microscopic eggs in currant buds, which visually increase in size compared to healthy ones. The plant is harmed not only by the developing population of pests that eat the bud from the inside; in parallel, viral diseases develop, the pathogens of which are carried to different parts of the plant through the flow of juices.
The affected bud has a swollen and enlarged shape, so it is visually easy to identify on currant branches.
March is the best time to remove pest nests. If you pluck out infected buds, you can immediately remove a pest nest with numerous parasites. Such care in the spring is important for black, red and pink currants - all varieties of berry crops have identical pests and similar control measures. Important! The swollen currant buds are plucked out with your fingers and burned.
The next preventive means of caring for currants in the spring is practiced by many gardeners - this is the spring treatment of berry bushes with boiling water. You can process not only currant bushes, but also gooseberries. This procedure will allow you to get rid of many pests, among which in the first place are bud mites, gold borers and aphids, and the method also helps to reduce the infection of the plant with fungal and viral infections.
Important! The procedure for irrigating currant bushes with boiling water can be carried out strictly until the buds swell.
How to loosen under bushes correctly
Loosening is required to break the earthen crust and allow air and moisture to reach the roots. First, the tree trunk circle is cleaned, then watered. After absorbing the water, they loosen no deeper than 5 cm. The same loosening is done after fertilizing.
To prevent the top layer of soil from drying out and to provide warmth during cold weather, a mulch layer is laid on top. This is humus, mature compost, mowed green manure or grass, straw or sawdust. Some gardeners cover with black non-woven material.
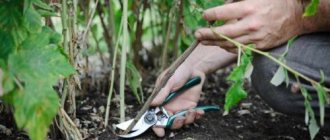
Currant pruning
Caring for black currants in the spring (and other types of currants) consists of sanitary pruning, which is carried out when the bushes freeze in winter. In March, formative pruning of currant bushes is carried out according to the following scheme:
| Year of cultivation | Spring pruning technology |
| 1 year | Trim all shoots, leaving a few buds |
| 2 year | Select several strong shoots that will form the skeleton of the bush - pruning is carried out by 1/3. All other branches (especially diseased and broken ones) are cut off at the surface of the ground. |
| 3 year | Up to 3 strong shoots are left, the rest are removed. |
| 4 and subsequent years | The formed bush is subjected to sanitary pruning only in the spring, removing broken and frozen branches from the bushes. |
The rules for pruning currant bushes involve the formation of a wide base, where the main branches will not touch each other. Interfering shoots directed into the bush are removed.
It is very important to prune currant bushes before the sap begins to flow, which will help the plants survive this procedure painlessly.
To water or not
Black currants have their roots close to the surface, so there is often enough moisture after the snow melts. If you start watering, the additional moisture will cause rotting of the roots or the spread of diseases, so you should not water. Watering is only required in dry weather or when there is little snow cover and the soil is dry by mid-spring.
In order for there to be a lot of berries and enough for winter harvesting, adult plants, from 3 years old, require 4-5 buckets of melt or rain, not ice, water. 1 bucket is poured under the young bushes.
The first time is usually watered when the currants form ovaries or bloom. In dry weather, it is worth watering after 7-10 days so as not to wet the branches and leaves, and the soil is saturated with moisture to a depth of 35-40 cm.
Fertilizing currants in spring
Red, white or black currants - spring care in terms of feeding is identical.
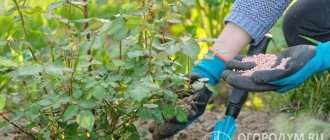
At the time of planting currant bushes in the garden plot, the first application of nutritional compounds is carried out under the roots of the plants. If such a procedure was followed, the currant bushes do not need to be fed for the next two years.
From the third year of cultivation, plants need additional nutrition, which is added in the spring. For young plants, nitrogen is very important, which promotes the growth of the bush, so in the spring, 8-10 g of urea or 10-15 g of ammonium nitrate (per 1 bush) are added to the currants per 1 m².
Do you want to increase your berry yield? Then don’t miss the currant flowering period; it is during this period that foliar feeding of plants with boron is carried out.
Half a teaspoon is diluted in 10 liters of warm water. boric acid, after which the plants are sprayed, which stimulates a threefold increase in yield.
The next feeding is carried out at the moment of formation of the ovaries; the bushes are sprayed with the following solution:
- Superphosphate – 150 g.
- Urea – 60 g.
- Water – 10 l.
Advice from experienced gardeners
The duration of fruiting and the yield of currants depends on proper care . There are certain secrets that are definitely important to know.
5 golden rules
There are several rules that experienced gardeners adhere to :
- For all bushes that are more than 5 years old, anti-aging pruning is performed. Only disinfected instruments are used.
- If the cut thickness is more than 8 mm, it is treated with garden varnish.
- Winter shelters of bushes are removed as early as possible. After this, the soil is loosened to allow air to reach the roots.
- Be sure to treat plants against diseases and pests.
- After watering, the ground is mulched.
Mistakes to Avoid
Many novice gardeners make the same mistakes :
- Late maintenance work, for example pruning too late.
- Incorrect procedure. There is no point in treating pests first and then pruning.
- Lack or too much fertilizer.
- No anti-aging pruning. Every year the yield will decrease.
- Ignoring treatment for diseases and pests.
June
In June, currant bushes need to be supported if they did not have time to do this in the spring. Bushes under the weight of berries can bend to the ground and become dirty with earth.
Watering and weeding
While continuing to care for currants, do not forget to weed and water
In June, the berries begin to actively fill, so watering will be very useful for the ripening of the berries. You can scatter 1 cup of ash under each bush and loosen it.
Powdery mildew or other diseases may appear this month. Foliage can be sprayed with Topaz or soda ash.
In June, the berries begin to ripen, turning black. To ensure that the berries ripen well, currant bushes can be fed. In a bucket of water, dilute 1.5 g of copper sulfate, 2 g of boric acid, 2.5 g of zinc sulfate and 2.5 g of ammonium molybdic acid. The solution should be sprayed onto the plantings, thoroughly moistening the leaves of the plants.
Collection of currant berries
When the first ripe berries appear, you can begin picking them, leaving unripe berries on the bushes. At the same time, you should inspect the bushes for the presence of pests. If pests or diseases are noticed, it is better to carry out treatment with folk remedies.
Watering the bushes
Watering currants in June must be carried out, especially during the dry month. Currants need them to fill the berries. Water 1 bucket per seedling as soon as the soil begins to dry out. The formation of crusts and cracks in the soil should not be allowed.
Mulching
After watering, mulching should be done to delay the evaporation of moisture. You can scatter a bucket of compost under each seedling. Many gardeners tear up grass and lay it under bushes.
Fighting aphids
Aphids can be removed with a solution of green soap. Some gardeners tie yellow ribbons to currant bushes. “Prosvetok” recommends that you can try it.
Common mistakes
We list the typical mistakes a novice gardener makes when pruning currants:
- The work is carried out at the wrong time, when the buds are already swollen or blooming.
- When filing, stumps remain, through which the bushes become infected with fungal infections.
- Wounds and cuts are not treated appropriately.
- Pruning is carried out with a low-quality tool, which leaves chips and damages the bark of the shoots.
- Filing is carried out at random without following the cutting pattern.
- It is not the old branches that are removed, but the young ones. This comes from the misconception that old thick shoots will bear fruit better.
November
In November, humus and compost can be placed in the tree trunk circle. When spring comes, the currant will receive all the substances it needs.
After dropping the leaves, inspect the buds. If they are large, it means the tick is ready for winter. Remove buds without regret.
Measures against kidney mites
It is useful to use a 2% solution of colloidal sulfur against kidney mites. To do this, dilute 75 g of colloidal sulfur in a bucket of water, stir well and spray the currant seedling. You can use the drug Tiovit Jet, but below 20 degrees it is not effective.
The following biological products are effective and safe for humans: Fitoverm, Bitoxibacillin and Akarin.
Winter months
In winter, currants are covered in places where there are severe frosts in winter. In regions with a temperate climate in winter, you can add snow and the bushes will not freeze.
Shelter depending on region
In order for currant bushes to survive until spring in cold regions of the country, they must be covered. There are several ways to cover bushes for the winter.
- Divide the bush into several parts, tie the branches and bend them lower to the ground. If the winter is snowy, then under the snow they will survive any winter. But you can cover them with spruce branches to trap the snow.
- Tie the bush with twine and put humus around it. You can hill up with dry, loose soil, making a high earthen mound.
- Sprinkle fallen leaves around the bush in a layer of 10-15 centimeters.
- The tied bush must be spudded and wrapped with burlap on top.
- You can purchase a ready-made kit specifically for shelter. You can even cover spreading currant bushes.
It is necessary to cover the currants when the temperature reaches minus 15 degrees. If it gets warmer, the root system will begin to rot.
Features of spring care
Probably the first question that a novice gardener and gardener will have is why do bushes need quality care? After the winter cold, the plant is weakened, it needs to recover in order to begin sap flow, bud opening, and flowering with renewed vigor.
You need to start caring for black, white and red currant plantings in the garden when the temperature remains at least 5 degrees Celsius. You should not postpone care activities, otherwise it may be too late (the buds will swell) and garden activities will not be as effective, and some can no longer be carried out.
By the way! Spring care for the red, white and black varieties is not fundamentally different. Therefore, you can use the tips described below, regardless of what kind of shrub you have.
Why do you need covering material?
At the end of the spring processing, dark material is laid out under the bushes - cardboard, roofing felt, black film or spunbond. In this way, we will create darkness for pests that have overwintered in the soil, which means we will extend their hibernation period. As a result, they will not be able to crawl out of the ground for some period. And when they wake up and crawl out, the breeding period will be missed.
Having laid out black non-woven material under the currants, it is left under the bites for the whole summer. It is breathable, moisture is retained underneath it, and you can water the plant according to the material. In addition, no additional treatment is required, that is, under such shelter the soil always remains moist. As you probably understand, the covering material acts as mulch.
In addition, such mulch helps to quickly warm the soil and quickly awaken the roots.
