If you don't want your tulips to become shriveled and degenerate over time, you need to know when to dig up your tulips and store them.
Unfortunately, many gardeners neglect this agricultural technique. Dear readers!
For you, we have created communities on social networks in which useful articles and interesting ideas are published several times a day! Subscribe and receive useful content in a convenient format! But digging up tulips is very important if you want to preserve the varietal characteristics of specific plants, as well as propagate flowers to form a beautiful flower bed.
In this article we will talk about the timing of digging tulips in different regions and preparing the bulbs for storage. You will also learn about the features of storing planting material until the new summer season.
When to dig up tulips after flowering and how to choose the time?
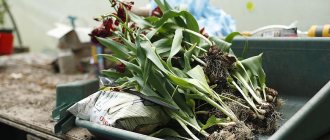
When determining the time when to dig up tulips, first of all, pay attention to the condition of the leaves of the plant. It is considered optimal to dig up the rhizomes when the above-ground part begins to turn yellow, but has not yet completely dried out. This means that the plant has completed the cycle and is going into a dormant period.
It makes no sense to dig up earlier, since the plant has not yet finished its growing season and has not been saturated with the nutrients it needs. There is also no need to wait for the foliage to completely dry out, because then you simply won’t be able to find all the bulbs.
Having received planting material in June-July, you will, firstly, be sure that you have dug up all the tulips. Secondly, you can separate fused nests and get new planting material. Thirdly, in the time before planting, the bulbs will rest and gain strength for flowering in the new season.
INTERESTING! In Central Russia there is such a sign. As soon as the day begins to decrease, you need to dig up the tulip bulbs. That is, after June 22.
Time selection depending on region
Russia is a large country, and in different regions, depending on climatic conditions, tulips are dug up at their own time. Let's consider when it is necessary to carry out the procedure in different areas of our vast Motherland.
Southern regions
In the south of the country, you can start harvesting tulips at the beginning of summer. At this time, the plants will have finished flowering and will be ready for the dormant period.
Middle lane
In the regions of the Middle Zone, tulip bulbs are traditionally dug up from the 20th of June until the second ten days of July. A specific day is chosen depending on the weather and the condition of the plants themselves.
Moscow and Moscow region
In the capital region, bulbs are dug up in the last days of June and the first days of July.
Leningrad region
In St. Petersburg and its environs, bulb harvesting can be done starting in the second ten days of July.
Volga region
In the Volga region, tulips can be dug starting from the last days of June.
Ural, Siberia, Far East
In the eastern regions of the country, the time for harvesting bulbs occurs in the last days of July - the first days of August.
When to plant in open ground in autumn
Ideally, peeled and sorted bulbs are stored at the dacha in a cool (optimum temperature is 18-20°C) and dry place during the summer. They can be planted again starting in September. Gardeners should analyze temperature conditions before planting. The guideline for when to plant tulips in open ground in the fall is the 10-degree indicator. If the temperature is higher, the bulb will quickly take root and germination will begin; if it is lower, then, on the contrary, it will not take root well. In both cases, you should not expect good spring flowering; even the death of the plant is possible.
Autumn planting of tulips
Transplanting tulip bulbs in autumn has an advantage over spring. Then you won’t have to wonder why the transplanted tulips don’t bloom. Usually, transplanted plants bloom in the spring only the next year.
Important! The bulbs take root in about 30 days. Therefore, when planting in spring, it is necessary to take into account temperature and time factors. As a rule, there is not enough time for good adaptation.
How to properly dig up tulip bulbs?
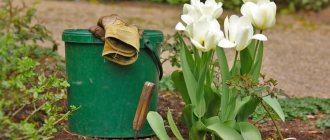
It is better to choose a dry, sunny day to “harvest” tulips. It is better to dig with a pitchfork, trying not to touch the rhizomes. With experience, you will be able to use a shovel, but it is better to start with a pitchfork.
In any case, the shovel or fork should be held vertically, almost perpendicular to the ground. This is done so as not to damage the rhizome when the bulb is deep.
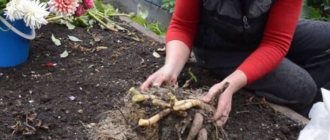
However, do not dig to the very root of the tulip. Step back a few centimeters so as not to leave children in the ground.
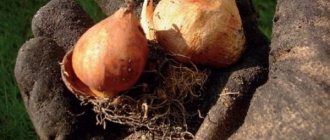
After digging up the bulbs, carefully shake off the soil and place them in a basket or box. You will prepare them for storage a little later.
Don’t forget that you must remove the “babies” from the soil along with the main bulbs. These shoots can be used to propagate and plant tulips in other areas of your garden.
IMPORTANT! Do not tear the stem and leaves from the bulb. They will then fall off on their own during drying.
Is it worth fertilizing the soil?
For growing tulips, flower beds with light, sandy loam, and humus-rich soils are selected. Sandy and heavy soil is unsuitable for such flower crops. Coarse river sand must be added to clay soil, and too light sandy soil can be improved with humus, peat or turf soil.
Material on how to care for the soil at your dacha will also be useful:
Recent Entries
Lilac perennials that are beautiful, compact and do not crowd out other plants Why when buying seedlings you should not take the sellers’ word for it and how to determine the age of the plant using 3 signs Tomato seedlings have turned purple or whitish: why the color has changed and how to save the plants
The ornamental plant feels best in flower beds that are well lit, without stagnant water and well protected from gusts of cold wind, but late-flowering varieties can be placed in partial shade. Too much shade causes the bulbs to shrink.
To combat high groundwater levels, drainage ditches are installed at half a meter depth.
Excessive amounts of organic matter can negatively affect the flowering process. In this case, the flowers have an irregular shape, and all developing peduncles differ in curvature. When applying fresh manure in any quantity, rotting of the plant roots is often observed, so such daughter bulbs are unsuitable for propagation.
Green manure plants plowed into the soil, as well as pre-disinfected compost, have a good effect on the growth and development of tulips. It is very important that the soil of the flower garden has a neutral or alkaline reaction; for this purpose, measures are taken to liming the soil. However, in a number of countries, the application of fertilizers when growing tulips is considered extremely harmful. In addition to organic matter, the application of mineral fertilizers, which have a positive effect on flowering time and bulb size, is of no small importance.
You can learn how to lim the soil in the garden from the material:
When to plant tulip bulbs after digging
The good thing about tulips is that their bulbs will be ready for planting in just a few months. For example, children can be seated in the second half of August and the first ten days of September. Adult bulbs are planted a little later, from September to November.
The main condition in this case is that the earth must have time to cool down to AT LEAST 10 degrees.
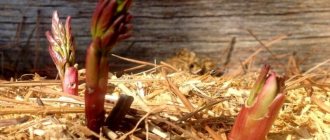
Why is it important? The fact is that tulips are considered one of the primroses, which means they begin to germinate in relatively cold soil.
It is also possible to plant plants in the spring, but in this case they will bloom much later.
The most experienced flower growers plant tulips literally 1.5-2 weeks before frost. But in this case, they carefully mulch the plantings and additionally cover everything with branches, leaves and even agrofibre.
Autumn planting
If you plant tulips in the spring, they are unlikely to bloom. This can only happen in the fall, and only on the condition that during the hottest months the flowers are moved to the basement or other cool place, and returned to their place in September.
This rather labor-intensive method is used by some experienced gardeners to obtain out-of-season bouquets or original flower beds.
Typically, bulbs are planted in the ground in the fall. In this case, the timing is no longer so important: planting can be done from September until almost the first frost.
The best time for planting is autumn
We recommend that you follow the following rules:
- The planting depth directly depends on the size of the bulb: it should be approximately three times its diameter. But it’s not worth digging below 15 cm. If after digging you sort the bulbs by size, there will be fewer problems with planting them.
- Between large bulbs you need to leave 10 cm of free space, between small ones from 5 to 8 cm. But if tulips of different varieties or shades are planted in one flowerbed, then it is better to leave more space between them - up to 20 cm. In this case, you will definitely not confuse the bulbs when digging.
Follow the recommended planting pattern
Advice. If the flowerbed or curtain consists only of tulips, plant large bulbs in the center and small ones around the perimeter.
- When planting at the bottom of a hole or groove, you need to pour sand, place the bulb on it without pressing it, and sprinkle it with earth.
- If the weather is warm and dry, tulips need to be watered 7-10 days after planting.
How to prepare bulbs for storage step by step
Now let's look at the algorithm for preparing tulip bulbs for storage.
Step 1. You have removed all the bulbs from the soil. Inspect them and set aside any that are rotten, diseased or damaged.
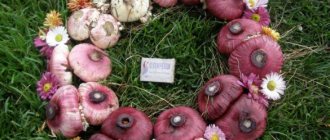
Step 2 : Calibrate. By sorting the bulbs by size, in the future you will be able to organize a flower bed and plant them beautifully.
Step 3 : Clean. It is necessary to remove adhering soil, roots, peeling husks, etc.
You may also need to cut off any rotten areas on the bulb. Please note that if there is little rot, then it is easier to remove it, but if there is a lot, then the onion will have to be thrown away.
And don’t forget to treat the cut area with potassium permanganate and crushed activated carbon.
An important point about the husk. There is no need to specially “undress” the bulbs. Clean off only those scales that easily come off on their own. Otherwise, you may damage the rhizome.
Step 4. Drying the planting material. The bulbs must be dried before storing.
This can be done by placing the rhizomes in mesh boxes in 1 - 2 layers. There is no need to apply more, as then the process of rotting may begin.
Drying time can vary from several days to 2 weeks. Everything, as you understand, depends on the weather.
Step 5. Disinfection. The simplest way to disinfect planting material is to soak it for several hours in a pale solution of potassium permanganate. Don’t forget that you need to dry the bulbs again later.
Step 6. Bookmark for storage. Choose the method that suits you to store planting material and do not forget to provide the necessary storage conditions.
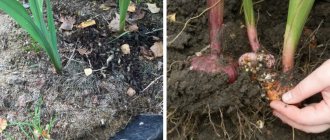
ON A NOTE. If the bulbs have grown together into nests, then they need to be carefully separated, peeled, cut off the roots and soaked for 30 minutes in a weak solution of potassium permanganate. Then they are dried again and sent for storage.
Preparation
Growing a tulip from a bulb requires proper preparation of the site, soil and the bulb itself. If necessary, gardeners use different fertilizers for a particular soil. In addition, tulips need drainage, the lack of which can cause freezing, soaking, or even bulb disease.
What location and soil are suitable for tulips?
Tulips love places in full sun. The main thing is that no through winds blow into such a bright place. They are particularly unpretentious to the soil, but they are best planted in slightly alkaline or neutral soils.
Preparing bulbs for planting, processing and soaking
To ensure healthy development of the bulbs, they must be treated with special solutions before planting. Folk solutions against diseases include products with potassium permanganate and an antifungal drug, foundationazole.
However, there are already drugs that have a complex effect. Such drugs include epin, phytosporin, vitaros and drugs similar to antibiotics. By diluting each such preparation in the required amount of water and treating the bulbs with it, you guarantee not only disease resistance and rapid growth, but also a more attractive appearance of the flower.
Treating tulip bulbs against infections is not the only thing that needs to be done before planting in the ground. Bulbs purchased in advance must be stored in a cool, but not damp place. Before planting, remove the husks and remove the babies. Removing the husk is the first step towards disinfection.
Inspect the bulbs; they should be free of damage and rot. The soaking process lasts differently, it all depends on the preparation you have chosen. For example, bulbs should stay in epin for a day, and in maxim - half an hour.
How to prepare the soil
Preparing the soil is not a labor-intensive process at all, but without it, planting tulips can be problematic. Regardless of the soil, loosen it; such soil absorbs fertilizer better. You can fertilize the soil with a mixture of humus and compost.
It is worth noting that acidic soils must be limed with phosphorus or potassium mixtures.
Methods for storing planting material at home
Planting material should be stored in a dark, warm place (about 20 - 23 degrees Celsius) without dampness. The room should be well ventilated. Boxes with holes made or baskets are ideal for containers.
ON A NOTE. It would be ideal to gradually reduce the storage temperature of tulips. Start with 25-27 degrees and end at around 20 degrees. But, unfortunately, not everyone can afford this storage method.
The bulbs are laid out in one layer. They need to be laid out so that they do not come into contact with their neighbors. Tulips folded in boxes can be sprinkled with dry sand or sawdust.
However, there are other ways to preserve planting material.
It is very convenient, for example, to store onions in egg cassettes. Then each bulb will have its own cell. No need to use bulk materials.
A cheap but practical option is to store the bulbs in nylon stockings, string bags and fabric bags.
IMPORTANT! Do not use iron or plastic containers, plastic bags or glass jars as storage containers. If there is no free air circulation, the bulbs will inevitably begin to rot.
Experienced flower growers advise periodically inspecting tulips during storage (once every 2 months is enough) in order to notice putrefactive processes in time and save the bulb.
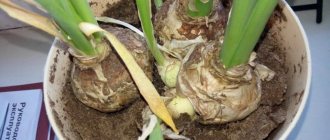
ON A NOTE. There is a storage method called “wet germination.” Wet sawdust is poured into the container (preferably peat, if you have it). Onions are planted in them and again sprinkled with peat or sawdust. Then the container is removed to the basement and stored until disembarkation.
Features of storing planting material in winter, and what conditions are needed
Sometimes it happens that it is not possible to plant tulips in the fall. In this case, the bulbs need to be stored for winter.
Preparing planting material for wintering does not differ from the standard procedure. You dry and disinfect the rhizomes.
Larger specimens (from 3 cm) are left for stocking for the winter.
It is very important to prepare your storage properly.
Firstly, it should be dry there, there should be no access to sunlight. A cellar, basement, or attic are quite suitable.
If there are few bulbs, you can put them in the refrigerator. But keep in mind that refrigeration is a last resort. Not all bulbs will survive such low temperatures.
The most important point is the temperature regime. Ideally, the temperature of tulip planting material is gradually reduced from 25 to 15 degrees. The reduction occurs once a month.
Choosing a place and preparing a bed
A good location of the bed and planting tulips in the fall, when and how to plant the choice will be less problematic. These flowers love sunny spaces sheltered from the winds. In spring, no puddles should form there. The soil should drain well - the best option would be loamy or sandy loam soil with a significant proportion of humus.
Cunning
asters, watermelons, melons, zucchini, cucumbers, and tomatoes are not the best predecessors for tulips.
It is worth digging up the ground to a depth of 25-30 cm, carefully removing the roots of weeds, trees and shrubs. If the soil is heavy and poor, add sand and fertilizers: compost, ash, peat, mineral complexes. Cow manure should not be used - add bird droppings instead. If the pH values are increased towards oxidation, liming is required.
The soil needs to be prepared a month before the expected planting date. This is necessary for the soil to “settle.” In a loose “cushion” there is a high probability of damaging the emerging roots. Before planting, water the ridges generously - this will completely distribute the soil.
Cunning
Sprinkle the formed rows with a thin layer of sand. This will provide additional drainage and help reduce the likelihood of rotting.
Usually this is where caring for tulips after planting in the fall ends. There is no need to cover the bed - this can lead to the bulb growing ahead of schedule, overwintering worse and blooming later. Exceptions include sudden cold weather. When the temperature drops sharply, use specialized covering material. Do not use garden waste, mulch or leaves as this may attract rodents.
Is it possible to store diseased and thrips-infected bulbs?
There is still controversy regarding the storage of diseased bulbs.
Some gardeners are absolutely sure that infected or rotten planting material should be thrown away so that the infection does not affect other tulips.
This is a common sense approach. After all, it is better to sacrifice a few specimens than to receive completely infected planting material.
Others disagree with them. And here too there is a grain of truth. If you remove the infected areas and treat them with antifungal and insecticidal agents, the bulb will sprout as if it were healthy.
Here you need to decide for yourself. But, if you want to save the maximum number of bulbs, here are some useful tips:
- Sick and infected rhizomes are stored first.
- Be sure to place them separately so as not to infect other bulbs.
- Treat infected planting material. To do this, you need to remove the diseased areas (if there are few of them and they are small), treat them with crushed coal and soak the tulip bulbs in a solution of potassium permanganate or Fundazol.
- During storage, inspect the problematic planting material at least once a month; if rotting processes continue, then destroy the infected bulbs without regret.
Possible difficulties
Even if everything is done correctly, there may be problems when collecting and storing tulip bulbs. Both novice and experienced gardeners encounter them. To avoid this, you need to know what reasons lead to such consequences.
- When digging, tubers must be handled carefully. If damaged, they will become weak and the risk of developing fungus increases.
- When using a cardboard box, mold may appear, which will spread to the rhizomes.
- If the onions are laid out in one layer, they will begin to rot and disappear.
- Failure to comply with the correct temperature conditions will lead to the death of planting material. The optimal mode is no more than 25℃.
If you avoid such mistakes, the tulip bulbs will be well preserved and will delight you with beautiful flowers after planting.
When growing this crop, flower growers need to know when to dig up its tubers, as well as the rules for storing them. By following these rules, in the spring the area will be full of bright colors, and the aroma of tulips will not leave anyone indifferent.