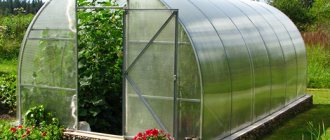
The presence of a greenhouse on the estate makes it possible to create the most optimal conditions for growing crops, while using the space not only in breadth, but also in height. To do this, you need to have a site of the required size, which will be located not far from the house, since light, heat and water supply are usually organized precisely from it. What other nuances need to be taken into account in order to correctly position the greenhouse on the site?
Proper location provides greenhouses with maximum light
How to orient a greenhouse to the cardinal points
If a greenhouse is installed in the local area, the owner naturally expects high yields of the crops grown in it. This can only be achieved by the correct illumination, which will be ensured by the most optimal orientation in space.
The point is simple: the more sun that gets inside, the less money you have to spend on additional heating and lighting, without which the process of photosynthesis slows down. And in general, no source of artificial light can replace the sun one hundred percent - without it, productivity will inevitably decline.
Only the sun will ensure good yields
North-south or east-west?
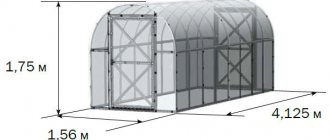
First of all, the location of the greenhouse is oriented on the site according to the cardinal directions. It can be latitudinal, when both the building frame and the beds have a west-east orientation. In this case, the sun enters the greenhouse throughout the daylight hours, not on one side, but on the other. True, the midday heat will be tiring for plants, especially in southern latitudes.
- When the direction is given north-south, this orientation is called meridional. Plants on the north side do not receive enough light, become overly elongated and do not bear fruit as actively. But in this case, there will not be so many of them at the end of the greenhouse, because the long sides of the frame will be illuminated from the east and west.
- Most plants will be quite comfortable in this situation (it is shown in the picture below): there is enough light, and the sun is not too hot at noon.
The optimal location of the greenhouse for southern latitudes is meridional
- For complete photosynthesis in plants, it is always better when the greatest amount of light enters the greenhouse in the first half of the day. And this is only possible when the greenhouse is oriented to the east or southeast.
- But the configuration of the site and its existing development do not always allow choosing the location of the greenhouse on the site that is required for maximum plant comfort. If the orientation from west to east does not work, you can simply shift the timing of growing seedlings.
- For example, with a meridian location of the building, it is very convenient to grow cucumber seedlings in the spring in order to harvest in the fall. In this case, it will not be possible to have vegetables on the table by February-March.
Note: it is not advisable to orient greenhouses from north to south in northern regions. In the summer there is enough light there, because the nights are white, but the rest of the time the plants will be sorely lacking it.
Read on our website: winter greenhouses for summer cottages.
Installation methods
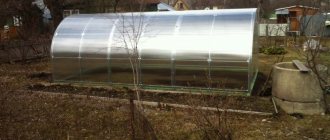
The structure can be installed in two ways: with or without a foundation. Each of these methods has its own advantages and disadvantages. When installed without using a foundation, heat loss occurs, which in cool weather leads to increased heating costs.
But there is a noticeable saving on materials for the foundation, installation and dismantling yourself, moving the structure to another place at any time.
A permanent greenhouse is installed in a permanent location. For proper growth, an annual change of crops is needed - crop rotation.
Failure to comply with this condition leads to depletion of greenhouse soil, the development of pathogenic microflora and, as a rule, the death of planting material. Therefore, it is better to have two structures installed on a foundation on the site. This will make it possible to change crops painlessly and grow different vegetables every year.
How to place two greenhouses on a site
If you decide to install not one, but two greenhouses at once, it means that the size of your plot allows this. All that remains is to decide on their relative position. The ideal option is to place the frames side by side, with a step of 80-100 cm. At a minimum, this will make it possible to walk between the greenhouses and remove debris or snow.
If the length of the site allows, the greenhouses can be joined at the ends in one line or perpendicularly, which will save space and simplify the laying of communications.
Options for placing two or more greenhouses:
PENTAX Image
Greenhouse on the roof
The lack of building space forces people to get creative when figuring out where to place a greenhouse. The option with a used roof is not the worst. It is advisable to include it in the design, although some manage to redo the existing roof.
Greenhouse on the roof
This option can only be implemented on a reinforced concrete floor (read the article on how to make floors in a house), taking into account the weight of the soil and ensuring the proper level of waterproofing. Although, in our opinion, remodeling the roof is not economically feasible. After all, this is how much vegetables need to be grown in a greenhouse for these costs to be recouped! It’s another matter when you are building a new house with a glazed roof, and instead of a winter garden you want to organize a greenhouse there.
House with a winter garden on the roof
Soil quality
Before starting work, it is recommended to study the characteristics of the soil on the site. The geological map should contain all the necessary information, but if there is no such document, then you need to examine the soil yourself. It is not advisable to place the structure on muddy soil: increased moisture will ruin the structure. If the question arises of how to properly install a greenhouse, while saving time and money, then you should adhere to the following tips:
- It is better to erect a structure on a flat area. If there is no such place on the site, then its surface must be leveled using a construction roller or simply pouring earth into the depressions.
- It is recommended to cover clay soil with a three-centimeter layer of gravel, and then fill it with black soil.
In order not to disturb the soil structure, it is better to avoid areas where the soil is too dense.
Summing up
The article examined options for placing greenhouses on the site from the point of view of the convenience of its owner and the comfort of the plants. But what about the distance to the neighbor’s fence - what should it be? According to the standards prescribed in SNiP, no matter how many acres you have, the distance between outbuildings and the fence is at least 1 m. But in general, it is better to increase this distance, since snow will inevitably accumulate in this passage in winter.
What to avoid when placing a greenhouse
Where to put a greenhouse as an extension
This design has several nuances that are important to consider at the planning stage.
The main thing to think about before planning a greenhouse as an extension to your home is the plants nearby. Such a building can cast a shadow and interfere with the development of crops in the neighborhood. Start arranging the beds, stepping back a couple of meters from the future greenhouse.
Another important point is the side towards which the slope of the dacha is facing. If towards the greenhouse, then in winter the falling snow can cover the building. This is especially important if you are attaching the greenhouse directly to the wall of the house. In this case, provide a structure that can withstand the load of snow. It should be covered not with polycarbonate, but with the thickest glass possible; the first option simply will not withstand such a load. Make the roof of the extension with a strong slope or round. But it’s better to step back a little from the main building, about three meters.
Instagram @glass_house_ru
Instagram @glass_house_ru
- Country cottage area
How to choose materials for a greenhouse at the dacha in 4 steps
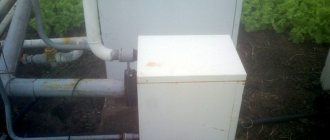
Location of communications
It is recommended to install water supply, electricity and heating into the greenhouse. You must adhere to the following recommendations when choosing a location for a building:
- the closer the greenhouse is located to outbuildings, the cheaper its maintenance;
- if you install a water supply system, it will be possible to install automatic watering indoors;
- it is necessary to lay wide paths of stone or crushed stone to the building;
- experts advise providing water supply to the greenhouse when laying the foundation.
If you listen to these tips, the result will be a convenient structure for growing vegetables, flowers or mushrooms both in summer and winter.
Stages of foundation construction
For all types of foundations, it will be necessary to carry out preliminary work on the site. To do this you need to markup:
- take the thread and make 12 equal segments on it;
- place pegs to pull the thread on them (this will be the first side;
- using the rule for constructing Egyptian triangles, make a right angle (the aspect ratio of the figure is 3: 4: 5);
- make the opposite corner according to a similar pattern and connect all the pegs together with a thread;
- check the diagonals to make an even rectangle;
- mark for future piles or tape.
It is also necessary to clean the proposed area before marking from debris, plants or roots. After this, remove 20 cm of turf and level the area with a shovel.
Advice. Part of the soil that remains after excavation can be used to level deep holes.
From wooden beams
Wooden beams are one of the materials for building a foundation, since you can quickly make a foundation of the required length from it.
Its disadvantage is that due to soil moisture, additional treatment with antiseptics and waterproofing will be required for such a base to stand for more than 5-10 years.
Most often, timber with a cross-section of 100x100 or 150x150 mm is used, which is laid in 1 or 2 rows. In some cases, wooden poles of 50x150 mm are sufficient for a greenhouse.
In order to install a timber base you will need:
- dig a trench (as for a tape), the depth of which will be equal to the thickness of the timber;
- compact the soil in the hole so that it does not collapse;
- pour gravel and sand onto the bottom so that they cover 25-30% of the depth (drainage pad);
- put a layer of waterproofing, for example, roofing felt, on top of the sand;
- cut the timber into piles of the required length depending on the chosen type of connection: metal corners or grooves;
- treat all parts of the wood with an antiseptic;
- carry out preliminary assembly to check the evenness of the structure;
- fasten the beam and lay it at the bottom of the pit;
- the voids between the log and the soil must be filled with sand;
- cover the timber with an additional layer of roofing material.
How to make a foundation from timber, watch the video:
Tape
The strip foundation is made in the same way as it is built for ordinary houses. Its depth depends on how much you need to protect the soil inside the greenhouse from external cold.
Usually a shallow base is made, which should cover 50% of the freezing depth. For better thermal insulation, a deep-seated type is used, which is installed 30-40 cm below the border.
To build a strip base you need:
- dig a trench of the required depth (depending on the freezing point) and width (25-30 cm);
- level and compact the walls, then fill the bottom with a drainage cushion (sand, crushed stone);
- lay waterproofing (usually polyethylene film) and make formwork;
- install the reinforcement at the required height, and then fill the trench with concrete;
- in some places, insert anchor bolts into the still liquid solution, which are needed to secure the greenhouse;
- in order to avoid cracks in the foundation, you should water it for 3-5 days and cover it with film from the sun;
- after 2-3 weeks you can remove the formwork and install waterproofing (roofing felt, bitumen);
- in some cases, to improve thermal insulation, brickwork (basement) is laid on the concrete foundation.
Note. If you make the base from blocks or bricks, then the tape can be made in 2-3 days, but it will be less durable.
Columnar
To arrange a columnar support structure you need:
make holes for the pillars (depth 30-50 cm, width 40x40 or 50x50 cm);- compact the bottom and walls, pour a drainage cushion;
- lay the pillars - you should use masonry in one block, and not make a pillar from pieces, for example, a whole brick instead of 2 halves and use red, as it absorbs less moisture;
- the pillars should be 10-20 cm above the ground;
- make waterproofing from roofing felt on top of the pillars and install a grillage made of timber, which will distribute the load more evenly.
In this article you will find detailed instructions on how to build a columnar foundation with your own hands.
Pile-grillage
A pile-grillage foundation is made using a method similar to a columnar one, but in this case, metal supports are screwed into the ground if they are screw piles, or driven in using construction equipment if they are concrete. Find out more about the features of a pile-grillage foundation here.
As a rule, reinforced concrete piles are not used for greenhouses due to the disproportionate cost. In addition, you can independently install piles from pipes (plastic, asbestos or iron).
Important! The step for installing piles is most often 1-2 m, but to reduce the deflection of the grillage and distribute the load, the distance can be less.
To install a pile-grillage foundation you need:
- make holes in the designated places with a depth of 20-50 cm and a diameter 3-4 times larger than that of the pile;
- install the piles strictly vertically into the ground, to a depth below the freezing point;
- To install the grillage, a U-shaped mount is installed on top, into which the lower crown is mounted.
Monolithic
Installing a monolithic foundation is similar to building a strip, only the area of pouring concrete is larger. In addition, the base under the greenhouse does not need to be deeply buried; it is enough to make a shallow version.
To build a monolithic slab you need:
- level the soil and mark it;
- pour a drainage cushion;
- make formwork;
- install reinforcement cage;
- pour concrete;
- after 1-1.5 hours, insert anchors for the greenhouse into the concrete;
- During the week, water the foundation surface with water and protect it from the sun;
- After 2-3 weeks, remove the formwork and fill the gaps between the slab and the soil with crushed stone or sand.