Mushrooms are loved by many; having them on your table requires a trip to the forest. City dwellers, with their frantic pace of life, do not always have time to visit the forest, and the result of a mushroom trip can be extremely unpredictable.
There is an exit. You can grow your own mushrooms in your dacha. And the most surprising thing is that these can be porcini mushrooms - the most desired ones in the kitchen, and not oyster mushrooms or the well-known champignons. Growing porcini mushrooms in the country is a fascinating and interesting process; in addition, it saves money and time.
Brief description of porcini mushrooms
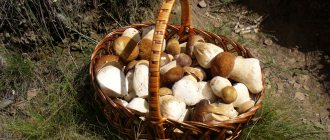
The mushroom has a large fruiting body: a club-shaped or cylindrical stalk, white with brownish scaly specks. Some specimens grow at the bottom up to 10 cm in thickness. The cap is convex on top, flat on the inside, like the bottom of a plate. The diameter of an adult specimen reaches 30 cm.
The surface is colored with a brownish tone, depending on who the mycorrhiza is formed with, the shade of the cap may contain more red or dark brown tint. Boletus, the second name for the porcini mushroom, has fleshy, fibrous flesh that does not darken when cut. The taste and aroma are rich mushroom with nutty notes.
Also find out how long it takes for porcini mushrooms to grow.
Mushroom picker secrets
Substrate preparation
Experienced mushroom pickers take the preparation of the substrate very seriously and begin work a month before the actual laying of the mycelium.
The main component of the substrate is fallen leaves, which are collected in the spring and stored in 10 buckets. In addition, you will need 1 bucket of rotten wood or fruit tree sawdust and 1 bucket of clean cow manure without straw.
For the substrate you can use seed husks, leaves, straw and even pine needles
If you haven’t had time to stock up on leaves, straw, sunflower seed husks and pine needles do a great job. The main condition is to use last year’s material, which is easily rotten.
The resulting composition is poured with a 1% solution of nitrate (ammonium nitrate) and covered with a waterproof material. Every week the mass is shoveled until it becomes homogeneous. This process will take about a month.
Ammonium nitrate is an excellent complex fertilizer for mushrooms
Planting mycelium
It's no secret that mushrooms grow in small families; the mycelium is located at a depth of 5-10 cm. Having found such a family in the forest, carefully use a shovel to dig out a layer of earth 30 cm thick.
These are the small families that mushrooms live in natural conditions.
Before planting, the resulting layer must be divided into 5-6 parts and planted on the prepared bed in a checkerboard pattern, retreating from each other at least 30 cm. In this case, the depth of the mycelium embedding should not exceed 3-5 cm.
Immediately after planting, the bed is watered and “hidden” under a layer of leaves to obtain a favorable microclimate. All further care of the mushroom bed will consist of regular watering and shelter for the winter.
Growing conditions and agricultural technology
Under natural conditions, boletus bears fruit in the warm season: June - October, and in warm regions the first fruits appear in May. On a personal plot, you should germinate spores when the soil is heated to at least +9°C.
Successful cultivation of crops requires a certain regime:
- temperature - +18...+28°С;
- humidity - 60%, no less.
Video: Growing porcini mushrooms on the site
Selecting a location
Boletus does not tolerate proximity to fruit crops, the mycelium may die. Boletus forms mycorrhiza with deciduous and coniferous trees:
- birch;
- beech;
- hornbeam;
- oak;
- larch;
- alder;
- spruce;
- pine.
A bed for future planting should be laid out next to one of the trees listed above, and it should be older than 10 years.
Preparing open ground
You need to grow mushrooms on suitable soil - loam or sandy loam soil. If the soil at the dacha is heavy, it should be diluted by adding sand along with digging.
Immediately before planting, the soil must be disinfected:
- biological products (“Trichodermin”, “Fitosporin”, dilute and water according to the instructions);
- pour in a solution of potassium permanganate;
- clean from weeds and plant residues mechanically.
Seeding mycelium
In the forest you need to find a clearing with the desired tree (a boletus dug up under a birch will not grow under a pine) and dig out a mycelium, capturing a layer of soil and leaves or pine needles that have fallen from the tree, pieces of bark.
Soil selection
The success of the entire procedure will ultimately largely depend on the soil you choose to grow your mushrooms in. If you are going to plant mycelium in an open area, then a place under a forest tree is best. By next year you will have your first harvest. On average, the mycelium bears fruit for 3-4 years. To increase the fruiting period to 7 years, it is necessary to additionally add special microorganisms to the irrigation water. If your garden plot is located far from the forest, then it is better to use special soil for planting mycelium.
You can buy it at the store or prepare it yourself. To do this, you need to take sawdust from deciduous trees, straw, and sunflower seed husks. I lay these ingredients in layers with the addition of soil. The main condition is that none of the components should contain mold or rot. Before planting the mycelium, I moisten the substrate. The best way to do this is with boiling water. Hot water will also help to immediately remove all harmful bacteria.
Reproduction by spores
When there is already a harvest, you can propagate the crop. They do this as follows:
- One large fruit should be left in the garden so that it becomes overripe.
- Then its cap, which contains the spores, is crushed, removing the skin.
- The mass is placed in a container (a 1 liter jar is possible), 5 g of sugar, 20 g of yeast are added and clean, preferably spring water is added.
- The mixture should stand for 2 weeks in a warm place.
- After this, 150 ml of mushroom infusion is brought to a volume of 10 liters with clean water and the selected area of soil is spilled.
- Then regular watering is carried out so that the moisture, seeping deep, pulls the spore material with it.
How to grow oyster mushrooms at home
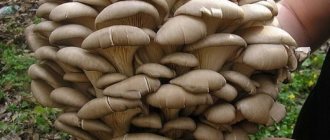
Growing oyster mushrooms in your dacha will not surprise anyone. This species has long been actively cultivated for sale. They are the most actively growing and best-bearing mushrooms. Oyster mushrooms reproduce well indoors; some people even manage to grow them on the balcony of their home. The mycelium can be placed in the basement, garage, barn. Some varieties grow on vertically installed bags or nets with substrate. Wooden boxes with wet sawdust are suitable for this.
How I grew oyster mushrooms at my dacha
I have oyster mushrooms growing in the basement on large plastic bags with husks from sunflower seeds. Before lowering the substrate down, I treat the basement with a disinfectant solution (ready-made preparations are available in stores).
I leave the basement closed for two days, then I ventilate it. There should be two rooms in the basement reserved for mushrooms, this is important. In the first, the mushrooms are germinated; in the second, they are transferred when they begin to actively grow and bear fruit.
The following are suitable nutritional bases for oyster mushrooms: • crushed corn cobs; • sawdust; • straw.
All types of compost can be mixed or used separately. I prepare the nutritional base as follows: 1. I water the raw materials with warm water; 2. leave it to swell for an hour; 3. I drain the remaining water; 4. I brew the raw material with boiling water, cover it with oppression, and leave it for 7 hours; 5. I remove the remaining liquid; 6. I squeeze out the substrate, add a store-bought growth stimulator to it; 7. I package the finished nutritional base in layers 25-30 cm thick in large plastic bags; 8. I make holes in each container with a diameter of 1 to 2 cm, with a distance between them of 15 to 20 cm.
I place the mycelium in bags between layers of substrate. I hang containers ready for germination in a vertical position. The room temperature should be from +18 to + 24 degrees. I constantly moisten the bags. Mycelium does not need lighting; it only needs heat, high humidity and a nutrient base for active growth. I ventilate the room periodically.
After the mycelium begins to grow, I transfer the bags to the second room, where artificial lighting and frequent ventilation will be needed. The air temperature should be from + 12 to + 18 degrees. To increase air humidity, a sprinkler with dispersive nozzles had to be installed in the basement. If this is not the case, you can lower large containers of water into the room and place them in the corners; they will provide the necessary humidity. As for lighting with lamps, I arrange a 12-hour daylight period for the mushrooms. The first harvest of oyster mushrooms is possible on the 8th day after germination.
Useful tips
There are usually no difficulties when growing boletus mushrooms, but sometimes, due to inexperience, novice mushroom growers make mistakes.
Useful tips from successful farmers:
- The tree under which the mycelium is dug and the one where it is planned to be grown must be of the same species.
- Be sure to learn the difference between a real boletus mushroom and an inedible gall mushroom.
- The specimen selected for propagation by spores should be immediately soaked after collection: the spores and pulp quickly decompose.
- When watering the beds, do not overdo it. The soil should always be moist to a depth of 15 cm, but not wet. 40 liters of water is enough for one tree.
- When soaking the pulp for propagation, you can use alcohol instead of sugar. For 10 liters of liquid, 4 tbsp is enough. l. alcohol.
- Sowing is carried out no later than September, otherwise in winter the mycelium will die before it has time to take root.
- The place should be lit, and the crown of the tree will provide light shade.
- Planting is carried out on cool, cloudy days.
When choosing planting material in the forest, you need to be able to distinguish a false specimen from a real one.
The gall mushroom differs from the boletus mushroom in the pink color of the tubular layer; in the real species it is yellow or white; the blende darkens when cut, unlike the edible fruit. Thus, growing and enjoying your own harvest of porcini mushrooms is not difficult. The main thing is to follow the rules for planting and collecting material.
Planting material
You can purchase mushroom mycelium at places where gardening supplies are sold (in a store, at a fair) or you can independently obtain spores (or part of the mycelium) from wild champignons.
Store assortment
Seed, "Aelita", "Prestige", etc.) offer champignon mycelium in small packages
When purchasing, pay attention to the expiration dates, and store the package unopened in a dry and cool place, possibly in the refrigerator (but not in the freezer)
Two-spore champignon (white)
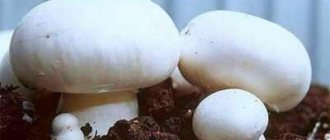
The most common champignon, familiar to us, highly productive and very tasty.
Royal champignon (brown)
This is a special species with a light brown cap. It has an intense aroma and richer taste. Gourmets believe that in terms of taste it is close to porcini mushrooms.
Brazilian champignon (brown medicinal)
It is believed that this type of champignon, with a scaly brown cap, has unique healing properties: normalizes the functioning of the liver, kidneys and gastrointestinal tract, restores immunity after exposure to strong drugs; It’s as if he’s even fighting cancer.
INTERESTING!
There are also other edible types of champignons with their own external characteristics and shades of taste.
Disputes from wild plants
In our natural conditions, white champignon (bisporous) is found everywhere, and obtaining its planting material is not difficult.
You can get spores for reproduction. To do this, the caps of overgrown, old champignons are filled with natural water (rain, river or spring) and left for a couple of days. The resulting mixture is used to water the prepared bed.
Live mycelium (mycelium) is also used. In the place where the mushrooms grow directly, after the rain, pieces of soil the size of a matchbox are cut out. They serve as planting material.
