Tillage: what happens and why is it needed?
Cultivation of any land in which edible crops will grow (no matter in a greenhouse or outdoors) should be carried out at least once every couple of years, preferably annually, in the spring. Disinfection is carried out in order to remove harmful substances from the ground. There are three processing methods that are popular among farmers.
Table 1. Variations in soil health
Treatment of land with hot steam or boiling water. Suitable either for small areas or for those gardeners who have their own boiler room that can heat a sufficient amount of water.
Heat treatment in a greenhouse
In addition, disinfection technologies are used to treat soil. There are several of them, let's look at the most popular:
- With the help of fungicides. Fungicides are chemicals that destroy harmful microorganisms, sometimes not even visible to the human eye. Usually drugs are used in the form of gas or steam. Fungicides are applicable when the soil temperature is about 17 degrees. An example of a fungicidal agent is “Chlorpicrin”. Seedlings can be planted no earlier than ten days after treatment.
- Using formaldehyde. Formaldehyde is diluted with water in a ratio of one to one hundred and the solution is poured onto the soil (about two buckets or twenty liters of product are needed per square meter). The method is recommended for use not only for open air, but also for processing greenhouse and greenhouse soil. Planting after formaldehyde disinfection is permitted no earlier than on the fourteenth day, after ventilation and digging.
- Using pesticides. Disinfection of soil with pesticides gives a powerful disinfecting effect. The most common remedy is “Dust” - it not only destroys bacteria, fungi and insects, but also expels rodents and other pests from the site.
- Using an antiseptic. There is a special covering material that contains antiseptic substances. Cover the ground with this material and then water it abundantly. The wet layer is removed a couple of days before planting.
- Using an electric sterilizer. One of the safest ways. A sterilizer is a special metal device that is buried in the ground and connected to the network. The device reaches a certain temperature and destroys pathogens of various diseases.
There are simpler technologies available even to gardeners who have tiny summer cottages and do not want to spend too many resources on land cultivation. So, you can disinfect soil in a greenhouse, greenhouse or open area in the following ways:
- pour boiling water or, on the contrary, freeze it thoroughly;
- pour in a one percent solution of potassium permanganate;
- water with such budget substances as “Fitosporin”, “Fundazol”, “Aktara”.
Table 2. How to freeze soil from a greenhouse
Timing for processing
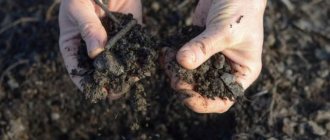
Many summer residents rush to start gardening work as soon as the snow on the site has melted. And the first thing they do is mechanically cultivate the land. But, before you start loosening the soil, you need to determine its readiness for spring work. To do this, a handful of soil is taken from a depth of 15-20 cm; its suitability for processing is determined by the following characteristics:
- Doesn't stick to the shovel
- slightly moist but not dry texture,
- does not stick together when squeezed,
- warm to the touch,
- the structure is fine-lumpy.
If you start cultivating the soil while it is still damp and frozen, then when the temperature becomes warm, it will dry out into hard lumps. In this case, repeated loosening will be necessary. To eliminate such an error, we plan processing at the end of April-beginning of May, in cold areas - in mid-May. To speed up the process of warming up the soil, a couple of times at the beginning of warming we scatter snow from snow-covered areas onto thawed areas of country gardens and flower beds. However, if the site is dominated by light, sandy soils, then it is better not to delay treatment, since such types of soil dry out very quickly.
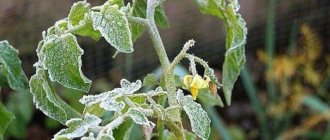
Another clue for a summer resident are coltsfoot flowers. When this plant opens its buds, the soil awakens. The active flowering period indicates the readiness of the soil for spring cultivation.
Soil diseases
Infection with bacteria and fungi. As plants grow, they may become sick. After harvesting, bacteria and fungi remain in the soil. Some of them die in the cold, but some can remain in the soil for many years and infect new plantings. A sign is the appearance in young plants of diseases that were present in plants of the previous year (spots on leaves, rotting, etc.)
We recommend reading
Pests and parasites. They can be both very small (ticks, aphids) and quite large (moles, mole crickets, slugs). Some of them are well adapted to wintering; they can overwinter either themselves or their eggs (pupae). Sign: Young plants are immediately attacked by parasites in the spring.
Exhaustion. As plants take away nutrients, the land becomes depleted and loses fertility. This disease is characterized by a general stunting of seedlings for no apparent reason (there are no pests, diseases, but the plant is still weak and stunted)
|
Violation of the structure. The earth can become hard, heavy, form layers, crack, and undergo erosion. This defect is very easy to diagnose. The soil appears rough, cracked, crusts and cracks form, and forms hard lumps to the touch. It is difficult to dig up such soil. It does not retain moisture after watering and dries out quickly.
Weeds. Weeds may take root in the garden bed. A small number of weeds are always present, but sometimes there are a lot of weeds and they clog all the crops. Then we say that the land is overgrown.
Disinfection of soil with special substances
In addition to exposing the seedling base to hot and cold temperatures, there are methods of cleaning with additional substances. Soil purification is carried out on the basis of chemical and biological substances.
Chemical agents for soil disinfection are used in the most extreme cases - when neither heat treatment nor biological cleaning methods have yielded results. Such substances include:
- Chloride of lime - destroys most pathogenic microorganisms, is introduced into the soil 6 months before planting seedlings in an amount of up to 200 g / 1 sq. m. m. But it should be taken into account that not all seedlings perceive this substance positively.
- Formalin fights blackleg disease microbes; it must be added to the soil two weeks before planting the sprouts. 200 ml of 40% product is dissolved in a bucket of water and poured into the ground. The amount indicated will be sufficient for 1 sq. m plot. Then the treated area is covered with oilcloth; humus or mown grass can be used as cover. After three days, the protective layer is removed and the ground is dug up.
- The chemical TMTD in the form of a powder or suspension is introduced into the base for planting seedlings immediately before planting. This substance is harmless to plants. For treatment, it is enough to dilute a suspension with a concentration of 0.6% in a bucket of water and pour it into the soil.
- Using copper sulfate, the soil is disinfected in the fall, after harvesting. The optimal amount per bucket of water is 50 grams of product. Treatment with the specified substance is allowed once every five years.
Do not overdo it: copper sulfate in large quantities is destructive for plants!
Biological substances give vitality to the soil, increase the number of beneficial bacteria, and reduce toxicity. Among the biological additives to the soil to obtain a cleansing effect, the following can be distinguished:
- Trichodermin is essentially an antibiotic containing biologically active substances that are produced when harmful competing fungi appear. The action of the described product is expressed in the release of beneficial mushrooms that suppress the vital activity of pathogenic microbes and bacteria. The product is mixed in the proportion: 1 gram per 1 kg of soil, after dissolving the substance in water.
- Baikal EM-1 is ideal for preventive soil treatment before planting seedlings and after harvesting. Add 150 ml of the product to a bucket of water and mix. For 1 sq. m of soil, it would be optimal to pour 2.5 liters of solution.
- Alirin-B – fights root rot. 1 tablet of the product is diluted in 5 liters of water and the sprouts are watered.
- Fitosporin-M - the action is based on the fact that after dissolving the product in water, the active substances begin to act and suppress the activity of harmful bacteria, normalizing the microflora, increasing resistance to various types of seedling diseases. To process 1 sq. m area will be sufficient 6 gr. dissolve the substances in a bucket of water.
It is strictly forbidden to mix chemical and biological preparations. To avoid the destruction of useful compounds, it is necessary to wait about two weeks between the use of these products.
The use of elevated temperatures in spring against diseases and pests
This method is quite effective for destroying pathogens of various diseases and harmful insects. Temperature treatment can be implemented in two ways, which are quite effective at stable positive air temperatures, that is, at the end of April or May. The first is to pour boiling water over the prepared area. The second method is to tightly cover the bed for 3-4 days with several layers of plastic film. In sunny weather, under such a shelter, provided it is completely sealed, the temperature can rise to 70–80 °C.
Articles about growing seedlings
Prepare the soil mixture for seedlings yourself
Every gardener can produce his own “turf soil”. As a result, we will have a high-quality soil mixture for planting seedlings in the spring.
- We cut the turf and place it in a stack, at least 1 m high.
- When laying, we spill slurry or simply lay it with fresh manure.
- Drying out of the stack is unacceptable. Therefore, we always keep it moist.
- Then, after a few months, the pile is shoveled. Anything large that is not rotted is discarded.
- We store the resulting soil in bags and buckets in unheated rooms until spring.
Preparation:
- 1 - 2 - 1. Turf soil - humus - sand. Here, for 10 liters of mixture, 2 cups of ash. Plus a teaspoon of superphosphate and a pinch of potassium fertilizer.
Health-safe folk remedies in the spring against diseases and pests
Many adherents of ecological farming practice treating beds against diseases and pests using solutions of various natural disinfectants. This can be an aqueous solution of pine concentrate, an infusion of tobacco dust, as well as other infusions and decoctions of plants with insecticidal properties (onion, garlic, wormwood and others). Green manure plants (mustard, rapeseed, rye, oats and others) perfectly enrich the soil and fight diseases and pests, which can be sown on the site both before winter and in early spring, before planting the main crop. Their shoots are cut off and sent to compost or embedded in the soil during spring digging.
Articles about unusual growing of seedlings
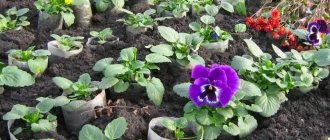
Do not cover the surface of the earth
Quite often you can see covered beds in areas. For this purpose, glass, film and other materials are used. On the one hand, this is not bad for the germination of seedlings and seeds. But on the other hand, excessive soil nutrition becomes a favorable environment for the development of fungi and mold. With poor ventilation and excess moisture, the fungus may appear faster than the seeds germinate. The mycelium can get into the seeds and infect them. This is fraught with loss of harvest. Therefore, try not to cover the surface of the ground or ensure sufficient ventilation of the beds.
Biological method of disinfection in spring from diseases and pests
The biological method of disinfection uses a method of destroying microorganisms in the environment with biological preparations, containing antagonistic microbes. This method has a strictly specific purpose.
The biological method is used to destroy arthropods – carriers of pathogens of infectious diseases. With this method, cultures of certain types of pathogenic bacteria and fungi, spores of bacilli, fungi and actinomycetes, and viruses that can cause mass diseases among insects are added to food baits.
The use of bacterial preparations makes it possible to reduce pollution of the external environment with chemicals. In addition, when using chemical disinfection methods, not all insect habitats are accessible to disinfectants.
First - good mechanical cleaning!
Any soil treatment in a greenhouse should begin only after thorough cleaning of the entire internal space: from debris, dust, dirt and overgrown moss. If the greenhouse is film, remove the covering and wash it well.
Mechanical tillage is, first of all, its cleaning. All plant debris, lashes, stems and unrotted mulch should be taken away from the greenhouse (just do not dump it nearby, so as not to later make the area a haven for hungry rodents).
Now look around: is there still snow around the greenhouse? Are you in too much of a hurry to start the season? It’s better to scatter it more than the bed, and let it melt on its own - this is the first natural treatment of greenhouse soil:
And after that, start processing with chemicals. And don’t delay, remember: from year to year there are more and more pathogenic microorganisms in the greenhouse soil, and it will be more and more difficult to remove them.
Chemical method of disinfection in spring from diseases and pests
Before starting work, analyze what diseases or pests attacked your plants last year. Depending on this, you need to choose a chemical solution: specialized or broad-spectrum. So, for processing they use:
- copper sulfate;
- formalin;
- creolin;
- bleach;
- carbation.
Depending on the disease, you can use:
- Fungal diseases and pathogenic flora are afraid of the drug "Fitop-Flora-S".
- “Lightning” saves you from spider mites.
- Bayleton will help get rid of gray rot
- Rot and pathogenic microorganisms will be destroyed by Fitolavin-300
Before diluting medications, read the instructions on the package!
Increasing productivity: proper tillage in spring
Summer residents who have extensive experience in growing vegetables on their plot know that its richness depends on how fertile the soil is. Soil fertility in the garden and vegetable garden can be increased by proper spring tillage. Proper soil care and timely digging enrich it with oxygen, thereby significantly improving the quality of the soil. But digging up the earth or simply loosening it is not enough. Soil is not a permanent, unchanging substance, but a living organism in which various processes continuously occur, caused, among other things, by human manipulation. It contains a lot of beneficial bacteria and other microorganisms, the activity of which helps to increase the fertility of the top layer. The cultivation of the soil that a summer resident performs in the spring has many nuances that make it possible to improve the quality of the soil and maintain it in this condition throughout the entire summer season.
Choosing the time for soil treatment
Many owners of summer cottages are in a hurry to start gardening work immediately after the snow melts. And they begin the season with mechanical tillage. This is the wrong approach. Before loosening the soil, you must first find out how ready it is for spring work. Take a soil sample from a depth of about 20 cm and carefully examine its condition. The following signs indicate its readiness for processing:
- the earth does not stick to the bayonet shovel;
- the soil is slightly moistened, but does not form into a lump when squeezed in the palm of your hand;
- upon contact with your hand, you feel that the ground is already quite warm;
- its structure is finely lumpy.
You cannot begin spring tillage of the soil on the site if it is still damp and frozen in places - this will lead to the fact that when the weather warms up, the treated soil will dry out into large hard stones, which will then be difficult to break, and it will not be possible to do without repeated loosening. To avoid having to do extra work, spring soil work is carried out approximately in the last days of April or early May, in regions with a cold climate - in the second ten days of May. To speed up the warming up of the area, on warm days it is recommended to scatter the snow several times in areas where it is in no hurry to melt, and move it to those areas where the snow cover has already melted. If the soil in your garden is predominantly light, with a high sand content, then excavation work should not be delayed for long, since such soil will dry out quickly. The coltsfoot plant can tell summer residents whether the soil is ready for digging: if it blooms flowers in your area, this means that the soil has woken up from hibernation and is ready for pre-planting treatment.
Determining the soil type of a summer cottage
Before starting spring work, be sure to find out what type of soil predominates on your estate. This will make it possible to choose the optimal complex of fertilizing and fertilizers, and will also allow you to determine the order of different types of soil treatment. When digging a site for the first time, it is not difficult to determine the type of soil: just take a little soil in your palm and try to form a sausage out of it. Evaluate the results:
- if nothing works, then the soil is sandy;
- if the earthen sausage crumbles almost immediately after formation, this indicates that you will have to deal with sandy loam soil;
- if the sausage falls apart into separate pieces, this means that there is loam in the area;
- if it falls apart when you try to roll the ring, such soil is called medium loamy;
- if a ring is rolled up from a sausage, but cracks appear on it, the soil of this type is called heavy loam;
- a smooth ring without cracks indicates clay soil.
Soils of another type make it possible to identify weeds that mainly grow in the country. For example, if horsetail or sow thistle grows everywhere in the garden or vegetable garden, this indicates that the soil here is peaty or even swampy. Coltsfoot and toadflax grow on limestone. After determining the type of soil, they move on to planning and implementing measures to increase soil fertility.
We fertilize the soil taking into account the type
The list of soil amendments is selected based on its type. High yields can be achieved on any soil if it is fertilized in a timely and competent manner.
Sandstone and sandstone
Water is poorly retained in these types of soil. To improve the situation, add loam or medium loamy soil to the soil. The volume of soil added during spring cultivation should be equal to a quarter of the volume to be fertilized. The fertility of sandstone and sandstone can also be improved by adding peat. The treated area is covered with a peat “blanket” approximately 6-7 cm thick, after which digging is carried out.
Medium to heavy loam and clay soil
Soil containing large amounts of clay does not conduct moisture well, and in hot weather a dense crust appears on such soil. The structure of clay soils can be improved by adding sand to them. To 4 parts of the earth you need to add one part of coarse river sand. To make the soil more loose, it is recommended to add the same amount of wood ash to the sand.
Limestone type soil
It is characterized by low acidity. To increase it, you should add organic matter to the site - compost, rich humus or peat. Any organic matter is added to the soil before spring plowing or digging or simultaneously with them. Certain vegetable crops, for example potatoes, are fertilized when planted.
Spring digging of soil
Before you start digging the site, find out the weather forecast for the coming days. If the weather is cloudy, you can dig up a significant part of the land and give it a couple of weeks to rest before it is all planted with one or another vegetable crops or flowers. If the days are expected to be hot and sunny, you need to dig up only such a plot of land that you can sow immediately. This will protect the soil from drying out and create an environment favorable for planting seeds and seedlings.
Spring digging of the site can be carried out using various tools. Their choice depends on the type of soil, as well as on the preferences of the person doing the work. Most often used:
- bayonet shovel;
- gardening tools "Tornadika";
- forks, and the number of their teeth may be different;
- walk-behind tractors and cultivators.
Bayonet shovel FISKARS Dacha
If the area is not dug up in the fall, then in the spring the soil is dug up using a full shovel. In this case, the soil is not just loosened, it is turned over, destroying lumps. During the digging process, visible weeds, debris and large stones, as well as pest larvae (for example, wireworms or May beetles) are removed.
Sometimes spring tillage is carried out in two stages. The first time it is dug up to a depth of 20-25 cm, after which the area is fertilized, and repeated digging is performed, shallower - to a depth of 15 cm. This allows the fertilizer to be delivered to the root layer. This method of treatment is especially good if your site is dominated by heavy soils - clay or loam. In light soils, sometimes you can do without digging. For example, if the autumn digging has been completed in the spring, it is enough to simply loosen the area thoroughly, and you can start planting. If the site was not dug up in the fall, it is enough to simply dig up the light soil with a pitchfork - this will require less effort from the summer resident.
Digging forks Country Sonata with V-handle handle
Many owners of summer cottages use gasoline or electric devices to plow the land. This certainly facilitates the processing process and allows it to be carried out in a short time. But the quality of such processing is very questionable. Firstly, in this case, the weeds in the ground, or rather, their roots, are crushed into small segments, which allows them to multiply and grow with greater intensity than, for example, in the previous year. Secondly, when plowing the land (for example, with a motor cultivator), it is quite difficult to maintain the same plowing depth over the entire area of the plot and not lift up unwanted loam.
After digging up the soil, carefully loosen the soil and level it with a rake or hoe so that no large lumps remain. To roll beds and flower beds, rolls are used, which you can buy in a store or make yourself. Rolling is necessary to deliver moisture to plants. In addition, on a well-leveled surface it is easier to mark and plant seeds of cultivated plants.
Straight rake with twisted teeth Forsazh with handle
Garden pre-planting work
After digging the earth, it is allowed to rest for a couple of weeks, but only if the weather is not hot. In dry and hot weather, the area is quickly planted by laying out vegetable beds on it. Vegetable crops are planted taking into account the basic rules of crop rotation, otherwise you will have to forget about a rich harvest. In general, any vegetable crop should be planted in a different place at least once every three years. This allows you to protect plants from parasites and diseases, and enrich the soil with useful substances. After selecting a site for planting vegetables, beds are formed using garden tools. Some fence them with boards or other materials, or buy ready-made fences for garden beds. But on light soils it is quite possible to do without forming beds, but if heavy soils predominate on the site, it is better to make them high and fertilized to improve soil fertility.
Often, even summer residents whose plot is located on light soils still make high raised beds. This method of growing vegetables has a number of advantages: firstly, it is more convenient to care for the plants - watering, fertilizing, weeding, without the need to bend low. Secondly, raised ridges are better heated by the sun, including their side parts. Vegetables in such beds receive much more light.
The width of the beds varies. A width of 60-80 cm is considered normal for them. It is comfortable to water and weed a bed of this width, reaching to the middle from any edge. After the ridge is formed, its marking is carried out. Some people do it by eye, but those who love order and neat planting resort to the help of pegs and threads. It is better to use light threads, they are much more noticeable against the background of the soil. If your plot of land is very small, it would be more rational to plant it with vegetable crops without forming ridges. In this case, you will be able to use all the available space with maximum efficiency.
Spring mulching of the soil
The role of moisture in the planting and development of plants can hardly be overestimated. Germination of any seeds without water is impossible. Spring tillage is also aimed at retaining moisture remaining in the soil from winter. Of course, when cultivating vegetables, in any case you will have to resort to artificially moistening the beds, especially in hot weather. But when watering, the top layer of soil gets wet, and then dries out in hot weather, turning into an airtight crust. This can negatively affect the development of planted plants, since they will experience a lack of oxygen delivered to their root system. To save the plantings from this and prevent the formation of crust, the beds are mulched.
Many summer residents prefer to mulch in the fall, but if you postpone it until the beginning of the summer season, it’s okay. Various materials and substances are used for mulching. The best option for most vegetable crops is, of course, compost. It effectively protects the sprouts from both overheating and excess water. In addition, compost also serves as an excellent fertilizer for cultivated plants.
When choosing compost as mulch, the optimal layer will be a layer 3-5 cm thick. Mulch can also be coarse materials - sawdust, pine needles, straw, etc. But they should be used carefully in the garden, since they significantly increase the acidity of the soil. Mulch of this type is suitable for protecting the following crops: tomatoes, strawberries, potatoes, eggplants. In this case, the mulch layer should be no thicker than 8 cm. If the site is located in the shade and clay soil predominates on it, there is no need to mulch it.
Spring soil preparation for planting vegetables and flowers in a summer cottage is quite labor-intensive. But the more carefully you carry it out, the better you cultivate the soil in the spring, the greater the harvest of vegetables you will reap in the fall, and the flowers will delight you with long and lush blooms. This result is worth the sweat for it.
Possible problems if left untreated
Experts in the field of agronomy note that the soil requires replacement every year. This is necessary to feed the planted plants.
But, unfortunately, not everyone has the opportunity to change the soil annually, and in some cases this procedure is simply impossible due to the large size of the land plots. Therefore, the only option for growing strong and healthy plants is to disinfect the soil.
Tilling is an important component of the preparatory stage of the soil for planting. You can't do without it.
After each harvest, a large number of pathogenic microorganisms accumulate in the ground, negatively affecting the amount of agricultural products grown in the future.
Organic residues stop the growth of seeds and seedlings. Pathogenic microorganisms, nematodes, rot, mycelium and mold negatively affect the ability of cations to penetrate the plant fibers, saturate them with moisture, nutrients and elements necessary for growth.
Many bacterial and fungal infections settle in the soil after the previous harvest. If plants are planted in such soil, pathogenic microorganisms will begin to destroy it.
The most obvious signs of soil contamination are the appearance of spots on the leaves of previously planted crops and drying of the foliage.
|
Tillage is also necessary to eliminate pests.
The most common insects found in garden plots and fields are:
- Melon aphid (sucks juice from leaves and fragile shoots).
- Flea beetles (gnaw holes in heads of cabbage).
- Whitefly (sucks juice from leaves, depriving them of moisture).
- Colorado potato beetle (eats plant foliage).
- Exclamation owl (feasts on root vegetables).
- Mole cricket (damages the root system of the plant).
- Leaf beetle (eat leaves of agricultural crops).
- Meadow moth (damages ovaries and fruits).
- Slug (spoils fruits and seedling trunks).
Method number 3. Biological soil disinfection
Examples of biofungicides for soil disinfection
This treatment involves the use of biofungicides (bactericides) to suppress phytopathogens.
Among the common and frequently used biological products:
- "Fitosporin-M, Zh, P, PS";
- “Alirin-B, Zh, SP, Tab”;
- "Gamair, KS, SP, Tab";
- "Glyokladin, Tab";
- "Trichodermin" / "Trichoderma veride".
A separate material on the website “TOP-5 best biological products for soil disinfection” provides a comparative analysis, regulations for the use of biofungicides, etc.
It is important to note that all biofungicides have powerful anti-stress and immunostimulating properties. Their use not only revives beneficial soil microflora, but also significantly reduces the number of repeated infections of plants with bacterial and fungal infections.
Preliminary preparation for processing
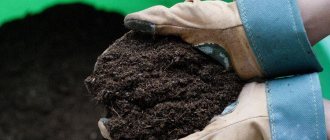
Soil preparation is carried out in the fall. Initially, garden waste and leaves are collected from the land plot and everything is burned. Ash will serve as an excellent fertilizer for mail.
Then the earth is dug up to saturate it with oxygen. Loose soil is more saturated with moisture from autumn and winter precipitation, so it is better to begin preparation in the fall.
But if this is not possible, then this can be done in the spring. During the spring months, treatment is carried out when the soil is still wet.
Preparations continue in the spring. It is necessary to do shallow loosening to destroy the crust that has formed on the soil.
Determining the type of soil on the site
Before spring tillage, it is extremely important to determine the type of soil. This will allow you to select the right fertilizer complex for it and the sequence of earthworks. If no work has been carried out on the site before, then it is very easy to determine the type of soil: you need to take a handful of soil and roll it into a sausage. If it does not form, then the soil is sandy; if it forms and immediately disintegrates, it is sandy loam. When scattering the sausage into pieces, the soil is loamy. If the sausage breaks when rolled into a ring, then the soil is medium loamy; if cracks form on the ring, the soil type is heavy loamy. When the soil is free of cracks and breaks and forms a ring, it is clayey.
There are other types of soils on the site; they can be identified by the weeds growing (hopefully) in the dacha. Horsetail and thistle grow in peat or marshy areas. And on calcareous soil you can find coltsfoot, toadflax and buttercup. When the type of soil is determined, you can begin to increase its fertility.
Methods for treating soil against pests
In the spring, you can treat the soil against pests using folk remedies and chemicals.
The latter are more effective, but can cause an allergic reaction and even intoxication of the human body if used incorrectly. Traditional methods do not always help, but are harmless to humans and the soil.
Traditional methods
Soil treatment for seedlings
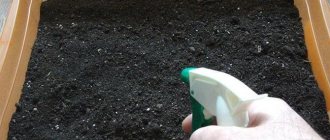
You can disinfect the soil for planting with potassium permanganate.
Method of preparation: 3 g of potassium permanganate is dissolved in 10 liters of water. The liquid is then applied to the ground by spraying or flooding.
- Spilling boiling water.
- Steaming.
- Watering with Aktar solution.
- Adding the drug "Fitosporin".
- Watering with fungicide.
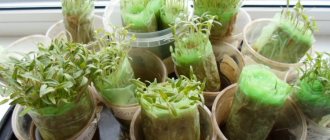
Freezing is used only in cases where the amount of soil is not very large. This method is effective, but does not protect against late blight.
- Filling soil into bags in winter.
- Taking them outside.
- Place the bags in a warm room for a week.
- Take outside at low temperatures.
- Placement in a warm room.
Method No. 1 “Folk wisdom”
a) Freezing
A simple and generally effective method of pre-planting soil treatment. The soil in bags is taken out into the cold (temperature below -10... -15C) for 5-7 days. You can use the freezer (-18C). Then they are brought into the heat until completely defrosted, the eggs and larvae of insects are given the opportunity to “wake up from hibernation”, and then again into the cold. For maximum effect, it is advisable to perform such cycles at least 2-3 times. However, this method does not allow you to get rid of phytopathogens - fungi and bacteria.
b) Thermal method (high temperature)
The soil is treated with high temperatures using two methods:
- calcination (the soil is poured with boiling water, mixed, laid out on a baking sheet in a layer of 5-7 cm, calcined for 30-40 minutes in the oven at a temperature of +100 ... +120 C);
- steaming (place the soil in bags on a wire rack over boiling water, the so-called “water bath”, and steam for 1.5-2 hours).
“Folk methods” of land disinfection are effective, but have a main and significant drawback - the destruction of beneficial microflora. Today, biological products have been developed and are successfully used that easily solve this issue. These methods are recommended to be used in conjunction with chemical and biological methods of soil disinfection.
Preparing soil for different crops
There are many soil options. To choose the right one, you need to take into account the requirements of each specific culture. Tomatoes, for example, prefer slightly alkaline soil with plenty of organic matter, nitrogen and potassium. Cabbage prefers soil to which lime and wood ash have been added.
| Culture | Soil Mix Options |
| Eggplant | 1. Humus (2 parts), peat (1 part), rotted sawdust (0.5 parts). 2. Garden soil (1 bucket), ash (0.5 cups), superphosphate (1 tbsp), urea or potassium sulfate (1 tsp). |
| Cabbage | 1. Soddy soil (1 part), humus (1 part), peat (1 part). 2. Turf soil (20 parts), ash (5 parts), lime (1 part), sand (1 part). 3. Peat (12 parts), turf soil (4 parts), sand (1 part). |
| Cucumber | 1. Peat (2 parts), humus (2 parts), rotted sawdust (1 part). For every 10 liters of this mixture add 1 tbsp. ash and 1 tsp. urea, superphosphate and potassium sulfate. 2. Turf soil (1 part), compost or humus (1 part). Add 1 tbsp to a bucket of mixture. ash, 10 g of potassium sulfate and 20 g of superphosphate. 3. Peat (6 parts), humus (1 part), sawdust (1 part), sand (1 part), mullein (1 part). 4. Soddy soil (1 part), peat (1 part), humus (1 part), rotted sawdust (1 part). |
| Pepper | 1. Turf soil (1 part), humus (2 parts). 2. Peat (2 parts), humus (2 parts). 3. Humus (3 parts), turf soil (2 parts). 4. Nutritious peat soil (2 parts), turf soil (1 part). 5. Peat (4 parts), turf soil (2 parts), humus (1 part), rotted sawdust (1 part). |
| Tomato | 1. Peat (16 parts), turf soil (4 parts), mullein (1 part). Add 3 liters of river sand, 10 g of ammonium nitrate, 20-30 g of superphosphate, 10-15 g of potassium chloride to a bucket of the mixture. 2. Peat (3 parts), sawdust (1 part), mullein (0.5 parts). Add 3 liters of river sand, 10 g of ammonium nitrate, 20-30 g of superphosphate, 10-15 g of potassium chloride to a bucket of the mixture. 3. Humus (1 part), peat (1 part), turf soil (1 part), rotted sawdust (1 part). Add 1.5 tbsp to a bucket of mixture. ash, 3 tbsp. superphosphate, 1 tbsp. potassium sulfate and 1 tsp. urea. |
You can also prepare a universal soil mixture. It consists of two parts of garden soil, one part of humus or well-rotted compost, one part of peat and one part of sawdust or sand. Depending on what crop will be grown, add a certain amount of fertilizer to this substrate.
| Culture | Amount of fertilizer per 10 liters of substrate |
| Cabbage | 15-20 g ammonium nitrate or urea, 20-25 g superphosphate, 10 g potassium sulfate, 25 g dolomite flour |
| Cucumber | 8-10 g ammonium nitrate, 10-15 g superphosphate, 10 g potassium sulfate, 10 g dolomite flour |
| Tomato, pepper, eggplant | 8-10 g ammonium nitrate, 80 g superphosphate, 20-30 g potassium sulfate |
No matter how great your desire, do not sow vegetable seeds in pure humus or compost. They contain a lot of nutrients, thanks to which the seedlings quickly grow green mass and look very attractive. However, their roots develop poorly, so the plants do not take root well on the site. You should not sift the components of the soil for seedlings through a fine sieve - such a substrate will “float” after watering and will turn sour very quickly.
How to deal with gray mold in the fall
During the autumn period, a number of activities need to be carried out:
- spray the plants with fungicides, Bordeaux mixture;
- Collect moldy plant remains and burn them.
Photo of spraying with Bordeaux mixture
Important!
It is not enough to just throw away infected fruits. In this case, the spores will simply be spread throughout the area, which may damage healthy crops. Destruction is required.
Fruit rot on apple, pear, plum and other fruit and berry trees
Rot on fruit and berry trees is called “fruit rot” or moniliosis - this is a very terrible disease that is difficult to fight. Fruit rot can affect apple trees, pears, plums, quince, cherries, cherries, peach, apricot and deprive the summer resident of 80% of the harvest.
Important!
There are no fruit and berry trees that are completely resistant to rot.
To stop the spread of infection on fruit trees, you can use the following fungicides:
- Speed;
- Home;
- Tsineb;
- Tsiram.
How to deal with fruit rot - video
During one ripening period, no more than 4 treatments are carried out.
As a preventative measure, the apple tree is treated with a 3% solution of Bordeaux mixture. It is important to apply the treatment before the leaves bloom.
Mineral fertilizers for the garden!
• Urea • Potassium monophosphate • Azophoska • Nitrophoska • Ammophoska
Gray rot on sunflower
When sunflower seeds are damaged, a gray coating forms. The sprouts begin to rot in the ground, underground. The appearance of rot on adult plants occurs on the stem and leaves. One touch is enough for the affected leaf to crumble. When the flower basket is affected, brown spots, sclerotia, form on the sunflower.
Measures to prevent disease on sunflower:
- purchasing exclusively high-quality material for sowing;
- maintaining the distance between healthy and diseased plants;
- soaking seeds in a solution of potassium permanganate;
- compliance with the timing of sowing and harvesting;
- 14 days before harvesting, when the weather is rainy, the process of dehydrating plant tissues with chemicals is carried out;
- thoroughly dry the planting material;
- In the fall they dig up the soil.
Sunflower must be protected from the appearance of the disease. It can worsen the taste characteristics of seeds and lead to a decrease in yield.
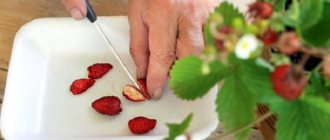
Gray rot on strawberries and wild strawberries
For healthy strawberry bushes, you need to create optimal conditions for them. In this case, the appearance of gray rot on strawberries is simply excluded.
Preventive measures to combat gray mold on strawberries and wild strawberries:
- planting in well-lit places;
- systematic loosening of the soil, elimination of weeds;
- mulching after watering;
- moderate application of fertilizers (this is especially true for nitrogen, since its excessive amount will cause active growth of foliage);
- elimination of infected berries;
- Plant plants carefully so as not to damage the sockets.
Preventive measures against gray rot are carried out several times a year.
In November, strawberries and strawberries are sprayed. Sometimes the procedure is postponed to spring (March). The treatment should be repeated after the leaves grow and buds form.
Preparations for treating strawberries against gray rot: Horus, Teldor, Alirin-B, Switch.
Important!
Carefully study the instructions for using fungicides to treat plants against gray rot.
You can also use the folk remedies described above to combat gray mold in strawberries: iodine, ash, garlic, mustard, potassium permanganate, soap solution.
Protecting wild strawberries from gray rot - video
Unfortunately, if strawberry bushes are severely affected, they will have to be destroyed and the soil must be treated so that the disease does not spread to other crops. It is better to plant new berry beds in another place.
Gray rot on grapes - how to fight
On grapes, gray rot disease manifests itself in the form of brown spots with a gray coating on the foliage and fruits. Gray rot affects the above-ground part of the grapevine, leaves, leads to the death of branches, leads to wilting of inflorescences, and the berries on the bunches also dry out and spoil.
Heat and high humidity are the main “friends” of gray rot that affects grapes.
Treatment of grapes against gray rot should be carried out 4 times a year:
- After flowering;
- During fruit formation;
- 30-40 days before harvest;
- In autumn.
What it looks like and how to deal with gray rot on grapes - video
[media=
https://youtu.be/KjQOAW-8TDg
]
If no precedents of the disease have been encountered before, then the treatment can be carried out 2 times: when the bunches are formed and a month and a half before harvesting the fruits.
In another article you can read in more detail
about fungicides for grapes.
Traditional folk remedies for gray rot can also be tried on grapes.