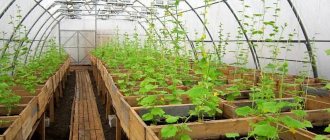
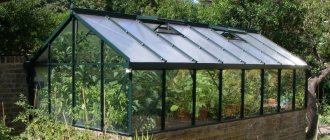
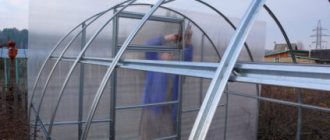
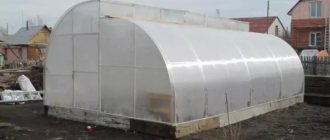
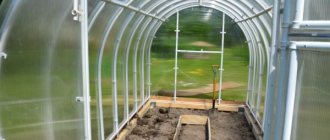
A winter greenhouse is a useful structure for a plot of land that allows you to grow garden crops all year round. It is used both for personal needs and for growing fruit plants for sale.
The most versatile material for constructing greenhouses is polycarbonate. It is this that allows the use of the latest construction technologies, design developments and technical equipment for greenhouses.
Polycarbonate retains heat well and allows enough sunlight to pass through. Source plodogorod.com
Stove heating
A reliable solution that will provide year-round heating of the greenhouse. In the simplest case, an ordinary potbelly stove is placed in a greenhouse, which can be heated with firewood, sawdust, and other wood waste. Advantages of this method:
- Maintains the temperature necessary for plant growth, regardless of outdoor conditions.
- Possibility to install the stove yourself.
- Low heating price, which will not increase the cost of the future harvest.
But installing one stove also has a certain disadvantage - the volume of the greenhouse is heated unevenly, and the temperature near the heat source will be higher. Therefore, for a large greenhouse, it is advisable to make at least a simple water heating system. To save money, they lay a circuit of pipes. Heating efficiency will improve if inexpensive registers or radiators are installed, but in this case the cost of the system will increase significantly.
Rating of heaters for greenhouses
You can heat a greenhouse in different ways. When compiling the rating, our team studied the main options for heating rooms, from primitive and low-cost to technically complex and expensive. Each of them has its own advantages and disadvantages. Water heating, heat guns, electric panels and infrared emitters - all of the heating methods listed have their own characteristics, advantages and disadvantages.
Some are highly effective, but their implementation is associated with serious costs of labor and material resources, and they will pay for themselves only in reputable and profitable farms. Others do not require special material costs, can be installed within a few hours, but are ineffective and consume a significant amount of energy resources. Our task is to select inexpensive, effective and economical devices that do not require complex installation and the constant presence of the owner during operation, such as when using a potbelly stove.
When selecting nominees for the rating, our experts paid special attention to the following characteristics and functions of the devices:
- Model sizes. The heater should not clutter up the work space;
- Weight. Lightweight greenhouse structures will not withstand heavy equipment;
- Power. It should be enough to effectively heat the soil and plants;
- Cost-effective – The model must provide the desired effect with minimal costs;
- Autonomy. Preference was given to devices whose operation can be programmed to automatically maintain a set temperature in the room around the clock.
- Price. Nominees with the best price-quality ratio were selected;
- Safety. Models that meet all electrical safety requirements were selected.
A team of experts took part in compiling the rating, which included experienced gardeners who have been using heaters of various designs for many years, electricians with extensive experience, and sales consultants in specialized stores. Considering their competence and high level of professionalism, we can confidently recommend any of the seven nominees presented to customers.
Air heating
Such heating of polycarbonate greenhouses is also in demand. In this case, a stove or other heater is installed outside the greenhouse; a pipe is connected to it, through which heated air enters the greenhouse. In the simplest case, you can build a fire under the outer edge of the pipe.
The main advantage of heating a greenhouse with air is its ease of implementation. The greenhouse heats up quickly, but also cools down quickly.
This heating option is not suitable for constant use. This heating method does not warm the soil, which slows down the development of the root system, and also dries out the air greatly. It is very difficult to heat a large greenhouse in this way: it will require a large amount of fuel.
When is a heater needed?
The presence of a heater helps to achieve earlier germination, harvesting ahead of schedule and in a shorter period. Sometimes such a device is installed in ordinary
greenhouses in regions with rather short summers or very changeable weather.
They are recommended to be used in the spring to allow early sowing of seeds or seedlings. In summer, the technique is used if the air temperature in the region can drop to critical levels. In autumn, especially at night, when frosts begin. In winter - if there is not enough power of the general heating system.
Water heating
A water heating system is a closed loop of pipes through which water circulates, heated by a boiler or other heat source. The circuit can be laid either along the walls of the greenhouse, heating the air, or embedded in the soil, heating the root system of plants.
Water heating can operate on any fuel: gasoline, peat, bustard, biofuel. This depends on the boiler configuration. This system is safer than laying electrical cables or using gas heating. Cables may become damaged, causing a short circuit, and the gas may explode.
For optimal heating, it is best to lay two pipe circuits at once:
- The first is laid at a depth of 30 cm in the ground. It is used to heat the soil. In this case, the temperature of the pipes should not exceed +30-40 degrees Celsius.
- The second is laid along the perimeter of the greenhouse along the walls. It is not advisable to install the circuit on the ceiling, because Warm air, according to the laws of physics, will not fall down and warm the plants.
Polycarbonate in winter
We have already mentioned above the ability of polycarbonate to withstand very high and low temperatures. So, the installation temperature of polycarbonate in winter is up to -40 degrees. In winter, it is most likely not the installation of polycarbonate that causes difficulties, but the load from the fallen snow. If the structure has an infrequent lathing pitch, then this will become a major problem. It will be necessary to control the amount of snow that has fallen or even install supports. Otherwise, the material may simply bend under the weight of the snow cover.
But there is another problem that you may encounter when a lot of snow falls. This is the roof seal. After all, if the melted snow begins to drip, and the roof is not airtight, then the drops will fall on equipment, furniture, or worse, the insulation will suffer. And this can already lead to consequences worse than just wet furniture.
Storing polycarbonate in winter
If you ordered polycarbonate in winter and it was delivered to you, it would be better to store it unfolded. Installation of cellular polycarbonate in winter involves, although short-term, storage of rather long sheets. But if you do not have a room suitable for its dimensions, which are 6 or 12 meters in length, then you will have to store it rolled up. But some actions need to be taken. It will be enough to loosen the roll a little. This must be done so that it does not turn around. Then secure it with a rope and place it vertically.
Installation in winter
When frosts come, many people have a single question: is it possible to install polycarbonate in winter? This question can be answered unequivocally. Polycarbonate is simply a unique building material that can be used at any time of the year. Working with polycarbonate in winter is practically no different from installation in other seasons. It is better not to mount it at a temperature of -15 degrees. Working with polycarbonate in cold weather must be carried out with extreme caution, since in winter this material becomes more fragile.
When installing in winter, you need to take into account such a property as expansion of the material. Polycarbonate expands when heated and contracts when cold. This can lead to the fact that polycarbonate installed in winter may simply crawl out of the grooves.
You also need to take into account the need to drill holes when fastening sheets that are several millimeters larger than the screw itself.
From this we can conclude that installation in winter is quite possible, it just depends on whether it is necessary. After all, the material becomes less flexible, brittle and quite rigid, and working with it becomes much more difficult and dangerous than in the warm season.
There are some things that are strictly prohibited from doing with polycarbonate:
- Re-tightening of self-tapping screws.
- Using unsuitable washers.
- Rigid fastening of panels.
Should snow be removed from polycarbonate?
If snow falls quite rarely in your region or there are frequent thaws, then cleaning the polycarbonate roof and canopy is not necessary. But if there is too much snow, you can clean the roof. But this must be done extremely carefully. It is better to use a broom or some kind of wooden tools. Under no circumstances should this be done with a shovel or other similar tools. Indeed, in winter, polycarbonate becomes quite fragile and, despite the strength of the material, it can be damaged. Happy installation everyone!
To prevent polycarbonate from deteriorating, it must be stored according to certain rules, our detailed article will tell you about this, study it so that your polycarbonate is stored for a long time.
If you want to place a window in your polycarbonate greenhouse, then study the advice of experienced specialists; they will help you avoid mistakes during installation.
Heating with infrared heaters
This method is considered one of the most promising. Compared to conventional electric heaters, it requires less electricity. In addition, infrared devices have the following advantages:
- Can provide year-round heating.
- With the help of these devices, it is possible to zone the greenhouse, maintaining different temperatures necessary for the growth of different plants.
- It is possible to automate the process by installing a thermostat with a sensor; constant human control is not required.
- Heating does not lead to a decrease in air humidity, which can be detrimental to most crops.
Among the disadvantages of the solution, we highlight the need for significant initial costs to purchase the required number of infrared emitters.
Selecting and preparing a site for a greenhouse
Now is the time to take care of preparing a permanent place. It would be a very good option if the winter greenhouse is buried 40-50 cm into the ground, and even deeper in the northern regions, in order to save heat. The dugout has helped our people more than once, and now it will serve the plants.
It is advisable to orient the greenhouse from east to west. If it is impossible to do this (for example, the territory is limited), we orient the building from north to south. In this case, inside on the northern wall we will install a foil reflector approximately like in the photo, so that the valuable rays of the winter sun are not wasted, but are used to heat the soil. Reflectors are an effective thing.
Heated greenhouse
Another popular architectural technique is combining the northern wall of a winter greenhouse with the main wall of one of the buildings. In the photo: a self-built winter greenhouse is combined with the wall of a bathhouse. In this case, we get a triple effect -
- save space on the site;
- there is heating from the side of the building;
- The heat is better retained in the building itself.
In some cases, this arrangement allows heating in the greenhouse without unnecessary heat loss.
You just need to take care of protecting the main wall from the harmful effects of moisture: carry out standard waterproofing measures.
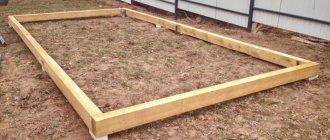
A winter greenhouse requires a foundation because the structure is quite heavy. The simplest strip foundation or 20x20 bitumen-treated timber will do.
Warm floor for a greenhouse
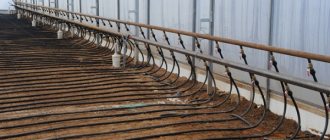
This method heats not only the air in the building, but also the soil itself, which has a beneficial effect on the life of plants. It is worth equipping the system at the stage of greenhouse construction: it is simpler and cheaper.
In practice, the following “warm floor” options are used:
- A system based on water heating, in which a network of metal-plastic or propylene pipes is laid in the ground. Water or antifreeze circulating through them, heated by a furnace or boiler, releases thermal energy to the ground, as a result of which the air temperature rises. This solution does not require significant energy costs; heating will ultimately become inexpensive.
- Installation of an electric “warm floor” by laying a heating cable or ready-made mats. This option allows you to automate the process by maintaining the required temperature using a thermostat. The only disadvantage of this solution is that year-round operation will require significant energy costs.
Similar solutions are used in greenhouses with a small or medium area.
Materials and manufacturing stages
For the winter version, special galvanized profiles are used, polycarbonate is most often cellular. With a thickness of 4 to 6 mm, it is mounted in two layers; when the value increases, one is enough; in cold regions, even 25 mm material is used.
To construct the foundation part, concrete or reinforced concrete blocks are used, which are insulated with extruded polystyrene foam or polystyrene foam. If a greenhouse is built at the joint to the wall of a house or outbuilding, then a slab is often laid under the base (ready-made slabs or poured with concrete mortar).
The construction of winter greenhouses takes place in several stages:
- Layout. At the initial stage, it is important to determine the size, location of the beds, what is planned to be grown, and the characteristics of the region, taking into account climatic indicators.
- Pouring the foundation part. It is necessary to position the greenhouse correctly and wait for the concrete to dry completely. Sometimes, during installation, some communications are immediately carried out, laying pipes and cables inside.
- Installation of the frame part. The so-called “skeleton” of the future greenhouse is being assembled. All parts are well secured to increase reliability and stability.
- Sheathing. Having received a metal base, polycarbonate is laid on it in one or two layers. It is necessary to seal joints and seams so that internal heat does not disappear.
- Floor insulation. The foundation slab or floor is backfilled with special materials.
- Installation of doors and windows. The installation of these elements occurs at the final stage;
- Connecting heating systems, irrigation, etc. Initially, the most suitable options are selected, and gradually during the work they are connected.
In the finished building, paths are laid out, beds are poured, the soil is watered and fertilized, and then left for several days to create its own microclimate and generally check the structure. If there are no cracks, good heat retention and normal humidity, crops can be planted in the greenhouse.
Heating the greenhouse with electric or gas heaters
The main advantage of this solution is ease of implementation. A heat gun, powered by electricity or a gas cylinder, can be easily placed in the required area of the greenhouse. No additional communications are required, and equipment of this class efficiently and quickly heats the air inside the greenhouse.
This solution should not be used as the main heating system: energy costs are too high. The operation of heat guns dries out the air in the greenhouse, so you will need to consider using humidifiers to create optimal conditions for plant growth.
Greenhouse design options
The construction market offers a huge selection of shapes and sizes of greenhouses. Therefore, customers always have the opportunity to make it to suit their own needs. When choosing a design, it is worth considering the type and number of plants that you plan to grow in the greenhouse.
A heated winter greenhouse can be quite long or wide. For private land plots, there are standard dimensional grids for turnkey structures.
The base of the greenhouse is usually rectangular or square. The roof is made in various forms:
- arcuate;
- single slope;
- gable;
- multi-level.
The main condition for the roof of a winter greenhouse is the presence of a slope so that snow can slide off it under the weight of its own weight and not accumulate on the roof. It is also recommended to make vents in the roof to ventilate the structure.
Vents in greenhouses are most often located at the top point of the roof Source oteplicah.com
Greenhouses, as a rule, consist of one “room”, but experts recommend organizing a heated dressing room. This is done so that with frequent use in winter, the plants do not suffer from the penetration of cold air from the street.
See also: Catalog of companies that specialize in the installation of metal structures.
Solar heating
To maintain positive temperatures in early spring or late autumn, you can take advantage of the free energy of the sun. Such heating will not allow heating the greenhouse in winter, so the solution is only suitable as a seasonal one.
Sunlight passing through transparent polycarbonate heats the air in the greenhouse. Practice has shown that heating will be more effective with an arched roof shape. In this case, polycarbonate will work on the principle of a lens, collecting more sunlight.
An even more advanced system is using water collectors. Panels with pipes painted black are mounted outside. Heating water or antifreeze circulates through a simple hydronic heating system, releasing thermal energy to the air.
Polycarbonate in the construction of winter greenhouses
The use of polycarbonate in the construction of winter greenhouses is due to its strength and light transmission qualities. The advantages of this material are the following:
- resistance to mechanical damage;
- good aesthetic characteristics;
- light weight of the structure - suitable for any frame;
- conducts sunlight well;
- ease of processing and installation of sheets;
- the material can withstand heavy loads - important when there is a lot of snow in winter;
- tolerates strong heating and cooling, does not deteriorate under the influence of UV rays.
All these factors make polycarbonate an ideal material for the construction of winter greenhouses. It perfectly protects plants from snow and frost and allows you to maintain the correct microclimate in the building.
In a greenhouse, heat-loving plants are not afraid of early frosts Source neldekstop.ru
Biological heating
To increase the air temperature at the stage of planting and germination of vegetables, you can also use a biological heating method. To do this, cut straw and manure are placed in the soil. When these components decompose, the temperature rises, the soil and air in the greenhouse warm up to favorable parameters.
All these methods will be effective, and heating costs will be minimal if you first insulate the foundation of the greenhouse. This will minimize heat loss.
Horse manure is the best biofuel. Within a week, the mass can warm up to 60–70 °C, the temperature remains for a long time.
Fallen leaves, mown grass and other plants can also serve as biofuel, but such a mass will not heat up on its own. Therefore, it is necessary to add at least 25% manure to it.
All these methods will be effective, and heating costs will be minimal if you first insulate the foundation of the greenhouse. This will minimize heat loss.
Fertilize the soil
The autumn stage of soil preparation also includes the application of fertilizers. Over the summer, the soil has been greatly depleted; it needs new nutrients so that next spring and the coming summer the plants receive them in sufficient quantities.
Experienced summer residents advise that in the autumn it is necessary to add organic fertilizers to the soil. This could be compost, peat, humus, manure. Many people are afraid to add the last source of organic matter to the soil, but in the fall this can be done safely - the plants are no longer growing in the greenhouse, which means that the manure will not harm anyone.
Table of manure composition for fertilizing greenhouse soil
Step 1. Dig the soil thoroughly.
The soil in the greenhouse is being dug up
How to prepare manure for fertilizer yourself
Step 2. Distribute manure over its surface at the rate of 10-20 kg per m2 and dig again.
Manure for fertilizer
Manure is evenly distributed over the soil surface
The soil needs to be dug up again
Step 3. Sprinkle everything with regular ash.
Sprinkle everything with ash
Step 4: Cover with clean grass.
Step 5. After snow falls, cover the entire surface of the soil with it. The layer of white “blanket” should be about 20 cm. In spring, this measure will allow the soil to immediately be saturated with the necessary moisture.
Snow in the greenhouse
By the way, snow will help equalize the temperature in the greenhouse and in the open space, which is important to ensure the safety of the structure during the winter. And the soil will freeze less in the cold months
Old film in a new way
The unstabilized polyethylene film that we have known since Soviet times is a thing of the past. It has been replaced by almost a dozen new ones, of which the following UF-stabilized covering materials will be useful at the dacha:
- hydrophilic film;
- heat-saving (heat-retaining) film;
- reinforced film;
- copolymer (ethyl vinyl acetate) film;
- PVC film.
Several more types of film coatings are in development, including those that convert ultraviolet radiation unnecessary for plants into infrared radiation useful for photosynthesis.
Winter dictates its requirements to us - heating and heat preservation. Therefore, our choice is heat-retaining film.
Common Mistakes
The most important mistake when heating a greenhouse with your own hands is flaws in preliminary planning. It is necessary to think through all the details in advance, calculate the costs of materials and time.
If heating work in a greenhouse is carried out in a hurry, the risk of errors increases. This leads to heat loss, malfunctions and equipment breakdowns.
There is also a risk of making mistakes in calculations and choosing the wrong boiler power for the area you plan to heat. As a result: the inability to achieve the required air temperature in the cold season. Therefore, it is recommended to consult a specialist before carrying out work.
How to make it yourself
The installation of a heating system for a greenhouse depends entirely on the type chosen. In recent years, infrared emitters have become widespread, the installation of which does not require any special skills. However, in many year-round greenhouses and greenhouses, other types of heating are still installed. You may also be interested in information on how and why an automatic machine is used to ventilate a greenhouse.
Water heating device
This is a convenient and economical option for heating agricultural premises if there is a constant source of water. Installation occurs according to the following algorithm:
- You can use a purchased heating tank or make a container with your own hands, for example, from an old fire extinguisher or barrel. The heating tank is connected to the water supply system or pump;
- There are always two pipes leaving the heating tank, which are connected to the radiator . Such a system will ensure constant heating and circulation of water. In this case, it is necessary to ensure complete tightness of the structure to avoid leakage. Rubber seals are suitable for this purpose;
- In order for the device to operate in constant mode, it is necessary to connect to a standard current source with a voltage of 220-240 V. In this case, it is advisable to additionally install a fuse box to avoid short circuits;
- The number of pipes for water circulation and their system depends on the area of the beds. Typically, up to two pipes are installed on one ridge to uniformly heat the soil. If a small heating tank is used, then radiators will be sufficient.
But how the fight against aphids on cucumbers in a greenhouse occurs and what means should be used is described in detail here.
The video shows a heating diagram for water heating:
The use of water heating in a greenhouse is the most variable type of heating. You can use old cast iron or metal radiators and even barrels as pipes, and the actual volume of water and the area of the system depends only on the area of the soil.
