The main school flowers, gladioli, have bloomed, and now we have to dig up the corms and properly preserve them until a new planting. It seems that there is nothing complicated here, but the simple rules of gladioli agricultural technology are difficult to apply to specific climatic conditions. You have to retreat from them, and this may ultimately affect flowering next year. In this article we will tell you what members of our portal do with gladioli in September.
And on our portal you can read an article about how to make a school bouquet of gladioli and other country flowers.
When to dig up gladioli
According to agricultural technology, gladioli are dug out 35, and for late varieties - 40-50 days after the end of flowering. In reality, this is not always possible: flowering may end with the onset of stable frosts, and if you wait a month and a half, you will have to dig the corms out of the snow. Therefore, agronomists advise not to be afraid and to harvest gladioli earlier - if you provide them with good storage conditions, overwintering will go well.
It is also recommended not to delay harvesting because in cold and damp soil the corms begin to rot and become sick. This, first of all, concerns varieties with early flowering and dark-colored gladioli, which are characterized by low immunity to fungal diseases. They are the ones that are removed first. The gladioli that we grew from children can be removed later.
All gladioli are dug up before the onset of stable frosts.
The ideal day for digging is dry and warm; the soil should not be wet, but it should not be dry to a stone state, otherwise there is a risk of losing a large number of babies.
Timing for digging up gladioli
Also check out these articles
- Agricultural machinery: types, types, applications
- Growing radishes in a greenhouse
- Apple compote
- Grape variety Transfiguration
When to dig up gladioli? The time of digging depends on the flowering period of the crop and climatic conditions. The easiest way to calculate when to do this is to follow the golden rule of all gardeners. Namely: 30-40 days should pass from the moment of cutting the peduncle to digging up the bulbs.
From the moment of cutting the peduncle to digging up the bulbs, 30-40 days should pass
Interesting!
You can also determine when to dig up gladioli for the winter using the Lunar calendar.
If you dig up the bulbs too early, they won't survive until spring or simply won't bloom next year. And if you leave them in the ground in the fall, they may begin to rot. If there are a lot of thrips in the area, it is worth digging up the bulbs before the temperature drops below +8...+10 degrees. It is then that thrips begin to look for places where they can hide from the cold and often infect gladioli bulbs.
When to dig up diseased gladioli
The leaves of gladioli are often affected by spots, especially if the summer was rainy and not very warm. This indicates that the plant is suffering from a fungal disease and looks like this:
If the lesion is quite large-scale, and not two or three spots on the entire plant, it makes sense to dig up the corms earlier than usual so that they, too, are not affected by the disease.
Structural features
The structure of gladiolus has some features that explain the need to dig up the plant in the fall:
- Gladiolus is a heat-loving bulbous plant, the thickened stem of which forms a corm in the lower part. The soft, juicy core of the onion, which contains a large amount of nutrients, freezes at the first subzero temperatures, the scales die off, and with a further decrease in temperature, all layers freeze.
- If in winter the temperature is low, but not minus, the bulb can survive the winter, but is very often damaged by fungi that quickly multiply in damp soil.
- “Children” are formed on the bulb, storing information about the variety. They are able to withstand frosts down to -7°C while maintaining their properties; at -10°C, germination is reduced by 50%, and at -12°C, the tuber buds die. In the event of a warm winter, the children that have overwintered in the ground produce a different variety.
- The sweet, juicy pulp of the bulbs attracts rodents, and they can destroy the plantings.
Based on these features, we can conclude that if you do not dig up gladioli in the fall, you can destroy the seed material or get it with great damage. This is especially important when breeding rare and valuable varieties.
How to dig up gladioli
The stems of gladioli can be mowed before digging, or trimmed after digging. The corm is trimmed with pruning shears so that nothing unnecessary remains; both the roots and the entire above-ground part are cut off (but you can leave a stump up to 1 cm in size).
Trimmed corms are placed in a foundation solution (0.1%) for half an hour, then washed and placed in a solution of potassium permanganate (0.3%) for another half an hour. This, of course, is an ideal processing option, but in extreme cases you can be content with the minimum.
GALE Member of FORUMHOUSE
It is imperative to treat with at least a dark cherry solution of potassium permanganate (30 min.).
Storage conditions
Only well-dried corms can be stored. The best conditions for drying are 3 weeks at a temperature of 20°-25°C. At this time, you need to periodically inspect the seeds, removing any signs of disease or mold. Also remove dried and loose scales (thrips may be hiding under them), and unnoticed long roots.
If a small lesion is noticed, then you can cut off this area and treat the cut with brilliant green, potassium permanganate or fungicide (Vitaros, Maxim).
After drying, the bulbs are placed in an old stocking, box, box and placed in a dry cellar or basement. It is convenient to store the stocking in a hanging position, and place the boxes on a rack, but not on the dirt floor. You must remember to inspect the material stored for storage and remove diseased nodules in a timely manner to prevent contamination of the entire material.
How to cull corms
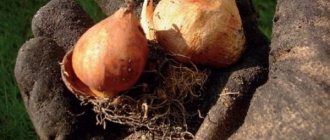
Below in the photo we see a fully matured corm.
Signs of maturity of the gladiolus corm:
- Full-blooded root scales; the baby is “dressed” in scales.
- The scales of the baby are dense and dark.
- The baby is easily, without effort, separated from the corm.
During the growing season, one peduncle grows from the corm, and one young (replacement) corm with children is formed. Beginners often worry that they won't be able to figure out where the babies are and how to get them off.
Mariska Member of FORUMHOUSE
The children are impossible not to notice. Association: a large river mother mussel with a bunch of baby mussels clinging to the shell.
It happens that not one bud awakens in the corm, but two or three. In this case, two or three peduncles will grow and two or three replacement corms will form. In the spring, inspect each corm again, and if you notice that there is not one sprout, but two or three, leave the strongest one and break off the rest.
On average, corms of one gladiolus replacing each other live 3-4 years; Every year the corm becomes flatter, and its productivity and immunity decrease. It is because of this that old bulbs are discarded and burned, but unscrupulous sellers willingly slip them to newcomers. Unfortunately, it will not be possible to obtain a good, flowering plant from such a corm. When buying, look carefully, here are the signs of an old onion:
- it is flat;
- she has a wide bottom.
Otherwise, there may be such a sad picture - it looks like there is a flowerbed full of gladioli, but you still won’t get any flowers.
Valucha Member of FORUMHOUSE
This year I have a problem with gladioli - none of them bloom fully, all the buds turn yellow and wither.
We also do not take into storage children whose shells have burst or their corms are damaged.
How long does a corm last?
If all storage conditions are followed, the gladiolus corm will easily be preserved until spring. But the timing of planting flowers in different regions can differ significantly:
- in the South, for example, gladioli are sometimes not dug up at all for the winter (unless there is a serious drop in temperature in winter). In other cases, they can be planted as early as April.
- In central Russia, the optimal planting period is considered to be the end of April-May.
- In Siberia, the Urals, and some northern regions, gladioli are planted at the end of May or even at the beginning of summer.
In general, you should adhere to a characteristic such as +10Сo on the street on an ongoing basis .
Planting gladiolus corms
And one more important point. Before planting, 2-3 weeks before planting, gladiolus corms must be removed from permanent storage areas. You can also prepare them for planting - treat them with a weak solution of potassium permanganate, soak them in warm water, but only strictly just before planting.
How to prepare gladioli corms for storage
Treated gladioli are placed on a dry, clean litter and dried for 10-15 days at a temperature of +25 - +30 degrees in the open air or indoors with good ventilation.
GALE
I keep it at the top of the kitchen cabinet near the hood.
After this, we carefully separate the replacement, young corm from the old one and the remnants of the roots. If we have properly cared for our gladioli, the bulb will be wrinkled, small, almost hidden in the roots. We separate the children. Many people do not like to tinker with them, however, it is better to spend time on them if you want to preserve the variety for a long time.
Sveta2609 Member of FORUMHOUSE
It's not difficult to collect children. I choose the largest ones, the size of a pea, and store them in a nylon stocking in the refrigerator. If you save only large bulbs, then after 3-4 years you can lose half of the varieties, because Gladioli bulbs degenerate over time. And the large children will begin to bloom in a year.
We send the young corms for further drying for another three weeks to a month at +18-+22 degrees. Children dry in less time; they cannot be allowed to dry out. And corms need a minimum amount of moisture for successful storage.
How to properly remove bulbs
Choose a time when the soil is dry and the weather is warm. It is better to dig during the day, when the dew has dried, so that there is less moisture. Prepare a shovel, or better yet, a pitchfork, so the likelihood of damage is much less. Carry out work in the following sequence:
- Insert a pitchfork or shovel into the ground at a distance of 15-20 cm from the gladiolus so as not to damage it. Carefully lift the earthen ball. If it is dense, it is better to put the soil on a film and let it dry for half an hour; if the soil falls apart into lumps, remove the bulbs immediately.
- Do not press on the surface of the corms when removing soil, do not hit each other or other surfaces. Be careful not to damage the outer covering.
- Rinse under running water or in a bucket. Remove items that show signs of rotting or damage.
- Separate the bottom, do not press too hard. If it holds up well, put it in the sun to dry for 2-3 days, only then remove it when the bulbs are ripe.
- Tear off the roots along with the stumps. After this, rinse the gladioli well again and place on a cloth to dry.
You cannot cut the roots and leave stumps. They often rot during storage, especially if the humidity level is high.
If the stems were not cut before harvesting, do so immediately after digging. Leave petioles no longer than 2 cm. You should use garden pruners or sharp scissors; you cannot twist or tear off the dried part, as this can damage the inside.
How to store gladioli in winter
During the entire drying time, we monitor the corms and if we see that some are starting to deteriorate, we throw them away. After drying, we place the corms in paper bags (or thin stockings, very convenient!) and send them for storage. Children are kept separately.
It is advisable to store babies in a paper bag. As a rule, all members of our portal store corms in a vegetable drawer in the refrigerator, in a box on the windowsill in a heated country house, or on a glassed-in loggia. The main thing is that the temperature is stable throughout the entire storage period and is +5-6 degrees. Proper storage can, among other things, prevent the development of a dangerous pest - thrips.
Krysya Member of FORUMHOUSE
Here's what I learned today about gladioli: they can be infested with thrips. These are small black or white, flea-like creatures that chew out the flower stalk.
These bulbs are infested with thrips.
These bulbs are infested with thrips.
To get rid of thrips, you need to treat the corms with mothballs. Or do it simpler: add a few heads of garlic to the wintering gladioli. Or here’s another newspaper-dichlorvos method:
Samaritan Woman Member of FORUMHOUSE
After drying and cleaning, I put the bulbs in a plastic bag, along with crumpled newspaper sprinkled with dichlorvos, and tie them up for two or three days. Removes thrips completely.
What to do if the corms wake up in the middle of winter
In winter, gladioli corms go through two phases. The first phase, the natural resting phase, lasts about 40 days. At this time, the corm will not sprout, even if it is warm and humid. Then comes a period of forced dormancy, and here it can already germinate. If this does happen, you will have to take out the corms, lay them out for a week to dry in a room with the heating on, and put them back in a cold place. When there are 2-3 weeks left before planting, the storage temperature will need to be increased to +15 degrees.
On FORUMHOUSE you can find any information on the agricultural technology of gladioli and information on the agricultural technology of other bulbous plants. Check out our gladiolus show: photographs of the most beautiful blooming gladioli grown by members of our portal. Read the article on how to store, root and divide dahlias. Watch our video about forcing, keeping and planting bulbs.
Is it possible to store diseased and thrips-infected corms?
Even gladiolus corms affected by thrips can be saved rather than thrown away . Moreover, they will be able to grow in the spring if they are stored correctly.
But first you need to cut off all the affected areas with a sharp knife. Of course, in this case we are talking about those parts of plants in which pests have chosen a smaller part.
After pruning, the planting material is placed in a weak solution of potassium permanganate, and then the cut areas are necessarily treated with brilliant green.
Then it is stored according to general rules. However, it is still advisable to allocate a place for it separate from completely healthy plants or place it together with the same cured corms.
By the way, this method can be used not only in case of thrips infection, but also in case of other unpleasant diseases. For example, rot.
Storing diseased corms


