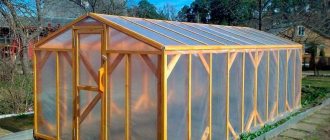
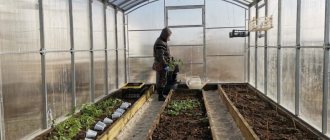
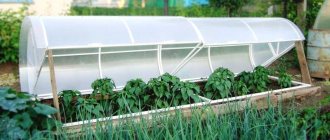
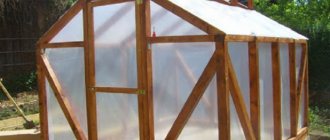
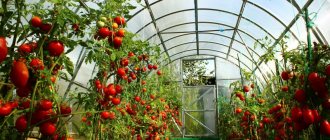
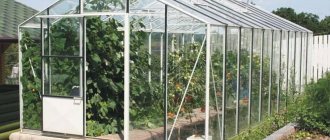
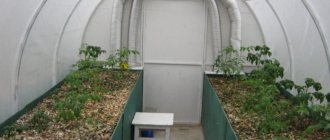
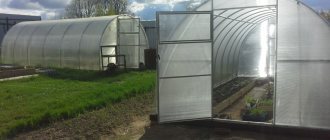
In the middle zone and northern regions, it is possible to obtain a good harvest of heat-loving crops only in greenhouses and hotbeds. And even then, returning May frosts can destroy all the seedlings. So gardeners have to build additional shelters even inside the greenhouse to protect the plants.
In this article we will not describe in detail which greenhouse to choose, how to make a foundation and install a frame. We will talk about how to insulate an existing structure covered with polycarbonate in order to protect plants from frost and extend the growing season. The most reliable way to retain heat is a two-layer greenhouse covering, since the air gap between the walls is an effective heat insulator.
A two-layer greenhouse has many advantages:
- Saving heat resources.
- Reducing the amount of condensation in the greenhouse.
- Comfortable temperature in hot weather.
- Protecting plants from sunburn in summer.
So, let's look in detail at what the inner layer can be made of and how to attach it to the greenhouse.
Disadvantages of wooden greenhouses
Wooden structures require special care:
- The wood must be pre-treated with special means that protect the material from moisture and insects, and in the future the procedure will have to be repeated periodically;
- In a humid, warm climate, wood will begin to deteriorate quite quickly, so individual elements will have to be replaced within a few years.
A raised foundation will help partially correct these shortcomings, which will protect the tree from constant contact with the ground.
In addition, the shadow from the crossbars will fall on the plants in any case (however, small bars will not become too big an obstacle, and the sun moving throughout the day will evenly illuminate the area), and moving a wooden greenhouse to a new place will become quite a big problem: disassembling it It will not be difficult, but assembly will require additional labor.
The essence of the problem
The main problem with the domestic greenhouse business is the rather high cost of the product. Growing vegetables in a winter greenhouse is a troublesome and expensive undertaking.
Firstly, it is necessary to use exclusively reliable frames that can withstand wind and snow loads.
Secondly, a covering material should be used for cladding that will not lose too much thermal energy. Ordinary polyethylene is definitely not suitable; cellular polycarbonate or multilayer double-glazed windows would be a good option.
Third, you can’t do without a full-fledged heating system: pipe distribution and heating devices and, of course, a heat generator (bulerian, heated floors, pellet boiler...).
Fourth, to compensate for the lack of natural light on short winter days, greenhouse farms will have to use special lighting devices.
There are two types of expenses:
1. Capital. 2. Current (operational). Of these, about 60 percent or more are energy sources for heating and additional lighting. This is for modern greenhouses; outdated structures made of film or single glass are even more energy-intensive.
The most important thing is that operating costs do not particularly depend on the type of crop, much less on the gross yield of the product. These are mandatory costs, depending primarily on the area of the structure. If you look at it, high-quality technological greenhouses of a similar size, which are operated in the same climatic zone, will consume approximately the same amount of resources. Therefore, much will depend on how we use the precious protected space.
Solution
Obviously, it is necessary in winter, when the price is most favorable, to get as much product as possible. The only way to make this business profitable is to increase the yield per square meter, because cost reduction has its limits. How to do it?
Use not only square, but also cubic meters of cultivation space. Traditionally, the height of the greenhouse is several meters. In the summer and off-season, when we grow cucumbers/tomatoes, the height of the structure is more or less full. However, in the winter months, if the main vegetables are not cultivated (many farms switch to growing greens and seedlings), everything changes. The heated volume is used irrationally; where the air is warmest (as you know, it rises), there is nothing. A temperature-appropriate space several meters high simply sits idle.
If you install 3-4 (or more) racks/tiers in a greenhouse for the winter, then with the same area of the room you can get an additional harvest. Moreover, capital costs and current energy costs remain the same. Essentially, we have the opportunity to use free heat that has already been generated.
So, the highlight is to increase the number of plants per square of the greenhouse.
What and how is grown in multi-tier greenhouses
There are several options:
- flowers;
- mushrooms;
- seedling;
- forced green crops (onions, parsley, lettuce, celery, etc.);
- tomato, pepper, strawberry, beetroot, carrot, eggplant...
These are all low plants. For example, varieties and hybrids of tomatoes cultivated hydroponically are selected exclusively for low-growing ones, which are characterized by increased activity (have short paths for the movement of basic substances) and simply must be placed on several floors. In addition, they must be early ripening, highly productive, with a “friendly” yield.
As for technology, there are three main methods:
- Traditional: beds filled with soil mixture are created on racks.
- Hydroponics.
- Aeroponics (substrate-free cultivation).
How the tiers are arranged
Each tier contains plants with their own assimilation apparatus and root system. They are organized from 2 to 10, depending on the operating conditions of the cultivation room. As a rule, space is allocated for several stages of cultivation: for seedlings, seedlings and adult plants (vegetable sections of the greenhouse).
The shelving is arranged in height at several levels, offset from each other, so that the plants growing below receive the required amount of light. All kinds of designs such as a rectangular “pyramid” or an elongated “cascade” have become widespread. The width of racks with soil mixture is usually calculated so that one or two beds can be made on each tier.
Many things can be used as building materials, from lumber and polymer boxes to dense films in spatial frames.
For hydroponics, multi-tiered growing plants are used, consisting of pipes, trays, ditches, and containers in the form of glasses. They can be mounted on supports, suspended from the roof, or installed on narrow racks.
Let's sum it up
A multi-tier greenhouse can hardly be considered an innovation. Back in the 50s of the last century, this technology was successfully used in greenhouse farms of the Soviet Union and made it possible to increase the specific yield per unit area of the structure several times. This approach is especially valuable when growing plants in winter, when the main expense item is heating and artificial lighting.
Choosing a tree for building a greenhouse
To make greenhouses, bars with a cross-section of at least 50 millimeters are used. It is important to choose the most dried wood that does not have knots, chips, discoloration and other troubles that can lead to rapid destruction of the frame.
Larch is considered the best material. It copes remarkably well with unpleasant weather conditions, has increased strength and only strengthens its properties over time.
Spruce and pine have good properties; an additional bonus of this material will be the pleasant smell and phytoncides emitted. But such wood requires constant monitoring of its condition and taking timely measures to impregnate it with special means.
Timbers made of oak, beech, and hornbeam have proven themselves. The wood is very dense, so it will serve you happily for a long time. But the price of this durable material will not greatly please home-made carpenters and joiners.
Construction sequence
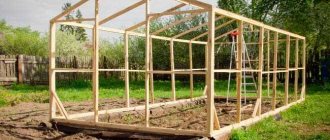
There is no universal sequence for constructing a greenhouse, since in each case it is determined by many factors. Usually, a foundation for a winter greenhouse (if necessary), a frame, and then sheathing are built.
The most important stage is the cladding. Before it you need to take accurate measurements. Also, do not forget about the heating system and ventilation.
Types of wooden greenhouses
Greenhouses made of cozy wood have several construction options.
They can be:
- Gable. This is the most common option, perfect for planting both large and smaller plants.
- Single-pitch. Such greenhouses are most often used as wall structures, although they can also decorate individual areas of the garden.
- Arched. Creating a dome out of wood will be quite problematic. So most often such a structure is made from small slats, which significantly increases labor costs.
- Pyramidal. This is the simplest option, but it will provide very little space for planting.
- English. In this case, the wooden frame is installed on a stone plinth. Such placement will require additional costs, but will ensure maximum durability of the structure.
Among the original designs, greenhouses made from window frames occupy a special place. Such a greenhouse can be erected as quickly as possible, since it only requires connecting the finished blocks to each other.
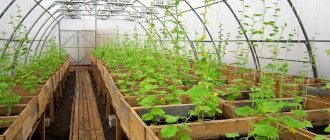
The multi-level greenhouse is particularly functional, providing the maximum number of habitats for plants.
To increase the service life of garden greenhouses, special thermos greenhouses have been invented. Such structures, buried a couple of meters into the ground (according to the level of soil freezing) and sheathed throughout the entire foundation with thermal insulation materials, can be used throughout the year.
True, it will be necessary to provide heating and light to them in order to maintain the climatic parameters necessary for normal plant growth.
Temperature
The main component of such buildings for the winter period is represented by a heating system. It is quite difficult and difficult to carry out. This may require the knowledge and skills of professionals.
It is important to make the optimal choice of the type of heating system. This will determine the temperature regime of the building and ensure the efficient use of the greenhouse with heating.
To heat the building in winter, you can use:
Sunlight is the cheapest. However, it is too problematic in the winter season, because weak radiation alone will not be able to maintain the desired temperature. Therefore, an additional heater will be required.
A bioheater that generates heat due to the decomposition of biological substances. Manure is usually used as such a substance. The method is not effective enough and requires combination with an alternative heat source.
Electric heater. The most popular and accessible. Usually presented in the form of convectors, heaters, infrared emitters, cables, pumps, and so on.
Supplying warm air requires the installation of a special unit at the beginning of work on the building.
Gas heater - warms the air through combustion, requires good ventilation.
Stove – can be heated with gas, coal or wood. Allows you to heat the entire area. However, it can heat up the walls. That is, when choosing this option, there is no need to plant plants close to the walls.
The list is not exhaustive; there are other heating options.
Covering material for greenhouses
High-quality wood can withstand quite significant loads.
Therefore, you can cover a wooden greenhouse using:
Polyethylene film
The simplest and most budget-friendly option for creating a cozy and warm home for plants will last a couple of years, after which it will have to be replaced. The disadvantage is the need to dismantle the film before the onset of heavy rains and cold weather. The film will have to be additionally strengthened on the frame, otherwise it will simply collapse from a strong wind, and it is strongly not recommended to pierce the material.
Polycarbonate
Transparent plastic sheet has higher performance characteristics. The material will easily withstand frosty winters, will not be damaged by rain or ultraviolet radiation, and can be attached directly to the frame beams. Polycarbonate will last 20-30 years, but installing it alone will be quite difficult.
Glass
Expensive and heavy material is rarely used for conventional greenhouses. The material is quite fragile, so you will have to be especially careful when handling tools when working inside the greenhouse. But the glass can be washed, providing additional light, and the shelf life is limited only by the carefulness of the owners.
Cozy wooden greenhouses will be an inexpensive and attractive decoration for any summer cottage, helping to obtain a high harvest.
DIY garden beds. 5 unusual ideas
Reviews:
Tatyana Matyukhina
writes: What nonsense! Are you full of foreign pictures? Who would even think of hanging fences with all sorts of rubbish? And then run along the fence every hour to water this nonsense? No intelligence, no imagination. And what does the word beds have to do with it? Only idiots like this take away people's time.
ludmilkaschatsi
writes: Horrible! And the voice is like from hell!!!
aleksei0634
writes: fuck
Tatyana Matyukhina
writes: What nonsense! Are you full of foreign pictures? Who would even think of hanging fences with all sorts of rubbish? And then run along the fence every hour to water this nonsense? No intelligence, no imagination. And what does the word beds have to do with it? Only idiots like this take away people's time.
ludmilkaschatsi
writes: Horrible! And the voice is like from hell!!!
Photos of all types of wooden greenhouses
How to assemble the ends: step-by-step instructions
The gables of a top-opening greenhouse are assembled in the following sequence:
- First of all, you should unpack the parts.
- Mount the spacers on the doorway on both sides (the bottom ones are shorter than the top ones).
- Install the upper arch on the door.
- Then it and the spacers should be secured with M 6 x 30 bolts and nuts and washers.
- Install side arches with spacers on both sides and connect with bolts and nuts. The upper part is a T-shaped connector, counting on the future connection of arched ties.
- Check the reliability of all connecting units and parts.
- When the gable frame is assembled, you need to take a polycarbonate sheet, remove the protective film from it and cut off half enough to cover the end.
- Use sealing tape for unprotected sheet edges.
- Apply the polycarbonate to the gable so that the stabilizing coating faces outwards.
- Next, you should secure it with 5.5 x 19 mm roofing screws, without overtightening them or damaging the material
- Trim off the excess with a utility knife, following the arch of the roof.
When one end is assembled, begin assembling the second copy.
How to assemble a roof
To assemble the movable roof, horizontal ties should be attached to the front arches in the center and on the sides. To them is an intermediate roof arch. Then you need to gradually build up the frame with ties and arches.
Align the finished element and secure the polycarbonate with self-tapping screws. Make hooks on the gable arches to secure the roof.
At the ends of the arches, 2 wheels should be fixed at a distance of 12-14 cm from the edges and also on the third (for a greenhouse 6 m long) frame arches, if you count from both ends.
All that remains is to install the platbands. And the roof is ready.
