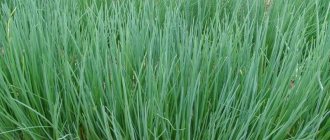
It would seem that growing an absolutely picky spice would not cause difficulties even for a beginner. But even the usual and widespread garden grass can grow poorly or bloom at the wrong time if the rules of agricultural technology, crop rotation and development features are ignored. Varieties are distinguished not only by purpose, taste, morphological features of the structure of rosette leaves, but also by the timing of stem formation. Depending on what goal is being pursued - obtaining greens or seeds, choose the variety and the moment when to plant dill.
Thanks to the efforts of breeders, the crop is quite well acclimatized in all regions of our country
Sometimes you can hear original advice on how to quickly grow dill without umbrellas, to which experienced summer residents only smile skeptically. To speed up the awakening, it is suggested to soak the seed material in diluted alcohol, hydrogen peroxide, and sow in heaps or bunches. It is worth understanding that aggressive liquids will burn the protective shell along with the embryos. No matter how the seeds are sown - in a row or a handful in a hole, the plant will still bloom sooner or later, despite the assurances. But there are still secrets.
Optimal planting dates
Dill tolerates cold well, so I start seeding as soon as the snow melts. They can sit in the ground and wait for the soil to warm up to 3-5 degrees Celsius. If suddenly there is frost after sowing, the crop can withstand up to -6 degrees.
A pleasant temperature for dill is 12-15 degrees. Then he grows unhindered. A temperature of 20 degrees is the most optimal.
If you trust the lunar calendar, pay attention to the most favorable days for sowing:
- in May - from the 5th to the 8th;
- in June - from the 4th to the 6th.
It is not advisable to plant when the moon is just entering its initial phase and the full moon.
Recommendation
To get fresh herbs every two to three weeks, I sow dill in several passes, with an interval of 2 weeks.
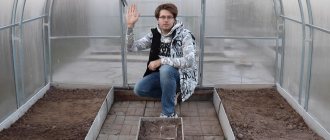
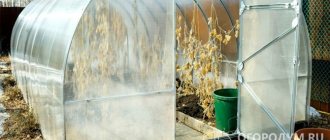
Greenhouse cultivation of dill
Dill can be grown in a greenhouse throughout the year. An average daily air temperature of at least 16o C is enough for it. From the end of September to the end of March, dill needs lighting. If the greenhouse area is large, it is better to choose sodium lamps for lighting. For small areas, the industry now produces blue-red LED lamps.
Reference! For additional lighting, it is enough for artificial light to be turned on for 2-3 hours in the morning and 3-4 hours in the evening.
Potentially, the yield of dill in a greenhouse is higher than in open ground. It is necessary to maintain high soil fertility and add new soil before each sowing. However, with high air humidity in the greenhouse, powdery mildew may develop.
Watch the video! Growing dill in a greenhouse in the fall. Cleaning by thinning
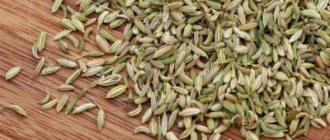
How to prepare seeds
To begin, I soak the seeds in water for several days. It is necessary to wash the essential oils from the grains so that the plant sprouts faster. The same technique is used when planting carrots. I will give step-by-step instructions on how to do this.
- I pour the seeds with very warm water, about 50 degrees. The water immediately turns yellow.
- I change the water up to 5 times a day. If possible, I make sure that the water does not cool down; each time it becomes lighter, as the essential oils are washed out.
- On the third day, I spread the seeds on gauze folded in several layers and dry them slightly.
That's it, the seeds are ready for planting - let's go to the garden bed.
By the way, there is another way to prepare seeds, called bubbling. This is when essential oils are washed out by air currents in the water using an aquarium compressor. In this case, it is also necessary to change the water 4-6 times during the day.
Diseases and pests
A feature of dill plants is their strong susceptibility to powdery mildew. Different varieties are more or less susceptible to this fungal disease. The main control measure is prevention. The set of preventive measures includes:
- choosing a sunny place for planting;
- regular watering and loosening;
- unthickened crops;
- maintaining crop rotation.
Fungicides can only be used on plants that are grown for seeds. If cutting is carried out less than once a week, then the bed can be treated with 1% copper sulfate. Among biological preparations, Alirin B is suitable. If blackening of the shoots is noticed, then the plants are affected by another fungal disease - Phoma.
Among the pests, bugs and some types of aphids can settle on dill. To combat them, mechanical removal should be used and the pests should be washed off with a strong stream of water.
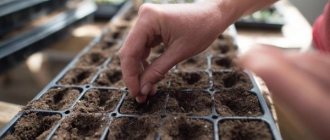
Soil preparation
Dill loves a lot of light and moist soil. Therefore, we choose the right place for the garden bed.
Important
Experienced agronomists have noticed that crops that grow in shaded areas absorb nitrates more strongly.
It will be better if in the fall we choose a place where we will plant the seeds and prepare the soil, then we can limit ourselves to simply loosening. Then we cut grooves 1-2 cm deep, pour water on them, sow the seeds, dig in with earth and tamp lightly with our hands.
If we maintain a distance of 1-2 cm between the seeds, we will get powerful bushes with lush greenery.
You should not water what has just been planted, otherwise the water will carry the seeds with it into the depths of the soil and then the sprouts will have to wait longer than usual.
If you cannot visit the site often, cover the bed with film and secure it with something heavy. Now neither the wind nor the birds are afraid of the seeds. But as soon as they germinate, we remove the shelter.
Important
The film will not protect against high temperatures. The plants underneath will burn. Therefore, it is best to cover it with spunbond.
Variety selection
When choosing a dill variety for planting, you need to carefully study its characteristics. The fact is that some varieties produce abundant greenery, while others form flower stalks and are intended for collecting seeds. The types of this crop are distinguished not only by purpose, bush height and flower shape, but also by ripening time.
Early ripening varieties
These include:
- Gribovsky (30-45 days pass from germination to the first harvesting of leaves). The culture is undemanding to weather conditions: even in cold summers the bushes produce a lot of high-quality greenery. You can plant seeds of this variety several times starting in April and ending in July. The height of the Gribovsky dill rosette reaches 25 cm. The leaf weight of one plant reaches 1 kg. The variety is resistant to many diseases and pests.
- Further (from germination to harvesting – 38-40 days). This is a productive variety: from 1 sq. m collect 2-2.5 kg of green mass. Dalniy dill is grown on an industrial scale for sale. The peculiarity of the variety is the presence of a waxy coating on the leaves. Far is resistant to pathogens, withstands heavy rains without dying.
- Redoubt (first collection – 1.5 months after seed germination). During the season from 1st quarter. m, 1.3 kg of leaves are collected.
Early ripening varieties quickly form umbrella inflorescences: they form faster than the leaves ripen. That is why it is impossible to collect a large amount of greenery from them.
Mid-season varieties
Popular representatives of this group are:
- Amazon. It is recommended to sow the crop in late April-early May. The first harvest of greens is carried out approximately 1.5 months after the seeds germinate. During the season from 1st quarter. m you can collect 2.5 kg of leaves.
- Max. Seeds of this variety are planted in the soil after it warms up to 8 degrees or more. Leaves can be collected 1.5 months after seed germination. The total weight of deciduous mass is up to 4 kg per 1 sq. m.
- Umbrella. A hybrid variety that is distinguished by its rich green leaf color and heavily dissected blades. The crop reaches commercial maturity after 40-48 days from seed germination. From 1 sq. m during the season, about 2 kg of greenery is collected.
Mid-late varieties
These crops ripen slowly, the process takes about 45-57 days. Popular types include:
- Frost. The bush of this variety reaches a height of 1.7 m and has large convex umbrellas. From 1 sq. m during the season, about 2.7 kg of greenery is collected.
- Boreas. Greens are cut 39-55 days after seed germination. The stem reaches 1.2-1.3 m in height. The advantage of the variety is resistance to disease. During the season from 1st quarter. m harvest up to 4.2 kg.
In total, about 70 varieties of dill are known. To provide yourself with juicy fresh herbs for the whole season, gardeners recommend planting several varieties of this crop with different ripening periods.
What does the appearance of greenery say?
By the appearance of the greenery and how it gains growth, you can understand whether everything is fine with our plant. For example:
- if the dill turns yellow, it means there is not enough nitrogen, which is contained in urea or mullein, and it may also be cold or lacking space;
- if it quickly fades into color, it means there is little moisture;
- slow growth indicates lack of nutrients or low temperature;
- red color indicates that the soil is too acidic or has a lot of potassium.
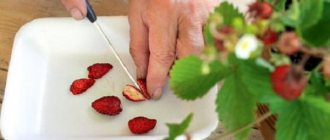
Harvesting
Greens are collected as they grow, cutting off large branches from the stem. Late varieties of dill grow greenery for more than a month.
Umbrellas are harvested when at least 60% of the seeds in them turn brown. Umbrellas are placed in fabric bags and hung in the shade in a draft for ripening.
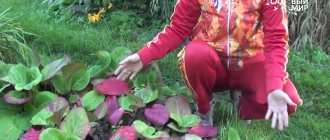
@girl.grows.green, Instagram
How to care after planting
Now that the young greens have started to grow, you won’t need any special care. The main thing is not to let the soil dry out, but also not to overwater it, so that powdery mildew does not appear.
When very hot days set in, the plant likes rain watering. I do this from a watering can.
While the plant is young, it is important to remove weeds. When it gets stronger, they will no longer be afraid of it.
Did you know that dill also needs to be pinched? If you pinch the umbrella in time, a new sprout will appear and there will be much more greenery.
Watch a video on how to properly grow greens so that you can have enough for the whole season.
Dill care
Basic measures for caring for dill:
- timely watering;
- fertilizers;
- loosening the soil;
- weeding as needed.
Dill bushes from which greens are already taken for cutting should be watered every other day. The next day after watering, the soil between the rows is loosened. To grow greenery, dill is fed with nitrogen fertilizers every 10-14 days. A fast-acting fertilizer for green crops is ammonium nitrate. The number of feedings is no more than two during the period of growing greens.
Attention! To prevent dill greens from accumulating nitrates, the amount of nitrogen fertilizing should not exceed twice per season.
As flower stalks form and seeds ripen, the greens become unsuitable for cutting, fibrous and not juicy. It is recommended to leave several plants on the site to collect seeds at the end of summer, add them to conservation and use them for medicinal purposes.
The importance of proper watering
Do you want to achieve an excellent harvest? Watering rules must be followed. What and how you water your dill seeds affects their germination and growth.
It is important to know:
- temperature regime is necessary or not;
- what time of day to water;
- how often to water in hot weather and in normal summer weather;
- how much water to use for irrigation;
- fertilize dill during watering or not;
- Should I mulch the soil after watering?
- rules for watering dill grown at home;
- What is the difference between watering a plant in a personal plot?
First shoots
How long does it take for dill to sprout after planting? The average time for germination of the first shoots is two weeks. However, the specific timing depends on certain conditions:
- if you sow the seeds not soaked, but dry, they can sprout only after half a month;
- essential oils that prevent germination are washed off from the seeds if they are pre-soaked, and after planting, such seeds will germinate on about the 5th day;
- if the air temperature is about 5°, then seedlings will appear only after 2–3 weeks, and if the air is warmed up to 15–20°, then almost twice as fast.
Features of the procedure at home
Dill is sensitive to chlorine. It is advisable to take water for irrigation that has stood for at least 24 hours. It is best to water the spice with melt water or passed through a magnet. The water you need is warm or at room temperature. The soil in the box where the crop grows should be loose and slightly moist. When watering, you should loosen the substrate.
Water should not be allowed to stagnate, as this can lead to the development of blackleg disease. Dill grown at home must be moistened periodically. A spray bottle or spray bottle is suitable for this procedure.
Important! Be sure to spray water when the container with the plant is close to heating devices or central heating.
What happens if you don't follow the rules?
If you want to achieve a good harvest, adhere to certain standards. The plant needs moisture. It is necessary to water immediately when the top layer of soil dries out. The main thing is not to overdo it.
Drying out
The top layer of soil may crack and a crust may form, resulting in:
- Early bolting of the plant.
- Poor quality seeds.
From our special publications you can also learn how to care for dill after planting and what kind of soil this plant likes.