A small greenhouse on a summer cottage is an undoubted help for a gardener. And you can grow seedlings in it, and get early vegetables and herbs, and get a harvest of cucumbers and tomatoes, and even harvest remontant strawberries until December. And there are a great variety of ready-made polycarbonate structures on offer – choose to your heart’s content. But the question often arises of how to arrange the beds in a greenhouse for maximum results. Let's try to figure it out.
Gardeners use stationary greenhouses and temporary film shelters - greenhouses - to create a favorable microclimate for heat-loving plants
The most “favorite” mistakes of summer residents
According to tradition, we’ll start by analyzing other people’s mistakes in the planning and arrangement of protected ground, so as not to repeat them ourselves.
- “I want everything at once!” Becoming the happy owners of a greenhouse, summer residents try to make the most of the usable space. They plant literally every centimeter, counting on a great harvest. And in the end they remain disappointed. Firstly, every crop requires sufficient space for its leaves, shoots and roots. But where can it grow if another plant is already sitting nearby, also trying to win a piece for itself?! The result is a real jungle, where the more active inhabitants oppress the shorter ones, and the paths are hidden under a carpet of vegetation. Secondly, for high-quality pollination and growth, access to air and light is required, but this is impossible in thickets. Thirdly, diseases and pests simply adore the “jungle”, where all the conditions for their development are created. So summer residents are running around with sprayers, receiving cocktails of fungicides and insecticides instead of organic vegetables.
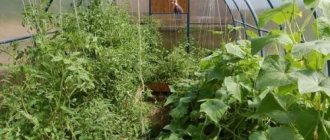
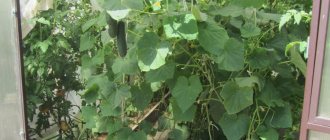
- "Let's marry the fox and the hen." Inexperienced gardeners try to combine a variety of crops in one greenhouse, without taking into account their needs for microclimate, lighting and soil. The most typical example is tomatoes and cucumbers. Cucumbers require warmth and humid air, and tomatoes begin to get sick from humidity, becoming covered with late blight. Even greenhouse manufacturers make combined options, separating them with a partition.
- “We plant as is.” Often, after installing a polycarbonate structure, the owners simply dig up the soil inside and plant plants, wondering later why they don’t grow and get sick. The point is the most banal physical laws: while the “tops” warm up in closed ground, the roots freeze in the ground, because the cold from outside is directly transferred inside, under the shelter. As a result, the leaves are hot, want to drink and eat, but at this time it is winter at the roots - they have trouble absorbing cold water. And somewhere on the border a conflict occurs, leading to the death of the poor plant.
- “Wider and bigger.” Another common mistake is to take up as much space as possible with beds, leaving a minimum for walkways. As a result, it is inconvenient to weed wide ridges, you can’t reach the plants, and you can’t even walk along narrow paths with a watering can, let alone with a wheelbarrow.
- “They made it out of what was there.” Some summer residents believe that the beds in the greenhouse can be fenced off with whatever is necessary, as long as the soil does not spill into the passages. In particular, the worst option is boards. Considering the constant “tropics” of protected soil, even thoroughly impregnated wood is not enough for five years. Rot and mold, moisture and fungus quickly destroy borders, then crawling onto plants.
Here is a kind of TOP 5 typical mistakes of beginners who are learning vegetable growing in protected ground for the first time. All of them lead to a natural result - disease and death of plants, low yields and dissatisfaction, complete with irritation among the owners themselves.
Vegetable neighborhood rules
The most popular greenhouse plants are cucumbers and tomatoes. Therefore, they are planted first, followed by other crops. Plants to be planted should be low-growing.
You can grow radishes in early spring and plant your main vegetables after harvest.
- Tomatoes go well with herbs, beans, cabbage, and bell peppers.
- Cucumbers go well with zucchini, herbs, garlic, onions, and beets.
- Cabbage grows well next to carrots, radishes, onions, herbs, and spinach.
- In early spring, crops that grow and ripen quickly can be planted, then early ripening ones can be planted, and cold-resistant varieties can be planted in late summer.
To ensure that the greenhouse intended for growing tomatoes does not stand idle in early spring, you can plant cold-resistant vegetables: lettuces, radishes, onions, herbs.
You should choose large, undamaged seeds. Seeds should be placed in the holes at a distance of one centimeter from each other. After sowing radishes, the bed must be covered with film.
Planning: basic layouts
The location of the beds in the greenhouse will depend on the type of plants for which they are intended. Thus, for low-growing peppers, herbs and berries, optimal lighting is created if the rows are stretched from east to west. Then the plants will receive maximum light even when placed in several tiers (on racks, in hydroponic installations, hanging containers), making it possible to effectively use the useful area of the shelter not only in width and length, but also in height.
For tall crops, supports, such as trellises, are installed next to the plantings
But for indeterminate tomatoes and cucumbers, an extension from north to south is better suited, when the sun illuminates first one side of the “wall”, and after lunch, the other.
The dimensions of landing areas for ground placement should be correctly calculated in such a way that:
- the plants were comfortable to develop without shading each other and without competing for soil, moisture and light;
- the owners had free access to the entire area of the boxes for weeding, thinning (picking) seedlings, forming bushes and other necessary agrotechnical measures;
- There should be distances between the rows of plantings that allow you to walk without touching the shoots or breaking through the foliage.
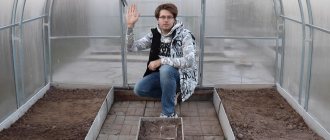
We suggest considering several options for planning beds in a standard 3x6 m greenhouse.
Two narrow beds on the edges and one wide one in the center
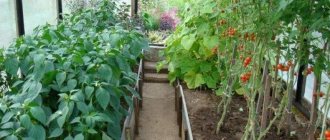
The outer boxes have access only from one side, which determines their dimensions, limiting the width to half a meter. The middle bed can be served from both sides at once, so it is made twice as wide. An excellent option if you plan to combine planting tall crops (in the center) and medium-growing crops (along the edges) in one greenhouse.
Three identical boxes
In this option, you can expand both side beds to 65-67 centimeters, but narrow the central one, otherwise it will become impossible to pass.
U-shaped box and central bed
This type of arrangement is perfect for those who have a blank back side of the greenhouse, without a door. The passage turns out to be circular. And if low-growing crops are grown in the center, they can be arranged in several tiers.
Two wide ridges on the sides and a path in the center
This method of planning is optimal for growing melons, allowing you to place deep and wide boxes and get a good harvest of early zucchini, squash, melons or watermelons (as in the photo).
Having chosen the optimal option for placing boxes in a standard polycarbonate shelter, you can begin to search for materials for the structures themselves.
Business
is profitable to plant in a greenhouse ? You can also consider greenhouses as a business. You can make a year-round winter greenhouse and grow cucumbers, tomatoes, herbs, vegetables, strawberries, and flowers for sale. Such a business can become very profitable.
You can also grow chrysanthemums, roses or tulips in a greenhouse for sale by March 8th.
This is where we will end our article. You already know the features of growing in a greenhouse and what to plant in a greenhouse and how. By installing it on your site, you will get a great opportunity to significantly extend and increase the summer season and the plants grown in the greenhouse will give you an excellent harvest of your own production. And using an insulated greenhouse is such a pleasure all year round.
What to make beds from in a greenhouse
When making boxes with their own hands, summer residents usually use all kinds of available materials. Unfortunately, not all experiments are successful, since each type of fencing has its own advantages and disadvantages:
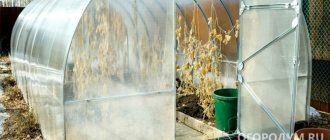
- Boards . As mentioned above, wood is not very practical for greenhouse conditions. The same as plywood, chipboard, OSB and other wood materials. Natural porosity, fibrousness, low resistance to moisture and rotting will not allow board borders to last long enough. Wood-polymer composite is considered the most suitable.
- Slate . Wavy or smooth slate sheets are the most economical and durable option for boxes. They don’t rot, they keep their shape, they don’t allow cold and moisture to pass through, they don’t need impregnation, painting or maintenance - what else does a summer resident need?! You can buy old slate for pennies, and often you can get it for nothing by asking neighbors who are replacing their roofs.
- Metal . Until recently, galvanized and stainless steel sheets were not so expensive, and they could actually be used to fence off garden beds. With the rise in prices for ferrous and non-ferrous metals, it becomes too expensive to make boxes out of them. And the heat in such structures is difficult to regulate; plant roots are at risk of overheating or freezing.
- Brick, cement, blocks . Capital beds are expensive, but if you plan to use the shelter professionally and year-round, then it is completely justified. The only pity is that the thickness of the enclosing sides will “steal” the invaluable area of closed ground.
- Plastic . The panels and siding are too thin to adequately support the weight of the soil in the box, and when exposed to the sun they also become brittle. The only decent option is plastic window sills.
Savvy summer residents use various building materials and recyclable materials to build boxes
Issues of choosing a material, as a rule, are decided depending on what is easier (cheaper) to obtain. However, it is important for gardeners to make the beds not only beautiful and comfortable, but also fertile.
Preparing beds for greenhouse planting
As you know, the main purpose of installing polycarbonate shelters is to obtain early vegetables and herbs and extend the harvest period. This is especially true for the northern regions, where warm days begin only in June and can end as early as August. Early greens and greenhouse vegetables are much more expensive than seasonal ones. In order for the greenhouse to “work” as long as possible and provide a decent result, you need to create maximum comfort for the plants:
- Separate the boxes with nutrient soil from the surrounding soil. For what? Everything is easily explained by the laws of physics. No matter how well the greenhouse was heated, no one canceled the heat exchange. Imagine that outside it is already (or still) frosty, 10 degrees, and inside it is full summer, created by heaters. If the soil in the greenhouse comes into contact with the frozen ground outside, then heat is lost and plant roots suffer from the cold. The result is that the tops are in the heat, and the roots are in the cold. From such dissonance, plants get sick and die.
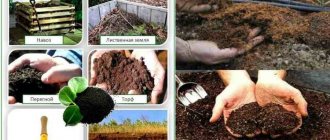
- Create “warm” beds. In industrial greenhouses, the soil is poured onto a water or film heated floor, but in a summer cottage such options are unprofitable. Experienced gardeners use alternative “biofuels”. On top of the drainage, approximately 2/3 of the volume of the box is laid out with a layer of branches, large weed stems, leaves, straw and fresh manure (preferably horse manure). The top is filled with the prepared soil mixture and thoroughly spilled with hot water or solutions of mineral fertilizers. After this, the bed is covered with film, “launching” the process of natural heating. Gradually overheating, organic matter releases heat that warms the roots and additionally enriches the soil with nutrients.
- Protect plantings from pests and rodents. If moles, mole crickets and mice are often found on the territory of a dacha village, then do not be lazy and place a fine-mesh metal mesh under the beds. It will protect the plants from pests that find satisfying food and settle down for the winter in warm boxes.
When filling high beds in multiple layers, a layer of branches (1) is placed on the bottom, then fresh manure and vegetable compost (2), and a fertile soil mixture is placed on top (3)
For full-fledged warm beds, the height of the box will be at least a meter, where 30 cm is large branches with unrotted manure, 30 cm is small organic matter with leaves and wood chips, and 40 cm is a mixture of earth with humus, peat, sand for plant roots.
Of course, the prefabricated structure does not have to be mounted entirely on the surface. Taking into account the groundwater level, you can deepen the boxes, providing drainage, or “drown” the passages, creating a kind of heat collector. There are a lot of options, but they need to be chosen taking into account the characteristics of a particular site and the climatic conditions of the region.
Germinating cucumber seeds
I want to share with you my personal experience of germinating cucumber seeds. I cover the floor of each seat with a liter plastic bottle with the bottom cut out. The lid can be removed from it after germination - for ventilation. To maintain stable moisture in the soil, I make small holes in the lid of another liter bottle without a bottom with an awl and bury it next to the future plant, neck down. Then I pour water into it.
Now, when the soil dries out, moisture will evenly flow directly into the zone of the cucumber’s root system. After this, I build a “tunnel” from arcs over the bed and cover it with a double layer of white non-woven material. I dismantle this structure only in May, with the onset of stable warm weather.