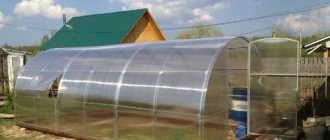
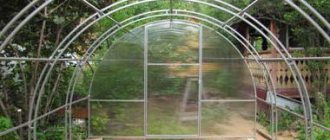
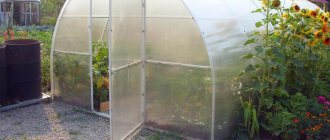
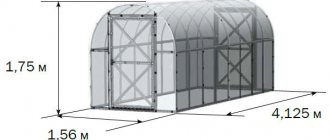
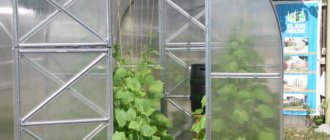
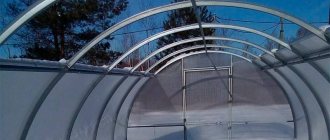
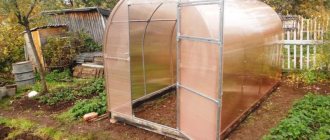
A durable and reliable greenhouse is the key not only to a good harvest, but also one of the ways to save free time and money. The fact is that in regions with severe climatic conditions, it is important to install reinforced structures in the garden plot or constantly visit the dacha throughout the entire winter period and clear snow from the greenhouse - an excessive amount of it can lead to the collapse of the plant house. However, the Kremlin Lux greenhouse does not need this - it is one of the most durable garden structures on the market.
Greenhouse "Kremlevskaya Lux"
Design Features
A good greenhouse is one that will last throughout the snowy winter and will not collapse. And indeed, if the structure withstood heavy snowfalls and turned out to be unshakable under the influence of the wind, then what else is needed? And the well-deserved title of the strongest was given to the designs of the “Kremlevskaya” series, developed in accordance with SNiP 2.01.07-85 specifically for Siberia and the European part of Russia.
SNiP 2.01.07-85. Loads and impacts. Downloadable file (click the link to open the PDF in a new window).
SNiP 2.01.07-85
The Kremlevskaya Lux greenhouse is perhaps the most durable arch-type structure on the greenhouse market. It can easily cope with a significant snow load - it is not even afraid of the impact of 240 kg/m2, and these are quite large figures. The “Kremlin Lux” can achieve such values thanks to a special frame configuration - the arches are bonded pipes (the distance between them is only 5 cm). It was this engineering solution, which came to the bright minds of the creators of the structure, that allowed Kremlevskaya to take a leading position in the market in terms of strength. Such connections are called trusses, and the pipes in them are located one below the other. Each arc is made of steel pipe with a square section of 20*20 mm.
The main advantage of the model is the double arcs
The frame arches are located at a distance of 100 cm from each other and are connected with ties. The latter, in turn, are connected by spiders - cross clamps. Thus, snow and wind loads are distributed evenly throughout the greenhouse, which further increases its strength. However, due to the large number of parts, it takes quite a long time to assemble the frame.
Spider
On a note! Kremlin Luxes have been produced since 2009, and, according to the manufacturer, to this day not a single case of structural collapse has been recorded.
"Kremlin Lux" have been produced since 2009
It is noteworthy that all the frame parts are collapsible, which means that transporting the “Kremlin Lux” is not so difficult, even the largest one. It is enough to simply disassemble it and use it for transportation in a regular car, albeit with a roof rack (unfortunately, they have not yet learned how to fold polycarbonate to the size of the trunk of a regular passenger car).
On a note! Many companies involved in the sale or manufacture of “Kremlin Lux” can also custom-make a frame from solid arches - it will be even stronger than a standard collapsible one. But for transportation in this case you will need a truck.
The Kremlin Lux frame is coated with a special powder paint that prevents the formation of rust. Even in a humid environment, which is created and maintained in the greenhouse for almost the entire period of operation, the structure does not corrode.
The frame is coated with special powder paint
On a note! The painted arcs also undergo heat treatment - they are heated to 200 degrees in special chambers. Due to this, the coating becomes even more durable and “hardened”.
"Kremlevskaya Lux"
“Kremlin Lux” is excellent for growing vegetables, as it is covered with polycarbonate, which transmits the necessary light well, but retains heat and moisture. Typically, the thickness of the material is 4 mm - this is enough to prevent the greenhouse from collapsing (taking into account such a frame). And in the countryside it does not take up much space due to its fairly compact size.
Greenhouse frame prices
greenhouse frame
Table. Parameters of the Kremlevskaya Lux greenhouse.
| Length, m | Width, m | Height, m | Area, m2 | Weight, kg |
| From 4 or more (step 2 m) | 3 or 2.5 | 2.1 or 2.25 (depending on width) | From 12 or more | 107, each extension block (2 m long) adds 30 kg to the mass |
Greenhouse structure
Features of a polycarbonate greenhouse
A polycarbonate greenhouse is an excellent option for creating an optimal microclimate for cultivated plants, protecting them from harmful atmospheric influences and various diseases, significantly increasing productivity compared to growing in open ground. The main factors influencing the formation of a healthy microclimate for plants in a greenhouse are lighting, constant temperature, as well as soil and air humidity. Due to the design and materials used, a polycarbonate greenhouse is airtight, perfectly transmits light, retains heat inside the greenhouse space and blocks harmful ultraviolet radiation. It is easy to transport and install. It does not require dismantling for the winter, since the characteristics of its material are unchanged even at -60 degrees.
Equipment and operating tips
The Kremlevskaya Lux greenhouse set includes two doors and two windows, which are installed at the ends of the structure. It is packaged in a disassembled state in 4 bags (in the case of the basic design), and the 2-meter extension insert is packed in 3 bags.
Greenhouse equipment
Table. Complete set of the basic frame "Kremlin Lux".
| Element | Quantity, pcs. |
| Collapsible arches (each consists of several parts) | 3 |
| Door and parts for it | 2 |
| Window and parts for it | 2 |
| End (side parts, rods - upper and lower) | 2 |
| Ties | 42 |
| Base (assembled from several parts) | 4 |
| Packaging of small parts and accessories | 1 |
The weight of three out of four boxes in this case is:
- 34-38 kg each (with greenhouse parts);
- 1 kg – with accessories.
Table. Complete set of extension insert for “Kremlin Lux”.
| Element | Quantity, pcs. |
| Collapsible arches (consist of half-arcs) | 3 |
| Jumper ties | 14 |
| Guide base | 2 |
| Packaging of small parts and accessories | 1 |
Weight of boxes with parts – 34, 10 kg and 300 g.
On a note! The vents are supplied with special latches that will prevent them from closing automatically during operation of the greenhouse.
Table. Complete packaging with parts.
| Element | Quantity in base, pcs. | Quantity in insert, pcs. |
| Spider parts | 70 | 28 |
| Bolts | 70 | 28 |
| Nuts | 70 | 28 |
| Bracket (for vents) | 4 | — |
| Hinges for doors and windows | 8 | — |
| Pens | 4 | — |
| Screw (locking mechanism) | 4 | — |
| Self-tapping screws | 80 | — |
| Self-tapping screw for roofing | 42 | 16 |
Bolt M6 Nut M6 Screwdriver Window bracket Overhead hinge Handle Self-tapping screw 3.9*19 Roofing screw 5.5*19 Spider plate
The number of polycarbonate sheets will directly depend on the length of the greenhouse. For example, sheets measuring 600*210 mm will be spent on a 4-meter greenhouse, 3 on a 6-meter greenhouse, and so on.
Experienced gardeners advise, in addition to the Kremlin Lux, to purchase a thermal drive system for doors and vents. This is especially true for those who cannot visit their dacha every day.
The Kremlin Suite perfectly fits two fairly wide beds along the walls (or even three - one in the middle). At the same time, a spacious passage remains between them, allowing you to easily move around the structure.
Garden beds in the Kremlin Lux
Features of the Kremlin Lux greenhouse
The Kremlin Lux greenhouse is one of the most durable arched structures. Such a structure can withstand up to 240 kg/m of snow load. This stability is explained by the specially designed configuration of the frame - fastened square pipes of 20x20 mm are used as arches, the distance between which does not exceed 5 cm. The distance between the arches connected by ties is 100 cm. The ties, in turn, are combined using cross bars clamps. It is these design features that make it possible to distribute the loads from wind and snow evenly over the entire surface of the greenhouse.
Advantages
- The Kremlin Lux greenhouse has gained wide popularity due to its numerous advantages, the main ones of which are the following:
- Unlike most designs of other greenhouses, this modification has reinforcement along the entire length, and not just in its upper part. This feature gives strength to the structure.
- There are 9 metal purlins located in the same plane with the arcs - this provides reliable protection from vertical winds and the pressure of snowdrifts on the sides.
- The use of special guides under the base makes it possible to protect the structure from possible distortions and assembly errors. Such characteristics significantly reduce the time and labor costs for assembling the entire structure. The use of a special “spider” type mount also helps with this.
- The greenhouse has high mobility - when disassembled, such a structure can be easily transported in a regular passenger car.
- The presence of 2 main and 2 additional windows makes it possible to obtain a favorable climate for plants through ventilation.
- The greenhouse lining of this modification is a special powder coating made in Norway. Applied in a uniform thick layer to all load-bearing metal parts of the structure, as well as welding seams and joints, it reliably protects the entire greenhouse from corrosion. Thanks to this approach, the service life of the greenhouse is at least 30 years.
Flaws
- The main disadvantage, or rather a “thin spot”, is also the coating - no matter how high quality it is, there is a risk of it being damaged during the installation process, which can cause the formation of rust. To avoid such situations, it is recommended to avoid chipping the paint and renew the coating yourself on a regular basis.
Assembly Recommendations
It is best to install the “Kremlin Lux” on a foundation, but if this is not possible, then it can also be installed on the ground using the pegs included in the kit. But it’s still better not to be lazy and make the foundation. As a rule, this is a frame made around the perimeter of the structure and laid on the ground. It is best to create it from 100*100 mm timber, which is necessarily impregnated with a product that protects it from premature rotting and destruction.
Attention! It is a reliable foundation in the event of a strong wind load that will help the greenhouse cope with it and not tip over.
The frame of the greenhouse must be carefully secured to the foundation using self-tapping screws - it is not recommended to install it just like that (to avoid tipping over). By the way, if you are assembling a greenhouse in the fall, then be careful and have time to do it before frost - installing the “Kremlin Lux” (and indeed any greenhouse) on frozen soil is strictly prohibited.
Greenhouse frame
In order to assemble a greenhouse, you need to use:
- screwdriver;
- level;
- hex head (6 and 10 mm);
- cross bat;
- construction knife for cutting polycarbonate.
Please note that initially the base of the greenhouse structure is assembled without tightly tightening all the connecting elements - they are tightened only after the greenhouse is leveled. This is necessary in order to easily cope with errors and irregularities in the design. Until the fasteners are tightened, the greenhouse will seem shaky and unstable, gaining strength only after the nuts are tightened.
Remember that you must attach polycarbonate to the outside only on the side that has UV protection. It can be easily identified by a special mark on the protective film, which is removed at the very last moment immediately before attaching the sheets to the frame, so as not to get confused. Or you can mark the outside of the sheet with a marker and remove the film.
On a note! If you want to install a partition in the Kremlin Suite, then instead of one of the arcs, you will have to mount another end inside.
When installing the greenhouse and sheathing, remember that the screws and handles on the doors and vents are installed after the greenhouse is sheathed with polycarbonate. But it’s worth trying them on before covering, so that later the wrapping tongue closes well.
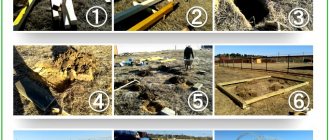
Main stages of frame installation
When covering the greenhouse with polycarbonate, do not overtighten the bolts; work carefully so as not to damage the material.
Cutting polycarbonate
To learn how to cut polycarbonate correctly, we recommend reading this article! In addition, you will probably be interested to learn about the technical characteristics and assembly of the Sibirskaya greenhouse!
Prices for the Kremlin Suite
greenhouse Kremlevskaya Lux
Cutting polycarbonate
Installation of “Kremlin Lux” always begins with cutting out polycarbonate, so that then all the details of this material are at hand. Unfold the polycarbonate and place it on a flat surface. Please note that during cutting the direction of the stiffening ribs must be taken into account - they must be positioned strictly vertically so that moisture and condensation from them can flow out independently.
On one of the sheets, start cutting out several parts of the end. To do this, it’s easier to place the assembled ends on it like patterns, trace them around the perimeter with a marker and then cut out the drawn parts. Also mark and cut out doors and windows.
Cutting polycarbonate
On a note! When cutting out doors, be careful - step 1 cm to the side from the door frame in the end area and 6 cm down. Then the door panel will rest firmly on the end rods.
Video - Cutting polycarbonate and installing the Kremlevskaya Lux greenhouse
Selection criteria when purchasing
When making your choice, you should take into account several factors that will help you avoid purchasing surrogate products, whose quality will be incomparably lower than the original.
So, the buyer should be wary if:
- there are no documents, passport and quality certificate of all components, as well as manufacturer’s markings;
- the frame looks unreliable - poor protection against corrosion, the use of a thin-walled profile, a large step between the supports;
- low quality polycarbonate - thickness less than 4 mm, lack of protective packaging and manufacturer's information on UV protection, obvious sheet defects.
A poor-quality structure will break under the thick snow.
Experienced farmers not only examine all parts of the structure in detail, but also, using a caliper taken in advance, independently carry out all significant measurements. In any case, when purchasing a greenhouse, it is best to contact trusted sellers who have real positive reviews from customers.
Video: which greenhouse to choose? Advantages and disadvantages
Mounting and installation of the frame
Instructions will help you assemble the Kremlin Lux, which will definitely be included in the delivery kit.
Step 1. First, assemble a foundation from 100*100 mm timber and place it on a flat surface. Connect the foundation parts together using self-tapping screws and angles. A level will help to level it.
Foundation assembly
Step 2. Saturate the timber with a protective solution. You can use copper sulfate. Impregnation can be done both before assembling the foundation and after.
Processing of foundation elements can be carried out even before assembly
Step 3. Place on the ground and connect the end halves together and assemble all the arches. They are connected very simply - using a 15*15 mm metal pipe and self-tapping screws. The upper end part (and the arcs, by the way, too) are attached with curved pipes, and the lower part with straight ones.
Arc assembly
Stages of assembly of ends and arcs
Step 4. Place the parts of the greenhouse base on the foundation beam and connect them together with self-tapping screws.
Laying the greenhouse base on timber
Step 5. Attach the assembled base to the beam.
Attaching the base to the beam
Assembling the base without frame
Step 6. Install the ends and arcs alternately on the parts of the base laid on the beams.
Stages of installation of ends and arcs
Installation of arches
Step 7. Install the ties using spider parts. On each of the arcs, the parts must be attached with the middle stream down, and at the ends the same side faces to the side. In this case, the spiders must be supported on the connections between the arcs.
Fastening the ties
Spider connection
Fastening ties using spider plates
Step 8. You can start installing the window. It is mounted in the doorway or in any of the openings between the frame arches, excluding the outer ones. Attention: those spiders that will be located above the vents are secured upward with a stream. The window itself is fixed using hinges and self-tapping screws.
Stages of installing a window
Window installation
The windows are installed
Step 9. Install and secure the assembled doors to the ends. Attach the hinges on the doors approximately 30 cm from the edge - both upper and lower.
Assembled greenhouse end
Step 10. Proceed to cover the frame with covering material. Secure it with roofing screws. Start with the door, then install handles and screws. If you decide to install a window in a door, be sure to attach the polycarbonate only to its (door) frame, and then carefully cut along the gap line between the lintel and the frame.
Step 11. Cover the ends of the greenhouse with polycarbonate.
End sheathing with polycarbonate
Sheathing the ends can be carried out after assembling the entire frame
Attaching the side end panels
Step 12. Cover the edges of the polycarbonate with special protective end rubber bands (these can be purchased separately).
Sealing polycarbonate ends
Attention! Do not cover the bottom ends of the polycarbonate so that condensation can escape freely from the honeycomb cavities.
Step 13. When covering the main frame, remember that the sheets of material should overlap by about 10-20 cm. They are attached every 50-70 cm, starting from the bottom.
Frame cladding stages
Sheathing of the main frame
Attaching polycarbonate to side windows
Advice! Leave a small cap (a few centimeters) over the end to protect the honeycomb of end panels from water.
Assembly of the “Kremlin Lux” is completed
The assembly of the Kremlin Lux greenhouse is completed. You can learn more about the process by watching this video.
Prices for timber
timber
Video - Installation of the Kremlevskaya greenhouse
Assembly instructions for the reinforced greenhouse “Kremlevskaya Lux”. Downloadable file (click the link to open the PDF in a new window).
Assembly Guide
The Kremlevskaya Lux greenhouse can not only become the pride of your dacha (it will allow you to get a wonderful harvest), but also decorate it. This arched design looks harmonious and neat, despite the fact that it is a reinforced model. And in order for it to serve for many years, it needs to be properly cared for. Timely cleaning, disinfection and careful handling will extend its service life.
WHAT IS INCLUDED IN THE GOST MERCHANT GREENHOUSE PACKAGE
| Greenhouse frame | 2 doors and 2 windows | Roofing screws |
| Accessories for assembly | Polycarbonate sheets | Those. passport |
The “Merchant GOST” greenhouse is the basic model from the “Merchant” series; most other models are modified and reinforced versions of the “luxury” greenhouse.
Despite this, the greenhouse does not lose its popularity and demand due to its distinctive characteristics. The frame elements consist of a 20x20 mm pipe with its own reinforcement. The trusses of the structure are made for installation from two arcs, located one inside the other with a distance between them of 100 mm and connected by jumpers. The fastenings do not require unnecessary drilling, so the performance characteristics of the structures are not lost. Snow on a greenhouse of such an arched shape rolls off and does not linger, so the frame of the structure will not collapse in the winter season, and the polycarbonate will not bend under snow loads. The safety factor of such a greenhouse allows it to be built even in regions with the most severe climatic conditions, for example, in Siberia. This design is easy and convenient to transport and can be installed with your own hands. With certain work skills and having studied the structural elements, it is possible to assemble a greenhouse without the help of a specialist. The innovative fastening system “crabs system” facilitates the assembly of the greenhouse in the shortest possible time, because its construction does not require drilling.
When choosing a foundation for a GOST merchant greenhouse, it is recommended to choose a foundation made of timber 100x100 mm or 100x50. Timber is a popular and reliable flat base impregnated with protective substances to preserve the wood.
This model is ideal for areas with heavy gusts of wind and snowfall. The Kupecheskaya Gost greenhouse has been tested in the harsh frosty conditions of far Siberia. The reinforced frame provides reliable protection against snow avalanches, so owners do not have to worry about the greenhouse in winter and do not bother themselves with long trips to the country. The arched design promotes uniform distribution of wind over the entire surface, thereby preventing collapse. The GOST greenhouse complies with SNiP 2.01.07-85 standards.
DETAILED SPECIFICATIONS
Features of the greenhouse: double collapsible arches for easy transportation on any type of passenger car
| Dimensions (Width x Height): | 2.1 x 2.5 m or 2.3 x 3 m. |
| Frame structure: | all-welded double galvanized pipe 20x20x1.2 mm. |
| Greenhouse shape: | arched |
| Distance between adjacent arcs: | 1m |
| Horizontal jumpers: | 5 pieces. |
| Maximum snow load: | 240 kg/m2. |
| Anti-corrosion treatment: | galvanizing |
| Minimum frame weight (length 4 m) | 89 kg (+ 25 kg for every 2 m length) |
| Dimensions for transportation 4 m (cm): | 220x100x30 (+10 cm height for every 2 m) |
| Manufacturer: | Kimry |
| Manufacturer's warranty: | 7 years |
In the standard version, the dimensions of the product allow you to normally plant 2 wide beds with a convenient comfortable passage between them or 3 but smaller ones. In a greenhouse you can grow any plants and vegetables, including exotic crops. The high light transmittance of cellular polycarbonate, combined with a comfortable temperature, promotes active plant growth. The minimum cost of a GOST greenhouse is 23,490 rubles. for the 4 m long model with economy class polycarbonate. The price depends only on the length of the model and corresponds to dimensions 2.1 x 2.3 m and 2.5 x 3 m
