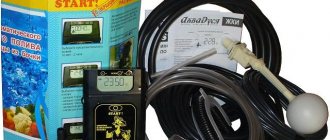
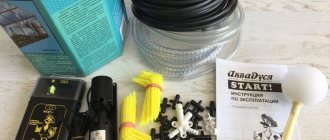
Every year, owners of suburban areas are faced with the fact that the lawn, which pleased the eye with fresh greenery in the spring, loses its brightness by the end of May and gradually becomes brownish-yellow, although it is still only summer and far from autumn. To solve this problem, you need to water your lawn at least once a week. This is quite a labor-intensive task that requires regular expenditure of effort and time. An alternative solution is automatic watering of the site using Rain Bird technology.
Are you planning to independently develop a project for a suburban area and install the system yourself? Then this article will be useful to you. Rain Bird automatic watering will help organize uniform and timely moistening of the lawn to avoid drying out of the grass and gradually strengthen the root system.
In this article we will tell you how to independently develop a project and then install an automatic watering system on your summer cottage with your own hands. Its correct use allows you to water the lawn evenly and in a timely manner, avoid the appearance of dried grass and strengthen the root system.
Advantages of an automatic irrigation system:
| You save water. Due to the programmable controller, automatic watering is carried out at a time when evaporation is not very large. Regular and timely irrigation of the lawn helps the plants stay beautiful and healthy. Excellent results after just a few uses. |
| You save money. Thanks to the Rain Bird automatic watering system, plants are watered according to their moisture needs. This eliminates additional costs for grass care. Additional measures are simply not required. Timely watering and cutting the grass is the basis of lawn care, allowing you to achieve its magnificent appearance for a long time. |
| You save time. Automatic watering technology relieves you of a number of hassles and worries associated with caring for plants and gardens. Forget about it. Now you have more time to relax and communicate with loved ones. Enjoy your weekend or vacation with the peace of mind that your lawn is receiving proper care and control. |
Price of an automatic watering system for a plot
| Name | Price |
| Rainbird Sprayer | from 260 rub./pcs. |
| Water outlet | from RUB 2,217/pcs. |
| Flexible connection for sprayer + fitting | from 35 rub./pcs. |
| Fittings and valves | from 0 rub. |
| Solenoid valve | from RUB 1,868/piece. |
| Indoor controller with rain sensor | from RUB 8,960/piece |
| Valve box | from 740 rub./pcs. |
| HDPE pipe | from 50 rub./p.m. |
| VVG cable | from 45 rub./p.m. |
| Protective casing | from 35 rub./p.m. |
| Water treatment equipment (pump, capacity 2 cubic meters) | from RUB 20,954/pcs. |
Static sprinklers
Static and rotating nozzles
Retractable rotors
Swivel connectors and fittings
Valve boxes
Controllers
Rain sensor
Solenoid valves DV or HV
Emitters
Microirrigators
Micro-irrigation zone kit
Drip Irrigation Hose>
Static sprinklers for automatic watering of small areas
Static sprinklers are used to water shrubs, flower beds and small lawns. They are installed at the same level with the ground. When water pressure appears, the sprinkler rod extends, and when watering is completed, it automatically retracts.
|
|
Irrigation radius is from 1.2 to 7.6 meters, operating pressure is 1–2.1 bar.
Rotating nozzles allow you to effectively distribute water in cyclic jets with low rainfall. They spray water evenly, reducing erosion and soil erosion.
Additional materials.
This homemade product was assembled from all sorts of rubbish that I managed to find in my shed. So, for example, carbolite legs were used from the Idas tape recorder, the isolation transformer of the protection device was used from the VEF 202 radio receiver, the power filter was used from the 3USTST TV, etc.
Therefore, even if someone decides to build something similar, he is unlikely to need my drawings. However, I publish them because I myself am always interested in other people’s crafts and technical solutions.
July 16, 2011 (12:21) in Do it yourself
Rotors for automatic watering of medium and small areas
Rotors are recommended for areas with a small to medium area. Water pressure lifts the rod to the surface. This is how watering is carried out. The rod lowers automatically after completion of work. The irrigation sector can be adjusted from 40 to 360°.
The technology allows you to create a “rain curtain” for optimal water distribution. This guarantees quality lawn care. Rotors with check valves are used to avoid waterlogging in areas with elevation changes.
|
Rain curtain technology helps to properly distribute water for irrigation, which guarantees excellent lawn quality. Rotors with check valves help avoid waterlogging in areas with elevation differences.
Automatic watering of lawns
TO KNOW
Organization of subsoil watering for the garden
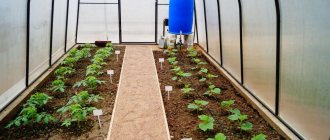
Subsoil irrigation system is used in small summer cottages. It is also advisable to arrange it for greenhouses. This is a fairly economical option that does not require high water pressure in the system and can work safely due to the difference in height between two communicating tanks. Underground root irrigation ensures minimal water loss and prevents evaporation.
The disadvantage of a do-it-yourself subsurface irrigation system is the likelihood of rapid clogging and labor-intensive installation. On a planted plantation, it is problematic to arrange intra-root automatic watering, since the root system of green spaces can be damaged.
This type of watering is convenient for perennial plants that need constant moisture. Water at a comfortable temperature reaches the roots slowly and evenly, which helps to constantly maintain moisture in the soil.
The controller allows you to set the time, strength and frequency of watering
Installation of the system is carried out similarly to the above automatic watering options. Here you will need a plastic or metal pipe for the main pipeline, a perforated hose for branches, a pump, a controller and a filter. The pipes are laid in a pre-prepared trench with plastic film laid at the bottom.
A pump is connected to the storage tank. Next, the filter and controller are installed, and the main pipeline is connected. Do-it-yourself automation of a garden watering system involves turning on and off the pump unit at a certain time. The following parameters are optimal for subsoil irrigation: pressure – 0.3 m, water speed – 0.2 l/s. 3-4 days after starting the system, it is necessary to dig up the soil in several places and check the degree of its moisture.
Valves
Special solenoid valves are controlled by a controller and open to supply water to the sprinklers.
The Low Flow DV DRIP valve was designed specifically for drip irrigation systems.
Even with low water consumption, the device functions perfectly. DV and HV solenoid valves are a good option for small areas of private households.
| ||
| LFV – Low Flow | H.V. | D.V. |
Automatic garden watering
TO KNOW
Controllers for automatic watering of the site
Using the controller, the signal to open or close the water supply is transmitted to the system valves.
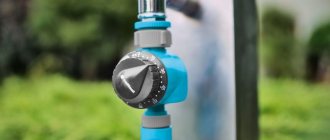
Timers installed on the water tap are characterized by ease of setup and programming. They effectively regulate even minimal water flow. Automatic systems include sprinkler shutoff devices that operate when it rains. These elements assess the level of precipitation and, if necessary, automatically block the water supply, allowing you to save it and eliminate the risk of waterlogging of the soil.
| ESP-RZX | ESP-Me | WP1 | WP6 |
| 1ZEHTMR | Rain sensor RSD-Bex | Wireless rain sensor | Soil moisture sensor SMRT-Yi |
Automatic watering at the dacha
TO KNOW
Procedure for developing a do-it-yourself irrigation system
First, take a scale plan of the site. If you don’t have it ready, draw it on graph paper or a large checkered piece of paper. Apply all buildings, beds, large plants.
Configuration development
On the plan, draw the irrigation zones, the water source, and its location. At the same time, draw where the main pipeline will pass. If you are going to spray with sprinklers, draw areas of their effect. They should overlap and there should be no unwatered areas.
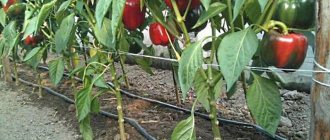
If the plantings are planted in rows, it is more rational to use drip irrigation: water consumption is much less, as is the cost of equipment. When designing a drip irrigation scheme, the number of irrigation lines depends on the distance between the rows. For rows with a distance of more than 40 cm, one line per row is required. If the rows are located closer than 40 cm, I water between the rows and there are one fewer lines.
DIY irrigation system development
After all the sections have been drawn, decide on the length of the required pipelines, count how many and what water distribution points you have, decide on the equipment - the number of pipes, hoses, tees, drippers, sprinklers, whether or not you need a pump and reducer, it will be whether the container is installed or not, what automation should be installed and where. Now, after all this has already been thought out, right down to the diameters of pipes, fittings and adapters, the practical stage begins. The irrigation system drawn on paper begins to be implemented on your site.
Let's start building
Construction work is already underway. And the first thing you need is to decide how you will lay the pipes. There are two ways: lay the pipeline on top or bury it in a trench. They usually lay it on the ground at the dacha: here the watering is seasonal and it is dismantled in the fall. It is very rare that irrigation systems in dachas are left for the winter: even if the equipment can withstand the winter, it can simply be broken or stolen.
When creating an automatic watering system for the site of a permanent residence, they try to make everything as inconspicuous as possible, so the pipes are buried. In this case, trenches are dug with a depth of at least 30 cm. This depth is sufficient so that the pipes are not damaged during excavation work. Just remember that pipes, fittings and other equipment that is left over the winter must be able to withstand freezing.
One of the stages of creating automatic irrigation with your own hands is earthworks and laying main hoses
Branches for irrigation depart from the main water pipelines. It is advisable to make all assemblies and connections in hatches with covers: namely, in connections, tees, etc. Most often leaks occur. Digging out an entire trench to find a leak is not the most fun, and if all the “problem spots” are known in advance and relatively accessible, maintenance becomes an easy task.
When laying main pipelines underground, install connection points in special boxes
The last stage - depending on the chosen irrigation method, water distribution devices are installed in the hoses, everything is connected and tested.
Automatic watering microirrigation
- Emitters. Rain Bird self-piercing emitters consume from 2 to 68 l/h. This guarantees ideal watering of beds, shrubs, trees and flower beds. To make installation more convenient, use the XM-TOOL.
- Drip hose. It is designed for drip irrigation and is available in two versions - for installation above or below ground. The element is suitable for irrigating beds, trees and shrubs, as well as hedges.
- Start-up kits for micro-irrigation. They contain a filter, a pressure regulator and a low-flow solenoid valve.
- Microirrigators. Such devices are recommended for watering bushes, flower beds and flower beds. Micro-sprinklers are connected using a distribution tube with a diameter of 6 mm. The irrigation radius is adjustable.
| 1. Emitters. The consumption of Rain Bird self-piercing emitters is from 2 to 68 liters per hour. This provides excellent watering of shrubs, beds, flower beds and trees. For ease of installation, use the XM-TOOL installation tool. | |
| 2. Drip hose. A special hose designed for drip irrigation is well suited for watering beds, hedges, trees and shrubs. It is available in two versions: for laying underground and on the surface. | |
| 3. Start-up kits for micro-irrigation. They include a pressure regulator, filter and low flow solenoid valve. | 4. Microirrigators. These micro-sprayers are perfect for watering flower beds, bushes and flower gardens. Connected with a Rain Bird dispensing tube with a diameter of 6 mm. Adjustable watering radius. |
Irrigation options, principles of operation and installation
Farmers consider drip irrigation to be the best option. It is started by opening the valve manually, thereby delivering liquid directly to the roots of the plants.
A huge advantage of this type is its economical fluid consumption. I suggest you figure out what homemade irrigation systems can be built without special skills.
From time immemorial, work done with your own hands was valued for its quality, and the costs are much lower, because you do not need to pay workers for installation and configuration. Next, I will share with you the best ideas on how to make your own watering.
Drip irrigation from things found in the yard
Irrigation parameters need to be monitored and adjusted. To do this, we need a reinforced flexible hose (preferably for a temporary type), or plastic (for a permanent type).
Next, we select a suitable container (preferably at least one hundred liters) and begin installation. The instructions for making irrigation systems will tell you how to do this correctly. Read more about this.
Drip irrigation from plastic bottles
You need 5 liter bottles. At a height of two centimeters from the bottom of the container, we make punctures with a shoe repair needle, and bury the structure halfway between the rows of the bed.
Lifehack with droppers
In this case, an individual distribution of liquid supply is made from the main pipe for each plant. The principle of operation in medicine and watering plants is identical.
Now you know what you can use to make a simple irrigation system. I want to say that not everyone now has the opportunity to buy ready-made systems, so I’m sharing the secrets of economical watering of their beauties. Such simple options can last for more than one season.
Once you start work, do not forget to draw up diagrams for the correct manufacture of systems. Without this, there is no way, because you need to calculate how much consumable material may be required, what is the water consumption per square meter and many other nuances.
Let's return to watering point 1 for a detailed installation diagram:
- For everything to function correctly, you need to raise the water container to a height of 1.5 meters (if it’s a little higher or lower, it doesn’t matter).
- Next, at a height of 5 centimeters from the bottom of the container, we make an opening for the supply tap.
- We are engaged in laying out pipes and hoses; it is preferable to place them between rows of plantings.
