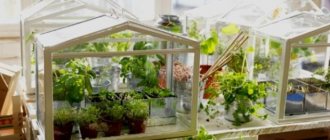
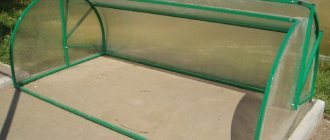
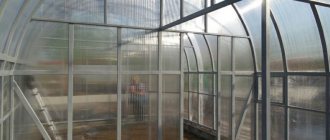
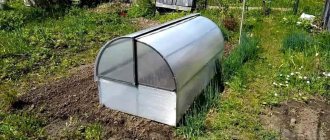
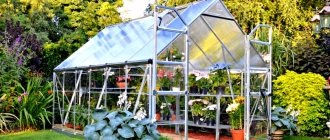
Cucumbers are capricious plants, demanding heat and requiring high air humidity. In our “risky farming” zone, it is very difficult to provide them with such conditions in the open ground. Therefore, any gardener wants to know how to make borage in the country with their own hands. But if a small greenhouse is enough for one to shelter young plants until the onset of stable heat, then the other wants to have a full-fledged greenhouse and grow cucumbers in it throughout the summer season. Any design can be made independently. Read the article and choose the best option for yourself.
Growing cucumbers in a greenhouse allows you to increase their yield Source 7ogorod.ru
Greenhouse sizes
Since in a greenhouse the plants are served from the outside, its width is chosen so that it is comfortable for you to process plants planted closer to the middle. You determine this experimentally: sit down and try to reach some area with your hand. Measure the distance. You get the width of the greenhouse with a one-sided approach. This is if the greenhouse is located in such a way that it is impossible to get to it from the other side (near a wall, for example). If you can approach from both sides, you double this result.
It is important to be comfortable at work
The distance is different for each person: height and physical condition affect. You should not chase savings by making it wider than necessary. You will have to spend a lot of time weeding, loosening, fertilizing, and other work. A couple of hours in an uncomfortable position, and there is no strength left. Therefore, it is better to make the greenhouse a little narrower, but to make it convenient to work: while enjoying your work, you spend less effort.
And the length of the greenhouse is chosen based on the layout of the site. It's arbitrary.
Preparation for construction
Before starting construction of a greenhouse, we choose a location. It should be sunny, not very windy, not swampy. There should be a convenient approach to the greenhouse, so it is better to build it a little away from the main beds. Free space around it is necessary for small repairs and for assembling the structure. The orientation of the greenhouse should be from east to west. The surface of the site must be flat.
Interesting articles about building other types of greenhouses with your own hands: Breadbox, Butterfly, Snowdrop, greenhouse under film, mini-greenhouse, winter greenhouse.
Drawing and calculations
The size of the greenhouse is calculated based on the number of beds on it. If it is convenient to approach it from two directions, you can make 2 ridges of 60 cm each. The length depends on how many cucumbers you want to grow. The height of a film greenhouse is usually no more than 1 m. To avoid difficulties and inaccuracies during construction, make a drawing indicating the dimensions.
To build a greenhouse, more material will be needed, since it will be higher - up to 2.5 meters. The foundation under it should also be more solid for greater stability of the structure.
Foundation
Wood is often used as a foundation for a greenhouse - tarred boards are laid in a prepared trench along the perimeter, placed on edge and fastened with corners. It will last no more than 3-5 years. The best option for a removable structure would be pipes buried in the ground. You can also attach arcs to them under the covering. Often greenhouses are installed without a foundation at all.
When building a large greenhouse, foam concrete blocks or cinder blocks are laid in a trench around the perimeter as a foundation. Anchor bolts are used to screw the beam on top to which the frame is attached.
You can learn more about the construction of a small greenhouse for cucumbers in the video below:
Organization of space inside the greenhouse
To understand what kind of structure you need, first understand what will be inside it. Calculate in advance which method will be profitable for you to grow vegetables. So, to do this, look at the table of average temperatures in your region, find out how close the groundwater is located under the beds in your building, and go from there. Indeed, in some conditions it is possible to harvest a rich harvest under an ordinary film greenhouse, while in others you cannot do without a capital structure with cellular polycarbonate and special subsoil heating.
For cucumbers, it is better to orient greenhouse beds from east to west, carefully covering them from drafts on the north side. This direction provides maximum illumination, which is very important. Additionally, consider another cover for the beds - film, spunbond or lutrasil to protect delicate plants from cold or overheating.
Today, several types of greenhouses compete with each other in which it is convenient to grow vegetables:
- Type 1. Narrow tall with plants in the middle and coarse mesh on the sides. On such a grid, the cell dimensions of which are about 30x30 cm, it is convenient to attach the shoots and harvest the crop there.
- Type 2. Wide traditional with beds on the sides and special devices under the roof, on which it is convenient to attach trellises.
Here, for example, is how a standard structure with reinforced mesh is built (for additional protection from sunlight):
But first, decide exactly how you will attach the vegetables.
Types of greenhouses
There are several varieties. Each has its own nuances. A greenhouse is a small-sized structure in which heat-loving crops are grown. Its main difference from a greenhouse is that the entire internal area is occupied by one bed, and is processed from the outside
This saves usable garden space, which is important for small plots. Depending on the production method there are:
- arched;
- single- and double-slope;
- buried.
Arched shelters are mounted on arches made of metal or plastic. A protective coating is placed on top of them. There are temporary and permanent structures. The latter are made from steel pipes of square or rectangular cross-section. Sheets of transparent polycarbonate are attached to them. The side part of the arch is made in the form of a sash, which is hinged to the main frame. The frame is placed on a frame made of wood or concrete. Arches of temporary greenhouses are made of steel wire with a diameter of 8-12 mm or polypropylene pipes. They are bent in an arc and stuck into the ground. Cover the top with plastic wrap. Collapsible structures are used in the spring at low temperatures.
Single- and double-slope structures are a structure in the form of a well and inclined top panels. They are made from any available material. A common option is a frame assembled from window blocks. In this case, for the borage plant, a wooden box is knocked down, closed on all sides. Window frames are attached to the top on hinges.
Recessed borage plants are used in areas with cold climates. For them, a hole is dug in the ground, about 50 cm deep. Its edges are reinforced with wooden sheathing and lined with straw to prevent heat loss. The top is covered with wooden doors with two glasses. You can plant seedlings in greenhouses of this design without waiting for the snow to melt.
Treatment of the greenhouse in the fall from pests and diseases When the summer season ends, and the harvest has been collected and processed, gardeners still have a lot of work left, because the plot needs...
What to look for when choosing a greenhouse
On the greenhouse frame
- By type: galvanized profiled pipes, steel pipes, wooden frames (greenhouses are often found in which the frame design is not designed for snow loads);
- On the thickness of steel and fasteners;
- At the welding points in the frame (if they are torn and not galvanized, they will quickly rust);
By type of greenhouse
- arched greenhouses (mainly polycarbonate and film),
- straight-walled greenhouses , as an option, straight-walled - wall greenhouse (polycarbonate and film),
- greenhouse - house = gable greenhouse (polycarbonate and glass),
- lean-to greenhouse (polycarbonate and glass),
- greenhouse with vestibule = English greenhouse (glass greenhouses),
- corner greenhouse (polycarbonate and glass),
- non-standard greenhouse = a custom-made greenhouse can have almost any shape: torus, dome, T-shaped, with a turn (mostly glass, but it can also be polycarbonate).
For covering a greenhouse
- glass,
- film,
- polycarbonate
For availability of accessories
- fasteners for the frame and fittings: handles, locks, latches for windows and doors.
Greenhouse frame
Particular attention is paid to the frame. Whether the entire structure will be durable depends on its reliability and strength.
There are several common options. The frame can be wooden - quite reliable, light, cheap. Immediately treat such a frame with special impregnations that will protect the wood from fungi and rotting.
The frame can also be made of PVC. The microclimate in such greenhouses will have to be maintained independently. The strength of the structure depends on the thickness of the profile. The design is as airtight as possible.
It’s good if you install a ventilation system in the greenhouse. In a small building, vents will be sufficient. If heating is needed, then biofuel, water, and electricity can play its role. Do not place the cucumbers very densely, then despite other efforts in caring for them and arranging the greenhouse, the cucumbers will not receive additional sunlight.
Tent greenhouse - excellent dispersion of sunlight
It is a fact that the vegetable does not like the scorching rays of the sun. And so far, only the awning has the best light dispersion of all known materials, which is becoming more and more popular every day in our country.
Its installation is extremely simple:
Here's how cucumbers live:
Gartering cucumbers is an important point!
And it’s a fact that trellises need to be fixed. Therefore, the biggest mistake when buying a room specifically for growing cucumbers is purchasing a model where the roof is solid without any hints as to where to attach the “tails” later. But the options with crossbars are just right.
By the way, vegetables in a greenhouse are not always tied up. Sometimes this plant is left to climb along the ground, as is often the case in open spaces. And both methods have their pros and cons. Just remember one thing: if you can water the fruits at least every other day, then hang them on trellises, because this is a significant space saver. If you come to your dacha once a week, then leave it on the ground so that the wide leaves of the plant themselves cover the ground from the scorching sun.
Trellis
Moreover, you can make such a structure yourself. Here's how to install these trellises:
- Step 1. At the ends of the row, insert stakes one meter high.
- Step 2. Stretch a cord between the stakes and lower a wire or rope tail from it to each seedling.
- Step 3. The plant itself will find and cling to the cord with special “tentacles”.
Or even simpler: when the beds are prepared, stretch two rows of wire along each bed - approximately at a height of 1.5 to 2 meters. The distance between the wires is 20-30 cm.
The fruits are also hung in a V-shape. Each row faces in its own direction, the plants get more heat, and it is more convenient to harvest. But by the end of summer it can still turn out to be a jungle, which is why the “one trellis - two passes” method still remains more popular today. Another good thing about cucumber trellises is that you don’t have to constantly bend your back.
And here is the detailed process of building a greenhouse with strong crossbars designed specifically for trellises:
Cucumber mesh
For this vegetable in a greenhouse, it is especially convenient to use a trellis net. This method has a lot of advantages:
- Significant space savings.
- The fruits do not touch the ground, do not get dirty and do not rot.
- Excellent ventilation for plants.
- It is convenient to observe and process plantings.
- The method itself is ingenious and inexpensive.
At the same time, all the plants “crawl” along the grid on their own - with the help of antennae. And modern agronomic nets are so strong that they even support heavy melons.
A simple plastic mesh can be purchased on the market - it is sold in rolls 2 meters wide. Thread a wire or cord at the bottom and top of the mesh and pull it between the supports. In the fall, the mesh can be easily removed from the support, rolled up and hidden until the next season. And as a support you can use thick metal reinforcement 2.5 meters high.
The standard parameters of the mesh are 1.7 meters high and the cells are 15x17 cm. And installing it in a greenhouse is generally as easy as pie - just stretch it between pre-installed posts directly above the beds with plants. Plant cucumbers on both sides of the trellis net, in a checkerboard pattern.
If you use a trellis net, then make the beds at a distance of half a meter.
Here's how to build a structure convenient for installing a grid:
Twine web
This method is also practiced, which summer residents have dubbed “horizontal-braided-twine.” Cucumbers are planted in the center of the bed, metal arcs with non-woven material are placed above them until the beginning of June, and the surface of the bed itself is mulched with mowed grass. At the beginning of June, the fabric is removed, the arcs are left, and twine is braided around the perimeter of the bed. It turns out that all the vegetable lashes are located inside the twine web and no longer stretch beyond the perimeter. It is convenient to water such a structure - right in the center, to the roots, and nothing gets on the leaves. As a result, as practice shows, the yield is 20-30% higher, it is easier for vegetables to withstand temperature changes and drought, and the fruiting period itself is significantly longer.
It is most convenient to mount the twine web in a lean-to greenhouse, on the high side, and on the other to place the work equipment and carry out communications:
Warm bed-hill - step-by-step instructions
Arranging a warm bed-hill is suitable for those who just want to try this agricultural technique and experiment with it, but do not want to spend too much time assembling the box and digging a deep trench.
Section of a hilly ridge (example with location on the site)
Step 1. Mark the areas in the greenhouse for the future bed.
Step 2: Remove the turf in these areas.
Step 3. Dig a shallow trench with one bayonet of a shovel.
Step 4. Lay layers of biological material for a warm bed so that there is 15-20 cm from the edges of the trench to it.
Step 5. Fill these gaps with fertile soil, also pour all the biological material on top.
Ready bed-hill
It should be understood that the width of the final warm bed will be from 80 to 120 cm, therefore it is not advisable to arrange it against the wall of the greenhouse.
Video - Warm bed in a greenhouse
Design requirements
To build an effective, high-quality greenhouse, you need to figure out what requirements a structure designed specifically for cucumbers must meet, and what types it can be.
There are many types of greenhouses and greenhouses for cucumbers. When building such a structure at home, craftsmen are limited only by their imagination and skills. But it is also worth observing some construction requirements.
Other important requirements include the possibility of ventilation. This is necessary for gas exchange and temperature regulation. Otherwise, the crop begins to quickly wither and get sick.
Glass greenhouse for cucumbers.
By design, borage plants most often come in the following types:
- Arched (tunnel). They are made of arches installed at the same level one after another in the form of a tunnel. The opening mechanism can be different, for example, like the wings of a butterfly (on the sides of the arches) or a bread box (chest).
- Single-pitch. Such structures are conveniently located near the walls of buildings.
- Gables, or houses (huts). Such structures can vary significantly in size - from miniature structures that open on the sides, to buildings taller than human height with a full-fledged entrance door.
Tunnel arc greenhouses with different types of opening.
Also, borage can be divided into two groups according to the installation method:
- Portable (collapsible or mobile). They are convenient because they can be collected and hidden at the end of the season, thereby freeing up space on the site. Also, mobile greenhouses can be used for open beds while there is a risk of frost, and removed when stable warm weather sets in.
- Stationary. Such structures are installed and serve for many years in one place. They carry out the full cycle of crop cultivation - from planting to harvesting.
Types of greenhouses by design.
Recommendations for using a warm bed
It should be understood that the properties of a warm bed, if it uses “biological” fuel, are not static and change over time. This applies to the release of heat and the amount of nitrates, nutrients, and minerals. On average, a normal warm bed with compost can last four years, and it is best to plant different crops in each of them.
Basil, which was sown in a regular bed (left) and in a warm one (right)
The first 12 months for this design are characterized by the release of a large amount of heat, as well as an increased content of nitrogenous substances. Given these conditions, plant heat-loving plants that require large amounts of minerals and nutrients.
Such crops include:
Important! It is not recommended to plant root vegetables and greens in the first year - they tend to accumulate excessive amounts of nitrates in the fruits, which is harmful to those who consume them.
Arranging a warm bed creates favorable conditions for growing plants
In the second year, the average temperature in the soil of the warm bed will decrease, but there will still be quite a lot of nutrients and nitrates. The list of plants recommended for planting will remain the same, with the exception of watermelons, pumpkins and melons. The content of nitrogenous substances is still too high, so it is undesirable to grow agricultural crops prone to their accumulation in warm beds this year.
By the third year of using a warm bed with “biological” fuel, it will cool down even more, but the heat and nutrients created will be enough for tomatoes, beans, cabbage and peppers. The nitrate content will become acceptable and you can begin to grow root vegetables and various greens.
Beds in a greenhouse
The last year of using compost beds is characterized by the depletion of nutrients and the gradual cessation of reactions with the release of heat. It is recommended to plant greens, peas, beans and other unpretentious crops. In some cases, plants will need fertilizing.
At the end of the four-year cycle outlined above, the warm bed must be created anew, clearing the remnants of old organic matter and filling in new ones. A good solution would be to create such beds at intervals of one or two years in order to grow different types of vegetables and herbs in the same season.
Cleaning a warm bed in a greenhouse after the fourth year of use
Prepare warm beds in the greenhouse in advance - in the fall, after harvesting the previous harvest. In this case, during the period from November to March or April, decay will begin and develop in organic matter, and the heat created during decomposition will be enough to create optimal conditions for seedlings planted in early spring. If everything was done correctly, then at the end of the season you will receive a rich, healthy and high-quality harvest!
Types
Structures are divided into types: buried and above ground.
- Recessed – easy to assemble and economical design. It is made as follows: a trench of arbitrary length is dug, the width of which should be up to 80 centimeters, depth up to 40 cm. Manure is laid out in the middle of the trench, plant seeds are sown along the edges, and seedlings are planted in the middle. The top is covered with film. A buried greenhouse is much warmer than a ground-based one and has less chance of getting frozen.
- Ground – temporary film shelter. To maintain normal temperature conditions, the polyethylene cover is pulled closer to the ground so that the plants feel comfortable in it. In this regard, ground structures are divided into several types: Arched - the advantage of which is ease of installation and minimal costs. Arcs are installed along the entire length for attaching the film, which are mounted directly into open ground. The disadvantages include the fragility of the material, which is deformed from frequent folding and opening, and bulges form at the attachment points.
- Single-pitched - installed in a simple way: take three boards for the base, place them around the perimeter of the ridge, and cover them. The largest board acts as a wall. Vegetables such as radishes, carrots, and beets are planted in the structure.
- A portable greenhouse is the most convenient of all structures. The device will require a box, the height can reach up to 60 centimeters, the upper part is equipped with a flat or gable roof covered with polyethylene. A box is installed on a prepared plot of land, reinforced with bolts, and a roof is mounted. The advantage of the design is that every year it can be moved to a new place convenient for growing. There is only one drawback - when disassembled it takes up too much space.
Growing on a grid in a greenhouse
Netting for climbing vegetable crops is very popular among gardeners today. With its help, you can tie up not only cucumbers, but also other annual plants: zucchini, squash, beans, peas, not only in the garden, but also in the greenhouse. The mesh is an excellent alternative to bulky trellis structures and has many advantages:
- makes the bed compact, saving useful area of the greenhouse;
- looks much more attractive than other trellis structures;
- easy to install and dismantle, does not deteriorate, can be used repeatedly;
- when folded, it takes up little space;
- creates comfortable conditions for the development of cucumbers - on a grid, the cucumber bush is better illuminated and ventilated, blooms earlier, gets sick less, since the leaves do not come into contact with the soil;
- simplifies the process of weeding, watering and fertilizing plants;
- makes harvesting easier - removing cucumbers from a vertical support is much easier than searching in thickets, and the fruits always remain clean and dry;
- due to the fact that the fruits do not spoil and ripen faster, productivity increases;
- makes it possible to timely monitor the ripening process of cucumbers and prevent overripening.
The trellis net is very convenient to use. It is a mesh fabric consisting of large rectangular cells, predominantly green. When placed vertically, it is an ideal support for cucumber beds. You just have to direct each lash along a separate path, after which the plants themselves cling to the cells with their tendrils and stretch upward.
It is especially convenient to use a net in a greenhouse during the fruiting period, when intensive mass ripening of fruits begins. The material of the canvas has increased strength and, if installed correctly, can withstand heavy loads. So, during the most crucial period - harvesting, the net will keep the fruits healthy, and make the process of picking cucumbers easy and enjoyable.
When growing greenhouse cucumbers on a net, the formation of stems must begin as soon as tendrils begin to appear on the vines. The first stem should be carefully tied, and then monitor the growth of the bush. When lateral shoots form, they will also need to be directed so that the shoots do not interfere with each other. With timely watering and fertilizing, greenhouse cucumbers can be harvested not only during the warm period, but also in winter.
Warm beds and their advantages
Let's start with the basics. A warm bed differs from an ordinary one in that in a certain way an increased temperature is created in it, which is optimal for the growth of crops, even in the presence of frosts or real colds “outside” the greenhouse. Thanks to this design, gardeners have the opportunity to start the summer season in March-April, despite the remaining snow, unheated ground, temperatures below zero and unpredictable weather.
High warm beds
The most popular options for warm beds are those that use “biological fuel” in the form of compost or manure to heat plants and their root systems. But this will be discussed in more detail below, and now let’s look at what the advantages of warm beds in a greenhouse are, and whether they justify the investment of time and effort.
- The opportunity to start planting seedlings in the greenhouse earlier and achieve a large and high-quality harvest.
- Protection of crops and especially their root systems from freezing during sudden frosts.
- Good harvests with large fruits even on relatively poor and infertile soil.
- Improving the process of photosynthesis - when using “biological fuel”, carbon dioxide is released, which immediately goes to the leaves of seedlings and bushes.
Good potato harvest from a warm bed
- Reducing the need for fertilizers and fertilizing - the very composition of the warm bed contains a large amount of nutrients and minerals.
- Weed control - their seeds in a warm bed begin the process of rotting, without having time to turn into a hindrance for your tomatoes or cucumbers.
- A slight reduction in the need for watering due to wetter soil and minimizing the process of water evaporation.
- A warm bed allows you to use various waste from gardening and animal husbandry, which previously had to be burned or disposed of in some other way.
Proper organization of internal space is the key to high productivity
Among the disadvantages of warm beds, one can highlight only the need to start work in early spring or even autumn and the fact that the rotting process may be accompanied by far from pleasant odors.
Greenhouse for cucumbers made of polycarbonate
Unlike an arched film greenhouse, this design is more durable, but costs a lot of money and requires certain knowledge from the master. More often, lean-to greenhouses are built in vegetable gardens, which do not require complex calculations and allow you to save a little on material. With due diligence, such a structure can decorate the site.
The required materials can be viewed in the table.
| Material | Dimensions or quantity |
| Wooden beam | 40x50 mm and 40x20 mm |
| Antiseptic solution | Depending on the size of the greenhouse |
| Polycarbonate | Thickness 8-10 mm |
You will also need connecting corners, nails or screws, and optional frame paint. To fix the polycarbonate, you will need self-tapping screws with a thermal washer.
Often, to save space, such greenhouses are placed close to the barn or house, but it is also possible to install them in an open space. In this case, the lower part of the wall should face north, so the plants will receive more sunlight.
Instructions for assembling a polycarbonate greenhouse for cucumbers:
- Using a 40x50 mm beam, assemble the lower part of the frame. Assembly is carried out in grooves; additionally, the joints are fixed with steel angles and self-tapping screws.
- Corner beams 40x50 mm are attached to the resulting frame, respecting the height of the future walls.
- Install intermediate posts and crossbars on the slope using 20x40 mm timber.
- The turf is cut along the perimeter of the future greenhouse and deepened by 10-15 cm. A sand bedding is made, and a frame is installed on top.
- The wooden parts are cleaned, soaked in an antiseptic solution, and topped with varnish or painted.
- Polycarbonate is attached, the ends of which, after cutting, are covered with special plugs.
- The upper part of the greenhouse is made removable or covered with light-diffusing film; this is necessary for ventilation and maintaining the desired temperature inside the greenhouse. The film allowance on each side is at least 30 cm.
The greenhouse is ready. Usually it is made low, no more than a meter, so that it can be weeded and processed without much physical effort. After the end of the season, such a greenhouse needs to be treated with solutions against mold - it really likes to settle on polycarbonate, and then reduces the light transmittance of the material.
DIY cucumber greenhouse - step-by-step technology
The cucumber greenhouse described below is a simplified version of the Mittleider greenhouse. It has a convenient height: 1.8 m at the walls and about 2.5 m at the ridge; it is convenient to grow cucumbers on a vertical trellis. The width of the greenhouse (3 m) allows you to make two wide or three narrow beds inside. Strong rafters can be used to tie up plants.
Diagram of the slatted frame of a Mittleider greenhouse
Video - DIY greenhouse construction
With the help of seven independent transoms located under the ridge, it is convenient to regulate ventilation. In such a greenhouse, heat-loving cucumbers are not afraid of drafts; excess heat will be removed under the influence of natural convection.
Greenhouse according to Mitlider
Air exchange diagram in the Mittlider greenhouse
The greenhouse is placed on a lightweight timber foundation. The frame of the greenhouse is made of wood. Polycarbonate or film covering can be used as cladding. In the second case, it is better to give preference to reinforced or bubble film - they retain heat better.
Greenhouses according to Mitlaider have won the recognition of gardeners
Choosing a location for a greenhouse
It is better to orient borage from west to east. With this arrangement, light-loving cucumbers receive maximum sunlight. A greenhouse with top ventilation is installed with transoms facing south to protect from the cold north wind.
Orientation of the greenhouse according to the cardinal directions
It is equally important to install the greenhouse where it will not be obscured by buildings or tall trees. On the windiest side, it is desirable to have wind protection - a solid fence, bushes, buildings.
Location on the site
Greenhouse construction
You can build a greenhouse using the proposed technology quite quickly - in a few days. It is important to prepare all components and tools in advance.
Let's start building the Mittleider greenhouse
Necessary materials:
- timber 100x100 mm for the foundation;
- edged board 50x100 mm for the greenhouse frame;
- 50x50 mm block for making transoms;
- plywood scraps;
- wood antiseptic;
- reinforced mounting angle for mounting racks;
- mounting plate for mounting rafters;
- door hinges for transoms and doors;
- wood screws of different lengths.
Wood screws
Required tools:
- a circular saw;
- jigsaw;
- screwdriver;
- drill and wood bits;
- measuring tool and marker.
Note! Before assembly, all wooden parts must be coated with two layers of antiseptic, paying special attention to the end cuts.
Pre-treatment of wooden elements
Step 1. Before starting work, you need to prepare a detailed sketch and decide on the dimensions. The length of the greenhouse shown in the drawings can be increased by any number of sections, the ventilation conditions will not deteriorate, since the main air exchange occurs through the upper transoms.
Doors are installed on one or both sides. Bilateral maintenance is convenient if the greenhouse is used to grow several crops and is divided inside by a film partition.
Greenhouse details
Assemblies:
- A – timber foundation;
- B – side walls, 2 pcs.;
- C – rafters, 8 pcs.;
- D – transoms, 7 pcs.;
- E – door, 1 or 2 pcs.;
- F – end walls, 2 pcs.
Step 2. The foundation is assembled from 100x100 mm timber, impregnated with an antiseptic for the lower crowns of a log house or with waste oil. Treatment must be carried out in two or three layers. The ends of the timber and sections are also processed and dried before installation.
Level the area for the greenhouse, remove remaining weeds, bushes and debris. The prepared blanks are laid out on the site and connecting grooves are selected in them. Compare the diagonals, if the deviation is more than 1-2 cm, check the angles for perpendicularity and level the foundation.
The timber is connected using long self-tapping screws along pre-drilled holes. Longitudinal and corner connections are made using the same technology.
Beam connection
Pegs made of 50x100 mm boards with a pointed lower end are attached to the finished foundation. The board is pre-impregnated with an antiseptic or waste. Drive pegs into the ground to secure the foundation. Level the base and check the diagonals again.
Foundation
Note! On wet soils, it is necessary to dig a 30x20 cm trench under the foundation and fill it with sand to the ground level.
Step 3. The side walls are made from 50x100 mm boards. The blanks are cut: boards of the lower and upper frames 4320 mm long and racks (8 pieces for each wall) 1830 mm long. The walls are assembled on a flat area, securing the racks with self-tapping screws through pre-drilled holes of small diameter. 2-3 self-tapping screws are screwed into each connection point.
Side walls
Step 4. The assembled side walls are installed on the foundation, aligned with the outside of the beam. Fixed with temporary jibs to the end parts of the foundation. Check the equality of the diagonals at the lower and upper corners, and align if necessary. Fix the boards of the bottom trim to the foundation beam using pre-drilled holes in each section of the wall.
Installing side walls
Step 5. The end walls are assembled from 50x100 mm boards directly on site. Lay the bottom trim boards on the foundation and secure them with self-tapping screws in three places. Install the racks in place, respecting the width of the doorway. Corner posts are attached to the side walls. Intermediate posts are attached to the corners. Secure the top trim board.
End walls
Step 6. Check the structure for strength - the frame should not wobble. If mobility is observed, jibs are installed in several sections of the side walls. They are tried on in place, the cut location is marked with a marker, cut out and attached to two long self-tapping screws on each side along pre-drilled small-diameter holes.
Fastening racks and jibs
Step 7. Rafters are cut according to the dimensions indicated in the sketch from a 50x100 mm board, placing it vertically. When cutting, observe the specified angles. The outer pairs of rafters are secured to the boards of the top trim using fastening angles. They are connected to each other using a mounting plate.
Rafters
Step 8. The upper racks for fastening the transoms are made of 50x100 mm boards. The blanks are cut to the specified dimensions and attached to the rafters using mounting plates or triangular plywood overlays. The plates are attached closer to the short side of the rack so that they do not interfere with closing the transoms.
Upper racks
Step 9. To install the intermediate rafters, a strong twine is pulled between the outer rafters. All other rafters are aligned along it. Make blanks in accordance with the sketch (see step 7) and install rafters and racks using a similar technology, maintaining the distance between them.
Rafter system
Step 10. The crossbars between the rafters, forming the frames for the opening transoms, are made from a 50x50 mm block. Cut blanks 560 mm long - 14 pieces - and fasten them between the rafters, as shown in the sketch, using mounting angles and self-tapping screws. The corners are placed on the outside of the frame so that they do not interfere with closing the transom.
Frames for transoms
Step 11. The transoms are assembled from a 50x50 mm block on a flat area. The workpieces are connected from the inside using furniture corners or a tongue-and-groove connection. The outer side is sheathed with film or cellular polycarbonate. The transoms are secured to the frames with hinges. Transoms are equipped from the inside with a latch or hook for locking, as well as a stand for holding them open.
Transoms
Step 12. When using film as a covering for a greenhouse, it is necessary to prevent sagging. To do this, thin plastic slats are fastened across the roof or wire is pulled in insulation. In areas with strong winds, it is recommended to secure the slats on the sides of the greenhouse to avoid tearing the film.
Slats for film
Step 13. The door is assembled from a 50x50 mm bar. Make the frame smaller than the doorway by 10-15 mm vertically and horizontally. Reinforced with crossbars and jibs. The door is sheathed with film or polycarbonate. Attach the door hinges and hang the door in place.
Door
Step 14. The finished frame is coated with paint or wood impregnation in 2-3 layers. After drying, seal the cracks where dirt and pests can accumulate. For this purpose, you can use frost-resistant wood sealant.
Wood sealant
Step 15. Cover the remaining parts of the greenhouse with film or polycarbonate. When using film, it is attached through a lath or thick tape to self-tapping screws or small nails. First, the sides of the greenhouse are sheathed, then the ends, and lastly the roof. Excess film is carefully trimmed and glued with tape so that it does not fray in the wind.
Cellular polycarbonate is arranged vertically with internal cells for unimpeded drainage of condensate. The ends are treated with sealing tape and end profiles are put on. Vertically, the sheets are connected using connecting profiles.
General form
Note! It is advisable to equip one or more transoms with an automatic ventilation system. It will protect cucumbers from severe overheating on hot days.
Wood sealant prices
wood sealant
Arrangement of beds
Cucumbers love loose, fertile, well-heated soil with a lot of organic matter, so it is recommended to arrange warm beds with bioheating in a cucumber greenhouse. They are easy to make.
Mark the beds using pegs and twine. Remove the soil using a spade and temporarily remove it from the greenhouse. Install a box fence made of 50x150 mm boards, impregnated with an antiseptic and painted in two layers with any waterproof paint.
Box beds in a greenhouse
Fill the bottom of the trench with large garden debris - tree branches, logs, scraps of boards and bark. A layer of dry leaves, mown grass, tops or straw is placed on them.
Bed filled with dry leaves
All this is covered with cardboard or newspapers in several layers. Fill the box to the middle of the board with compost with the addition of mineral fertilizers and ash. The soil taken out of the trench is poured on top, after selecting the weeds from it.
Cardboard and fertile soil on top of organic backfill
Water the beds with a solution of the drug “Baikal-EM-1” at a concentration of 50 ml per bucket. Solution temperature – +25°С. Consumption rate – 10 l per 1 m2. Cover the beds with dark spunbond or mulch with humus.
"Baikal-EM-1"
Mulch on the beds
After 5-10 days, the beds are ready for planting seedlings or cucumber seeds. During this time, the soil will warm up and the decomposition of the lower layers of organic matter will begin, so the bed will be warm even at night and during frosts.
Note! It is advisable to equip a greenhouse for cucumbers with drip irrigation; their superficial root system needs constant but moderate soil moisture.
Drip irrigation in a greenhouse
What should a greenhouse for cucumbers be like?
It is sometimes difficult to choose a suitable design from the entire variety of greenhouses. To do this, you need to know what conditions are necessary for this culture.
Greenhouses for cucumbers - basic requirements
Here are the basic requirements for growing cucumbers:
- air temperature 23-25°C during the day and 17-18°C at night;
- soil temperature is not less than 18°C and not more than 35°C;
- humidity 75-80%;
- greenhouse height is at least 0.7 m;
- area per bush – at least 0.3 m2.
The width of the greenhouse should provide convenient access to each plant - cucumbers must be pinched and shaped in a timely manner, as well as green herbs must be collected regularly. For bee-pollinated varieties and hybrids, the greenhouse must have a convenient ventilation system, otherwise insects will not be able to penetrate the flowers.
Bee-pollinated varieties are planted in greenhouses with a ventilation system
The greenhouse frame can be made of the following materials:
- wood - boards and bars;
- profile metal pipe;
- galvanized profile;
- plastic arches from pipes;
- metal arcs made of wire in PVC insulation.
The strength and shape of the greenhouse, as well as its manufacturing technology, depend on the material of the frame. It is also necessary to coordinate the frame material and coating. For example, it is impossible to firmly fix polycarbonate on wire arches - they use a film or covering material. Glazed greenhouses are made mainly from wooden blocks or ready-made frames.
The choice of greenhouse covering largely depends on the region. For areas with a warm climate, it is enough to protect cucumbers from spring return colds and frosts. During the southern summer, they do not need to be covered at all, just a little shade from the scorching sun is enough. Medium density covering material is best suited for this purpose.
Greenhouse under covering material
In areas with a temperate climate, film, dense covering material or polycarbonate is used - they provide thermal insulation on cold nights and protect plants from wind and rain.
Greenhouse under film
In northern regions, a single layer of film or covering material may not be enough, especially in May and August. As a result, the fruiting period is shortened and the yield is significantly reduced. In this case, it is better to use glazed frames, polycarbonate or double film.
Greenhouse with glass frames
Briefly about the main thing
Homemade greenhouses in the country are more common than ready-made ones, since making a greenhouse for cucumbers with your own hands is much cheaper. To do this, you can use boards, window frames, leftover plastic pipes and other materials available on the farm, and cover the frame with cheap film or spunbond. The easiest way is to build a shelter from flexible pipes, installing arcs on the bed, or from wooden blocks, connecting them in pairs with a hut. Film coating is simple and inexpensive. If you want to build a permanent greenhouse, you need to build a reliable foundation and install old frames with glass or a metal frame covered with polycarbonate on it.
Instructions: how to make a greenhouse?
Before you make a greenhouse for cucumbers, you first need to decide on a location. The location of the future greenhouse must meet the following requirements:
- if you decide to make a greenhouse for cucumbers with your own hands, then make sure that there is no shadow from trees or buildings in the area;
- the place should be, if not elevated, then at least not lowland (low areas do not warm up well in the first half of summer, which negatively affects the quality of vegetables and their quantity);
- absence of constant strong winds.
Photo of a greenhouse made by yourself
Expert opinion Kazimov Azhar Askhatovich, summer resident-designer
If you place a greenhouse in a place where there is no wind, the covering material will constantly deform, as a result of which the structure will lose its correct shape. Air circulation will deteriorate and a lot of moisture will penetrate. The result is sad - productivity will fall, and materials will become unusable.
After choosing a location, we mark the future bed. This is necessary only for those cases when there is no ready-made “dig” yet. First you need to determine its dimensions:
- no more than six meters in length (if it is more, the greenhouse will lose stability, the consequences of this are discussed above);
- the width is within one and a half meters, but not less than 90 centimeters (if there is too much, then, again, the structure will quickly lose its shape; too small a width will lead to cramped plants).
Once the measurements and markings are complete, we begin digging. Try not to deviate from the planned dimensions; if the bed is uneven, it will be very difficult to install arches and stretch covering material over them.
Once you have dug up, measure the resulting bed again. If size correction is not required, then purchase materials taking into account the resulting figures
Pay special attention to the arcs:
- Plastic “tubes” are inexpensive, but by the next summer season they will most likely fail. In addition, they get too hot in the sun, which leads to damage to the film.
- Metal arcs are more durable and reliable than plastic, however, they also tend to heat up. Keep in mind that in 2-3 years they will rust and you will no longer be able to use such arcs.
- “Metal in plastic” is the best option. They are metal tubes coated with polymer. Durable, reliable, low heat.
- Making a wooden greenhouse for cucumbers is often for 1-2 seasons, but it’s up to you.
After purchasing materials, we begin installation. Arcs are placed every meter. More often it is pointless, less often the greenhouse will sag and will not have a positive effect on the crop.
Next, the film is stretched over the arcs. It should fit very tightly to the frame and be taut, not draped over. Otherwise, the material will sag and the cucumbers will die from cold and dryness. Don't forget to leave 30-40 centimeters of covering material to secure the film to the ground.
There are special pegs for fastening, which are freely sold in all “theme” stores, but is it worth spending the extra money? There is an interesting scheme for securing the film with improvised materials:
- on one side we press the film with wide and long boards, leaving everything unchanged until the end of the summer season;
- on the other hand, we press the “cover” with bricks or stones, leaving the opportunity to lift the film for watering and ventilating the greenhouse;
- We press the PVC at the ends with two bricks, again making it possible to ventilate the structure.
That's it, essentially the greenhouse for cucumbers is ready! All that remains is to plant seedlings in the garden and wait for a rich harvest.
If you make a greenhouse for cucumbers correctly, the harvest of cucumbers will impress even the most experienced summer residents. Remember that if you are interested in growing vegetables for sale, then a greenhouse is not enough; you need a greenhouse. But if dacha “production” is aimed only at satisfying family needs, then this small building will be just right for you!
I would like to add that making a greenhouse yourself is so easy that there is no difference between the questions “how to make a greenhouse yourself?” or “how to make a greenhouse yourself?”
Photo of a homemade greenhouse
Preparing filler for a warm bed
Beds using biological materials are the most environmentally friendly and at the same time economical. To warm the soil in such a bed, there are no costs for their construction and maintenance.
In addition to the thermal effect, this option enriches the soil with nutrients and carbon dioxide. Plants are in warm soil and receive enough nutrition. At the same time, they become resistant to diseases.
The ideal filler for the garden bed is a layer of rotted manure. Various plant residues, foliage, and trimmed branches are mixed into it.
If there is no manure, freshly cut grass mixed with food waste and potato peelings can serve as a filler.
You can fill the bed with straw bales, which are watered with a solution of chicken manure or Baikal fertilizer.
Last year's tops mixed with fresh humus can also be planted in the garden bed in the fall.
Compost bed
The traditional compost heap, created on the surface, has a large number of disadvantages. It is laid in a fairly high layer in the fall and freezes through in the winter. In frozen layers, the rotting process does not occur, which means that decomposition does not occur and the summer resident does not receive ready-made compost by spring.
In addition, such a high layer will thaw in the spring later than it will be necessary to use compost. Another disadvantage of such a heap is its maintenance in the summer.
The unpleasant appearance and smell, periodically watered with slops, causes a lot of unpleasant sensations. Flies fly over the heap, maggots begin to crawl along the edge, this phenomenon causes a lot of inconvenience not only to you, but also to your neighbors in the area.
An expedient way to prepare this biofuel is to create a compost trench bed. It is dug to a depth of 40 centimeters, the top layer is deposited, and the hole is filled with plant debris. In autumn, falling leaves are placed in the same trench.
To start the fermentation processes, the vegetable compost filler is spilled with slurry or grass infusion. The surface of the trench can be covered with roofing felt or a piece of linoleum. It is better to place them on poles for air access.
In winter, the compost trench is filled with a layer of sawdust and covered with a layer of snow to avoid severe freezing.
In the spring, the trench becomes a source of effective biofuel for laying in a warm bed.
Leaf compost
Fallen leaves are an excellent material for creating compost - biofuel. To obtain compost in a greenhouse to generate heat, you can use two options:
- Compost pile of leaves for heating a greenhouse. .
The foliage is laid on the surface of the soil, and a certain amount of ready-made compost is added to it to start the decomposition process. The top of the pile is covered with straw or bags. This is necessary so that the foliage does not dry out, but rot. The compost preparation process takes place over two years. The pile is periodically watered. - compost pit. To make it, a hole two meters wide and 30-40 centimeters deep is dug in the ground. The bottom is covered with film or roofing felt.
Fallen leaves are laid in layers, each of which is spilled with a solution of saltpeter and sprinkled with a small amount of turf soil. The next layer is shed with slurry.This is followed by a layer of caustic soda. Next, a layer of foliage is laid, sprinkled with wood ash. This sandwich is covered with straw on top, and then with turf, with the grass laid down.
After a month, the pit must be loosened to allow oxygen to enter and all layers to be mixed.
REFERENCE. The use of plant waste and branches as a filler for warm beds solves the problem of recycling plant waste on the site. Instead of simply being destroyed, they will serve as fuel and at the same time fertilizer for other plants.
Types of structures
Greenhouses for growing cucumbers should provide maximum heat, but at the same time have the possibility of ventilation. It is advisable to purchase or build spacious structures with wide passages to make caring for plants easier.
Greenhouses for cucumbers should be high, so as not to interfere with the development of long cucumber vines.
The size of the structure can be different; for industrial cultivation, structures with an area of 100 square meters are built. m or more, in small garden plots mini-greenhouses from 20 to 50 sq. m. are practical. m. Read more about making greenhouses with your own hands on our website.
Among the most common designs, the following types of greenhouses for cucumbers can be distinguished:
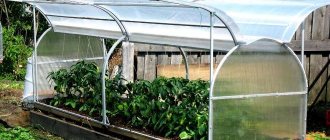
- arc greenhouse under film;
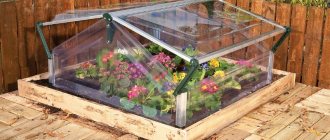
- butterfly greenhouse;
- wall greenhouse;
- greenhouse made of polycarbonate.
Arc greenhouse
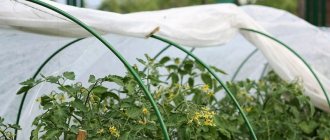
The simplest design that is easy to build with your own hands. Arcs made of a thick metal rod are dug into the ground, then they are covered with durable plastic film.
Along the edges the film is fixed with bricks. The structure is very mobile, it can be installed in any corner of the site. A greenhouse can have not only an arc frame, but also straight supports that create the appearance of a hut.
The design is very easy to use. You can ventilate the greenhouse by lifting one half of the film and fixing it with clothespins. The greenhouse is used for several years in a row, the film is washed and dried every season, and replaced if necessary.
Greenhouses for cucumbers, photos, see below:
Butterfly greenhouse
Simple and easy to use design. This type of greenhouse can be purchased ready-made and can be easily installed with your own hands. The butterfly has two folding flaps, and the design itself resembles an elongated house.
To ventilate or care for plants, you can fold back one or both doors, securing them with a support. There are designs of different sizes and heights on sale. Such greenhouses can be used for cucumbers and tomatoes, as well as planting peppers, eggplants and flower seedlings.
Wall-mounted
A wall-mounted greenhouse for cucumbers is erected next to a house, summer kitchen, barn or other building. It is best to do it on a wooden frame or metal frame. The wall of the building protects the greenhouse from gusts of wind; the plants do not need heating, developing well from early spring to late autumn.
When finished, the structure resembles a small house or a closet; the depth may vary. It is better to make the roof of a wall-mounted greenhouse pitched so that snow does not linger on it.
Polycarbonate greenhouses
The most convenient and modern design. They can be arched or sloped; industrial cellular polycarbonate with a thickness of at least 4 mm is used for production.
Polycarbonate structures are equipped with 1 or 2 doors, as well as vents for ventilation. In large structures, you can grow various crops, separating them with screens made of film or other materials.
Finished polycarbonate structures have lightweight prefabricated metal frames with anti-corrosion coating. They are durable and do not suffer from weather fluctuations. A high-quality greenhouse does not need to be disassembled at the end of the season; snow or frost do not damage them. The winter greenhouse for cucumbers must be supplemented with a heating system, turning it into a full-fledged year-round greenhouse.
