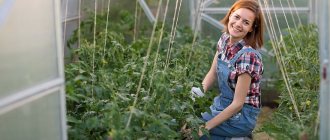
Why do you need a greenhouse at your dacha? It helps to grow seedlings. Under cover, the first harvest of vegetables and herbs ripens faster, and the last one can be obtained later. And the harvests themselves in greenhouse conditions are more abundant than in open ground.
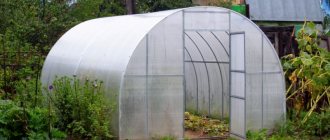
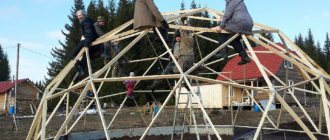
The dream of many summer residents is their own greenhouse. However, the area of the plot does not always allow the placement of a large, spacious structure on the territory. For such situations, compact versions of greenhouses have been created, which, however, cope with their purpose no worse than their full-size counterparts. We have selected 5 greenhouse options for you - different in price, size and covering material.
- Where to install a greenhouse on the site
Is it possible to install a greenhouse on a standard plot of 6 acres? Quite if you take into account all the necessary factors.
Polycarbonate - the optimal combination of price/quality
A small polycarbonate greenhouse is a compact and lightweight structure in which you can grow different types of vegetables and flowers. Limitations on the choice can only be imposed by the properties of the soil or the special severity of the climate, which is difficult to compensate for with heating and additional care.
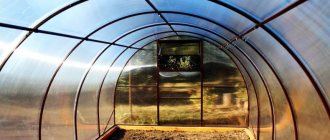
Cellular polycarbonate is an excellent choice for greenhouses of any size and purpose. This is a two-layer material with specially ordered cells inside.
Polycarbonate is much stronger than the usual, easily torn film, much lighter than glass, and bends well, which allows you to effortlessly give it an arched shape.
Even a small greenhouse made of this material has no less high-quality thermal insulation than expensive greenhouse frames with double glazing.
Due to its aesthetic appearance and ease of installation, it can be used not only at the dacha, but also in the garden of a private house, where flowers rare for this or that time of year can delight guests and owners.
The greenhouse preserves the set temperature and humidity level from the influence of the sun or frost during the day, while continuing to protect the plants in the greenhouse at night. This significantly improves the survival rate of the most delicate seedlings in soil that has not yet fully awakened in early spring.
Top 5 DIY mini-greenhouse projects with step-by-step photos
You can come up with many options for shelters for plants yourself from scrap materials. Let's look at the best projects.
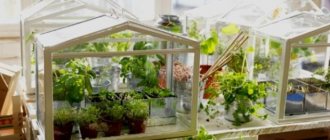
DIY greenhouse made from picture frames on a windowsill
Step-by-step process for making a home greenhouse:
| Illustration | Step by Step Actions |
| Source: www.countryliving.com | Four frames should be large, and the rest should be smaller. When choosing the length and width, you need to take into account that the dimensions of the first 4 should be such that they can be used to assemble a box. It will house greenhouse plants. Small frames serve as a roof. Therefore, their long side should be equal to 1/2 the length of the large frames. |
| Source: www.countryliving.com | We fasten the large frames with the middle two screws at the top and bottom. |
| Source: www.countryliving.com | Then we connect the others so that a box is formed. |
| Source: www.countryliving.com | From the small remaining frames we make a gable roof. Its sides can be fastened with metal corners. |
| Source: www.countryliving.com | We fasten the roof and box with hinges. |
| Source: www.countryliving.com | From plywood or a piece of board we cut out 2 triangles that will fit into the voids at the top of the structure. |
| We insert them and fasten them with screws to the structure. |
| Source: www.countryliving.com | We paint the resulting structure. |
| When the paint dries, coat the gutters for inserting glass with hot glue and place the glass there. |
| After opening the lid, place your plants there, place the mini-greenhouse on a sunny window. |
Do-it-yourself portable version of a mini-greenhouse with step-by-step photos
To make it you will need lumber, screws, glass or polycarbonate, canopies and a handle.
Step by step steps:
| Illustration | Step by Step Actions |
| Make a small box without a bottom from the boards with a sloping roof. Those. one side should be higher and the other lower. The roof will be sloped. | |
| Make a wooden frame for the lid. Insert a sheet of polycarbonate or glass, you can use old window frames. | |
| Secure the lid to the top of the structure on the high side. | |
| Make a support for it from a block. You can attach a handle for easy opening/closing. |
Helpful information! The greenhouse can be made entirely of glass or polycarbonate, then more light will penetrate inside.
Do-it-yourself greenhouse rack for a window with step-by-step photos
This greenhouse for plants is best placed on a south or south-east window sill.
Before you begin its construction, you need to carry out preparatory work:
- wash the glass so that natural light penetrates better;
- seal all the cracks to prevent a draft from coming in;
- Insulate the window with double glass if necessary.
Step by step steps:
| Illustration | Step by Step Actions |
| Measure the depth, length, height of the window opening. Buy boards that are suitable in size and build a rack from them. The shelves should be 40-60 cm apart from each other. | |
| Insulate all sides with polyethylene film. | |
| Do not secure the top shelf so that it opens. Don't forget about lighting seedlings and flowers. |
Attention! When choosing a material for making a greenhouse rack, you need to choose one that does not have signs of decay or insect damage.
Do-it-yourself arched mini-greenhouse for the street with step-by-step photos
Phased construction:
| Illustration | Step by Step Actions |
| Buy or make arcs from plastic or metal. Their number depends on the planned length of the greenhouse (taking into account that the distance between them will be 40 cm). | |
| Drive them into the soil to a depth of 30 cm. If the soil is too soft, deepen them to a denser layer. | |
| Connect the arcs with wire and slats. | |
| Cover with plastic wrap. On one side, secure it with clamps or wire, on the other, attach a wooden strip that will help open/close the greenhouse. | |
| Cover the ends with separate pieces of polyethylene or take a longer main film to simply lower its ends. | |
| If you take spunbond, you can simply cover all the arches without providing for ventilation. Secure the covering material with stones or bricks. |
For reference! It is advisable to take new polyethylene, because last year’s one transmits light worse and can be deformed.
In the video they make a similar greenhouse, we recommend watching it:
We recommend reading the article on how to make a greenhouse for cucumbers with your own hands. We analyze different options and also choose what is better for cucumbers: a greenhouse or a greenhouse.
Do-it-yourself mini-greenhouse for the balcony
What it will need:
- plastic or wooden container;
- wire arches;
- polyethylene film.
Step by step process:
- Place polyethylene inside the container to seal it.
- Attach 2-3 arcs to it in any way.
- Make a case from film.
- Fill the container with soil or arrange the pots.
- Place 1-2 bottles of water to create optimal humidity.
- Cover with film or film cover.
Such a greenhouse will not only be an excellent shelter for seedlings of cucumbers, peppers, tomatoes, etc., but will also serve a decorative function.
Pros that outweigh everything
Like any design, a small polycarbonate greenhouse has positive and negative sides. The advantages are as follows:
- easy and simple installation of the structure;
- high thermal insulation;
- excellent light transmission (at least 92%) and uniform light dispersion;
- protection of the plant from ultraviolet radiation due to the presence of a special coating;
- the strength of the material (200 times greater than that of glass) and the ability to withstand mechanical loads;
- polycarbonate is resistant to aggressive environments and provides plants with good protection from acid rain;
- Due to the light weight of the coating (it is 16 times lighter than glass), the cost of manufacturing the supporting part of the structure is reduced.
Perhaps this is the ideal material, thanks to which, with a little effort and common sense, any novice gardener can grow almost anything on his plot.
But the world is not yet as perfect as everyone would like, so greenhouses made of cellular polycarbonate must have their drawbacks.
Convenient small greenhouses
A greenhouse is a small greenhouse in which the gardener is located on the outside of the structure.
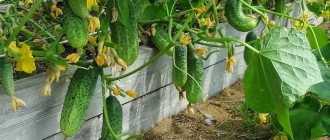
The following crops are grown in the greenhouse:
- Cucumber;
- Zucchini;
- Leaf lettuce;
- Greenery;
- Radish et al.
In a small greenhouse you can grow any vegetables that do not require great height to grow. Usually this is a small pit, which is dug in the soil to a depth of approximately 70 cm, and if groundwater is close, the depth may be less. In this case, the pit is dug to a depth of 35 cm and the height of the structure is increased to 70 cm with the removed soil.
A wooden harness is placed on top of the soil, the thickness of which is 10-15 cm. The harness can be made from logs soaked in hot drying oil. Wood with impregnation will be able to contact the soil for more than one year. The piping is arranged with a slight slope, due to which water will drain from the surface that covers the structure.
Since we are talking about a greenhouse that will be covered with cellular polycarbonate, the dimensions of the structure must be made based on the standard size of sheets of building materials, their economical use and the comfort of construction. It is good to edge frames with wooden planks or metal profiles. They may or may not be removable.
The traditional “sandwich”, starting from the bottom of the pit, consists of a layer of sawdust 3-4 cm thick, a layer of manure placed on top and soil mixed with peat poured on top. And a greenhouse will look very similar to a small greenhouse if it is built in the form of a box placed on the surface of the ground.
Cons to consider
Speaking of disadvantages, it should be noted that polycarbonate is less protected from external influences than glass, although it reflects ultraviolet radiation, thereby protecting plants from drying out in the sun.
However, here are the design disadvantages of cellular polycarbonate:
- the edges of the material should not be open, as moisture or insects can penetrate its internal “honeycombs”, which will lead to the appearance of mold or other fungi, as well as deterioration in performance properties and the circulation of greenhouse gases;
- it is necessary to very carefully clean the sheets from which the greenhouse is made from dust and dirt with soft cloths and neutral cleaning agents;
- products containing salt, alkaline, ether and chloride components should not interact with polycarbonate;
- It is strictly prohibited to use abrasive materials and sharp objects to avoid damaging the ultraviolet protection layer.
The difference between a greenhouse and a greenhouse
Assembling a greenhouse: how to assemble a Kinovsky greenhouse, instructions and video, do-it-yourself photos, summer resident and hero
Many summer residents and owners of private houses do not share the concepts of greenhouse and greenhouse. In fact, the two specified structures are not the same thing at all. To understand what their differences are, you need to give basic definitions. Thus, a greenhouse is a compact, mobile structure without heating, which is intended for growing seedlings and protecting them from various kinds of negative external factors. Subsequently, the grown plantings leave the greenhouse and are transplanted directly into open ground.
A greenhouse is a heated structure in which it is possible to organize the growth of crops throughout the year, from planting seeds to direct harvesting.
And now we should look in detail at what exactly is the difference between a greenhouse and a greenhouse.
- A greenhouse differs from a greenhouse in that it has a more thoughtful and complicated structure. The building itself should be stronger and more reliable.
- In many cases, greenhouses are placed on a foundation and equipped with walls and a roof. Greenhouses do not need a foundation, and their design is simpler.
- A greenhouse is a mobile product of small size, while greenhouses can be both small and quite large, and moving them from place to place is much more problematic.
- The greenhouse absorbs heat using the greenhouse effect (involving the sun's rays) and biological fuel buried in the soil, that is, manure or compost. The greenhouse can be heated not only by sunlight, but also by water or steam heating, as well as an electric heater.
- The greenhouse is not designed for the entire crop growth cycle. In most situations, such a structure is reserved exclusively for growing greenery and seedlings with their further movement into open soil. In addition, a greenhouse can only protect plants from minor frosts. A greenhouse, especially a well-heated one, can become a longer-lasting shelter for plants. They can grow in such conditions and bear fruit all year round, and they will not be afraid of severe frosts.
As you can see, there is a lot in common between a greenhouse and a greenhouse, but there are also plenty of differences, so you should not confuse these structures.
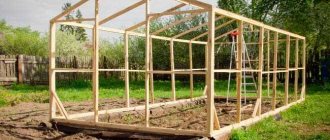
Ready-made or self-assembled
Of course, ordering and assembling a small greenhouse according to the instructions is easier than understanding how to prepare the materials to create a new home for future plants, arrange them correctly, organize a suitable climate inside, and not make mistakes in the calculations.
It’s especially disappointing if the greenhouse, made with your own hands and with love for the crops grown, failed and the plants died.
In the ready-made version, there is much less chance of such a situation arising, although if the instructions are not followed correctly, the green pets being raised can die even in the most expensive ready-made greenhouse.
Attentiveness, a calculator and as much information as possible, now available on the Internet - then the decision to build a small greenhouse will be justified, and a transparent house for plants, assembled with your own hands, will become their cozy refuge in the cold or hot season.
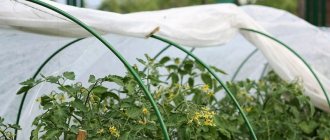
A simple greenhouse made of arcs under film or spunbond
This greenhouse is made of several boards, knocked down to the required dimensions, arcs of PVC pipes, which are attached to a wooden base. The tops of these arcs are connected at the top by a beam or the same pipe. If it is a timber, it needs to be well processed, rounding the edges so that the film does not tear.
A simple greenhouse made of boards and PVC arches
How to secure the arches
How to attach arcs of PVC pipes to a greenhouse frame. They are most often secured using metal perforated tape. Take a small piece of it about 5-6 centimeters, screws and a screwdriver. And they are secured on both sides. To be on the safe side, you can do it twice.
This fastening can be repeated twice
In exactly the same way, you can fasten them from the inside to hold them tighter by adding bars.
The greenhouse arcs are fixed inside the frame
Another option: drive in pieces of reinforcement near the frame, place pipes on them and only then secure them with clamps to the frame boards. This option is more reliable.
How to attach the film
You can attach the film to PVC pipes using double-sided tape. But only if inexpensive polyethylene film was used: it is impossible to tear it off without damaging it, and polyethylene lasts no more than a year. So for a seasonal greenhouse this is a “cheap and cheerful” option. The second method is special clips for fixing films and anything that can replace them - a piece of an old hose cut lengthwise, a clamp for pipes that are used for installing pipelines, office binders, etc.
How else can you fix the film on the meadows of a greenhouse or greenhouse?
It also makes sense to secure a block on both sides along the edges of the film. To do this, the film is cut to a length greater than necessary, a block is wrapped in the excess and the film is secured to it. Now you have a piece of film with bars attached to its short sides. Leave one on one side, throw the second on the other. Now you don’t need to press the film to the ground with stones: the block holds it well. It is also convenient to open the greenhouse for ventilation; wrap the film and place it on top.
A block wrapped around the edges of the film makes the work easier
You can use small nails to attach the film, but place washers under the caps. It is faster to work with a construction stapler with staples. To prevent the film from tearing at the attachment points, it is padded with something. You can use thick braid or just a strip of fabric, and hammer fasteners into it.
Methods of attaching the film to the bar and to the arcs
More powerful option
If there is a need to make a greenhouse with PVC arches more reliable, wooden posts are nailed to the board base in the center of the short side. A board is attached to them on the edge, in which holes are pre-drilled with a diameter larger than the outer diameter of the pipes.
This greenhouse can be used not only for growing peppers or eggplants. Having grown the side posts if necessary, you can tie up cucumbers or tomatoes
During installation, the pipe is threaded through the hole. You can fasten it on the sides as suggested above, or you can do it another way: first install pins in the bars and put the pipe on them.
How to secure a longitudinal beam in racks
The simplest greenhouse
The good thing about PVC pipes is that they are easy to bend. Also because they weigh little. An ideal option for a lightweight, portable greenhouse, especially if combined with spunbond. This material can be sewn. Take a piece with a density of 30 kg/m2 and make drawstrings in it in increments of 50-60 cm. For the drawstring, stitch across a strip of the same material about 10 cm wide (it is stitched on both sides). Insert pipes cut into the required lengths inside.
This is what you should get: a covering material with arches threaded through the drawstrings
Now all this can be installed on the bed: stick pegs in two rows on one side and the other of the bed, and place a pipe on them. You immediately get a ready-made greenhouse. And what’s more convenient: you open and close the plants simply by collecting or straightening the spunbond on the arc. This is a very convenient temporary greenhouse: as soon as it is not needed, it can be removed and folded in a couple of minutes.
Greenhouse - it couldn't be simpler
If the area is small
At home, there is usually no need to build a structure for growing anything of industrial size, but a greenhouse in a small area is quite within the capabilities of even a beginner.
This is especially true for compact gardens, where installing a huge purchased greenhouse seems to be a dubious and financially unjustifiable undertaking.
Usually a photo of a small greenhouse looks very touching if it is well-groomed, and inside there are small and defenseless flowers or vegetables grown, rather, “for the love of art.”
The main thing is to correctly imagine how this should be done and always use the rule “measure twice, cut once.”
Detailed instructions for assembling a small polycarbonate greenhouse with your own hands should be obtained only on specialized sites where issues of landscape design and construction in local areas are discussed.
Adviсe
The construction of a greenhouse on a summer cottage is considered a responsible undertaking that requires not only time, but also financial costs. In order for the structure to reliably serve for a long time, the assembly of the structure must be made of durable and high-quality material, and if you do not want to test yourself as a novice builder, then it is better to install products purchased ready-made. They do not need to be registered on the site. If you plan to build a large greenhouse with a foundation, then its location at the dacha is best coordinated with the relevant authorities and obtain permission for installation.
In addition, novice gardeners should take into account the following recommendations from experts.
- In small greenhouses it is better to form beds with central placement, and in rooms more than 2.5 m wide they can be given a place around the perimeter.
- In the case when it is planned to plant medium- and low-growing plants, it is not necessary to build a tall structure; the most important thing is that it must be placed from north to south.
- For “stepped” planting, you should choose lean-to structures.
- In large greenhouses, it is advisable to plant tall crops along the walls, and low-growing crops in the middle.
- In a gable building, you can install special shelving on the walls and grow tall plants.
- Arched structures are well suited for planting crops in beds, and their height should be selected depending on the size of the plants. Models with a rectangular shape are considered the best option.
- The hemispherical greenhouse is convenient for planting both medium- and low-growing crops. In the center of it you need to place a barrel of water, painted black, this way the container will heat up during the day and at night provide the room with optimal humidity and air temperature.
Glass House began its work in 2001 and successfully produces products that have no analogues throughout the world. Due to the fact that greenhouse frames are made of pre-treated metal, structures can last up to 30 years. As for the greenhouses of the Harvest House, they differ in design features, since they are produced according to individual drawings, taking into account the wishes of consumers. Gardeners noted their profiles’ resistance to corrosion, the possibility of additional assembly of sections and the installation of buildings without a foundation.
The models manufactured by Osnova HRT also received a lot of positive feedback. They are inexpensive and suitable for growing both vegetables and flowers. The legs of the structure are buried in the ground, and the arcs are simply fixed to each other at a distance of 65 cm using a fastening system. The outer covering is made of polycarbonate.
What you shouldn't forget
Growing in a greenhouse is not much different from growing outdoors, but there are some significant differences.
First of all, the roof of the greenhouse, in addition to protecting against cold and rain, limits air circulation. This means that you must manually ensure proper watering, maintain the required level of humidity, and properly ventilate the internal space to circulate greenhouse gases in the most favorable manner for the growing crop.
In summer, very high temperatures can arise inside the greenhouse; in this case, growing plants is only possible if the structure opens on the sides.
Despite the coating protecting them from damage from excess ultraviolet light, during the hottest times of the year it may be advisable to cover the greenhouse roof with shade netting in the event of particularly strong sunlight.
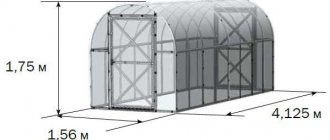
Greenhouse "Siberian Agronomist"
One of the most compact and inexpensive options is the Siberian Agronomist greenhouse. There are several options for greenhouses, the most economical being only 2 m long. There is room for such a design even in the smallest summer cottage.
The height of the greenhouse at its highest point reaches 1.85 m, so the average person can easily fit in it at full height. The width is 1.65 m, which will allow you to make two narrow beds with a passage in the middle. The shape of the greenhouse is arched, the distance between the arches is 1 m.
The frame of the Siberian Agronom greenhouse has increased rigidity; it is made of galvanized profile 0.8 mm thick. The rigidity of the structure is achieved through the use of bolted connections with self-tightening nuts. Two people can easily assemble the greenhouse; no special knowledge or skills are required. The structure does not require a foundation - you just need to dig metal legs into the ground. In this form - without shelter - the frame is able to withstand heavy wind and snow loads. The service life of the frame is 20 years.
The greenhouse awning is made from Reifenhöuser covering material. This coating, unlike polycarbonate and film, is breathable. For this reason, the main enemy of greenhouse plants, condensation, does not form inside. In addition, the greenhouse does not need to be ventilated.
The porous covering material also partially allows moisture to pass through, thereby reducing the amount of watering. On the contrary, it blocks the scorching rays of the sun, but at the same time the plants receive a sufficient amount of light.
Thanks to a special additive, the covering material does not deteriorate longer under the influence of UV rays. Its service life is 3-4 years, but the awning must be removed for the winter. It can be washed in a washing machine. When the shelter becomes unusable, it can be easily replaced: awnings are sold separately.
The price of the Siberian Agronomist greenhouse depends on its length and starts from 7,000 rubles.
Photo of a small greenhouse
Materials you will need
For the construction of small greenhouses, they are often limited in the choice of equipment and materials, using only what is available on the farm. In fact, it doesn’t hurt to buy new and sufficiently reliable structures so that even a small greenhouse is not afraid of the wind. In particular, to create this kind of building you will need:
- metal profiles (angles, beams, pipes);
- PVC materials (pipes of different diameters);
- wooden beams, boards, slabs;
- glazing and covering products (polycarbonate, thick film, window frames with glass).
Agronomists believe that when constructing a temporary structure, it is better to use agrofibre or polyethylene. They are quite dense, so they can save scatterings from frost in early spring.
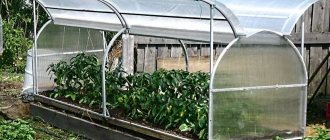
Greenhouse bread box with convenient access to plants Source vseteplicyspb.ru
On a note! If you plan to grow seedlings in greenhouses for further transplantation into the ground in the warm season, then the shelter must be solid (glass, polycarbonate). For parsley or radishes, a regular plastic sheet is sufficient.
Reinforced film is very convenient for use. It is not only securely attached to the greenhouse frame, but also has a high transmittance of sunlight. Such coatings are also suitable for stationary greenhouses, which are used to grow heat-loving crops from year to year.
A simple film will not be suitable for this purpose, because in winter, in windy weather, it will quickly become unusable. You'll have to buy a new one for next season.
Self-production of a film greenhouse
A greenhouse that is not inferior in functionality to commercially available ones can be made with your own hands.
Preparation of materials and sizing calculations
To create a balcony greenhouse you will need the following materials:
- aluminum, steel or metal-plastic pipe d 10-25.4 mm;
- mounting fasteners (sheet plastic 20-30 mm);
- bolts with nuts and washers – d 6-8 mm;
- polyethylene film (preferably reinforced);
- double sided tape;
- Velcro tape;
- plastic or metal grid for arranging shelves.
Plastic pipes for frame
Tools:
- metal saw;
- pipe cutter for m/p pipes;
- drill-driver;
- set of metal drills;
- file;
- screwdriver with a set of bits;
- retractable construction knife.
The dimensions of the greenhouse are chosen arbitrarily, taking into account the size of the balcony (loggia) and the expected number of seedlings that you are going to grow.
Considering the design of balconies, most of which have a parapet that blocks natural light, light film greenhouses should not be placed on the floor, but in such a way that the lower tier of plants is located at the level of the upper edge of the parapet. If you plan to place the greenhouse on the floor, you will definitely have to arrange additional lighting for the lower shelves.
Assembling a frame from pipes
Assembling a greenhouse on a balcony with your own hands is done from pre-prepared (cut to size) pipe sections. If metal pipes are used, it is convenient to use rectangles sawn from sheet plastic, 20x40x40 mm in size, with holes drilled at the ends equal to the diameter of the frame pipes as fastening elements. The ends of the pipes are inserted into the holes of the plastic fasteners and, if necessary, secured with short self-tapping screws.
Arch frame option
Diagram of a mini-greenhouse made of PVC pipes
The shelter is cut according to the assembled frame. Allowances should ensure free, effortless installation of the shelter on the frame and its easy removal.
Manufacturing and installation of the roof
The roof of the greenhouse for the balcony is made flat, since there is no threat of water accumulating on it after precipitation. Four strips corresponding to the width of the sides of the frame are cut out. Using double-sided tape, they are attached to the roof sheet on one side. The three panels are fixed together using double-sided tape.
Assembling the frame - step-by-step instructions
The front strip of the film is made folding. To do this, Velcro tape (the fleecy part) is glued to the sides with double-sided tape. Additionally, it should be secured with stitching on a sewing machine or using staples with a stationery stapler. In the same way, the second part of the Velcro tape with hooks is attached to the edges of the film sheets.
In the area of the roof, four ribbons are glued with tape to tie the rolled up front sheet of film during watering, weeding, and ventilation.
You can take a reduced diagram of a garden greenhouse as a basis.
In terms of its characteristics, a self-made structure will be in no way inferior to “industrial” greenhouses purchased in a store. Its big advantage will be its dimensions, taking into account the size of the balcony and the number of plants.
Homemade zipper cap
Features of a greenhouse for growing greens
In order to harvest a good harvest of fresh herbs in winter, you need to build a well-insulated greenhouse. The structure must stand on a solid foundation, 50–100 cm deep. In harsh regions, it is recommended to lay out the main wall from cinder blocks or beams.
Important! It is advisable to adjoin the northern side of the building to any other room in order to protect it from piercing winds.
The best covering for a winter greenhouse is polycarbonate. You can, of course, use glass or film as a cover, but they will not retain heat well. As for its roof, it should be pitched. This will protect the roof from snow accumulation and possible damage. The base of the frame is made of metal, which must be subjected to anti-corrosion treatment.
The main thing that the owner of a winter greenhouse should take care of is lighting and heating. Plants need to receive light for at least twelve hours, so winter daylight is not enough. You will have to take care of additional lighting. For such a procedure, you will need to stock up on fluorescent or special phytolamps.
Tender greens will not grow in an unheated greenhouse. Therefore, it is worth taking care of heating the building. You can install central heating by installing water radiators, or you can install potbelly stoves or fires in the building. It is also advisable to use infrared heaters.
Advantages
- The advantages of growing green crops in greenhouse conditions include:
- Ability to grow different types of plants at the same time.
- Growing safety: in closed conditions, access of pests to plants is minimal.
- Harvesting all year round.
- The ability to harvest even the most capricious and demanding varieties of greens.
- Variety of growing methods: plants can be placed on racks or used hydroponic or aeroponic methods. This saves valuable space.
- Ease of crop care.
Did you know? Greenhouse structures first appeared in Ancient Rome. They were considered ordinary carts, which were rolled out to sunny areas during the day, and placed in a specially equipped warm room at night.
Flaws
- A few disadvantages of growing greens in greenhouse conditions include:
- The high price of a properly equipped building.
- Large costs for heating, watering, lighting and structural repairs in winter.
- Regular soil replacement. If crops are grown in a greenhouse all year round, then the substrate must be changed every 3-4 months.
- In closed conditions, you will have to add much more fertilizer to the soil.
Many gardeners are primarily concerned with the question of how to plant and what types of greens in the greenhouse in winter. Winter planting is no different from spring or summer planting. As for the types of crops, in greenhouse conditions it is effective to grow varieties whose growing season does not last long and also have good taste. If plants are grown for industrial purposes, then it is worth focusing on their market demand. Experienced gardeners recommend growing dill, parsley, lettuce, green onions, mint, and cilantro in greenhouse conditions.
Did you know? The Dutch install greenhouses on geysers. Therefore, the constant companions of greenhouses in the country are swimming pools filled with hot water.