Set of socks, Omsa socks
349 ₽ More details
Set of socks, Omsa socks
349 ₽ More details
Baths of Monaco
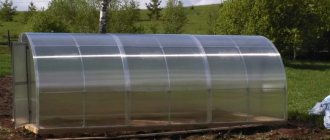
Since many people have garden plots and summer cottages, entrepreneurs have launched the production of prefabricated greenhouses. One of the most popular models was the “Maria Deluxe” model, in the creation of which the engineers used a special approach. From the article you will learn how to assemble the Maria Deluxe polycarbonate greenhouse.
Features of the reinforced greenhouse Maria Deluxe
Some summer residents who have not previously worked with greenhouses may be asking questions: Maria Deluxe reinforced greenhouse - what is it? Is there a real need for it?
The design of the Maria Deluxe model is specially thought out for people - even a gardener who has never dealt with greenhouses can handle its assembly without unnecessary hassle. But you can be completely sure that the seedlings will not die in any form of bad weather, because this greenhouse is endowed with an excellent level of heat retention and is ideal for harsh climates.
The structure itself consists of a frame and covering material. The frame is made of metal profiles that are connected using clamps. Cellular polycarbonate is used for the covering - the most popular material used for covering greenhouses for the winter.
Thanks to the material and shape of the greenhouse, the metal profile has increased resistance to strong wind, rain and snow. And the polymer coating of the frame protects it from corrosion. Polycarbonate, among other things, has the ability to withstand severe weather and heavy loads.
The diameter of the metal profile is 2 centimeters. Despite its relatively small size, the frame of the Maria Deluxe greenhouse can easily withstand wind gusts exceeding 20 meters per second or withstand a layer of snow weighing up to 40 kilograms per “square”.
The standard parameters of the greenhouse are:
- height – 2.1 m;
- width – 3 m;
- length – 4.6 or 8 m.
https://youtu.be/https://www.youtube.com/watch?v=0KrI6KfTnQQ
_
Advantages and disadvantages
Two types of greenhouses of this model are produced: “Maria” and “Maria Deluxe”. The second option is preferable because:
- the frame is made of durable steel profile with a rectangular section of 20x30 mm to enhance strength and a thickness of 1.5 mm;
- All parts are galvanized - the structure is rust-resistant.
Dimensions of both greenhouses: 2x3x4 m. Although the structure can be extended, for which special inserts are used. The distance between the profile arcs of “Maria Deluxe” has been increased to a whole meter. Usable area – 4 sq. m.
The frame of the Maria Deluxe greenhouse is made of metal, which in turn increases the strength of the structure
Let's name the main advantages of the greenhouse:
- Any ventilation and watering option is suitable.
- If necessary, you can replace individual parts without completely dismantling the structure.
- The wall and foundation fastening system is designed for strong gusts of wind (up to 40 m/s), temperature fluctuations and high humidity (snow load up to 3 kg/sq. m).
- Easy to install, easy to operate.
In other models of polycarbonate greenhouses, the buyer has to choose: durable options are expensive, cheap ones do not have the desired strength.
This design offers “two in one”, while the manufacturer guarantees at least 7–8 years of normal operation if all operating precautions are followed.
The manufacturer of Maria Deluxe guarantees 8 years of normal operation with proper use
And yet, although profile pipes have sufficient strength, it is always recommended to clear snow from the roof. If the greenhouse is not used in winter, it is better to remove the polycarbonate covering.
Advantages of the Maria Deluxe greenhouse
The design has many advantages, among which the following points can be particularly highlighted:
- If necessary, the greenhouse can be moved to another area.
- The finished greenhouse looks beautiful and therefore will easily fit into any site design.
- If you follow all the instructions, you can easily assemble the greenhouse yourself.
- Due to the strong fastening of the coating, the soil warms up faster, which means that vegetables can be planted earlier than expected.
- Non-monolithic nature makes the frame more flexible, which prevents damage.
- Precipitation will not accumulate on the surface of the structure.
- The dimensional parameters of the greenhouse allow a person to go inside and take care of the plants with his own hands.
Among the shortcomings, the only one that stands out is the long assembly process. But if you strictly follow the instructions, there will be no problems. So, how to assemble a reinforced model of the Maria Deluxe greenhouse step by step and without errors with your own hands?
Assembly technology for the “Maria” greenhouse
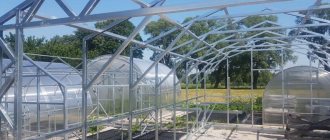
The frame of these greenhouses is completely dismountable, consists of arched and straight elements and is assembled with strong bolts. When disassembled, “Maria” easily fits into the trunk of a regular passenger car - it is not difficult to transport and move from place to place.
And this is one of the most valuable advantages of this greenhouse - it is very easy to assemble and disassemble: if you call specialists, then four to five hours will be enough. But you can do everything with your own hands - in a day, if you take with you the following tools: a mallet, a 10 and 8 wrench, a knife with a retractable blade and a screwdriver.
Installation instructions
The store-bought kit includes:
- bolts and fastening parts;
- metal frame - arched and straight profile pipes;
- polycarbonate roll - standard panel size 6 by 2.1 meters.
Large vehicles are required for transportation. For example, a minibus. If necessary, the finished greenhouse can also be easily disassembled and then moved to a new site.
To assemble the structure you will need:
- set of wrenches;
- set of drills;
- knife;
- pliers;
- roulette;
- screwdriver
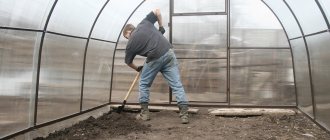
Foundation
First of all, a completely flat area is required for installation. Do-it-yourself assembly technology does not require a foundation. It is enough to use special supports that are driven directly into the soil. But if moving the greenhouse is not planned and it is installed for a long period of time, experts advise making a reliable foundation. It can be concrete, wood or brick.
If you decide to mount directly on the ground, experts recommend strengthening the supports with wooden blocks. This will make the support more stable. Impregnation with an antiseptic will protect the wood from rotting and drying out.
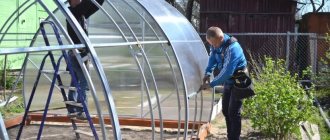
Ideally, two people will be needed to assemble the greenhouse. One should hold the frame and material, and the second should secure the clamps.
Frame
The greenhouse frame is assembled in strict sequence:
- It is necessary to take measurements using a tape measure to mark points for supports. The step between the arcs should be 1 meter.
- Parts and fastenings must be unpacked and laid out around the perimeter of the base or along an already prepared foundation.
- During installation, the lower beams and lintels are connected with self-tapping screws and three-sided brackets. When attaching the base to the foundation, the screws should not be screwed all the way. You need to leave about a centimeter so that you can later align the structure during assembly.
- Next, the mounting clamps and end elements are installed. On the lower beams, using a marker, it will be convenient to mark points for securing the arches, and then install connecting clamps in them.
- The longitudinal beams and arches are combined using fasteners, and three-sided clamps are placed on the base, after which the end sides are installed in them.
- The main frame is being assembled. Brackets are mounted at the points where the arcs are located. The frame arcs must be inserted into them and secured with bolts.
- The last step is to install the upper longitudinal beams using cross-shaped brackets. These fasteners secure arches, floors and beams.
Having fixed all the parts, you need to independently check the fastenings for strength and make sure that the greenhouse has not tilted and remains standing in place. A visual installation video will help you better understand certain points.
https://youtu.be/https://www.youtube.com/watch?v=4bR9J1FAJrA
_
To prevent distortion of the structure during the assembly process, it is advisable to check the quality of the connections after each completed item using a building level in order to immediately correct the slightest defects “hot on the heels”. Curvatures in the frame will make the greenhouse unstable and complicate the opening of the door and vents, causing gaps to appear. Only after making sure that the frame is assembled smoothly can you fully tighten the screws at the base of the greenhouse. Frame diagram is attached.
Characteristics and Features
The kit is a strong frame that can withstand the most adverse weather conditions. The structure is made of lightweight materials, making it easy to assemble on site according to the instructions. The finished greenhouse has:
- base made of light wood, reducing the overall load on the ground;
Thanks to its wooden base, Maria Deluxe has minimal load on the ground
- sloping roof - one side is curved into an arch to prevent precipitation from accumulating, the opposite side rises above the base at an angle of 90°, which is convenient for planting plants directly next to the wall;
- two doors and windows on both sides for convenient watering and ventilation.
The structure is sheathed with lightweight polycarbonate. The individual parts are connected by wear-resistant plates equipped with bolts.
How to care for the Maria Deluxe greenhouse
Assembling a greenhouse is not difficult. Many summer residents are only looking for advice on how to properly assemble a greenhouse, but practice shows that with further use, errors very often arise due to ignorance.
First of all, you should carefully consider the fastening system. After all, it bears the main burden. On the one hand, it will help restrain strong gusts of wind, and on the other hand, it can accelerate the destruction of the greenhouse.
When assembling the frame, you need to be careful, and then the reinforced frame will retain its properties for a long time. The fact is that each fastener has a mark indicating the limits of fixation. All necessary fastening parts are supplied complete with housing and cover parts.
As reviews from summer residents show, complaints about polycarbonate arise much more often. The material periodically wears out, and certain areas of the coating need restoration. Most often, polycarbonate is chosen as a covering material for greenhouses for its functionality and simplicity.
As an alternative, you can subsequently choose any other matter. But only with similar characteristics. If you use coatings with different parameters and properties, this will not benefit the strength of the greenhouse. Experts advise purchasing a small supply of polycarbonate. If only because during the cutting process no one is immune from mistakes that will require starting the cutting all over again.
In order for the Maria Deluxe greenhouse to last long enough, it is important to regularly carry out preventive inspections. In particular:
- Once every six months, you need to thoroughly lubricate all fasteners.
- After a strong storm, rain or blizzard, you need to carry out an external inspection to immediately eliminate possible damage.
- If any element breaks, it should be replaced as soon as possible, before this leads to more serious damage.
Tips for choosing and using polycarbonate
If the “Maria Deluxe” greenhouse was purchased only in the form of a frame, then you need to buy the covering material yourself. The film is not suitable for this greenhouse; the design is designed for polycarbonate.
When choosing polycarbonate, it is better to choose colorless sheets with ultraviolet coating. With such protection, the material will last at least 10 years, and without it - only 2-3 years. The optimal thickness of polycarbonate for greenhouses is 4-6 mm. If it is less, then the sheets will not withstand snow loads in the cold season, and if it is more, they will be too heavy for the greenhouse. Sheets larger than 6 mm cannot be rolled into rolls and are more difficult to install due to the lack of plasticity.
To prevent the polycarbonate coating from becoming cloudy over time due to insects and dust getting into its honeycombs, it is necessary to use an end profile when assembling the case, which can be purchased separately, or periodically seal the gaps with tape.
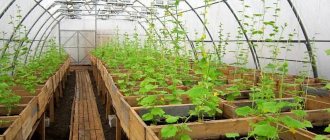
Harvest in a polycarbonate greenhouse
If you are not sure that you can assemble the Maria Deluxe greenhouse yourself, then it is better to seek help from professionals who will quickly and reliably install the greenhouse, saving you from unnecessary hassle.
Main characteristics of the greenhouse
The greenhouse is designed for growing early-ripening varieties of vegetables in cold areas. It is based on a frame, the parts of which are fastened with plates and bolts. This allows the greenhouse to withstand negative environmental factors. The structures can withstand heavy rainfall and strong winds.
Design Features:
- Made from high quality materials.
- The frame is based on a steel pipe with a polymer coating, which prevents corrosion. In cross section it has a square shape, which provides the structure with additional strength.
- The length of the greenhouse is 4-6 m. Special inserts are designed to adjust it.
- Windows and doors are installed at the ends.
- The distance between the arches is 1 m.
- The frame can withstand up to 40 kg of snow per m2 and impressive wind gusts of up to 22 m/s.
- The cellular polycarbonate that covers the frame is protected from UV radiation.
- Installation of the structure can be carried out both on the ground and on the foundation.
- An alternative to polycarbonate sheets can be film.
Maria Deluxe
Do-it-yourself modernization of “Maria” - little tricks
Do-it-yourself vegetarian greenhouse
This is what experienced gardeners who have already purchased the “Maria” and “Maria Deluxe” greenhouses advise:
- Tip #1. Buy an additional small piece of polycarbonate - you will need it. The fact is that if there is not enough experience in cutting this material for a greenhouse, in this case it is quite likely that there may be a defect when covering the end - a hole will form, and it will need to be closed. Which, however, is not a problem.
- Tip #2. In order not to spoil the polycarbonate due to inexperience, it is advisable to purchase more drills in advance, and organize the whole process as follows: first we drill, and only then apply the sheet - otherwise the drill will break, because it will move out, and the cellular polycarbonate will deteriorate.
- Tip #3. Strengthen the bottom of the greenhouse - it is best to place it on a 50x70 block of pine or larch, pre-treated with an antiseptic. Moreover, the block must be placed from the outside, since the polycarbonate sheet will hang slightly below the metal base. And, of course, it is more convenient to attach the bottom to wood than to metal. Moreover, it does not need a truly serious or solid foundation - the entire structure is strong, but quite light.
- Tip #4. If the climate in the area is too harsh, the greenhouse will also benefit from struts - which will not only help the greenhouse experience loads from snow, but also from strong winds on the sides - so that it does not collapse into some kind of storm.
Just a couple of these tricks and precautions - and Maria’s greenhouse will outlive all the neighboring “Cucumbers” and “Tomatoes” by at least a couple of decades! In general, the Maria greenhouse and its variants are ideal for the cold regions of Russia - it produces the richest harvests of heat-loving plants, flowers and out-of-season vegetables
We assemble “Maria” ourselves
You purchased a greenhouse and delivered it to your site, where to start?
The right place - step #1
The first step is to choose a suitable location. When performing this work, it is worth considering that the assembled Maria Deluxe is a rather impressive structure capable of creating a shaded area. Therefore, when choosing a location, carefully consider the location and orientation of the greenhouse.
Our information - Maria Deluxe, like all greenhouses of this brand, consists of identical elements. At the same time, you can increase or decrease the size of the structure by adding inserts. These size changes occur only in length and are multiples of two meters - 4 meters, 6 meters , etc. The width of all greenhouses is 3 m , with a height of 2.1 m .
Foundation – a good structure needs one
The place has been chosen, it’s time to arrange the foundation. Sometimes the installation instructions for prefabricated greenhouses tell us that they can be installed without installing a foundation.
Theoretically, this is possible, but from a practical point of view, the presence of a base is the key to additional strength and durability of the entire structure, and it is much easier to assemble the frame onto a flat, solid base.
For prefabricated frames, you can arrange a concrete, brick and wooden foundation. Each of them has its own advantages and disadvantages. We will not consider them, since the consideration of foundations for greenhouses is described in some detail in separate articles on our resource.
Wooden foundation - all the pros and cons
Today we will choose a wooden foundation and here's why. (See also timber foundation)
- The main advantage of such a base is mobility.
- If you need to move your greenhouse to another, more convenient location, you can always do so.
The disadvantage of wood is its fragility.
- But this issue can be easily resolved by treating wooden structures with special protective agents.
- If one of the wooden elements nevertheless becomes unusable, it can always be replaced with another. Simply install supports under the frame and replace the rotten element.
- The cost of such a foundation is low and replacement costs will not have a significant impact on the cost of the final product.
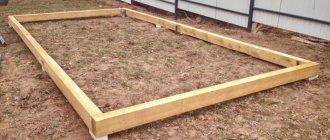
The choice has been made - we are laying the foundation
We will install a greenhouse measuring 6000x3000 mm .
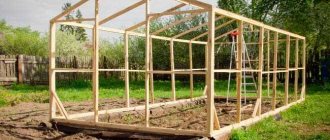
Photo of a wooden foundation.
- from 150X200 mm with an external dimension corresponding to the size of the greenhouse.
- When laying the beams, carefully measure the diagonal using a construction tape.
- To ensure that the foundation lies strictly horizontal, we will use a building level.
- Now you need to fasten the beams. To do this we will use self-tapping screws.
If we need to disassemble the foundation in the future or replace a separate part of it, it will be easier to do this by simply unscrewing the screws.
Our advice is to use special corner metal elements when fastening in the corners. You can buy them at any hardware store, the price is not high.
Frame assembly - installation of lower beams
The foundation is ready, it’s time to assemble the frame.
- For ease of assembly, we lay out the lower beams of the frame along the perimeter of the foundation, each in its place.
- Using self-tapping screws, a mounting pin and three-sided mounting brackets, we fasten the lower beams and lintels.
Now you need to secure the base of the frame to the foundation. We do this using self-tapping screws.
But first, while the base is not secured to the foundation, we thread the doorway fastening bolts into the holes.
Doorway fastening bolt.
Installation of arch clamps
Now on the metal base it is necessary to mark the places where the arcs are installed. This can be done using a tape measure and a marker.
- The clamps included in the kit are installed in the marked places.
- After this, we attach the base to the foundation, do not tighten the screws completely, but leave 5 - 10 mm .
Assembling the end parts
Next, you need to assemble the base of the ends of the frame. This is best done on a flat, horizontal surface.
- The arches and longitudinal beams are fastened using T-shaped fasteners, and we completely tighten them. All the details are indicated in the instructions and it is not difficult to complete.
The most important thing is to ensure the correct joint. The arcs at the junction should under no circumstances rest against the beam. The figure above shows how to do this correctly.
Installing end elements
Now you need to install the ends.
- To do this, install three-sided clamps on the base.
- Now you need to install the end sides into the clamps.
Now the end parts are ready for assembling the main frame.
Installation of arches
- The arcs are installed in brackets that were previously placed strictly according to the markings.
- Fully tighten the bracket bolts.
When attaching the arches, as opposed to assembling them, when installing them in brackets, they must rest against the longitudinal beams of the base of the frame.
It is important - when securing the arcs, strictly ensure that the markings are observed. This will ensure an equal distance between the frame arcs along the entire length.
Installation of longitudinal beams and upper arches
It's time to install the upper longitudinal beams. When installing them, cross-shaped brackets are used. This allows you to connect longitudinal beams, frame arcs and floors. The fastener must be fully tightened.
When installing this type of fastening, it is worth remembering that the arcs must rest against the longitudinal beams.
All other longitudinal beams and upper arches are installed in the same way.
Checking and fastening
After all frame elements are installed, you need to check whether all brackets are tightened properly. If necessary, perform a tightening.
When everything is ready, you can completely tighten the screws securing the base of the frame to the foundation. Remember, we did not tighten them by 5 - 10 mm ?
It is important that during final fastening with self-tapping screws, avoid any deformation of the frame.
We make the correct fastening - mistakes are unacceptable
If the foundation beams are not completely level, we do not exclude this possibility; tightening the screws can lead to deformation of the base of the frame, leading to deformation of the entire body or the appearance of sources of excessive tension in individual parts.
- To avoid this, use appropriately sized wooden shims when tightening.
- A deformed frame will lead to difficulty opening and closing windows and doors, as well as to the formation of large gaps between them, which will negatively affect the operation of the entire greenhouse.
Door posts and lintels
Now it's time to install the door pillars. As you remember, at the very beginning we inserted bolts into the metal beams of the base.
- Using these bolts and nuts, we fasten the vertical door posts. The process is quite simple and does not require additional explanation.
- After installing the vertical posts, there is no need to fully tighten the fastening bolts and nuts; we still need to install the middle jumpers.
This should be done as follows.
- According to the dimensions in the assembly instructions, on the end arc, from bottom to top, measure the required distance and put a mark. This must be done on both sides of the end part.
- Next, we will install a T-shaped bracket in place of the mark and install jumpers between the end parts and the vertical pillars of the door and windows.
- Do not tighten the fastening completely.
Installation of doors and windows
The frame is ready, now you need to install the windows and door.
- To do this, you need to measure the gap between the door and the doorway posts at the top and bottom. By default, the manufacturer specifies this distance as 5 mm .
- But the distance may be slightly different. Therefore, secure the door so that the gaps at the bottom and top are the same size.
- When the doors are installed, it is necessary to adjust the side gaps.
- This can be done with the help of jumpers and their brackets, because we don’t have them fully tightened.
- When the gaps are aligned, it is necessary to fully tighten the bolts and nuts securing the jumpers and vertical posts.
- If the kit comes with a wind deflector, now is the time to install it. It is attached with self-tapping screws from the kit.
All that remains is to install and secure the window and door latches. We think you can easily cope with this without explanation.
Now it’s the turn to install metal corners, which allow you to strengthen the doorway and create additional rigidity. They are fastened with self-tapping screws.
Correct installation of the upper beams
The upper beams are installed after assembling the entire frame.
- Using a tape measure, we find the middle of the arc and put a mark with a marker.
- Beams are installed using brackets.
- In this case, fastening to the end arches is carried out using T-shaped ones, and to the rest - with cross-shaped brackets.
Attaching the top beams.
We advise you not to immediately tighten the fastenings at first, but to install all the beams. After this, align them according to the marks and only then tighten the fasteners completely. The most important thing is that the beams are installed exactly, in one line.
Door installation. Laying covering material
DIY polycarbonate greenhouse drawings and instructions
Hang the door posts on the pre-installed bolts. But don't delay it just yet. Install the middle jumpers on the end parts. To do this, measure the distance along the end arc specified in the instructions. Make marks and secure the T-shape bracket at this location. Install the jumpers, but do not tighten their fastenings either. Proceed with the installation of doors and windows:
- Measure the gap between the door and door posts. After the door is hooked, the distance at the top and bottom should be the same.
- Adjust the side gaps. To do this, tighten the bolts one by one.
- Windows are installed in the same way.
- Attach the included wind deflector plate, door and window latches.
- Metal corners with self-tapping screws will give the doorway additional rigidity.
The final stage of assembling the “skeleton” of the greenhouse is the installation of the upper beams:
- measure the middle of the arcs with a tape measure;
- Attach the top beams to the T- and X-shaped brackets at these locations.
All we want from greenhouses is quality
Today we are looking at another greenhouse with the sonorous name “Maria”. But unlike previous articles, we will not focus your attention on the quality of one or another component of this design. The topic of today's article is assembling the Maria greenhouse.
The right choice is your right
Previously, when analyzing the designs of individual greenhouses (See Greenhouse - Uralochka), we did not want to provide specific information about a specific design. We just wanted to show how to correctly select the design you require, without paying attention to the colorfulness of the advertising.
The main difference is the assembly
Why did we decide to move away from the usual plot?
The fact is that greenhouses produced at a given time under production conditions, as a rule, repeat one another. Their basic parameters are the same with minor exceptions.
But the method of installation and assembly sometimes differs significantly. (See also Installation of a polycarbonate greenhouse) Therefore, additional, more detailed instructions on this issue can significantly facilitate the assembly process when doing it yourself.
Maria - purpose and design
The Maria Deluxe garden greenhouse is designed for growing vegetable crops in household plots and summer cottages.
The design ensures ease of assembly, and the modern covering material, cellular polycarbonate, provides excellent heat saving performance.
- The greenhouse consists of a metal frame fastened with clamps.
- The frame is a profile pipe with a protective polymer coating.
- The frame of an ordinary Maria is made of galvanized profile.
Constructive solution
If at first glance a galvanized profile seems preferable to you, take your time, its thickness is only 0.8 mm and, unlike a 20X20 , it resists snow loads poorly.
The frame is connected with clamps, which ensures a certain mobility along with sufficient rigidity. This solution allows the frame to adapt to external influences without breaking the load-bearing parts.
