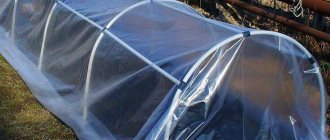
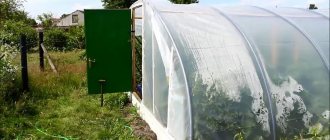
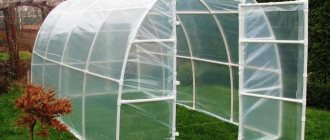
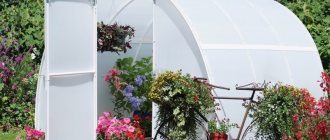
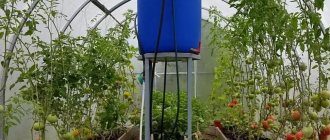
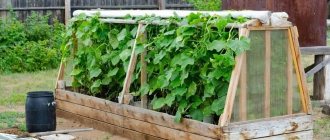
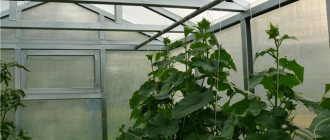
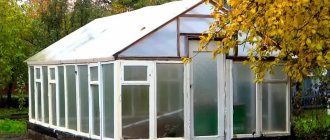
A greenhouse made of propylene pipes, when built with your own hands, is considered the easiest to implement. When purchasing materials, large financial costs will not be required. To build such a greenhouse with simple installation, just follow the step-by-step recommendations.
Selection of propylene pipes for greenhouse construction
Even in an ordinary hardware store, not to mention large supermarkets, there is a sufficient selection of varieties of propylene pipes, ranging from the cheapest to the most expensive. Since the main purpose of the material is the installation of pipes for supplying gas, hot and cold water, their resistance to pressure and pressure when arranging a greenhouse is not the main criteria. For a high-quality greenhouse, the thickness and diameter of the pipe walls are important.
Of course, metal pipes last longer. But in order to avoid deformation of the greenhouse and under them, you need to install supports.
If polycarbonate is used for coating, then choose pipes with a larger diameter. When using polyethylene film, a small pipe diameter is sufficient.
Required Tools
When building a greenhouse, you cannot do without the following tools:
- garden borer;
- shovel and bayonet shovel;
- measuring tape;
- stakes with a cord;
- hammer;
- stapler;
- hacksaws;
- sharp knife;
- screwdrivers;
- soldering iron for plastic pipes;
- welding machine;
- concrete mixer;
- construction hose for supplying concrete mixture;
- large square;
- plumb line;
- building level;
- electric drills;
- file;
- scissors;
- pencil.
Pros and cons of using propylene pipes for building a greenhouse
The main requirements for pipes used in the construction of greenhouses are long service life and the ability to withstand adverse atmospheric conditions. The advantages of greenhouse structures made of polypropylene pipes include:
- service life up to 50 years;
- resistance to corrosion, since this type of pipe is not subject to rusting and rotting in conditions of high humidity;
- ease of installation: the material is easily cut and bent into arcs, the profiles are fastened together and installed in the ground quite simply;
- low weight of the structure (it does not matter whether these are multi-layer or single-layer pipes);
- high resistance to air temperature changes: from – 15 to + 97 degrees;
- resistance to strong winds, especially with a reinforced foundation;
- polypropylene pipes do not burn and do not emit hazardous substances;
- there is no need to apply protective and paint products;
- during the assembly process of the greenhouse, the structure can be given different shapes;
- low cost;
- attractive appearance.
The vulnerability of greenhouse structures made of polypropylene pipes includes low stability without a reliable foundation to sharp gusts of wind and heavy snowfalls. It may happen that a greenhouse covered with polycarbonate or film collapses.
We recommend studying: making an inexpensive and practical greenhouse with your own hands
Special properties used by humans
The bottom line is that as a result of synthesis, macromolecules of a three-dimensional (three-dimensional) type are formed. Strength comes from strong bonds and structure. As a chemical element, inorganic polymers behave amorphously and do not react with other elements and compounds. This feature allows them to be used in the chemical industry, medicine, and food production.
Thermal resistance exceeds all indicators possessed by natural materials. If fibers are used to form a reinforced frame, then such a structure can withstand temperatures up to 220 degrees in air. And if we are talking about boron material, then the temperature strength limit rises to 650 degrees. That is why space flights without polymersan would be impossible.
But this is if we talk about qualities that are superior to natural ones. The same products that are made from these compounds, which are similar in quality to natural ones, have a special meaning for humans. This makes it possible to reduce the cost of clothing by replacing, for example, leather. At the same time, there are practically no external differences.
In medicine, special hopes are placed on inorganic polymers. It is planned to use these materials to produce artificial tissues and organs, prosthetics, etc. Chemical resistance allows products to be treated with active substances, which ensures sterility. The tool becomes durable, useful and safe for humans.
Thus, an interior created using polymer materials is fire safe. Most macromolecules form objects that do not burn, do not melt, and therefore do not emit carbon monoxide when heated. And those that are light in weight are indispensable in the aircraft industry, especially since they are stronger and cheaper than natural ones.
To this day, scientists are working to create new polymer materials. And those that are already in use require study. The properties of some of them have not been fully disclosed. The development of the methodology itself is another step of progress. The goal of the creators is to improve the quality of products and make human life more comfortable.
Rating: /5 — votes
Selecting a site for greenhouse construction
Before you start drawing, you should find a place where the greenhouse will be located on your garden or summer cottage. There are a number of rules when choosing a location:
- The future greenhouse structure must be located at a distance of at least 5 meters from other buildings. Then the shadow will not fall inside the greenhouse and will not destroy the plantings. For plants inside the greenhouse there should be maximum illumination. This can be achieved if the structure is located in the southwest or southeast direction.
- If there are walnut trees and the like on the site, you should not install a greenhouse near them. The tree crown creates shade, the walnut tree releases toxic substances (phytoncides), and the root system of large trees absorbs a lot of moisture, greatly drying out the ground.
Types of greenhouses made of propylene pipes
Propylene pipes bend beautifully; various tees are used to connect them, helping to easily implement the most bizarre structures. And these classic forms are most often found in summer cottages:
- arched shape;
- structure with a pitched roof;
- lancet-arch greenhouse;
- house with a gable roof.
A greenhouse with a pitched roof is rarely built as a free-standing structure. And usually it is adjacent to buildings already located on the site. Its dimensions are small, and construction costs are minimal, since there is already a wall that provides the greenhouse with additional heat.
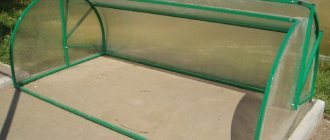
A popular and simple greenhouse made of propylene pipes is an arched one. If the soil on the site is acceptable, then an arch can be built in a matter of hours, without building a foundation. The main thing in the arched design is to provide additional rigidity and select the required pipes. But in the winter, the arched structure is dismantled, as it will not withstand the snow and will become deformed.
For winter, a pointed-arched greenhouse design is ideal. Yes, installation and construction are more painstaking and complex, but there are advantages. The walls and ends are mounted in such a way that they do not allow snow to linger on the surface of the structure. The snow just rolls down. With proper care, a pointed-arch greenhouse will last a long time.
A gable house fits into the interior of any summer cottage. A design with a gable roof is more difficult to install than an arched one, but is also popular among gardeners. Provided year-round living on the site with the possibility of regularly clearing snow from the roof, the greenhouse is not dismantled for the winter period. If, at the end of the dacha season, visits to the dacha are rare, then the greenhouse must be dismantled.
Otherwise, there is a risk of the structure deforming under the weight of snow.
Despite the existing disadvantages, for example, dismantling for the winter, among all the greenhouses encountered, the leader is the arch greenhouse. The gardener can only make a competent drawing, taking into account the width of the beds and internal paths. Experts recommend a retreat of 50-80 cm between the arcs in the greenhouse. The smaller the distance, the more reliable the construction. The width of the tracks is 35-50 cm.
Inside, the beds are placed taking into account the crops being planted and preferences.
Rules for working with pipes
Before building a greenhouse, it is worth studying some aspects of working with polypropylene pipes. It is important to know that it is better to work with polypropylene at an air temperature of +18–20 degrees. At this temperature, the material gains maximum flexibility and strength, does not “compress”, and it is easier to form the necessary shapes from the pipes.
To connect propylene pipes, you need to select fittings taking into account the diameter of the existing pipe. Selected fittings allow you to achieve a rigid connection of parts. It is better to buy pipes complete with fittings, then the risk that the pipes and connecting parts will not fit together will be zero.
Welding may be required to work with polypropylene pipes. But it is usually needed for permanent greenhouses, which cannot be dismantled for the winter and cannot be moved anywhere.
There is no need to take any special protective measures when working with polypropylene, since these pipes are not toxic materials.
The simplest DIY greenhouse
This is the simplest greenhouse design. It just couldn't be simpler. Curved sections of pipe are dug in above the bed on both sides in increments of approximately 50 to 70 centimeters. The step depends on the thickness of the film used, and the number of segments depends on the length of the bed.
Calculation and selection of material
Let's say our bed is 6 meters long. This means that we will need 12 pieces of pipe with a length of one and a half meters. Since pipes are usually sold cut into 4 meter pieces, we will cut them into 2 meter lengths. This means there will be 6 pipes. Fittings (devices for connecting pipes) are not needed. Ideally, fasteners can be used, but you can also fix the film on the pipes by tying its ends into knots and pressing the edges with stones.
Film can be either primary or secondary processed. The latter is much cheaper, but, as a rule, it either has an unpleasant brown, yellow or gray tint, or is completely opaque - gray or black, so it will not suit us. The film is sold in a sleeve, so we will need to cut it lengthwise. We will choose a thin film with a thickness of 150 micrometers.
The film sleeve is sold in rolls of 10 meters
Table: calculation of materials according to average price
| Position | Name | Specification | Quantity | Price | Price | Notes |
| 1 | Plastic pipe FORA PN10 | 20x1.9x4000 mm | 6 items | 22 rub/m | 720 rubles | We take the cheapest pipe of small diameter for easy bending |
| 2 | Set of clamps for attaching the film to the greenhouse frame GRINDA 422317–20 (12 pieces) | Diameter 20 mm | 2 sets | 60 rubles | 120 rubles | |
| 2 | Polyethylene film 150 microns | 1.5 mm x 3 m x 10 m | Roll | 600 rubles | 600 rubles | The sleeve must be cut lengthwise |
| Total | 1440 rubles | |||||
Tools
- Scissors.
- Shovel.
Job
- We cut four-meter pipes in half. We get 12 pieces.
- We stick each piece one by one into the ground more firmly, knock it down and stick it on the other side of the bed. The bed turns out to be under an arc.
- We cut the roll of film lengthwise and cover the resulting structure with it so that there are identical “tails” along the edges.
- We attach the film to the resulting arches with clamps - two or three per arch.
- We press the sides of the film to the ground with bricks or cobblestones.
- We tie the “tails” with twine; if desired, they can be untied to allow air to flow.
- Our greenhouse is ready. This is a super-primitive design, but it will completely protect our garden bed from cold and precipitation.
A greenhouse over a bed made of buried plastic pipes and film is reliable and simple
Selection of plastic pipes
When choosing material for a future greenhouse, you need to know that there are single-layer and multi-layer pipes. Single ply products have markings marked on their surface.
Multilayer pipes are further reinforced. Materials are made with reinforced glass fiber. These pipes have excellent characteristics, but the price is naturally higher. The service life of multilayer products increases 3 times. And although the erected structure is heavy, it is strong and resistant to weather conditions.
Often aluminum foil is added as a layer. When working with such a pipe, you must be careful not to damage the material. Whether there is a layer in the pipe or not, you can see with the naked eye on the cross section of the product:
- pipes in one layer have a uniform color;
- products in several layers are painted in colors different from the color of the pipe itself, and this catches the eye.
General characteristics of polymers
Polymers are high-molecular substances whose molecules consist of repeating structural units linked to each other by chemical bonds. Polymers can be organic or inorganic, amorphous or crystalline substances. Polymers always contain a large number of monomer units; if this amount is too small, then it is no longer a polymer, but an oligomer. The number of units is considered sufficient if the properties do not change when adding a new monomer unit.
Rice. 1. Polymer structure.
The substances from which polymers are made are called monomers.
Polymer molecules can have a linear, branched or three-dimensional structure. The molecular weight of common polymers ranges from 10,000 to 1,000,000.
The polymerization reaction is characteristic of many organic substances that contain double or triple bonds.
For example: the reaction of polyethylene formation:
nCH2=CH2 —> n
where n is the number of monomer molecules interconnected during the polymerization process, or the degree of polymerization.
Polyethylene is produced at high temperature and high pressure. Polyethylene is chemically stable, mechanically strong and therefore widely used in the manufacture of equipment in various industries. It has high electrical insulating properties and is also used as food packaging.
Rice. 2. The substance is polyethylene.
Structural units are groups of atoms repeated many times in a macromolecule.
Selection of covering material
The material for covering the future greenhouse must meet certain requirements:
- Have excellent thermal insulation characteristics, especially when the greenhouse structure will be used all year round.
- It should transmit sunlight well, and ideally covered with a protective layer that filters harmful ultraviolet rays that can have a detrimental effect on plants.
- Must be resistant to temperature changes and weather disasters. The weather in our regions is very unpredictable. Even the most reliable frame will not guarantee protection for plants when the cover breaks or flies away from strong winds or hail.
- The material must withstand snow loads when the greenhouse is not dismantled for the winter.
- The weight of the covering material should be light so that the racks of the frame made of polypropylene pipes do not deform under its weight.
Not all types of coating are suitable for greenhouse structures made of plastic pipes. For example, a frame made of propylene pipes will not withstand a lot of weight. Therefore, the pipes will not withstand the weight of the glass and will begin to deform. Frames with glass, used double-glazed windows, and heavy plexiglass are also not suitable for shelter. If you use lighter glass options for covering, there is a risk of damage.
White agrofibre cover
This is a universal material for shelter, but it can last one or two seasons, and only with proper care.
Agrofibre has many advantages: the material allows air to pass through, so no ventilation is required, condensation does not accumulate under it, and it has excellent light transmittance. The agrofibre is fixed either using special fasteners, or thanks to pre-stitched pockets along the width of the pipe. From below, the material is attached to the foundation using self-tapping screws and angles.
Polyethylene film
The material is one of the most budget-friendly covering options, which is why it is popular among gardeners. The film has a number of undeniable advantages:
- Ease of shelter. The material is simply stretched around the perimeter of the greenhouse and secured with staples. You don't need to put in any effort.
- Good ability to transmit light. The film perfectly transmits the sun's rays, and their amount can be adjusted by choosing a material with a tint coating.
- Resistance to atmospheric disasters. Temperature changes do not affect the strength of the film in any way. If you purchase high-density film, then it is not afraid of either wind or rain. But a layer of snow can tear the film. Therefore, for the winter, the shelter should be removed, dried well, folded and put away until spring.
- Good thermal insulation. A greenhouse effect is created under the plastic film in the greenhouse structure. Thanks to this, the soil does not cool even when the temperature drops sharply at night.
- Environmental safety of the material. Specialized polyethylene does not harm plantings, and the quality of the soil does not change even when in contact with the film, since polyethylene does not decompose.
- Minimum weight. The film is attached to any greenhouse frame and carries almost no load on the base.
- Low price. When compared with other types of shelter, film is the most budget option.
But there are also disadvantages:
- the material is very unstable to damage: any careless movements with the tool lead to rupture of the coating;
- short service life: under the influence of ultraviolet radiation, the film becomes thinner and more vulnerable, therefore it lasts only 2-3 seasons (if it is stored correctly in winter).
Polycarbonate
The best option for covering a greenhouse is polycarbonate. The advantages of the material fully justify the money paid for it:
- Excellent light transmission qualities. Polycarbonate transmits light well, not inferior to glass. Many manufacturers use a special coating that does not allow harmful ultraviolet rays to pass through. Now polycarbonate is sold as absolutely transparent, multi-colored or matte, its sheets of different structures and thicknesses.
- The material is highly durable and is not afraid of hurricane winds, hail, or even snow. Polycarbonate can withstand snow loads in winter. The material is quite resistant to various mechanical influences, high humidity and the formation of rot.
- Plasticity: polycarbonate bends well. Thanks to this, it is even attached to the arched pipes of greenhouses.
- Long service life. If the material is properly cared for, it will last up to 20 years.
- Aesthetic appearance. Greenhouses made of polycarbonate will fit into the exterior of a personal plot. You can choose a harmonious color of the material that will match the existing buildings on the site.
Polycarbonate also has disadvantages:
- polycarbonate expands when heated and contracts when cooled; these properties are important to consider when installing and drilling holes for fasteners;
- for the installation of polycarbonate, special thermal washers are needed;
- the material has a relatively high price.
Types of inorganic polymers
Asbestos is one of the most common polymers. Its structure is a fine-fiber material – silicate. It contains molecules of iron, magnesium, calcium and sodium. The production of this polymer is considered harmful to humans, but products made from it are absolutely safe.
Silicone has also found its application due to the fact that it is superior to natural rubber in many characteristics. Strength and elasticity are provided by the combination of oxygen and silicon. Polysiliconsan withstands mechanical, temperature, and deformation effects. At the same time, the shape and structure remain unchanged.
Carbine replaced diamond. It is also durable, which is necessary in many industries. This polymer is characterized by the ability to withstand temperatures up to 5,000 ºC. A special feature is an increase in electrical conductivity under the influence of light waves.
Graphite is known to everyone who has ever picked up a pencil. A special feature of hydrocarbon polymers is their planar structure. They conduct electrical discharges and heat, but completely absorb the light wave.
Polymers based on selenium, boron and other elements are also produced, which provides a variety of characteristics.
Development of drawings
It is needed to know exactly what is needed to build a greenhouse and exactly how it will be located. The layout is drawn up independently, remembering school geometry. There are also 3D modeling programs on the Internet, and you can find free options.
For example, in the photo below there is a drawing of a greenhouse made of film 3.6 meters wide, 1.9 meters high and 10 meters long:
Where: 1 is a propylene pipe, its length is 6 m, 2 is a wood beam 4x5 cm, 3 is a board 2.5x10 cm, and 4 is a reinforcing rod.
Calculation of the amount of polycarbonate for shelter
To calculate the required amount of material for an arched greenhouse, you need to know the length of the future structure and the length of the arches. The values are multiplied to obtain the area. This is the amount of material needed for the greenhouse.
The gables of a greenhouse structure are made of cellular polycarbonate or OSB boards. If gables are built from film, then it must be taken with a reserve.
For greenhouses, different types of foundations are constructed from propylene pipes: strip, slab, strip-pile, columnar. If the greenhouse will be moved, then the base is made of wood, from beams.
Video description
PP pipes can also be connected with fittings without welding, if you take them of a larger diameter and secure them with self-tapping screws for reliability.
How this is done is shown in the video: You can only make arcs from plastic pipes and connect them with longitudinal wooden slats, using clamps for fastening. Such a frame will also be easy to disassemble by unscrewing the screws holding the clamp.
Frame with wooden purlins Source i.ytimg.com
If such a greenhouse will be used all season, the film can be secured to it by nailing it to wooden slats through strips of tarpaulin or old linoleum.
Instructions for self-construction of a greenhouse from polypropylene pipes
The installation of the greenhouse begins when its drawing is ready, tools are collected and all necessary materials are purchased. This step-by-step guide is approved by experienced craftsmen and experienced gardeners. Basically, arched greenhouses are built on a strip base and covered with polycarbonate. Here's a step-by-step look at the process of constructing such a structure:
- Let us just remind you at this point that the construction process begins with the choice of location. Then markings are applied to build the foundation. First, they are marked schematically with pegs. And precise markings are carried out using a level and tape measure. The intersection of the strings between the pegs should be at an angle of 90 degrees. Correctly executed markings will allow you to build the foundation and install the greenhouse frame without errors.
- You need to prepare 16 pegs and 8 pieces of twine.
- Using a sharp bayonet shovel, select the top turf layer. This soil is not thrown away anywhere, but is then used to prepare soil mixture for future beds.
- Next, a smooth trench is dug out between the strings. Its depth is approximately 30 cm. If, when digging, the soil begins to crumble too much or the walls “slide” inward, then the trench can be reinforced with polyethylene or other insulating material. When digging trenches, they adhere to the marked dimensions and do not go beyond the boundaries of the stretched rope.
- In the dug trench, the bottom must be compacted properly. You can use either a log with a board nailed to its end or a professional soil compactor.
- A 10-centimeter layer of sand is poured into the compacted bottom. It is best to use slightly moistened sand.
- Next, a five-centimeter layer of fine gravel is poured.
- Roofing felt or other insulating material is laid out on gravel along the entire perimeter. To prevent the solution from spreading, formwork is installed, which is reinforced with spacers and supports. To prevent the solution from cementing on the formwork walls, they are protected with film.
- If you build a strip foundation according to all the rules, then you will need to lay a reinforcing belt in the formwork. The reinforcement will allow the foundation, and therefore the greenhouse, to last for a very long time. A reinforced monolithic structure is made by welding iron rods.
- The reinforcement frame inside the formwork is installed not on the bottom, but on pieces of brick.
- When the reinforcement frame is installed, rods are welded to its walls, protruding 40 cm above the base. Arches of propylene pipes are then strung to these rods.
- The concrete solution is poured inside the formwork. It is important that no air bubbles form in the concrete. To “drive them out”, use a piece of reinforcement or a thick stick, which is immersed in the solution and pulled out back. The procedure is carried out so many times that all air bubbles come out of the concrete.
The surface of the concrete base is leveled and covered with film until the solution dries completely. This takes up to 8 days. During the first 2 days, the concrete must be moistened with water several times. Once the base has hardened, the formwork is dismantled, the concrete is covered with roofing felt and the construction of a frame made of polypropylene pipes begins.
Further stages of building a greenhouse with your own hands:
- For the greenhouse structure, a wood base is made for polypropylene pipes. To do this, use four bars with a cross-section of 10x5 cm. They are treated in advance with a special agent against mold and pests. A rectangle is assembled from bars of the required length. They are assembled both using self-tapping screws and by joining the bars end to end using shaped cutouts.
- The reinforcement should stick out on the constructed foundation. So, holes are drilled in the timber frame along the entire perimeter so that the frame can be placed on top of the concrete base, and the reinforcement passes through these holes.
- Propylene pipes are bent into an arc and carefully placed on the fittings.
- The bottom of the pipes must be secured with special clamps or plates to provide additional rigidity to the frame structure.
- When all the arcs are installed in their places, the greenhouse must be given additional rigidity. Plastic pipes are bolted to the arcs along the entire length of the greenhouse parallel to the base. This is done inside so that the bolts do not interfere with the attachment of the covering material.
- Pipes of the required length are cut according to the drawing dimensions and the door frame is assembled from them using fasteners and fittings. The door is attached to the front of the greenhouse using lightweight hinges.
- The window in the greenhouse is also constructed from propylene pipes.
- The next stage is the installation of the covering material (polycarbonate). When covering, two points are taken into account. If the sheets were purchased with a protective layer against ultraviolet radiation, then it should be located outside the greenhouse. When drilling holes to secure screws, take into account that the material is deformed due to temperature changes. To prevent the polycarbonate sheet from cracking in the heat, the holes should be made slightly larger than the cross-section of the leg of the self-tapping screw used.
The polycarbonate sheet is adjusted to the shape of the end with a well-sharpened stationery knife. Polycarbonate is a brittle material when drilling. To avoid damaging the sheet, use self-tapping screws with a rubber washer. This fastener will prevent the sheet from cracking at the joint and will waterproof the hole.
Do not remove the protective film from the polycarbonate until the entire structure is finally installed. This material is easily injured and scratched. You should not spoil the appearance of your greenhouse during its construction.
Even if a greenhouse structure made of polycarbonate or film made of polypropylene pipes takes time to build, but in any case, making it yourself is much cheaper than buying a ready-made greenhouse.
✦ It’s useful for a gardener to know: Step-by-step instructions: how to make a glass greenhouse with your own hands in the country?
II. The simplest option is wood, PVC and film
A simple and inexpensive option is a small greenhouse for a summer house made of PVC arches, reinforced with wooden planks and ends. You can use regular film as a covering material. The frame will last for many years; it can be disassembled for the winter and reinstalled on the site in early spring. When used in this way, the soil receives all the necessary elements, moisture and does not require additional processing.
Such a greenhouse consists of two end walls, arches made of PVC pipes and longitudinal wooden planks to strengthen the frame. The base of the greenhouse can be made of wooden beams or a brick foundation.
You must first install the end walls on the foundation. They are made using a ready-made curved arc. Inside the arc (it must be placed on a flat surface and connected with bolts to a wooden base block), side posts and the upper beam of the doorway are formed. The optimal height of the opening is 190 cm. To strengthen the end, you need to fill in one more plank, connecting the edges of the arc and the edges of the top board of the doorway. The angle between the inclined plank and the base board should be 60-65 degrees. The upper nodes of the end part need to be reinforced with additional planks and wooden overlays, since this is where the longitudinal wooden planks of the greenhouse frame will be fixed:
Metal rods should be placed vertically along the sides of the base. Their diameter must match the internal diameter of the PVC pipes so that the arcs fit onto the rods. We install the end walls on the base and connect them to each other with two upper beams and two middle planks. We reinforce the fastening points with metal corners.
We put the arcs on reinforced rods and connect them to wooden planks using construction clamps. Don't forget to check the top of the arches and ends for level. Cover the finished frame with film:
