Advantages and disadvantages of plastic pipes
Every day, polymers are increasingly replacing wood, glass and other materials from the industrial sector. The plastic is durable and lightweight and is not corroded by mold. The material is not afraid of fumes, chemicals and moisture.
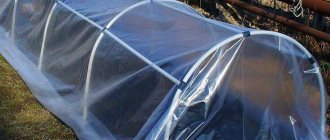
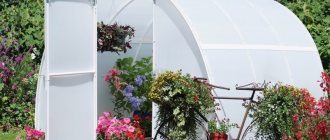
Greenhouse made of plastic pipes
Plastic structures last longer than products made from other materials, as they can easily withstand negative environmental influences.
The disadvantage is the cost of greenhouses from manufacturers, as well as the sizes, which do not in all cases meet the needs of summer residents. However, there is no need to be upset, since you can build a high-quality greenhouse yourself.
The highest quality and most affordable greenhouses are those with a frame structure made of profile pipes. However, if the budget is limited or there is no desire to overpay for the installation of such a greenhouse on the site, then you can build a structure from plastic tubes. This product has a number of advantages over more expensive analogues. The main advantages of the material include:
- Low cost. Aluminum buildings will cost much more.
- Easy to install and dismantle. This makes it possible not only to independently choose the dimensions of the structure, but also to dismantle it and store it in a garage in the winter. Without special skills, you can build a greenhouse from pipes in one day.
- Light weight. This quality is often mistaken by experts as the main drawback of the product.
- Mobility. The building can be easily moved from one place to another.
- Versatility of production. During the construction and design process, it is possible to choose any parameters and dimensions, taking into account the characteristics of the estate.
- Resistance to negative atmospheric influences.
- Long service period.
- Great looks. You can build a structure yourself, the appearance of which will not be inferior to the factory product.
- Environmental friendliness. Plastic is a safe and environmentally friendly material. Accordingly, nothing will threaten the crop and soil.
The only drawback of plastic buildings is that factory-made structures are not always suitable for the available site. If you want to build a product of complex shape, then you should know that the structure will be unstable in gusts of wind.
Selecting materials to create a frame
When choosing a material for making a frame, you should always proceed from what kind of greenhouse will be built (meaning the dimensions of the structure, its shape, as well as the cladding material).
Important! The main purpose of the frame is to ensure the rigidity of the finished product, since none of the possible cladding materials is capable of withstanding any heavy loads.
There may be several options here:
- tree;
- metal (profile or pipe);
- plastic (profile or pipe).
Let's look at the advantages and disadvantages of each type of frame.
Tree
Wooden frames for greenhouses are used less and less today. This material, of course, is highly environmentally friendly and is relatively inexpensive; in addition, it is very easy to work with (this does not require any special skills or complex tools). Wood is sold everywhere and makes it possible to produce various structures with very high precision.
And yet, in building a greenhouse, a tree has more disadvantages than advantages. The main disadvantage of the material is its fragility. To prevent the structure from rotting after the first rainy season, it must be subjected to special treatment. In addition, wooden parts are quite difficult to clean.
In terms of strength, such structures are also inferior to alternative options, in particular, steel frames. Finally, to obtain a reliable frame, it is necessary to use fairly wide beams or boards, which creates additional shading, which is very undesirable for a greenhouse.
Did you know? The most expensive wood in the world is not mahogany, but ebony. This plant is called grenadile, it grows in Africa, and the cost of one kilogram of such building material is estimated at $10,000!
Aluminum profile
Aluminum is a convenient material in all respects, except its cost. If you decide to make a structure from such a metal, you need to be prepared for the fact that it will cost much more than steel.
Another disadvantage of the aluminum profile is its insufficient rigidity. To prevent such a frame from sagging, it usually has to be reinforced with the same wooden beams, the disadvantages of which have already been mentioned.
However, the advantages of aluminum are so obvious that many people prefer to use this material in the manufacture of greenhouses.
- In particular, an aluminum profile frame:
- unlike steel, it is not subject to corrosion, but is in no way inferior in strength to steel (additional rigidity is provided by corners and ribs that distinguish the profile from linear metal);
- reliable and durable (the aluminum base of the greenhouse, unlike a wooden one, can last for decades);
- does not change shape, does not shrink, does not stretch or expand under the influence of different temperatures and changes in humidity;
- environmentally friendly (unlike some polymer materials, it does not emit harmful substances even when exposed to fire);
- is lightweight, ergonomic and compact;
- not difficult to process (aluminum can be cut using tools available to almost any owner).
Another advantage of the aluminum profile is that it is available in many different configurations, allowing you to design greenhouses of any type and shape.
In particular, for the manufacture of such products such types of aluminum profiles are used as connecting (for vertical joining of panels), end (to protect the side edges), ridge (attaches the greenhouse wall to the roof), as well as wall, used in cases where One of the sides of the greenhouse is the wall of a house or other permanent structure.
Plastic profile
- Plastic is a material that has the following characteristics:
- low cost;
- ease of installation and dismantling;
- ease of maintenance;
- resistance to temperature changes and changes in humidity;
- low thermal conductivity (very important for a greenhouse);
- durability (does not rot or rust).
All these qualities make the polymer a very attractive material for the manufacture of greenhouses. For this purpose, you can even use a profile for plastic windows, specially designed to hold the glass, while creating high tightness.
However, compared to metal, plastic also has disadvantages. The main one is lightness and instability. Plastic structures need significant weighting, otherwise the greenhouse may collapse due to high windage. For this reason, in professional greenhouses the use of a plastic profile is combined with a galvanized metal profile.
Metal pipes
The advantage of a pipe over a profile is that, other things being equal, a round section is always stronger than an angular one, so the structure does not require any additional reinforcements. Another advantage of a metal pipe is its significant weight, which gives the frame additional stability. For this reason, it can even be installed directly on a wooden base, without resorting to additional concreting.
However, if the profile frame can be quite easily assembled literally in the field, then the metal pipes are attached to each other by welding. Therefore, in the absence of special equipment and professional skills, the manufacture of the base for such a greenhouse must be ordered from a specialized enterprise, which, on the one hand, increases financial costs, and on the other, creates serious difficulties in transporting the finished product.
Another indicator by which pipes are inferior to profiles is their higher cost.
Metal corner
A corner is one of the many types of profiles. If the material for its manufacture is not aluminum, but iron or steel, such a product, of course, will cost less, but another problem arises.
Important! Products made of iron and steel are susceptible to corrosion, so the frame must include a special protective coating.
For this purpose, galvanizing or modern polymer spraying can be used, however, this significantly increases the cost of the material and in certain cases (for example, for the manufacture of a small summer greenhouse on a private plot) even makes the material unprofitable.
A way out of this situation may be to prime the finished frame, but this option is not without its drawbacks, since no one guarantees the reliability of such a coating.
From PVC pipes
Among polymer materials used for the manufacture of greenhouse frames, polyvinyl chloride pipes are much more popular than plastic profiles.
Having all the advantages of the latter, PVC pipes have higher rigidity, thanks to which they are able to withstand even the significant weight of snowdrifts on the roofs. In addition, such pipes have a huge range of standard sizes, are sold everywhere and cost literally pennies, while a plastic profile of the desired configuration can be much more difficult to select.
Read more about how to make a greenhouse from PVC pipes with your own hands.
As for installation, unlike metal, plastic is equally easy to process regardless of the cross-sectional shape, so from this point of view the pipe is in no way inferior to the profile.
Design dimensions
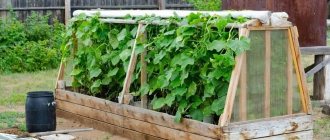
In most cases, two beds are placed in the greenhouse, which are separated by a path.
Beds in a greenhouse made of plastic pipes
The width of the beds is on average 0.9–1.1 m - this makes it possible to plant plants in two rows with the required spacing and provide unobstructed access to them.
The width of the path should be such that it is possible to move comfortably with a bucket and other dacha equipment, including a wheelbarrow.
Correct aisle width
The optimal width of the path is 0.7–0.8 m. In this case, the width of the structure will be 2.3–3 m.
The length of the product will depend on the needs and requirements for the location of the vegetables that are planned to be grown. Planting rates per 1 m2 can be seen in the table below:
| View | Number of roots per 1 m2 |
| cucumbers | 2–4 |
| Peppers | 4–6 |
| Tall tomatoes | 2–4 |
| Eggplant | 2–4 |
| Low-growing tomatoes | 4–6 |
| Pumpkins and zucchini | 1–2 |
Using the table you can determine the length of the building. Typically, structures with a length of 4–6 m are made, since it is impractical to install a greenhouse of smaller dimensions, and for buildings of greater length it will be necessary to use materials of increased strength. Construction technology will also differ.
It is important to know: if you plan to use polycarbonate as the material for covering the structure, then it is recommended to choose a length that is a multiple of the width of the sheets (2 m). In this case, you can avoid unnecessary pieces.
The height of the building should allow you to comfortably move around it. It is worth knowing that there should be at least 50 cm of free space above the plantings.
Correct greenhouse height
Warm air will accumulate in this place and air exchange will occur during the ventilation process. If you plan to grow low-growing vegetables, then a height of 1.9–2 m is sufficient. For tall crops, the minimum greenhouse height is 2.3–2.4 m.
The frame of the tube structure forms half a circle. The width of the product is the diameter of this parameter. If the diameter is known, then the radius can also be determined. The values allow you to calculate the length of the district. This can be done using the following formula:
L = 2πR = πD, where L is the circumference, R is the radius, and D is the diameter. The number π is 3.14.
For example, if you plan to make a greenhouse with a height of 200 cm, then with a correct arc the width should be 400 cm. In this case, the diameter of the circle is 400 cm and the radius is 200 cm.
Accordingly, the length of the district: L = 2 x 3.14 x 2000 = 12560 mm. Only half the circle is needed, so the length of the arc is calculated as follows: 12560 / 2 = 6280 mm.
The arc consists of 2 tubes and a cross, so the resulting value must be divided again: 6280 / 2 = 3140 mm. This will be the size of the pipe.
Next, you need to determine the shape of the structure.
Drawing of a greenhouse made of pipes
There are many ready-made diagrams that will help you assemble a greenhouse yourself. If you choose a simple option, you can assemble the structure in a few days. The first step is to prepare a design drawing, with which you can easily calculate the required pipe footage. The volume of materials depends on the dimensions of the building.
The greenhouse assembly diagram includes the installation of sides for fencing.
An example of a drawing of a greenhouse made of plastic pipes can be seen in the figure:
Drawing of a greenhouse made of plastic pipes
The project must indicate:
- dimensions and shape of the product;
- methods of fixing elements;
- the amount of materials and fastening parts needed.
After drawing up the drawing, you can proceed to the selection of materials.
Where to start building a greenhouse frame?
First, you should decide on the location of the greenhouse on the land plot. It is necessary to take into account the composition of the soil, the capabilities of the site (area), lighting, and the degree of protection from winds.
Secondly, resolve the issue with its functioning. If a greenhouse is needed in spring and summer, it is located from north to south. Thus, sunlight and heat will be present throughout the daylight hours.
If the structure is intended for growing crops in winter, the ideal location would be from south to north.
Tips for choosing material
You will need to buy large-section plastic pipes from which the frame is made. In addition to the main frame parts, smaller diameter tubes will be needed. The elements will connect the main arcs with each other. This is necessary to give rigidity to the structure.
Plastic tubes can be easily cut, bent, glued and welded. In greenhouse production, polymer elements are often fastened with self-tapping screws, since liquid will not flow through the parts. The manufacturability of plastic makes it possible to implement projects of almost any complexity: from a greenhouse or a small arched greenhouse to a huge all-season product with a gable roof. You just need to first decide on the design and buy the necessary equipment and materials.
The following pipes are suitable for the manufacture of the structure:
- Rigid products made of polyvinyl chloride. They are not elastic. They are used for the manufacture of gable, single-pitch and other buildings with straight lines and edges.
PVC pipes - Flexible products made of polypropylene. With their help, it is possible to construct rounded roofs over a rigid frame made of hard plastic parts, metal profiles or wooden slats.
Polypropylene pipes
All types of plastic pipes are sold with fittings, including:
- cross and tee splitters;
- swivel connectors;
- adapters for joining tubes of various sizes.
The use of fittings will speed up the process of construction work several times, but at the same time will increase financial costs.
Fittings for plastic pipes
It all depends on the capabilities and preferences of the owner. He must choose whether to use fittings or not.
To fix the frame, you will need metal rods 1.2 m long. Their diameter should be such that the rod fits freely into the tube.
Sides for fencing are made from edged boards. The recommended cross-section is 150 mm. The number of parts and length will depend on the dimensions of the greenhouse.
The transverse parts of the frame are fixed using plastic tees, which are used for plumbing. Another option is to use steel wire.
At the end, the structure will need to be covered with a reinforced polyethylene or polycarbonate film.
There is one more nuance that is important to consider before the start of construction work. A greenhouse made of plastic pipes can be stationary or portable. In the first case, the parts will need to be welded or glued; in the second, the elements are fastened with screws.
Greenhouse project made from plastic pipes
The choice must be made based on needs.
Greenhouse design
The main parts of the structure are a frame and a covering made of transparent material. During construction, attention is paid to size, shape, and cladding material.
- Single-pitched greenhouses (extension frame) are a profitable and practical option, since they allow you to save on heating, building and finishing materials. A nuance when creating such a structure is the southern direction.
- Gable types are popular with buyers. To construct such a greenhouse, you can install walls of various heights.
- Arched greenhouses - structures with many angles look attractive and original. However, in such a pavilion there is poor air circulation. Therefore, in addition to the vents in the roof, additional side vents will have to be built.
- The solarium greenhouse is distinguished by its ability to accumulate heat from light radiation. In them, the sun's energy is received and effectively accumulated.
- Ground greenhouses require maintaining a certain temperature and humidity. Often such structures are used for growing tropical crops.
Any greenhouse design begins with a frame - the supporting part of the structure. To create it, various materials are used - metal, plastic, wood. Each has advantages, but also has disadvantages.
Calculation of the required amount of material
To calculate materials, you will need to know exactly the dimensions of the structure. It is also important to determine the distance between the arches. If the covering of the building is planned to be dismantled in winter, then the arches can be located in increments of 0.9–1 m.
Arch installation step
For a stationary structure, the step should be reduced to 0.6–0.7 m. This will protect the product from damage after heavy snowfalls.
It is important to consider the material for the construction of screeds, end walls, doors and windows. The total length of the longitudinal ties is calculated by multiplying the length of the greenhouse by the number of ties. Most often, at least 5 pieces are installed: two bottom, two side and one ridge. To strengthen the structure, it is recommended to install additional side ties.
The end walls will require pipes with a total length of 17–20 m. One door will require a minimum of 5 m of pipe, and a window - 2.2–2.5 m. For convenience, you can make a detailed sketch, which will indicate all the dimensions and number of parts for fixation. An example can be seen in the image:
Diagram of a greenhouse made of pipes indicating the location of parts
As an example, we will consider a greenhouse of the following dimensions:
- length - 4 m;
- width - 2.4 m;
- height - 2 m;
- arc length - 3.8 m;
- The spacing of the arches is 0.67 m.
For the frame you will need pipes 6 m long and 25 mm in diameter. Such parts can ensure the reliability and rigidity of the structure. 25 mm fittings are used to fasten the tubes. You will also need glue.
List of materials that will be needed to build a greenhouse from plastic pipes:
- reinforcing bars;
- crosspiece for 25 mm tube;
- slats 50x100 mm;
- plastic pipes 25 mm;
- oblique tees;
- nails;
- metal strip;
- self-tapping screws;
- adhesive mixture;
- tees for pipes 25 mm.
For a greenhouse of these sizes with two doors and windows, materials will be needed in the following quantities:
- steel angle 90° with a diameter of 25 mm - 16 pcs.;
- plastic pipe 6 m long and 25 mm in diameter - 16 pcs.;
- wide tape or metal profile for connection (when using polycarbonate) - 1 pc.;
- two-plane tee - 4 pcs.;
- crosspiece - 5 pcs.;
- polycarbonate - 3 sheets measuring 2x6 m;
- single-plane tee with an angle of 90° – 28 pcs.;
- two-jaw clamps - 18 pcs.;
- self-tapping screws for fixing polycarbonate with thermal washers - 100 pcs.;
- furniture bolts for fixing side ties - 36 pcs.;
- single-plane tee with an angle of 45° – 4 pcs.;
- door hinges - 8 pcs.;
- self-tapping screws 24 mm - 48 pcs.;
- self-tapping screws 55 mm - 36 pcs.
Polycarbonate or film can be used as a coating material. If the second option is chosen, then approximately 8 linear meters of polyethylene are needed. with a width of 6 m.
Tools that will be needed:
- hammer;
- device for welding plastic tubes;
- hacksaw;
- building level;
- screwdriver or screwdriver;
- construction tape;
- hacksaw for metal.
It is also recommended to prepare the following devices:
- Desktop;
- ventilation system;
- heating boiler;
- racks;
- shelves;
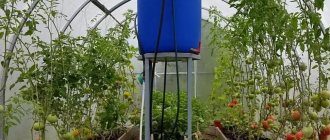
- design for automatic watering;
- fluorescent light bulbs;
- thermometer with hygrometer.
After preparing the materials, you can begin site planning and construction work.
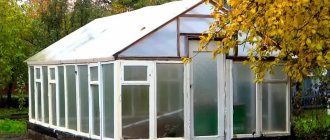
Frame made of profile pipe
To build a greenhouse measuring 6 m by 3 m, purchase a profile pipe:
- a section of 40x40mm for the base of the greenhouse itself and its roof, which has two different-level slopes;
- section 30x20 for vertical posts of the structure.
All welded connections are made using an inverter welding machine, so it is possible to obtain a reinforced frame for the greenhouse. The structure is placed on a burnt beam, which is laid level on six supports of a columnar foundation. The base of the frame, made of a 40x40 mm profile pipe, is fixed to the beam. The greenhouse is assembled like a construction set from welded blocks: roof, end walls, side rectangular frames.
Important! This method of installation from a profile pipe is attractive because it does not require bending the arcs. The order of welding blocks can be swapped.
First, the roof is installed, which is typical for Mittlaider greenhouses.
- Rafters from a thinner profile are welded to the central post, which results in two slopes running at different slope angles.
- For convenience, all structural elements of the roof are covered with primer-enamel for metal before it is secured at the top of the structure. Then it will be much more difficult to do this.
- Next, the two end sides of the greenhouse are welded separately, providing them with vertical ribs for installing doors.
- Then two intermediate rectangular frames are assembled, installed between the side walls at the same distance.
- Along the top, sections of profile pipe connect the installed frames, welding them at both ends to each element.
- The roof is welded to the resulting strong frame.
Please note! This type of frame is more suitable for polycarbonate coating. Polyethylene film with a thickness of 150-200 microns is used in case of a lack of funds to purchase polycarbonate or a fundamentally negative attitude of the greenhouse owner towards other types of covering.
Frame made of profile pipe according to Mittleider
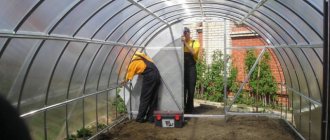
How to build a greenhouse from plastic pipes with your own hands - a step-by-step guide
To eliminate the possibility of the building skewing during installation and use, the area under the greenhouse must be leveled.
Leveling the area for the greenhouse
To do this, you need to mark the location of the future structure on the ground using pegs and rope.
Marking the area using pegs
After this, the area should be checked with a building level. If there is a slope of more than 1°, then the area must be leveled.
A sand cushion 6–10 cm thick should be made under the base.
Determining the location for the structure
First of all, you need to determine the location on the site for the construction of the structure. It should be:
- in flat areas so that the frame can be easily mounted;
- have direct exposure to the sun's rays, otherwise the greenhouse will not have its main property;
- in open areas.
The main condition for the correct development of plants is light. This is especially true in winter and early spring. If the greenhouse is located in a place with insufficient lighting, then it will be necessary to install additional lighting fixtures.
Lighting fixtures in a greenhouse
It is worth understanding that this can lead to high costs of grown vegetables. To make a greenhouse, you need to choose the most illuminated area, which is located at a great distance from trees and buildings. It is important to protect crops from excess shade.
The placement of the greenhouse relative to the cardinal points is an important factor when determining the location. The most preferable option is to locate the building from the west to the east.
Location of the greenhouse relative to the cardinal directions
Only in this case can crop lighting be ensured from morning to evening.
If it is not possible to place the greenhouse in such a place, then the frame must be installed so that the sun's rays enter through the covering at the beginning of the day. The morning hours are the coldest, and if the sun does not warm the air in the greenhouse, many plants may stop growing and lose their ovaries.
If there is insufficient lighting, fungal diseases can develop. This often leads to crop loss.
Another important factor affecting the effectiveness of a greenhouse is its location in relation to prevailing winds. This is of great importance in the case of using a protective structure throughout the year. In winter, the presence of cold winds can increase heating costs several times. If you plan to place the greenhouse in an open area, it is recommended to build barriers that can protect from the wind. You can use a hedge or a wooden fence mounted around the greenhouse at a distance of at least 10 m.
Hedge for protection from wind
This placement will avoid creating a shadow.
It is best to place the structure next to a private house so that there is free passage in winter during snow drifts. The path must be made of hard surface. This will protect the product from dirt during rain. The width of the track is determined based on the size of the wheelbarrow.
Making the base
A frame will be used as the basis, which will be able to hold a light frame and maintain its geometry parameters. The choice of the required base option is not associated with the design or type of construction. It depends on financial capabilities and whether the product is stationary or portable.
To make a frame, you will need to prepare the following elements:
- board 6 or 8 mm thick;
- block 6x12 or 8x12 mm;
- rigid plastic pipe for the bottom trim.
The base is made of thick boards. If financial capabilities allow, it is recommended to use timber. The elements are fastened by cutting half a tree without using fasteners. Accordingly, the frame will not contain metal elements that could rust.
The base of the bars will need to be buried in the soil. To do this, you first need to dig a pit. Only fill the trench around the perimeter so that the bottom and walls of the pit are covered. Next, the frame is installed.
Wooden greenhouse frame
A frame buried in a trench will serve as a foundation, but it is worth understanding that such a foundation is not necessary for a seasonal structure.
A frame made of tubes cannot be an independent base. It is made if there is a foundation made of wood, brick or concrete. Fixed with staples to bars or anchor bolts fixed in concrete during the curing process.
If the foundation is made, then it will not be possible to move the structure. Therefore, it makes sense to consider the process of making a plank frame as a basis. Sequencing:
- First of all, you need to prepare a site for making a greenhouse. A layer of turf should be removed from the area so that the area is longer and wider than the structure being erected by approximately 1 m. This will allow for an indentation of 0.5 m on each side.
- The surface must be measured with a building level. If necessary, the site must be leveled. A difference of 5 cm is allowed over a period of 2 m.
- A frame should be assembled from four boards. You need to decide on the sizes in advance. The structure is fixed with several self-tapping screws or nails. The length of the fastening element is determined taking into account the thickness of the attached part: it should be 2.5 times the thickness of the rail.
- The frame must be measured diagonally in both directions with a tape measure. If the values coincide, then the base is smooth. If not, the flaws should be eliminated.
- The frame is installed and fixed by driving in reinforcing bars from the inside of the corner. The length of the rod is 75–80 cm. The sections are driven flush with the frame.
Visually, the process of constructing the frame can be seen in the image:
Construction of a greenhouse base
The base will be in contact with moist soil. Therefore, the material for production must be thoroughly dried. Before assembly, the parts must be coated with hot bitumen and an antiseptic.
Manufacturing of frame structures
The first step is to do the following:
- Along the long walls on both sides of the frame, you need to hammer in the rods with a sledgehammer so that no more than 40 cm remains above the base.
- A piece of plastic tube is placed on the fittings.
To make internal arcs, you need to connect 2 pieces of tube 3000 mm each by welding so that the cross is located in the center.
Installation of frame arches
For external parts, the tubes in the center should be connected not with a cross, but with tees.
Next, you should fix the elements. They will need to be inserted into the reinforcement lengthwise on one side, bent and inserted on the other.
The frame is assembled as follows:
- You will need to prepare pieces of plastic tube measuring 850 mm and weld them between the crosses and tees. This will strengthen the structure.
- The structure is additionally fixed to a wooden frame.
Fixing pipes to the base with clampsYou need to make clamps in the shape of the letter Ω from a metal strip.
- Using self-tapping screws, secure the frame of plastic tubes to the base.
Next, the top screed of the greenhouse is installed. It should pass along the extreme points of the arcs. The tie is attached to the arches with plastic clamps.
At this stage, openings for installing windows and doors are prepared. Structures are needed for ventilation.
The two pieces of reinforcement that were installed earlier are places for installing windows and doors. Installation sequence:
- From the reinforcement that is driven in across the width, you need to draw a line up and make a mark on the outer arch.
- The tools you will need are: a flat piece of wood, a marker and a building level.
- Next you need to embed the oblique tees. You will need to measure the distance from the bottom of the reinforcing bars to the mark.
- You need to cut a piece of plastic tube to size.
- A tee is welded to the part so that a structure with a tee in the upper part is obtained. The bevel should mate with the tube.
- An arc is cut at the mark. The part is under load, so work should be done carefully.
- The tee is welded into the prepared space. It is recommended to carry out the work with an assistant.
After this, a door is made from tubes. The construction process can be seen in the diagram:
Making a door from plastic tubes
The window manufacturing process is shown in the image:
Making windows from pipes
Windows should fit into prepared frames without much effort.
As canopies, you can use pieces of plastic tube, but with a larger diameter. The 25mm tube should fit into the canopy easily.
How to cover a greenhouse with polyethylene or polycarbonate?
The next step is covering the greenhouse:
Covering the greenhouse with plastic film
The process is not complicated. To do this, attach the film to a wooden frame using nails and strips. The windows will also need to be covered with polyethylene and installed in their places. The following steps should be followed:
- The supply must be distributed evenly. At the ends there should be pieces of plastic film identical in size.
- The covering should be nailed through the boards to the frame.
- First of all, you need to nail the film along the long wall.
- You need to start from the middle of the surface, heading towards the corners.
- When the covering is stretched, according to this scheme it needs to be nailed to the second wall of the frame.
- In the end parts, the film is folded and then nailed.
In the covering that is fixed to the frame, you need to cut holes for doors and windows so that there is an overlap at the extreme parts of the holes for attaching the plastic film to the slats.
Next, you should screw on the hinges for the door, hang the fittings and install the locks.
Greenhouse doors made of pipes
This method allows you to quickly make a budget greenhouse from plastic tubes. The principle of its structure is taken as the basis for many variations. The end parts can be made from plywood sheets, the dimensions of the door, the location and size of the windows can be changed, stiffeners can be mounted diagonally in the end parts, etc.
It is not recommended to fix polyethylene film with boards; it is more advisable to use a construction stapler.
Fastening plastic film with a stapler
It is recommended to install the finishing material at a temperature of 15–18°C.
The reinforced film can be fixed using tube clamps. In the lower part it must be dug in with soil and strengthened by laying stones or slats on top.
If you plan to cover the greenhouse with polycarbonate, you will need to perform the following steps:
- Wooden slats need to be placed on the frame between the ribs.
- A solid surface is prepared. The ribs should be recessed inward.
- Holes are drilled into which fasteners will be installed.
- Polycarbonate is fixed with self-tapping screws. Be sure to install thermal washers.
Fastening polycarbonate with self-tapping screws and thermal washers
The diameter of the recesses in the polycarbonate should exceed the diameter of the screws by several mm. The gap is necessary to compensate for the expansion of the material due to atmospheric influences.
Useful tips
Products made from pipes are popular among summer residents. Many fans of year-round cultivation of vegetables are engaged in their production. Each owner has his own secret, which facilitates the construction process and reduces the cost of construction.
Some useful tips:
- It is recommended to install reinforcing bars for tubes on the inside of the frame, and not on the outside, as was the case before. The pipes are also fixed on the inside of the base.
- It is recommended to use reinforced polyethylene film with a thickness of more than 180 microns as a coating material. The material is not afraid of strong wind gusts, does not sag under snow and lets in the right amount of sun rays.
Reinforced polyethylene film - To minimize damage to polyethylene, it is recommended to use latches during the fixation process. They can be cut from plastic pipes of a larger diameter than those used to make the frame. If necessary, fasteners can be removed. This will allow you to remove or tighten the film if it becomes loose.
- During the manufacturing process of the structure, it is important to carefully check the dimensions of the base, otherwise distortions will form. To do this, you need to pull several twines diagonally from different corners.
- A tube greenhouse is not a long-term product. This is due to the fact that the foundation is most often made of wood. However, the service life of a greenhouse can be significantly extended if a concrete base is built. This will not affect the design; the construction process remains unchanged. The only difference is that the reinforcing bars will need to be driven into the concrete rather than driven into the soil. Such a foundation will be strong, and the absence of wooden parts will extend the service life of the structure.
If you take these tips into account, you can make a high-quality greenhouse with your own hands.