- Advantages of plastic pipes for building a greenhouse with your own hands
- Do-it-yourself forms and materials for covering greenhouses made of plastic pipes: photo examples of designs
- DIY greenhouse model made of polypropylene pipes: photo of greenhouses covered with film
- Choosing a place for a greenhouse made of plastic pipes
- Assembling a greenhouse frame from PVC pipes
- Covering a greenhouse made of PVC pipes with polyethylene
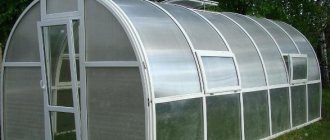
- DIY greenhouse assembly from plastic pipes and polycarbonate
- Choosing a location on the site, type and size of greenhouse
- Construction of the base of a greenhouse made of PVC pipes
- Covering the frame with polycarbonate plates
- Do-it-yourself greenhouse made of plastic pipes: assembling a frame from HDPE pipes
- Construction of a foundation for a greenhouse made of HDPE pipes
- Assembling a frame from HDPE pipes
- Video: DIY plastic greenhouse
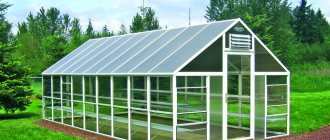
For those who decide to equip their garden plot with a greenhouse, manufacturers offer various types of greenhouse structures. They can be installed permanently or have a collapsible design. The frame is made from various types of profiles, the only question is the price. Or you can assemble a lightweight and inexpensive greenhouse structure yourself. For small garden plots, a greenhouse made of PVC pipes . Due to their low price, lightness and ease of assembly, plastic greenhouses are becoming increasingly popular among gardeners.
A greenhouse made of plastic pipes: photo examples, videos, instructions on how to make it yourself (read more)
Lightweight greenhouse construction made of PVC pipes.
Advantages of plastic pipes for building a greenhouse with your own hands
Such qualities of plastic pipes as strength, low weight, resistance to mechanical, temperature and weather influences have made them widely used in construction. These characteristics have become the main advantages in constructing greenhouses from plastic pipes with your own hands. By giving preference to such greenhouses, owners of personal plots receive a design with the following advantages:
- resistance to corrosion - a greenhouse frame made of plastic pipes does not rust, unlike a metal profile, and is not afraid of moisture when compared with wooden frames;
Plastic pipes are easy to install: quickly assembled and disassembled if necessary.
- pliability of PVC pipes to processing, ease of assembly - they can be cut and bent without much effort, creating various shapes of the structure. They are easy to install: quickly assembled and disassembled if necessary;
- light weight - they are easy to transport, it is possible to move the structure without resorting to disassembly to another location;
- durability of plastic pipes - the service life reaches 50 years;
- resistance to temperature changes - this is a fireproof material that is difficult to ignite and stops burning as soon as the source of high temperature is eliminated;
Greenhouse frame project made from plastic pipes.
- wear resistance - over time and under the influence of natural factors, the composition of the pipes does not change its structure;
- strength - the frame made of plastic pipes is stable and can withstand strong gusts of wind;
- low price - allows you to assemble a greenhouse using a minimum amount of funds;
- no need for additional surface treatment of plastic pipes after installation;
- attractive appearance of self-assembled greenhouses made from PVC pipes.
Various types of greenhouse designs.
Do-it-yourself forms and materials for covering greenhouses made of plastic pipes: photo examples of designs
You can assemble a greenhouse from plastic pipes with your own hands (photos of various models are available online) of any size. Taking into account the high flexibility, different lengths and diameters of pipes, and various fastening methods, it is also possible to give the greenhouse any desired shape. The most relevant designs are:
- arched greenhouse shape;
- rectangular lean-to structure;
- rectangular gable structure;
- There are models of greenhouses attached to a house, where one of the sides is the wall of the existing building.
On a note! The shape of the greenhouse structure and its dimensions largely depend on what crops will be grown in it.
Do-it-yourself greenhouse made of PVC pipes.
Some craftsmen build unique greenhouse structures in the form of a tent or dome on their plots. The main thing is to strictly adhere to the parameters specified in the drawings of greenhouses made of PVC pipes with your own hands.
Plastic pipes used to make greenhouses can be purchased in sizes from 2 to 7 meters. By choosing a long pipe, you can avoid additional connections. The diameter and wall thickness of the pipe are selected taking into account the size of the structure. For medium-sized garden plots, small greenhouses made of PVC pipes, which are quickly and easily assembled and disassembled, would be appropriate. Do-it-yourself photos of greenhouses made from PVC pipes clearly demonstrate the variety of structural shapes.
Calculation of materials for a greenhouse. Length of the structure – 12 m, width – 5.1 m, height – 2.55 m. Estimated distance between the arcs – 60 cm. Length of the arc (pipe) 3.14 x R = 3.14 x 2.55 m = 8 m .
To cover the frames of greenhouses made of plastic pipes, polyethylene film or polycarbonate sheets are used. Greenhouses intended for growing seedlings in the spring season are traditionally covered with film. For stationary durable structures that function throughout the year, a cellular polycarbonate coating is used. This coating can protect plants from wind, cold and ultraviolet radiation. On the Internet you can watch videos of greenhouses made of PVC pipes with your own hands to get an idea about this type of structure.
Greenhouses in the form of a geodesic dome can become a decoration for a garden plot.
The base for greenhouses made of plastic pipes can be boxes made of timber and boards. Many people mount the frame on metal rods driven into the ground around the perimeter of the structure.
On a note! In order for a self-built greenhouse made of plastic pipe to be sufficiently durable, it is recommended to use a shallow strip or columnar foundation for its foundation.
Brick, blocks, stone or concrete mortar are used to construct foundations.
Arcs made of polypropylene pipes are used in the design of greenhouses.
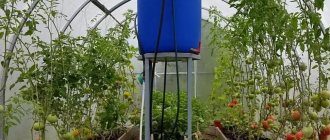
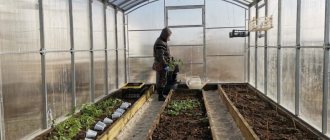
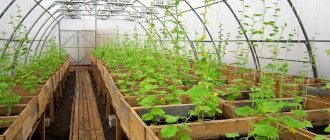
Placing beds in a greenhouse
Most often, 2 or 3 beds are arranged in a greenhouse. If the width of the structure is 3 meters, then 2 passes can be made, the width of each passage is 0.55 meters. Plantings are 0.6 meters along the walls, and 70 centimeters in the center. With this arrangement, each plant will receive its own portion of care.
If the structure has a door at the ends, then it is best to plant tomatoes in the middle. They love ventilation and are not afraid of drafts. Near them you can sow a row of parsley, cilantro, and radishes. The whitefly won't even get close to your seedlings because it can't stand the smell of cilantro.
It is better to leave the eastern or northern bed for cucumbers. You can protect from drafts with a film curtain. The western and southern sides must be left for eggplants and peppers. To reduce humidity, the base of the plants should be mulched with humus or compost.
In early spring, the greenhouse should be sowed with mustard. Then leave it as mulch. Tomatoes will be protected from late blight.
The placement of beds in a greenhouse is almost the same everywhere. But you can consider new products tested by gardeners.
Arrangement of beds in a 3 by 4 m greenhouse
Rational distribution of beds in a 3x4 greenhouse will also help to grow as many vegetables as possible. In a small greenhouse, it is most rational to distribute plantings along the entire length of the room in 2 rows.
Planting pattern in a 3x4 structure: the beds are located along the walls 1 meter wide, with a passage made in the center. In the beds, plants are planted in 2 rows or in a checkerboard pattern.
If the seedlings are positioned correctly, then 50 bushes can be placed, with a distance between bushes of 400 mm. Then 15 bushes can fit in one line. In a small space, you can make three rows by reducing the width of the tracks.
The technique of planting seedlings in three beds allows for a checkerboard-type planting method.
Calculation: It is recommended to compact the distance between seedlings to 300 mm, then up to 25 bushes can be placed in one line.
If the time has come to plant seedlings, then you need to choose a method based on the cardinal directions. It is better to plant low crops from north to south so that the sprouts receive more light.
High crops from the west to the eastern edge. With such a planting, the sun's rays will penetrate into the aisle, feeding the lower row of foliage.
When planting vertical beds, you need to ensure that the sun’s rays illuminate even the bottom row of the structure.
How to make beds in a 3x6 greenhouse
Often the beds are arranged in 2 rows. Many plants in such structures are planted in a checkerboard pattern.
Plantings in a 3x6 greenhouse can also be distributed in 3 rows. Two are along the side walls, and the third is in the center of the space. The distance between them is 50 cm. In the center, the width of the bed is approximately 1 meter, and the side beds are 45-50 cm. Tall plants are planted in the middle, and low-growing ones on the sides.
For greenhouses in which tomatoes are grown, several layouts of tomato plantings have been thought out.
The most correct beds in a greenhouse for tomatoes are those distributed according to ripeness:
- Mid-early and mid-season varieties should be planted in the middle of the ridge.
- Early ripening tomatoes should be placed on the sides.
This distribution of tomato varieties will allow you to always have fresh, juicy tomatoes on the table.
Tomato plants can also be distributed according to the growth of the bushes. Tall ones should be planted closer to the wall along the east-west line. Low-growing tomatoes should be planted so that they are not in the shadow of tall tomatoes.
It is best to distribute the beds in a 3 by 6 greenhouse by making three rows of the same width. To plant as many plants as possible, the paths should not be too wide.
Sufficient dimensions: two paths of 0.4 meters each, three beds of 0.7 meters each. By narrowing the paths, the three ridges will be quite wide and comfortable.
DIY greenhouse model made of polypropylene pipes: photo of greenhouses covered with film
Arched frames for greenhouses and greenhouses can be purchased in specialized stores or ordered on the appropriate websites. The kit includes ready-made marked frame elements made of pipes and fastenings. Such structures are assembled quickly and easily: a foundation is not built for them, but only the area on the site is leveled.
Arched frames for greenhouses and greenhouses can be purchased in specialized stores or made independently.
Installing a greenhouse made of polypropylene pipes with your own hands allows you to get a structure made according to individual dimensions and drawings. The arched greenhouse is equipped with windows and doors at the ends of the structure. For budget covering, polyethylene film is used.
Scheme of a greenhouse made of polypropylene pipes covered with film.
Warm beds
For some time now, warm beds in a greenhouse have been in demand among gardeners, as they help to obtain an early harvest of greenhouse vegetables. Creating beds with a cushion of manure in a greenhouse should be done in the fall.
Making such a bed is not difficult. You will need to dig a small trench, having previously moved fertile soil from the ridge. Manure, mixed humus, and the remains of various plants are laid as the bottom layer. This base is covered with nutritious soil.
With the seedling method of growing greenhouse vegetables, this method allows you to get the first harvest 15-20 days earlier than using conventional beds. However, after 3-4 years, the lower “cushion” on the warm bed will need to be re-equipped.
The decision about which beds to arrange in a greenhouse is purely individual. When choosing an option, you need to focus on the method of growing plants and their varieties. When planning the size and height of greenhouse beds, it is important to take care of the ease of caring for greenhouse plants.
Choosing a place for a greenhouse made of plastic pipes
When choosing a place to install a greenhouse made of polypropylene pipes with your own hands, you need to consider the following points:
- the greenhouse should not be under the shadow of garden trees or other buildings on the site;
- a convenient approach to the design for caring for plants should be provided;
- It is necessary to take into account the prevailing wind direction in your region. The location of the greenhouse taking into account this factor will reduce heat loss.
Greenhouses made of plastic pipes are becoming increasingly popular among gardeners.
Before starting the construction of a greenhouse from PVC pipes, the area for the greenhouse is leveled. If the ground surface is not smooth enough, leveling is done without excessive compaction so as not to disturb the soil structure. Then precise markings are made, observing the correct angles, which will ensure stability of the frame.
It is recommended to cover the greenhouse frame with film at a temperature of 16-18°C, which will help prevent the material from sagging.
Arrangement of beds depending on their type
Making beds in a greenhouse with your own hands is not difficult if you choose a convenient option and a new way of growing vegetables and berries.
Many gardeners have already used Mittleider beds, high heated beds, warm and vertical beds.
Beds according to Mittleider
An interesting method of growing seedlings according to Mitlider involves saving space in the building.
American vegetable grower J. Mittleider has developed an optimal way of planting plants, where each sprout receives a lot of light and is well ventilated.
According to Mittleider, beds in a greenhouse should be made in this way.
- Orient the plantings in the north-south direction.
- Level the soil horizontally.
- The width of the beds in the greenhouse is no more than 45-50 cm.
- The seedlings are placed in 2 rows along the long walls, leaving the center of the greenhouse free (the distance between the seedlings is 30-40 cm).
- A side about 10 cm high is made along the edge of the bed (as a rule, soil is poured or formwork is installed).
- The height of the ground does not exceed the height of the passage.
- A passage 90 centimeters wide is made between the ridges.
For sowing, you can use boxes made of boards, which are filled with nutritious soil. Ridges made from wooden boxes have their advantages. If necessary, the old soil can be pulled out and new soil freed from pests and diseases can be added.
Raised beds in a greenhouse
The main reason for arranging high beds, up to 60 cm in height, is the convenience of caring for seedlings and the ability to plant plants earlier than other gardeners.
The tall structure raises the soil above the frozen ground, so you can start planting a little earlier than usual. And all because high ridges become warmer.
The warmth of the soil is given not only by the height, but also by what the boxes are filled with:
- The first layer is geotextile or something similar;
- Then sand, mown grass, wood chips, branches, peat, manure;
- Next is ordinary land;
- Pour boiling water generously and cover with film.
In such a bed, organic matter will begin to slowly decompose, filling the contents with warmth.
Warm beds
Warm beds come in several types: electric, biological, water. Having occupied the greenhouse with such beds, plants can be planted on them as early as March.
The most accessible option is considered to be the biological one, when a layer of sand is laid out at the bottom of the bed, then drainage and all organic residues in the form of grass, branches, leaves, and compost. The biological bed will last at least five years.
To make a warm electric or water structure, special preparation of the place in the greenhouse is necessary. First you need to dig a trench, then make sides. If you decide to build an electric bed, then you should put an electric cable or tape on the bottom. Next, you should install a thermostat to maintain the desired soil temperature.
There is a similar way to create a warm structure when metal pipes are placed at the bottom of the bed. Arranging a water option for heating the soil will require installing a stove to heat the water and a pump to circulate it through the pipes.
The principle of making all types of beds is the same. The first step is to draw the layout and dimensions of the beds. The diagram and calculations will help you place the plantings conveniently and compactly.
Assembling a greenhouse frame from PVC pipes
To assemble the greenhouse frame, you should prepare all the necessary materials:
- polypropylene pipe, fastening elements;
- clamps for fastening polyethylene covering;
- tees, corner adapters, set of screws;
- metal reinforcement bars 0.8 m long.
Metal rods are driven in along the long sides of the marked rectangle. The distance between the reinforcement rods should be from 0.5 to 0.9 m. The closer the rods are located, the more stable the structure will be. The reinforcement should extend 0.4 m into the ground. At this stage, it is important that the rods on one side are positioned clearly opposite the rods on the other side. In this case, the greenhouse will turn out without distortions.
Installation of a greenhouse, the design of which uses plastic arcs.
Next, pipes of the required length are placed on opposite reinforcement rods - this way, even arcs are obtained. When all the arches are installed, a pipe is laid horizontally along the upper points of the arches and secured to the arches using anchors. To obtain a more rigid structure, horizontal supports can be attached in several places.
Placing beds according to cardinal directions
Lighting of plants is of great importance for a good harvest. Seedlings that receive more sunlight will produce a bountiful and “sweet” harvest.
There are two main directions:
- North South.
- West East.
North-south is more suitable for tall crops. The sun's rays will pass more evenly between the rows of seedlings. In this situation, tall plants are planted on the north side along the wall.
For low crops, the second option is best suited. It can also be used for mixed plantings.
It is not always possible to position the beds correctly so that they receive more light. In this case, you have to turn on additional lighting.
All gardeners know that the greenhouse where more light pours into the garden bed will produce more crops. When building a greenhouse structure, it is necessary to provide additional lighting.
Covering a greenhouse made of PVC pipes with polyethylene
When the frame is ready, they begin to cover the structure with film. It is recommended to carry out this work at a temperature of 16-18°C to avoid sagging of the material. The polyethylene is secured using clamps. This fastening allows, if necessary, to pull the film and remove the sagging. At the point where the film comes into contact with the ground, it can be buried with earth or weighting agents (boards, bricks) can be placed on it.
Folding greenhouse made of plastic arcs.
On a note! In order for the polyethylene film to last longer, choose reinforced or multilayer material with high strength, tightness and wear resistance for covering greenhouses.
It should be noted that greenhouses created using plastic film are not durable enough. They are designed to operate for one or two seasons, after which the film will need to be changed. In addition, the film coating does not provide adequate thermal insulation.
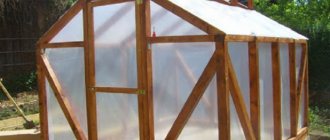
Construction of a greenhouse made of plastic pipes.
DIY greenhouse assembly from plastic pipes and polycarbonate
In order for the design of a greenhouse made of PVC pipes to be more reliable and last for more than one season, it is recommended to use polycarbonate sheets for the covering. This material has a number of properties that make it suitable for such purposes. Polycarbonate perfectly tolerates significant temperature fluctuations, has good thermal insulation, is not flammable, and a special film coating protects plants from exposure to ultraviolet radiation.
Scheme of a greenhouse made of polycarbonate and polypropylene pipes.
Types of greenhouses
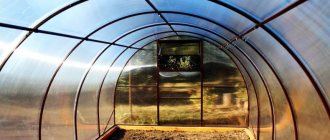
Such structures may have a film or polycarbonate coating. A fairly popular solution is the arched design. It has the following types:
- With a box based on boards and arcs strung on steel rods.
- With a plastic frame, arches and tees made of similar material.
Greenhouse with a wooden box Source stroypomochnik.ru
A greenhouse with a gable roof is also often installed. It can have the following varieties:
- With film lining.
- Coated with polycarbonate.
Professional gardeners often recommend using two-layer PVC-based greenhouses. Such structures have an excellent level of thermal insulation, since the inside of the greenhouse is reliably protected by polycarbonate sheets. Such structures give off 3 times less heat than conventional analogues.
See also: Catalog of companies that specialize in the installation of metal structures.
Choosing a location on the site, type and size of greenhouse
When choosing a place for installation, it is important that the area for the greenhouse is level and well lit by the sun. In addition, you need to immediately decide how the greenhouse will function. If you plan to grow crops in winter, you need to consider a heating system.
Scheme of a greenhouse frame made of plastic pipes.
The dimensions of the structure are determined based on the following parameters:
- type of foundation for a greenhouse;
- form of construction;
- seasonality (will the greenhouse be used in winter);
- types and number of crops planted in the greenhouse.
It is not recommended to build a greenhouse that is too large, since in such a room it will be quite expensive and difficult to maintain the necessary microclimate. Traditionally, the height of the greenhouse is taken to be two meters. The width is determined based on the number of plants to be planted, the path between the beds, and the sufficient distance for arranging a door, for which at least 60 cm is allocated.
Construction of a greenhouse frame using PVC pipes.
Ventilation
The basic kit includes an automatic ventilation system with hatches and vertical sashes, but in winter, open communication with the street is not recommended - heating costs increase and there is a possibility of frostbite of plants near the windows.
For safe air supply, the catalog of additional services includes recuperators - equipment that uses the temperature of the outlet air to heat the incoming air. As a result, warm air flows inside and ventilation occurs without a significant increase in heating costs. The cost of ventilation and prices for equipment can be viewed by clicking on this link.
Construction of the base of a greenhouse made of PVC pipes
The wooden base is made of timber with a cross-section of 10 cm. To prevent rotting, the beams are treated with an antiseptic compound. The beams are connected into a frame using staples.
First, prepare a trench for wooden beams. To do this, use pegs to mark and pull the cord around the perimeter of the base. To ensure that the angles are correct, the cord is pulled diagonally. If the length of both diagonals is the same, then the marking is done correctly.
Polycarbonate perfectly tolerates significant temperature fluctuations, has good thermal insulation and protects plants from ultraviolet radiation.
The trench is dug in such a way that the timber located in it is half buried. The bottom of the trench is covered with a layer of sand. Before lowering the beams into the trench, they are covered with a layer of waterproofing material, usually roofing felt. This is done in order to avoid contact of the wooden surface with moisture from the soil. Sheets of roofing felt are overlapped. After this, the remaining space in the trench is filled and compacted tightly.
The frame of a gable greenhouse made of plastic pipes.
To assemble a greenhouse frame from plastic pipes and polycarbonate, it is necessary to cut the reinforcement rods into segments 75-80 cm long. Along the long side of the wooden base, the rods are driven into the ground to a depth of 35-40 cm. The distance between the reinforcement rods should be no more than 60 cm, and it is important to ensure that it is the same on both sides of the base.
The frame of the greenhouse made of polypropylene pipes is covered with an awning.
Next, plastic pipes are placed on the reinforcement rods, forming arched arcs. Each pipe must be fixed on a wooden base. This can be done using metal clamps (brackets). To give the structure rigidity and stability, a pipe (stiffening rib) is attached from above (along all arcs from one end of the frame to the other). It is fixed under the arches with plastic clamps.
The service life of plastic pipes reaches fifty years.
The next stage will be the installation of the sheathing. To do this, it is necessary to install four racks of wooden blocks measuring 2 x 4 (cm) at both ends. The distance between the central posts is selected taking into account the width of the future door and window opening. The racks are connected to each other by transverse strips. To thoroughly familiarize yourself with the installation stages, watch the video “Greenhouse made of plastic pipes with your own hands,” presented at the end of the article.
The covering of a greenhouse with a frame made of plastic pipes is polycarbonate and polyethylene film.
Greenhouse construction procedure
After all the materials have been prepared, you can proceed to the main work. It is best to carry out this procedure together; additional help will not hurt when bending and installing pipes. The process consists of the following steps:
- Preparing the area for the construction of the structure.
- Assembling the box.
- Frame assembly.
- Covering the frame with film.
Preparing the area
The greenhouse is installed in a place that will be well lit by the sun throughout the day. The surface must be flat, without holes. For marking, you will need to use a shovel, stakes and nylon-based thread.
Preparing a site for a greenhouse Source silastroy.com
The preparation procedure is as follows:
- A rectangle is marked on the site using a tape measure. On each side you will need to make an interval of approximately 30-50 cm, while you need to take into account the dimensions of the future structure. Pegs are installed in the corners of the rectangle, and a thread is stretched between them.
- The top layer of soil is removed along the perimeter of the site and a hole with a depth of approximately 25 cm is dug. Roofing material is laid at its bottom with an overlap of 10 cm and crushed stone is poured on all sides. The thickness of the backfill layer should be approximately 10 cm.
- If the area is uneven more than 5 cm, then before digging a hole you will need to level the surface. You can add soil or, on the contrary, remove it. The first method is optimal.
If the height difference is too large, for example, the structure is being installed on a slope, then a wall based on brick or timber treated with protective solutions must be laid under the subsidence area. Then backfilling is carried out until the terrain is completely leveled.
Collecting the box
A greenhouse made of pipes has a box in its design. To assemble and install it, you will need to perform the following procedures:
- The wooden panel for the box is installed based on the size of the greenhouse. For this, 2 products with a length of 3 and 6 m are used. The panels are connected using self-tapping screws. The short panel should be directed towards the end of the long board, then 2 self-tapping screws are screwed in at intervals from the edge of approximately 20 mm. To increase the strength of the structure, a steel-based corner is installed in the corners.
- The assembled structure is treated with antiseptic compounds for wood and is installed in a pit. The visible area should not rise above the ground surface by more than 10 cm. To raise the box to the required height, you can add a small amount of sand.
- Inside the pit you will need to install special holders for arches. They should be installed around the perimeter of the box, with no more than 10 cm of the product sticking out from the ground.
- The final stage will be filling the hole and checking the correct placement of the holders using a level.
Frame assembly
The assembly procedure for such a structure consists of the following work:
- A purchased PVC tee is installed at the end of each pipe. To arrange the longitudinal sections in the lower part of the frame, you will need to measure the interval between the crosses and cut the required blank from the pipe.
- The cut products are mounted in crosspieces. If necessary, it can be rotated, and to ensure high-quality shrinkage, it can be lightly hammered with a hammer.
- Before installing the arc, experts advise bending the pipe to achieve the required bend. After that, the pipe is installed in the tee and bent until an arc of the required height is formed.
- When the arches are installed, you will need to strengthen the structure using boards. To do this, the panel is installed from inside the frame. Fastening is done using self-tapping screws.
- The ridge board is installed from the outside of the frame. To do this, it is laid on top and attached with self-tapping screws to the arches. The length of the fastenings should not be more than 40 mm.
- To increase the strength of the gables and ends of the structure, wooden panels are also used. Blanks of the required size are cut using a hacksaw.
- The end bases are being installed. To ensure good stability, a longitudinal board is installed between them. After which similar procedures are performed to create supports along the edges.
- Blanks for mounting the door are cut from the boards. Using self-tapping screws and a steel angle, the frame for the door is assembled. Plywood is suitable for cladding the lower part of the structure.
Greenhouse frame Source pinterest.com
To install the door, you will need to divide the hinge into parts. One of them is attached to the upper and lower parts of the central base, and the other is attached to the box of the structure. Then the door is finished with film and mounted in the prepared opening.
Covering the frame with film
For such a procedure, you will need to carefully adhere to the work technology. The procedure is as follows:
- Reinforced fabric with a thickness of 200 microns is spread over the frame so that the same distance remains at the ends and at the bottom.
- To attach the film, blanks based on pipes approximately 60 cm long are used, which are attached to the bottom of the structure. They are attached to the longitudinal pipe and secured with self-tapping screws.
- The blank walls of the greenhouse are finished in the same way. The fabric is carefully stretched between the supports and attached using slats of wood and nails.
Greenhouse made of pipes and reinforced film Source firma-ost.ru
To avoid the fabric from fluttering in strong winds, you will need to fasten it in several areas of the frame. To do this, you can use special sliding brackets or small parts of plastic pipes.
Covering the frame with polycarbonate plates
In order to correctly carry out the work of covering the frame with polycarbonate sheets, you should know some of the features of working with this material:
- the mounting spacing is 45 mm;
- the sheets are laid end to end and connected with a special strip;
- holes for fastenings are drilled 1 mm larger than the diameter of the screws;
- when fastening with self-tapping screws, thermal washers are used to ensure the tightness of the connection;
- the sheets are laid so that the cell channels are located as vertically as possible;
- the protective film is removed only after the installation process is completed;
- corner lines are fastened with a special corner profile.
To make the design of a greenhouse made of plastic pipes more reliable and last for more than one season, it is recommended to use polycarbonate sheets for the covering.
On a note! If polycarbonate sheets are purchased long before installation, they should be stored in a dry room to avoid moisture absorption.
Before laying the polycarbonate sheet on the arched frame, the ends are covered with punched tape and then with an end profile. This profile provides drainage and ventilation of the sheets, which will allow condensation formed in the channels to drain freely. Under no circumstances should the ends be sealed with tape or left open.
Installation of polycarbonate panels is carried out with the protective film facing up. If this condition is neglected, the polycarbonate will undergo rapid destruction.
Assembling a frame from plastic pipes with your own hands.
Do-it-yourself greenhouse made of plastic pipes: assembling a frame from HDPE pipes
Quite often you can find do-it-yourself greenhouses made from HDPE pipes. Such pipes are produced in coils of 100 m or in finished sections of 12-13 meters, which can facilitate the implementation of a structure of any length. The technology for their assembly is quite similar to the installation of a frame made of other types of plastic pipes. Here are some advantages of such pipes:
- the price is much cheaper than metal analogues;
- The shelf life is quite long - up to 50 years;
- resistance to chemical influences, corrosion;
- high frost resistance allows greenhouses to be used in the cold season.
The shape, size and choice of materials depend on the plants that are intended to be grown in the greenhouse.
How to arrange beds in a greenhouse
If you are planning to install a polycarbonate structure, it is recommended to place it from east to west. The wall with the door is placed from the north, and the blank end wall should be turned to the south.
You can distribute beds in a greenhouse of any size at your own discretion; there are no strict rules here, but there are established rules for organizing space:
- The width of the passages is 45-50 cm, if you plan to use a wheelbarrow, then 90 centimeters.
- The width of the ridges is no more than 1 meter.
- It is necessary to leave free space near the entrance, so the central bed should be shorter.
When planning the beds, it is necessary to take into account that over time the tops will grow and cover part of the path, so three most popular options have been developed.
- Two lanes. The ridges are located along the walls, with a wide passage in the center.
- U-shaped option with maximum filling of the area.
- Another greenhouse option is three stripes. Two on the sides and one in the center.
For the normal development of seedlings, the height of the beds is important, which depends on the type of soil.
- Low - 100-150 mm, suitable for fertile soils with low groundwater.
- Medium - 250-300 mm are suitable for crops with roots that are located closer to the surface. Suitable for soils of low fertility, so they are filled with nutritious soil.
- High - up to 60 cm. Used on infertile lands or wetlands. They are filled with fertile soil and plants with long roots are planted.
To grow seedlings faster, install heated boxes up to 80 cm high.
Construction of a foundation for a greenhouse made of HDPE pipes
A strip foundation is constructed from plastic pipes for the greenhouse. A trench half a meter deep and 30 cm wide is dug along the perimeter of the future building. Crushed stone mixed with sand (1:1) about 10-12 cm thick is poured into the bottom of the trench. We install formwork from boards, make a frame from reinforcement and fill it with mortar. The solution is prepared at the rate of cement - 1 portion, sand - 3, crushed stone - 5. Use water to bring the mixture to the consistency of thick sour cream. After the mortar has completely set, the greenhouse frame can be installed on the foundation.
Greenhouse with a frame made of polypropylene pipes.
Video description
PP pipes can also be connected with fittings without welding, if you take them of a larger diameter and secure them with self-tapping screws for reliability. How this is done is shown in the video:
You can only make arcs from plastic pipes and connect them with longitudinal wooden slats, using clamps for fastening. Such a frame will also be easy to disassemble by unscrewing the screws holding the clamp.
Frame with wooden purlins Source i.ytimg.com
If such a greenhouse will be used all season, the film can be secured to it by nailing it to wooden slats through strips of tarpaulin or old linoleum.
Assembling a frame from HDPE pipes
For the base of the frame, a frame structure is made of pipes with a width and length according to the drawing. The pipes are fixed into the frame with self-tapping screws. Every meter, transverse arches are attached to the finished frame. The pipe is first fixed on one side of the frame, then carefully bent and fixed on its opposite side. Next, pipes are attached longitudinally, protruding as stiffening ribs. It is advisable to install at least three such pipes: one running along the top point and two on the sides of the structure.
Project of a greenhouse with arcs made of HDPE pipes.
At the end of the frame, a doorway is assembled from pipes - it looks like a U-shaped structure. It is attached to the base pipe and fixed on top of the end arc-shaped pipe. The door is assembled according to the drawing from four pipe sections.
The finished frame is fixed to the foundation using dowels, after which the greenhouse is sewn up with polycarbonate. Assembling a greenhouse from any type of plastic pipes can be completed within one to two days. This does not require special knowledge or skills. Considering that plastic pipes have an acceptable cost, and the structure itself can last for several years, an increasing number of gardeners prefer such greenhouses and greenhouses.