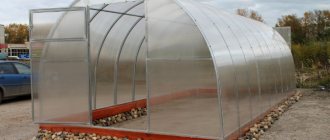
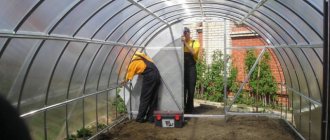
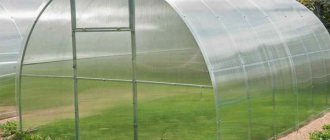
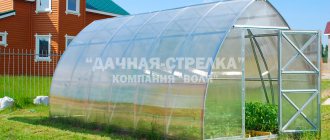
Every gardener probably knows what a greenhouse is Why it is needed is also clear. Everyone's attitude towards such structures is different. Some people find their own greenhouse tomatoes, cucumbers, peppers and other delicacies an excellent addition to the table. Others don’t understand at all why bother with this whole vegetable garden if you can buy ready-made vegetables and fruits in stores and markets. And you don’t have to dig into the ground, bending over, and then you don’t have to treat your sore back. My wife and I used to think so too, but when we moved permanently to the village, we also decided to buy a greenhouse. In this report we want to talk about how we chose it, bought it, installed it, and how we got our first harvest.
In general, my parents always had greenhouses at their dacha. One is collapsible, the other is stationary. For as long as I can remember, every spring I had to spend several hours erecting and covering these wonderful structures with spunbond. And in the fall, accordingly, disassemble, fold everything neatly and put it in the shed until the next season. It was impossible to leave them collected and covered for the winter. Why? Well, they'll steal it! Our people are passionate about the good of others and enterprising.
Now, living in our own home, we decided to choose a stationary option. So that you don’t have to assemble and disassemble every year and store it somewhere. In the first year, they installed a small “Fazenda” greenhouse. Also an option, but it’s still less convenient than a real large greenhouse.
Surely you yourself know that there is no shortage of greenhouses on the market now. Open any newspaper with advertisements, there will be a whole page with offers for every taste and budget. Some are cheaper, others are more expensive. Everything, as chosen, is of very high quality, with a guarantee, galvanized and the like. Some are small, others are small, and others are simple arched.
What's better? How to choose a good greenhouse? After all, you can’t just go and buy the first one you come across right away? Playing the lottery with a notorious domestic manufacturer is a big risk!
I had to re-read a mountain of reviews, recommendations, and bother friends and acquaintances who had long since become happy (or even unhappy) owners of garden greenhouses. Now that the choice has already been made, I would like to summarize the knowledge gained and present it here briefly.
"Factory of ready-made greenhouses"
The company has gained a good reputation. Designs from the “Factory of Ready Greenhouses” are a compromise between reasonable cost and high quality.
Greenhouse "Osnova"
Greenhouses from this category are characterized by resistance to environmental influences and increased strength. Thanks to these qualities, the products are in demand in the domestic market. In addition to the main office, the company has many warehouses throughout the Russian Federation. When producing products, climatic conditions must be taken into account.
Details
Options
It is not difficult to assemble a polycarbonate greenhouse with your own hands; moreover, the use of such material seriously increases the capabilities of home craftsmen in planning and assembling temporary buildings. Thanks to the use of polycarbonate, new and already classic models have been designed. If certain types can be classified as greenhouse dacha complexes, which must be assembled on a separate foundation, then a greenhouse version attached to a house can be assembled using only a few tens of meters of polypropylene pipe and from 30 to 35 square meters of polycarbonate. The only disadvantage of this design will be the high price of plastic. Due to strong shading from the house walls, the greenhouse frame needs to be assembled and glazed with transparent and more expensive monolithic polycarbonate.
The structures listed above differ from each other not just in the shape of the roof and the profile of the load-bearing beams. The main difference lies in the method of frame assembly and polycarbonate masonry technology. Naturally, other examples of detailed assembly are also used for greenhouses of various sizes, and therefore, before you try to build a greenhouse with your own hands from a material such as polycarbonate, you need to master carpentry and welding, or learn how to assemble polypropylene solder pipes.
How to calculate polycarbonate
It should be said right away that it makes sense to assemble arched greenhouses not because of the lower costs of polycarbonate/metal, but mostly because of the structural simplicity. If we take as a basis the drawing of the building in the form of a box and count the number of assembly units, then we can imagine how labor-intensive the construction of the arch structure will be less than the time and effort required to assemble a gable square design.
In order to assemble an arched greenhouse measuring 3*6 meters, you need the following materials:
- To equip the base, you need from 200 to 210 pieces of red brick, from 75 to 99 kg of M300 cement, sand and gravel - 1.5 cubic meters.
- In order to assemble the supporting arches for polycarbonate, 7 pieces of square pipe of 2*2*0.2 cm, with a length of 6 meters, are required.
- 18 meters of pipe measuring 4*2*0.2 cm are used for piping the foundation; another 30 meters of polypropylene pipe 2*2 cm are required to assemble the horizontal crossbars and gables.
- In order to assemble a greenhouse covering, you need 4 pieces of polycarbonate with a size of 2.1 meters and a thickness of 0.35 cm. For fastening, a standard self-tapping screw with a washer is used, the assembly of which requires from 120 to 140 pieces + 18 meters of an end-type edge profile for sealing polycarbonate honeycomb.
- Moreover, for the assembly process and fastening the greenhouse frame to the base, you need to buy from 18 to 20 anchors, with a nut, washer, grower, as well as canopies - 6 pieces.
Please note that since the greenhouse frame is assembled by welding, you need to rent an excellent welding inverter for a couple of days, or even better would be to use a semi-automatic machine with a mask and a set of electrodes.
Before the assembly process, supporting arcs and metal parts for the gables of the greenhouse must be treated sequentially and separately, at intervals of a day, with an aqueous solution of phosphoric acid, a primer composition and paint and varnish materials for atmospheric work.
Preparatory stage
If we are assembling a polycarbonate greenhouse, a video tutorial will definitely not be superfluous. But before this, it is important to consider the process of preparatory work, which, first of all, is associated with the loading of workpieces and welding of certain parts. The greenhouse will be much easier to assemble if the arches and gables were made in advance, for example, arches from pipes were cut and profiled in a garage or in a home workshop. Naturally, you can do the same work at the site of the new assembly, but this approach greatly complicates and makes all the work slower. The most important stage of preparatory work is considered to be the production of arcs. There are many recipes on how to bend a square pipe using a homemade method or using a homemade machine.
Helpful advice! If you have the opportunity, ideally you should order a bow bend from the nearest repair or locksmith shop. So, the quality will be much higher, and there is no need to waste precious time and effort to assemble a machine that will only be needed once during the entire construction period.
The price of arc profiling services can be from 30 to 50% of the cost of the pipe.
Design Features
The frame is made up of solid arches and welded ends.
The pipes from which all elements are made have the following parameters:
- cross section - 25*25 mm;
- thickness - 1.5 mm.
Pipes for the greenhouse frame
The main frame is covered with a zinc layer (its width is 140 microns), which prevents the appearance of rust and other problems that can be caused by greenhouse conditions. There is no need for additional staining. The frame is strengthened with arcs.
Reinforced frame
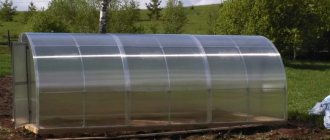
The standard length is 8 meters. This figure may be higher. In any case, the coating material is polycarbonate, the density of which is 0.8 kg/m2. To attach the polycarbonate to the base, self-tapping screws and galvanized tape are used.
Greenhouse covering - polycarbonate
The service life of the Base is at least 10 years. The manufacturer provides a three-year warranty. The standard kit contains all the necessary parts, including fittings, vents and doors. During assembly, the latter are placed at the ends located opposite each other. The kit also includes mounting hardware.
Cellular polycarbonate
These are the same sheets of transparent material that cover the frame of the greenhouse. Despite their apparent simplicity, they must satisfy certain conditions in order to last a long time and do their part in creating the “greenhouse effect”.
These are, for example, low specific gravity, flexibility, light transmission, resistance to low temperatures and sufficient mechanical strength.
I think there is no need to go into detail about these characteristics. They are understandable. The material has several other not so obvious properties that require special attention.
Light stabilizing layer
Good cellular polycarbonate is completely transparent to infrared radiation and visible light. But it simply must cut off ultraviolet radiation with a wavelength of 400 nm or less. This radiation is harmful to plants.
In addition, cellular polycarbonate that will be used outdoors must have its own UV protection. And not in bulk, but superficially. If it is not there, then such material can only be used indoors. You can find out about the presence of a protective layer by looking at special stickers on the protective film. If they are not there, then you should choose another material, otherwise your coating will not last long.
Material thickness
The optimal thickness of the material can be considered 4-6 mm. When choosing a greenhouse, it is important that the actual thickness matches that stated by the seller. Don’t be lazy to take a caliper with you to negotiations. With its help, you can measure the wall thickness of the metal frame pipe and the thickness of the polycarbonate sheet.
If the thickness is less than 4 mm, it is better to use another material or another seller.
Another trick of unscrupulous traders is the claim that the 3.5 - 3.7 mm thick sheet they sell is the same in strength characteristics as 4 mm. You should deal with such sellers in your own way.
Advantages and disadvantages
The popularity of the Osnova (reinforced) greenhouse is due to the following characteristics:
- resistance to the influence of external factors;
- simple installation;
- strength;
- versatility;
- reliability;
- reasonable cost;
- unpretentiousness.
Strength of the “Osnova” greenhouse
Disadvantages include difficulties with transportation. Their appearance is explained by their impressive size.
The manufacturer has achieved maximum strength through:
- small step between arcs;
- ends to which jumpers are welded;
- longitudinal ties.
There are special holes in the frame parts. Bolts and nuts for fixation are inserted into them. The stability of the structure largely depends on what the base of the greenhouse will be screwed to. The covering material is attached to the frame using galvanized tape, self-tapping screws and press washers. Installing a reinforced base will not take much time. Difficulties may arise when cutting polycarbonate sheets. The greenhouse is often equipped with a ventilation system.
Differences between models from different companies
Not only HRT is involved in the production of the People's Reinforced Greenhouse. A very similar product is offered by the Rus-greenhouses company. The same galvanized profile 20x20 mm and 1 mm thick, 5 horizontal ties, reduced gap between all-welded arcs (0.65 m). Model height - 2.1 m. Width - 3 m. The length of the greenhouse can vary from 4 to 8 m.
Along with this parameter, the type of polycarbonate also affects the cost of the structure. Rus-greenhouses offers several coating options:
- Domestic production - Yug-Oil-Plast company.
- Russian-Austrian brand Sellex.
- A new product is NANO-Greenhouse polycarbonate, which will help increase the greenhouse yield by 45% (if you believe the manufacturer’s promises).
- Austrian Sellex material 0.6 cm thick.
- German products Woggel. It features energy-saving properties and a warranty period of up to 20 years.
Attention! The cost of the cheapest 4-meter greenhouse, equipped with Yug-Oil-Plast polycarbonate, is 13 thousand rubles. The most expensive - in the amount of 34 thousand rubles. - an 8-meter product with Woggel sheets will cost.
The St. Petersburg company Life at the Dacha offers not only self-tapping screws as fastenings, but also special brackets and bolts. The advantage of this method is that to fix polycarbonate sheets you do not need to drill a galvanized profile. This way it will be possible to compensate for the seasonal expansion and contraction of the coating. The cost of fastening is calculated according to the length of the structure. Price for a 6-meter model is 2700 rubles.
Attention! On the website of the company Life at the Dacha, a complete Narodnaya greenhouse with a height of 2.15 m, a width of 3 m and a length of 6 m costs about 30 thousand rubles. Calculations for other models are different.
Assembly and installation of the greenhouse
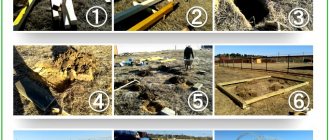
Before assembling the Osnova greenhouse from the Ready Greenhouse Plant, it is necessary to prepare the foundation. For this purpose, concrete, steel piles or wooden beams are used. They are purchased separately.
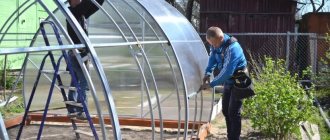
Installation is carried out following a certain algorithm:
- Connect the base and parallel parts.
- The piles are being fastened. They should extend 10 cm from the edge of the long side. Self-tapping screws are used to fasten the joints.
- In the prepared area, holes intended for piles are dug. The location where their installation is required is determined based on the greenhouse plan.
- Install the assembled base.
- The piles are driven in using a sledgehammer. Before doing this, it is necessary to assess the evenness of the base. A level is used for this.
- Check the diagonal. If all the rules are followed, they will be equal.
- The arcs are installed. The latter will require self-tapping screws.
- Remove the film from the unfolded polycarbonate.
- Trim off excess material.
- The ends are installed on the frame, T-shaped piles.
- Doors and windows are cut in.
- Place polycarbonate sheets on the frame and strengthen them with fasteners. In this case, marks that are previously made using a marker are taken into account.
If the assembly is carried out correctly, the heavy-duty greenhouse Base will last for more than one season. This is confirmed by reviews from grateful consumers. You can watch the installation process in the video.
What are polycarbonate greenhouses made of?
The main cost item for a new building will be the frame assembly, and therefore the first thing you need to think about when choosing a polycarbonate greenhouse project is the material for the load-bearing type of structure. You can assemble the frame of a greenhouse in several different variations, but the determining factor will still be structural reliability, and only then can we talk about the cost of the issue.
Most often, in order to assemble a frame for a large-area polycarbonate greenhouse, craftsmen and various craftsmen offer 4 types of material:
- Water pipes made of polypropylene.
- Wooden blocks and slats, a slab and an unshaped board.
- Profile and aluminum pipe.
- Square metal pipe with phosphate or galvanized coating.
Naturally, we are talking about assembling a full-fledged stationary frame with a small base and polycarbonate wall cladding. If you choose a greenhouse frame - a temporary structure for 1 season, then the selection criteria will be based on the simplicity of the assembly process and the low cost of the roof. The greenhouse needs to be quickly assembled and removed at the end of the growing season; the polycarbonate sheets and structural parts must be collected in bags until the new season. For this reason, if you plan to assemble and design it yourself, it is better not to use polycarbonate greenhouse drawings for greenhouses.
Wood and metal
From the general list, profiled steel pipe is considered the best and most reliable material. If you adhere to the basic requirements of construction technology for a polycarbonate greenhouse, then a steel frame lined with plastic will be able to stand on your summer cottage for at least 30 years. Next on the list of the most reliable solutions is wood. Despite the fact that wood is inferior to aluminum and plastic in terms of mechanical strength, this solution has one extremely important advantage - do-it-yourself greenhouse buildings made of polycarbonate, which are assembled on a wooden frame, are very easy to maintain and repair.
Helpful advice! When choosing the material from which you plan to assemble a greenhouse or polycarbonate greenhouse with your own hands, it is important to remember that you will also need to repair it yourself, and therefore the frame should be convenient for repair work and replacement of damage.
In addition, a steel and wood pipe is better suited for the assembly process of a square-shaped polycarbonate greenhouse. Using a beam, square, corner, or cuttings of a metal water pipe, assembling a building with a gable roof is much cheaper and easier than bending arch ceilings.
Advantages of aluminum and plastic for arched structures
One of the methods of building a polycarbonate greenhouse with your own hands involves simply copying ready-made structures that are designed and manufactured by companies under factory conditions. So, if you look at ready-made kits available for sale, it may turn out that most of the models sold should be assembled from aluminum and plastic pipes with a diameter of 1.5 to 2.5 cm. The reason for this decision is obvious, and installation of polycarbonate greenhouses with your own hands takes at most 2 hours of intensive labor, and therefore polypropylene and aluminum are excellent if you need to assemble small buildings. Another advantage of aluminum and plastic profiles is that the material is insensitive to condensation, of which a lot will constantly collect under the sheets. If you need to fight for the good condition of a greenhouse made of wood and steel using varnishes and paints, then the aluminum frame can be assembled, forgotten and not remembered about it.
Equipment, pros and cons
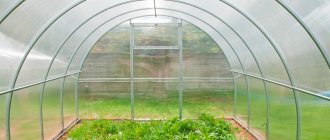
The delivery set of the Osnova greenhouse contains all the necessary parts and elements for installing the structure yourself. In addition to galvanized arches and end parts, the package includes two doors and two windows, which after assembly will be located at opposite ends. Also, along with the frame parts, polycarbonate is supplied in the required quantity. The package must contain a set of fasteners and accessories (handles, bolts, screws, sash clamps, galvanized tape, washers, etc.).
The greenhouse delivery package does not include only the foundation, which you will have to do yourself. As a rule, timber measuring 100*100 or 150*100 mm is perfect for this, however, the “Base” can also be installed on a strip concrete foundation or galvanized piles.
Advantages of the Osnova greenhouse:
- it is not afraid of wind and snow loads;
- it is easy to assemble thanks to a small number of collapsible parts - most buyers (about 95%) assemble it with their own hands without the help of installers;
- the greenhouse does not require snow removal and monitoring in winter, and the length of the structure does not affect its resistance to snow loads;
- there is no need to paint the frame;
- a special method of fastening polycarbonate allows you to achieve even greater reliability and strength;
- the covering material can be secured along the entire length of the arches.
Osnova has plenty of advantages, but no disadvantages at all. After all, even the price of this greenhouse is quite acceptable.
Greenhouse "Kremlevskaya Lux"
The Kremlevskaya Lux greenhouse is perhaps the most durable arch-type structure on the greenhouse market. It can easily cope with significant snow loads. Read this article for more details.
What can the frame be made from?
It is impossible to say unequivocally which building material will be the best for making a greenhouse frame - after all, each of them has its own undeniable advantages. Therefore, you need to be guided by expediency and practicality.
For example, a greenhouse can be made based on:
- profile pipe;
- wood;
- galvanized profile;
- polypropylene pipes and other materials.
Interior arrangement of the greenhouse
In the created greenhouse, it is important to consider the ventilation system.
Installation of doors and windows
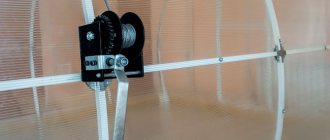
For a small room, 2 windows will be enough. They can be equipped with an automatic movement mechanism, which will allow you to fix the window in the desired position, which makes operation easier.
Doors must close tightly. This is very important in bad weather conditions, especially in winter.
The irrigation system is laid along the future beds. It is better to install drip irrigation, which will uninterruptedly supply water to the plants.
Don't forget about lighting. Plants constantly need sunlight, which may not be enough in cloudy and rainy weather. Therefore, it is necessary to install fluorescent lamps in the greenhouse. They are mounted at the top of the beds.
Heating a winter greenhouse
To grow plants all year round, you need to take care of high-quality heating of the greenhouse. The choice of heating system depends on the crops that will be grown in the cold season. For cold-resistant herbs and greens, heating the soil with electric heaters or compost is suitable. Heat-loving plants will need a stable microclimate and additional lighting.
The easiest way to install electric heating. For electric heating you can use:
- a heating cable that is laid under the beds;
- electric heaters or convectors installed along the walls;
- infrared heaters mounted on top of the beds.
You can also build a stove near the northern wall of the greenhouse, from which heating pipes are laid around the perimeter of the greenhouse, and a chimney is also led out to the street.
How to choose the right location for a greenhouse
You need to choose a place to install the structure regardless of the installation method. However, it should be borne in mind that the method without constructing a foundation has an advantage - the location of the greenhouse can be changed at any time.
Soil quality
The soil at the work site must be examined - determine the composition of the soil at a depth of up to 0.8 meters and determine the presence of groundwater.
If the greenhouse is installed on soft soil, it may tilt or sag. Because of this, the strength of the structure will be low, possible damage to the frame or coating, and disruption of the door.
To eliminate such negative manifestations, it is necessary to choose a place where the soil is dense. If this is not possible, the foundation must be poured, and in a swampy area, drainage ditches must first be made.
It is not recommended to make a greenhouse in a clay area. This is due to the fact that clay retains water when watered. And for plants, increased humidity is a negative factor. It is best when there is sand under the fertile soil. If there is no sand, you need to remove the clay layer and make drainage.
Level of illumination of the place
The greenhouse should be installed in such a way that the seedlings receive more light, especially in the morning. This is the most favorable time of day for photosynthesis.
When choosing a location for a greenhouse, take into account the illumination and position the structure:
- from North to South;
- from east to west.
Most often, gardeners use the second option - then the sun illumination is the highest.
Influence of trees and buildings
The distance between a one-story house and a greenhouse should be more than 3 meters, otherwise the shadow from the house may slow down the growth of grown plants.
The greenhouse must be located away from large trees. Otherwise, their root system will take away moisture from crops. They can also shade the greenhouse and drop leaves onto the roof in the fall.
Many summer residents place a greenhouse on a plot next to outbuildings. In this situation, you need to take into account the influence of shadow from buildings - it is unacceptable to shade plants in the morning. If the plot area is not enough, it is better to install a greenhouse on the south side of the buildings.
It is also not recommended to place the structure between buildings due to the effect of constant drafts.
Which greenhouse is stronger?
Before we begin a detailed study of the Osnova greenhouse, we suggest that you get acquainted with the basic rules that will help you choose exactly the greenhouse that will have the highest strength and will serve you for many years.
To begin, soberly assess the climatic conditions in the region where you live and think about whether you need a heavy-duty greenhouse. The fact is that such structures, as a rule, cost much more than standard structures. If you live where strong winds are very rare and snow falls in negligible quantities, then there is no point in buying a heavy-duty greenhouse. However, since you are still reading this article, it means that you really need a design that can easily cope with increased snow and wind loads. So which greenhouse is the strongest?
- A greenhouse with a frame made of galvanized profile is worse than one made of painted pipe or plastic. The fact is that in structures made of galvanized metal, the supporting arcs are often collapsible and consist of several parts. And the thickness of the metal is weak. However, at the same time, it is not at all afraid of rust and copes well with conditions of high humidity, which often (or rather, almost constantly) arise in a greenhouse. But frames made of pipes are not afraid of testing by snow and wind, but they rust and deteriorate faster.
- And among collapsible structures there are quite durable types of structures. And they are stronger and more reliable the fewer parts they contain.
On a note! Assembling greenhouses from solid arcs is much easier and faster than from those that have a lot of parts. And this is also their undoubted advantage. But collapsible structures are easier to transport.
And remember: you don’t need to save money if you want to buy a truly durable and reliable design. However, before purchasing, be sure to read reviews about the greenhouse options that you have already considered and choose the best one.
Prices for cellular polycarbonate
Preparing the structure for installation
It is best to install a small greenhouse in the shape of a house or a dome-shaped structure on the site.
Drawings, diagrams, dimensions of the greenhouse
To build a greenhouse, you need to choose a suitable scheme and build the structure according to it. The drawing is developed depending on the required dimensions. In a small area, you can place a 4x2 meter greenhouse with an optimal height of 2.2 meters at the highest point of the roof. Based on these parameters, a diagram is drawn up. Examples of drawings are shown in the photo below.
Advice! The drawing should indicate the shape and dimensions of the structure, as well as the location of doors, vents and chimney outlets.
Calculation of material quantity
Based on the drawing, you can calculate the required amount of material.
For example, for a semicircular greenhouse 4x2 meters with a circumference of 6 meters, it is best to use solid sheets 6x2.1 meters. This creates a seamless coating that provides reliable plant protection. If the length of the greenhouse is 4 meters, then you will need 2 sheets to cover the dome and another 1 sheet to cover the ends on both sides. The total number of sheets is 3 pieces.
The number of profile pipes or wooden slats for the frame assembly is calculated separately.
