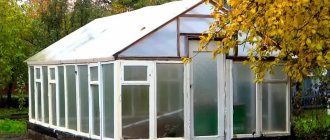
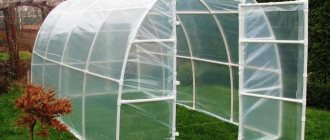
Building a full-fledged greenhouse complex at the dacha on a concrete base and with full glazing is expensive and not always justified from a technical point of view. Installing a polycarbonate greenhouse without a foundation looks much more attractive. Of course, this does not mean that the frame of a greenhouse or greenhouse can be easily installed on a dirt site without the use of fasteners; you will have to fix the greenhouse box on the beds in any case, you can only do it correctly, without obvious mistakes and violation of technology.
Without helpers it will be difficult to level the frame
Is it possible to install a greenhouse without a foundation?
Technically, nothing prevents you from assembling a greenhouse frame without using a foundation tape. Typically, the foundation in frame buildings is used to distribute the mass to the ground and the lower tier of the wooden frame. It is mandatory for heavy structures for two reasons:
- Compensation for subsidence and heaving of soil;
- At the same time it strengthens and tightens the frame like a reinforcing belt.
For light buildings and “quiet” soils, such reinforcement is not required, so installing a greenhouse on the ground without a foundation is quite possible. But the technology used is not universal even for the simplest polycarbonate buildings, so in order not to use a solid foundation, you will need to select the conditions for installing the greenhouse box.
Criteria for choosing a location for a greenhouse
In order to mount a frame without a foundation, you must ensure the following:
- The weight of the future greenhouse construction is small, there are no massive heavy parts in the design, and most of the frame is made of a thin steel profile or wooden slats;
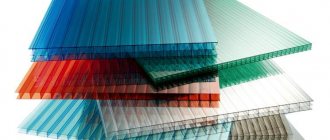
- The wooden frame is covered with polycarbonate, spunbond or polypropylene film;
- The place for the greenhouse is well protected from strong gusts of wind;
- The site has a minimal slope.
Important! In addition, it is important that the soil under the future greenhouse is viscous, with a minimum amount of moisture.
Therefore, if you install a greenhouse without a foundation with your own hands, then the best option would be sandy soil; installation on pins or anchors is suitable for it. It is clear that it is possible to install a polycarbonate greenhouse on black soil or loam, but due to heaving the frame will experience increased loads. As a result, the polycarbonate cladding may be damaged.
Greenhouse frame and pin foundation element
What to do with the soil
When choosing a location, you need to examine the soil. To do this, it is recommended to dig a special hole with dimensions of 70 cm by 70 cm and a depth of 1 meter 20 cm. Now you need to determine the type of soil. This is easy to do if you take a handful of it and try to make a ball. It was possible to roll a ball or sausage - there was a lot of clay, but it didn’t work out - sandy soil. Sand is a very good basis for greenhouse soil: it allows water to pass through, and excess water will prevent the roots from rotting. If the soil is clayey, it will have to be replaced.
To replace the soil under the greenhouse, you need to dig a pit at least 70 cm deep and fill it with 40 centimeters of sand, leaving the top 30 cm to be filled with a fertile mixture. In addition, it would be good to know the depth of the groundwater. If they are found higher in the pit, you will have to make drainage grooves to drain excess water.
Advantages and disadvantages of no foundation
The main and most significant advantage of using foundationless technology is a significant reduction in the amount of work. Installing a greenhouse on embedded pins will take an order of magnitude less time, and in addition, there is no particular need to worry about waterproofing the base.
Another advantage is the relatively simple way to level the frame when installing a greenhouse without a foundation on pins. There are no problems with leveling the supporting surface, since the structure made of angle and polycarbonate actually remains “hanging” in the air on point supports.
On marshy, waterlogged soil, the pin foundation will sag
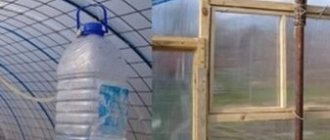
The only disadvantages include a weak and imperfect support system. If in the fall the ground area under the polycarbonate frame is flooded with surface water, the greenhouse may tilt or shrink. In winter or autumn, frozen, waterlogged soil can easily raise the top layer of soil to a height of 5-10 cm. This means that the lower edge of the cladding cannot be made of polycarbonate, but use a slab or film.
Installation instructions
If the location for the greenhouse has already been chosen, all the frame elements are made by hand or purchased ready-made and brought to the site, you can begin installation. You need to start by preparing the site. At the selected location with prepared soil, it is recommended to mark a site of the required size. This is done using wooden pegs and rope. Next, the site is leveled, the turf and protruding mounds and mounds are removed. It is advisable to check the horizontality using a construction spirit level. There should be no height differences of more than 5 cm. Particular attention is paid to a half-meter strip along the perimeter. The rest can be straightened out later.
To determine the outer edge of the trench, measure 30 cm from the marked line and draw a line with a shovel or pin on the ground. We dig a trench 30 cm wide and depth, which depends on the length of the greenhouse legs. We calculate so that the bottom frame of the frame rises 10 cm above the ground. If we are going to install the greenhouse on a beam, then the depth and width of the trench depends on the size of the beam. The bottom of the trench needs to be compacted a little and checked for horizontalness so that the frame does not warp later.
Now is the time to start protecting the greenhouse from weeds and pests. To do this, you need to line the outer wall of the trench with some hard material, for example, slate or roofing felt. They say that in 3-4 years the wheatgrass will overcome such an obstacle. So, if the greenhouse remains in the same place, the protection will have to be updated.
When is the best time to install a greenhouse?
It is best to install the greenhouse frame either in early autumn, when the soil is relatively soft and dry, or in early spring. Typically, a frame structure is installed for the winter without polycarbonate, and only with the arrival of the first warmth are the beds set up and cladding done.
You can install a greenhouse building in the summer, but you will need to dig two drainage trenches at a distance of 50 cm from the boundaries, otherwise summer and autumn rain moisture can drown the pin supports.
Most summer residents prefer to install a greenhouse in early spring; the soil is hard, but can be easily warmed up. After installing the pins, the soil in low temperature conditions will grab and fix the supports no worse than cement.
Advice! With the arrival of warmer weather, the soil at the base of the greenhouse will need to be added and compacted with a wooden tamper.
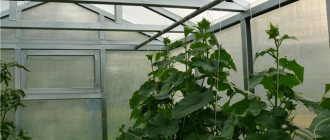
Wooden frame
Greenhouse structures made of wood are easier to repair. They are built according to the principle of a designer. If necessary, if the parts are rotten, they can be replaced. To protect the wooden frame from rotting, it is treated with various means, for example, copper sulfate or antiseptics.
A greenhouse with a wooden frame is lightweight, so when constructing it there is no need to create a strong foundation. For construction, timber with a cross section of 10-12 cm (length 3 m) is used. To install them, you need to first prepare holes 50 cm deep.
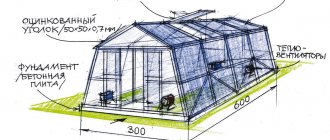
By preparing materials with these characteristics, you can create a greenhouse 2.5 meters high, which is enough to grow almost any greenhouse crop. If a greenhouse with dimensions of 3x6 meters is being built, 6 columns will be needed. Four posts are installed in the corners, and two in the middle. After installing the supports, they are filled with mortar. When the solution has dried, you can begin to assemble the frame.
Next, you need to fill the wooden posts with bars with a cross section of 10 cm at the top and in the middle. The rafters are fixed to the upper beams (0.5 m increments). This makes the structure more stable. The rafters and load-bearing supports are secured with self-tapping screws. Experts who professionally install greenhouses do not recommend using nails for these purposes.
Before assembling the frame, you need to think about the location of the doors and windows. For a greenhouse with the specified dimensions, a door frame with a size of 1.8x0.8 square meters is created, it is mounted on the north side. The sizes of the windows are selected taking into account personal preferences.
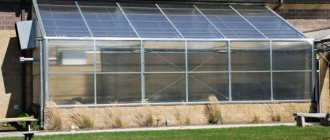
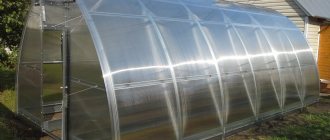
Options for installing a polycarbonate greenhouse base
For practical use, two support options can be recommended:
- Square steel tube driving rods;
- T-shaped steel support pins.
The rod system is used primarily for wooden polycarbonate greenhouses. The installation diagram is shown below.
The wooden square frame of the greenhouse is reinforced with L-shaped welded corners and laid out on the soil, sometimes the top layer of turf is not even removed so as not to weaken the soil. Next, the pipe sections are inserted into the mount on the greenhouse frame and driven into the ground using a sledgehammer. All that remains is to level the building to the horizon, install the polycarbonate and tighten the pins to the mount.
How to install and secure a polycarbonate greenhouse to the ground without a foundation
Metal T-shaped supports have to be buried in the ground, as in the case of a full foundation. Therefore, the supports for the greenhouse must be phosphated and painted with good polyester paint. Galvanized parts of the greenhouse frame, even with light polycarbonate, quickly lose their protective layer and begin to rust, so you only need to paint or treat them with silicone.
Site preparation
First of all, it is necessary to plan and level the surface of the site for the future greenhouse. It is important to do this at the very beginning, even before planning the size and shape of the greenhouse and the polycarbonate glazing method. The difference in height at opposite points should not exceed 50 mm, otherwise it will not be possible to level the lower tier horizontally, and the frame without a foundation will be skewed in one direction.
If this is not done, then the height of the supports buried in the ground is often simply not enough; it turns out that one edge of the greenhouse rests against the backfill with polycarbonate. From the opposite direction, the lower tier at this time hangs in the air without support.
To install T-shaped pins, you need to make a trench or dig holes 30-40 cm deep. Inside the ditch or holes, pour a cushion of sand and lay out a layer of gravel. The pillow must be spilled with water and the improvised foundation is compacted with a hand tamper.
Assembly
The most difficult thing is to adjust the height of each pin relative to the level of the ground surface. Often craftsmen prefer to simplify the task and bury the T-shaped pins long before assembling the greenhouse and lining it with polycarbonate. In this case, pegs are driven in advance along the perimeter of the future building, as is done when marking a conventional foundation.
Simplified installation option in pits
The stakes are connected with a metal profile or a cord is pulled; since there is no foundation, the lower part of the future greenhouse can only be leveled using conditional markings. Next, T-rods are installed in the trench or pits; the points of future attachment to the frame must be aligned in height, using a cord, or at the building level, as in a conventional foundation.
The accuracy of this method is low, so the pin foundation will turn out with an error, but the quality of the support settlement is very high. Therefore, it is better to install a greenhouse with a weak frame, polycarbonate lining and clay soil according to the above diagram.
The frills are tapped to align the frame with the horizon
The second method assumes that the supporting structures of the greenhouse are made of aluminum pipes and profiles. If the building does not have a foundation, then the metal frame performs its functions in terms of absorbing most of the mechanical loads. Therefore, first of all, the arches and spacers are assembled, the frame is additionally tightened with overlays and cords to artificially increase rigidity. It is better not to install polycarbonate at this stage.
T-supports are screwed to the lower tier, the frame structure itself is transferred to the prepared site and laid in a trench or pits of the core foundation. Next comes the most difficult part - we attach a hydraulic bubble level to the opposite sides of the flask and level the body in the foundation pit of the rod foundation. This is done by adding and compacting crushed stone with sand under the horizontal part of the rod.
If the greenhouse box does not swing, then you can install polycarbonate and rodent protection. We fill the hole or trench with soil.
Pest control installation
Since the greenhouse does not have a foundation, and the walls are lined with polycarbonate, the building remains vulnerable to soil pests, rodents and moles. The best way to protect the basement is to install regular steel mesh, preferably all welded, used for fencing. The material is laid in the area of the conditional foundation and covered with soil. There is no need to paint, since the polymer coating perfectly protects the steel from moisture.