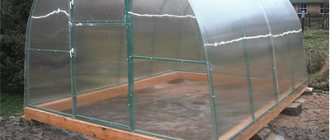
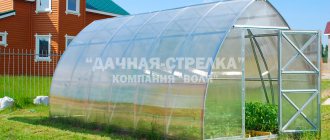
Durable greenhouse - what should it be like? This question is asked by many gardeners who are not indifferent to the fate of their plants and who are accustomed to saving their money. The strength of the greenhouse is especially of concern to those summer residents who live in northern regions with harsh climatic conditions. The “Osnova” greenhouse, which is produced by , is one of those structures that are famous for their durability and ability to withstand severe weather tests.
Greenhouse "Osnova"
Which greenhouse is stronger?
Before we begin a detailed study of the Osnova greenhouse, we suggest that you get acquainted with the basic rules that will help you choose exactly the greenhouse that will have the highest strength and will serve you for many years.
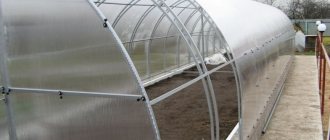
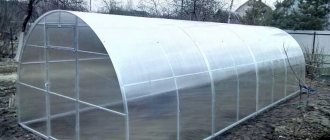
Photo of the “Osnova” greenhouse
To begin, soberly assess the climatic conditions in the region where you live and think about whether you need a heavy-duty greenhouse. The fact is that such structures, as a rule, cost much more than standard structures. If you live where strong winds are very rare and snow falls in negligible quantities, then there is no point in buying a heavy-duty greenhouse. However, since you are still reading this article, it means that you really need a design that can easily cope with increased snow and wind loads. So which greenhouse is the strongest?
- A greenhouse with a frame made of galvanized profile is worse than one made of painted pipe or plastic. The fact is that in structures made of galvanized metal, the supporting arcs are often collapsible and consist of several parts. And the thickness of the metal is weak. However, at the same time, it is not at all afraid of rust and copes well with conditions of high humidity, which often (or rather, almost constantly) arise in a greenhouse. But frames made of pipes are not afraid of testing by snow and wind, but they rust and deteriorate faster.
- And among collapsible structures there are quite durable types of structures. And they are stronger and more reliable the fewer parts they contain.
Types of materials for greenhouse frames: steel, aluminum, plastic, wood
- Pay attention to the thickness of the parts and their cross-section. The larger it is, the stronger the greenhouse. The strongest structures cannot have a cross-section of less than 20 mm.
- Estimate the thickness of the metal - it should be at least 1.2 mm (anything less is not suitable in your case).
- That greenhouse is stronger because it has a distance between arches of no more than 1 meter. Ideally, less. The more often the arcs are located relative to each other, the easier it will be for the frame to withstand high snow and wind loads.
- Choose dense and high-quality polycarbonate. Immediately discard options with sheet thickness up to 4 mm - they are no good and will fail in the first winter.
Consequences of using polycarbonate that is too thin
The greenhouse collapsed from the snow
On a note! Assembling greenhouses from solid arcs is much easier and faster than from those that have a lot of parts. And this is also their undoubted advantage. But collapsible structures are easier to transport.
And remember: you don’t need to save money if you want to buy a truly durable and reliable design. However, before purchasing, be sure to read reviews about the greenhouse options that you have already considered and choose the best one.
Prices for cellular polycarbonate
cellular polycarbonate
Homemade polycarbonate greenhouse
A name that everyone knows. Durable design suitable for almost all plants that require constant heat to mature.
This type of greenhouse is often sold ready-made, but it is also not so difficult to create them yourself. To do this, you need a foundation and strong supports, onto which the polycarbonate will be directly attached in the future.
A few words about the manufacturer
The Osnova greenhouse, which we are talking about today, is produced. And I would like to say a few words about this company, which has been operating for many years in Podolsk, St. Petersburg, and Vologda. At the moment, it is considered one of the best manufacturers of greenhouses, producing polycarbonate and frames made from square profiles with a section of 20*20, 25*25 and even 30*30 mm. The polycarbonate produced by the company is made from foreign raw materials from SABIC Innovative Plastics and can have a thickness from 4 to 16 mm.
Galvanized profile for greenhouse
The company is very sensitive to quality control and compliance with all production requirements, and therefore can boast of a high-quality and sought-after product.
On a note! The company has a narrow specialization, due to which it is focused only on the production of greenhouses and does not waste time on trifles. And the quality of the product only benefits from this.
is extremely responsible for quality control
The company is developing dynamically and already has a huge network of warehouses throughout Russia. That is why if you ordered a greenhouse on the website, it will arrive to you quite quickly. And most importantly, all the company’s products are designed taking into account the special climatic conditions of Russia. The “Osnova” greenhouse is one of those structures that are not afraid of absolutely anything.
Features of the “Fundamentals” design
The Osnova greenhouse is one of the strongest on the market. Its main feature is a special frame, which is assembled from solid welded ends, as well as solid arches. All these parts of the greenhouse are made of galvanized pipe with a cross-section of 25*25 mm. The metal thickness is 1.5 mm. These characteristics alone allow us to form a first opinion about how durable the Osnova greenhouse is.
Greenhouse “Base” 3x6 m from painted profile pipe
Due to the fact that the frame metal is covered with a zinc coating 140 microns thick, Osnova is absolutely not afraid of rust, coping well with humid greenhouse conditions. In addition, the coating adheres very well to the metal, so there is no need to touch up the frame every year.
However, that's not all. The “Fundamentals” frame is reinforced with additional arcs and guides connecting them. In addition, the distance between the arches is very small - only 65 cm. Due to this, “Osnova” is not afraid of either snow or wind.
The distance between the frame arches is only 65 cm
Table. Parameters of the "Basic" greenhouse.
| Greenhouse length, m | Height, m | Width, m | Soil cover area, m2 |
| 4 | 2 | 2,5 | 10 |
| 6 | 2 | 2,5 | 15 |
| 8 | 2 | 2,5 | 20 |
| 4 | 2 | 3 | 12 |
| 6 | 2 | 3 | 18 |
| 8 | 2 | 3 | 24 |
On a note! The “Osnova” greenhouse can be longer than 8 meters. But this parameter will necessarily be a multiple of 2.
The covering material of the greenhouse is polycarbonate, which has a thickness of 4 mm and a density of 0.8 kg/m2. It also has a coating that protects it from harmful ultraviolet radiation - this extends its service life. In this case, the polycarbonate is attached to the “Base” in a special way: using a special galvanized tape and self-tapping screws, due to which the covering material cannot be pressed through and damaged during installation. For the same reason, polycarbonate will not tear at the fastening points due to a sudden gust of wind. By the way, this method of fastening is a unique development of the Ready-Made Greenhouses Plant.
On a note! The “base” feels great on the site, without collapsing, for more than 10 years, and the warranty period is at least 3 years.
Useful tips
In winter, the surface of the greenhouse must be constantly cleared of snow.
Otherwise, many cracks will appear on the polycarbonate. In order for a greenhouse in central Russia to survive the winter and withstand the weight of the snow cover, the metal frame must be at least 1.5 millimeters thick. Pipe cross-section - 40 x 20 mm.
The door to the greenhouse must be kept open in winter so that the soil freezes well. This procedure destroys all pests in the soil.
Each arch must be secured using special amplifiers.
Greenhouses made of polycarbonate become very hot in hot weather. This leads to the appearance of gaps in the structure. To avoid this, it is necessary to implant polycarbonate into the structure in the areas where the walls come into contact with the roof using small 10-centimeter strips of polycarbonate.
In the summer, the maximum temperature in the greenhouse is set, so you need to ventilate it regularly. In addition to opening transoms and doors, you also need to water the polycarbonate with water.
Equipment, pros and cons
The delivery set of the Osnova greenhouse contains all the necessary parts and elements for installing the structure yourself. In addition to galvanized arches and end parts, the package includes two doors and two windows, which after assembly will be located at opposite ends. Also, along with the frame parts, polycarbonate is supplied in the required quantity. The package must contain a set of fasteners and accessories (handles, bolts, screws, sash clamps, galvanized tape, washers, etc.).
Assembly and installation instructions
The greenhouse delivery package does not include only the foundation, which you will have to do yourself. As a rule, timber measuring 100*100 or 150*100 mm is perfect for this, however, the “Base” can also be installed on a strip concrete foundation or galvanized piles.
The greenhouse is distinguished by its simplicity of design and reinforced frame
Advantages of the Osnova greenhouse:
Reinforced fastening via galvanized tape
Osnova has plenty of advantages, but no disadvantages at all. After all, even the price of this greenhouse is quite acceptable.
Greenhouse "Kremlevskaya Lux"
The Kremlevskaya Lux greenhouse is perhaps the most durable arch-type structure on the greenhouse market. It can easily cope with significant snow loads. Read this article for more details.
Choosing a location
Before you start working on the greenhouse itself, you need to choose the right place for it. It should be a flat area so that the frame is level, without distortions. The place should be sunny, not obscured by trees or buildings.
In addition, it is necessary that the site be spacious enough: this will allow you to work freely when building a greenhouse structure, and maintenance of the structure can be carried out without difficulty.
Installation of the "Osnova" greenhouse
Due to the fact that the Osnova greenhouse kit contains enough parts, and the arches and ends are made of solid arches, installation of the structure is quick and easy. Let's look at an example of installing a greenhouse on T-shaped piles produced by the Ready-Made Greenhouse Plant.
Step 1. Assembling the “Fundamentals” frame begins with connecting the base parts using connecting tees and self-tapping screws. Assemble the side parallel parts of the base.
Assembling the greenhouse base
Step 2. Next, attach to the base of the pile. They are installed in a certain way: step back 10 cm from the edge of one long side of the base and attach the first pile, then attach the second pile in the middle of the first part of the base. Install the next pile at the junction of two parts of the base, then again fasten the pile in the middle of the part and at a distance of 10 cm from the edge. Make fastenings with self-tapping screws.
Attaching piles to the base of the greenhouse
Step 3. In the area where the greenhouse will be installed, dig holes for the piles. To find out where the holes should be, place the base of the greenhouse with the stilts on the ground in the same way as the greenhouse will stand, and use the ends of these parts as a guide.
Next you need to dig holes for the piles
Step 4. Place the foundation piles in the holes and drive them into the ground using a sledgehammer through a piece of wood. Check the levelness of the base using a level.
Piles are driven into the ground
Step 5. Install the second part of the base opposite the first - parallel, at a distance of the width of the greenhouse. Check the diagonals - they should be equal.
Installation of the second part of the greenhouse base
Step 6. On all arches, measure 30 cm up and down from the holes for the screws. This is necessary to ensure that the symmetry of the screws is maintained along the entire length of the greenhouse.
Arch markings
Step 7. Install all the arches onto the base, sliding them onto the pins.
Arcs are attached to the base
Step 8: Install the guides. Please note that these parts are not perfectly straight; they have slight tapers at one end. These narrowings are needed for the joints of two guides, and therefore should not be at the edge of the greenhouse, that is, do not attach them to the first arc. Secure the guides with self-tapping screws.
Guide connection
Attaching the guides to the greenhouse frame
Step 9. Lay out the polycarbonate sheets on a flat surface. Using a marker under the protective film, mark the side of the material where there is a layer that protects the material from ultraviolet radiation. Remove the film.
Next you need to remove the protective film from the polycarbonate
Step 10. Place the ends of the greenhouse frame opposite each other, as if opening them, and cover with a polycarbonate sheet, as shown in the figure. Attention: leave a small outlet of 7-10 cm at the bottom of the sheet and the edge of the end.
The ends are covered with a polycarbonate sheet
Step 11. Partially screw the polycarbonate to the ends with self-tapping screws. Trim off the excess.
Trimming polycarbonate
Attention! When covering the door, screw in the screws diagonally so that when opening them in the future they do not interfere with each other.
Step 12. Take the remaining polycarbonate and apply it to the unlined edge of the end. Screw it on and trim off the excess.
The remaining polycarbonate is applied to the unlined edge of the end
Step 13. Install and secure the end to the greenhouse frame. Insert first into the base, then into the guides.
The end is attached to the greenhouse frame
Step 14. Install T-shaped piles at the door post, digging them into the ground under the ends, two at each end.
T-Pile Installation
Step 15. Install handles on doors and windows.
Door handle installation
Step 16: Cut slits in the polycarbonate to allow doors and vents to open.
Polycarbonate is cut so that doors and windows can open
Step 17: Install hinges and hooks for the door.
Installation of door hardware
Step 18. Install locks on the door.
Door lock attachment
Step 19. Cover the frame with polycarbonate sheets. At the edges of the greenhouse, do not forget to leave canopies about 5 cm wide.
Sheathing the frame with polycarbonate
Step 20: Take the galvanized strips and throw them over the frame of the greenhouse. Place one tape on each arc of the frame and attach the polycarbonate through it (tape) to the frame with self-tapping screws, guided by the marker marks.
Polycarbonate must be attached to the arches through galvanized tapes
Step 21. Cover the ends of the polycarbonate with special tape to prevent dirt and moisture from getting there.
Sealing polycarbonate ends
Video description
You can see how the factory greenhouse is installed in the following video:
During installation, it is also worth remembering several rules:
- First of all, the sheets are cut and cleared of the protective transport film.
- The sheets are installed with the UV layer facing outward and fixed with self-tapping screws. The latter should be located at a distance of approximately 50 cm from each other. If parts protrude, they can be cut off with a sharp utility knife.
- There are two ways to fix polycarbonate. The first is that the sheets are installed end-to-end and the resulting seams are covered with special strips or tapes. The second option is to lay the sheets overlapping and fasten them together. The main thing is that there are no gaps between the sheets of plastic.
- Windows and doors are installed at the very end.
Experts recommend regularly checking the screws and tightening them slightly if necessary.

