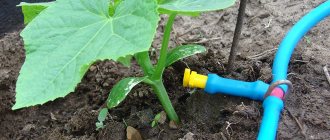
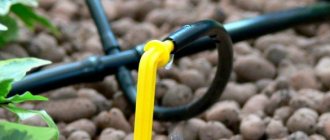
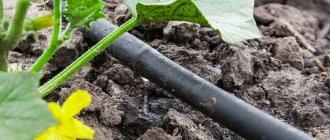
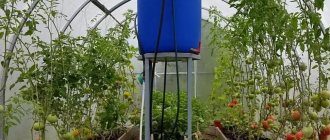
By installing drip irrigation in a greenhouse, in an open area or even at home, you no longer have to water the plants manually. Therefore, any gardener and florist would not mind acquiring one. You can do drip irrigation for a greenhouse yourself; in this article we will tell you and show you how. And in the end, we will analyze the options for ready-made systems that operate from a water supply or container.
DIY drip irrigation system assembly
Homemade drip irrigation is not difficult to make.
You must perform the following steps step by step:
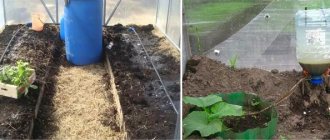
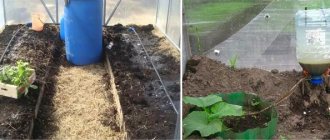
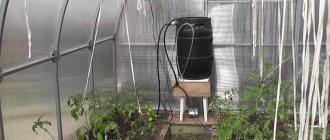
- The barrel (up to 200 l) is raised above the ground to a height of up to 2 m. Holes are made in the lid for air access. If it is missing, then cover it with gauze - this is protection from insects and dirt.
- A hole is drilled near the bottom, a tap-tip is installed and the hose is brought in.
- The mains are installed at a slight slope - about 5 cm for every meter. For this, additional pegs are used.
- Pipes (hoses) are not made long - it is better to build several systems. Lay out carefully, do not drag or pull.
- They ensure precise joining of pipes - they are placed in a vice before cutting. Sealed with tow or fum tape. All connecting elements fit very tightly.
- The holes are made small (no more than 2 mm). An awl or nail is suitable for a hose, and a drill for PVC pipes. If you insert pieces of wire, water will flow down them.
- Purchased devices have colored marks - they are placed upward.
- The main hose is secured with a clamp. The lines are washed to prevent blockages, and a plug - a wooden plug - is inserted.
- They check that the water reaches each dropper, and the soil is moistened evenly.
Automatic watering for greenhouse “Klip-36”
A pulse-local hydroautomatic drip irrigation system operates on the principle of supplying water in small portions lasting 1.5-2 minutes at long intervals throughout the day. Irrigation is fully automated, but there is no automation, which ensures reliable and long-term operation of the device.
Installation diagram of the Klip-36 drip irrigation system.
The system is designed to water an area of 36 m². The kit includes a 16 liter water meter tank, which can be connected to a water tap or barrel. It is equipped with a siphon that shuts off the water supply when it is filled. The water is heated and supplied to the plants. Excess liquid flows back into the distribution network. Thanks to the cyclic system, you can adjust the flow of 16 liters of warm water after 1-7 hours, depending on the needs of the plant.
Automatic watering of greenhouses does not require an electrical connection or batteries. The system can be installed at any phase of crop growth. The branched polycarbonate irrigation tubes included in the kit can be shortened, thereby adapting to any length of the bed. They contain special openings and drains, thanks to which a simultaneous and uniform irrigation process is carried out.
The presence of a small container allows you to apply fertilizers simultaneously with watering. The system does not require connection of drains to the placement of plants. It is characterized by reduced clogging, which is associated with an increased flow area of the holes, due to which it is characterized by a long period of operation.
For a large number of plants in a greenhouse, it is better to install an automatic or semi-automatic watering system.
Daily water supply can be adjusted within 0.5-20 l/m². When the system is connected to the water supply, it becomes fully automatic. A capacity of 200 liters will be enough for seven days of watering, so the greenhouse can be left unattended. Features of the installation of the system can be seen in the video “Drip irrigation for a greenhouse from a barrel “Clip-36”. Pulse-local watering has a short duration of impact on the soil and intensity, as a result of which the soil moisture is maintained at the level of 85%, which is optimal for plants. The cost of the set is on average 7,500 rubles.
Calculation of watering time and volume of liquid supplied
The system design allows you to calculate water consumption and tank volume. Calculation example:
- highways - 15 m;
- between nozzles - 20 cm;
- required number of droppers - 1500/20=75 pcs.;
- consumption of one - 2 liters per hour;
- all nozzles - 2*75=150 l;
- barrel size - 150.
A long system will require a larger capacity, so several devices are usually made.
Individual watering times are calculated for each plant. Devices that consume 2 liters per hour include:
- cucumbers - for 60 minutes;
- tomatoes - 45 minutes;
- cabbage - 75 min.
DIY drip irrigation from plastic bottles
For a small area, the simplest system of ordinary plastic bottles is suitable.
They are hung on a peg, with the neck down, and a narrow tube or simply the refill of a ballpoint pen is inserted into it. Be sure to make a hole for air to escape.
The second option is to make holes in the bottom. Here it is important to take into account the type of soil and its ability to absorb moisture, since the number of holes depends on this:
- sandy - 8;
- clay -12.
Their size is small so that the liquid does not spill out quickly. You can make them with a needle.
A simple option is underground watering: the bottle is buried in the ground, and the neck remains above the surface. When the amount of water decreases, add it. The advantage of this method is that there is no crust on the surface that needs to be loosened. For example, in a greenhouse, one tomato bush will need 1 liter of liquid for 7 days.
The holes quickly become clogged if there is clay in the soil. To prevent this:
- put ordinary nylon tights on the part of the container with holes;
- make a little drainage - put burlap or grass in the hole before burying.
This is a good idea for people who are often away. The bottle is placed in the ground, tilted at 30-45° to reduce the water pressure and the rate of its consumption.
Useful tips for long-term operation of drip irrigation in a greenhouse
Despite the fact that the drip irrigation system has a simple design, it requires proper care, which is the key to durability. Periodically, discharge pipelines with droppers should be cleared of blockages. For the main pipeline, it is better to choose a plastic product, since the material does not corrode, leading to the appearance of small particles of rust in the system, which will cause clogging of the drip holes. The same applies to a metal barrel.
The system must be equipped with a filter, which is purchased with the kit. As a last resort, you can use a piece of foam rubber by inserting it into the pipe coming out of the barrel. It is recommended to clean the filter once a week. The barrel must have a lid to prevent various debris from getting into the water, which can cause a decrease in pressure in the system.
For high-quality operation of the irrigation system, it is necessary to monitor the cleanliness of the pipes and install a filter.
Despite the fact that the drip irrigation system involves the application of fertilizers for plants, they should first be dissolved in water. After feeding, it is recommended to rinse the system with clean water for 15 minutes.
In autumn, the water is drained from the pipes. The system is disassembled and stored indoors. Otherwise, the injectors will become completely clogged with dirt during the autumn-winter period, which will require labor-intensive cleaning in the spring.
Installing a drip irrigation system in a greenhouse from a barrel not only has a beneficial effect on the growth and development of plants. This design allows you to reduce water and ease labor costs associated with maintaining the greenhouse. You can not only buy, but also perform homemade drip irrigation with your own hands in a greenhouse. To do this, you need to familiarize yourself with the features of the system and the rules for its installation.
Automation of drip irrigation
It is possible to automate a drip irrigation system so that it turns on itself on time without human intervention. To do this, use a special device - a controller (timer).
The controller, which has fittings on both sides, is inserted into the drip irrigation pipeline system. It can also be used to control water intake when connected to a pump.
It is possible to do underground irrigation - this drip irrigation is distinguished by the laying of a pipeline that is placed at depth.
The essence of technology
When watering this type, water is gradually supplied through special devices - droppers - to the base of the plants (for surface installation) or directly to the roots (placement of the system in the ground).
Compared to the sprinkler method, the drip method has the following advantages:
- The humidity in the greenhouse does not increase. This is the main advantage of this method of water supply. With sprinkler irrigation, even in a well-ventilated greenhouse, the humidity jumps, causing many plants to suffer;
- water is used rationally;
- it is possible to apply liquid fertilizers during watering (an easily digestible and safe form);
- there is no need to create high pressure in the system: water can flow by gravity.
With drip irrigation, the weeds remain without moisture.
DIY drip watering of indoor plants
When leaving for a long period, a drip irrigation system will be useful for house plants. You can choose it in the store. For example, there is a special polymer that retains liquid and then releases it.
But you can make drip irrigation for indoor plants with your own hands. A few simple ideas:
They take a plastic bottle and attach a dropper and silicone tubes. The end is closed, and holes are made along the entire length.
Wick watering - place a container of water near the pot. The wick is lowered into it with one end and buried in the ground with the other. Used for porous soil. Not suitable for tall plants because They have large roots and the moisture they receive will not be enough.
Be sure to check the operation of the system before leaving, the rate of water consumption.
Watering with a timer
An inexpensive alternative to a controller is a time relay; there are two types of such devices:
- mechanical . The user turns the knob to set the watering duration. Each session requires repetition of the procedure;
- electronic . Not only the duration, but also the frequency of watering is set. So the system can be left unattended for a long time.
The timer, like the controller, controls the operation of the tap at the entrance to the system.
Review of ready-made drip irrigation systems
Many gardeners prefer to make a drip irrigation system with their own hands, but, as a rule, it is good only for not too large plantings. It is much more reliable and convenient to purchase a ready-made drip irrigation system that will serve you for many years.
We offer an overview of the most popular systems to make it easier for you to decide on the model and configuration.
"Bug"
The system got its name by analogy with a beetle - a long hose-body and many dropper legs arranged symmetrically. The manufacturer offers two types of systems, separately designed for greenhouses and greenhouses.
You will have to assemble the structure yourself; to do this, use an awl to make holes in the main hose where the droppers are inserted. True, doing this without additional lubrication is quite problematic.
Each kit comes with a special filter that prevents soil and sand from clogging the irrigation holes, but the timer is purchased separately; on the official website of the store it costs 2,186 rubles. with discount.
“Beetle” is produced both with water intake from stationary containers and from a water supply system. The system works well even at low pressure. The container irrigation kit includes a transparent tube through which you can monitor the water level in the barrel.
The manufacturer gives a choice of systems for 20, 30 and 60 plants, but, as practice shows, even the “Beetle” 30 is too small even for a classic greenhouse, while we will not consider 20 at all, although its price on the official website is only 623 rubles.
Many summer residents note that the quality of the plastic leaves much to be desired, the joints leak, and the timer has to be hidden in polyethylene to prevent water from getting inside it. The kit also includes plugs that allow you to adjust the direction of water movement and carry out selective watering, as well as a fitting that makes it possible to connect the system to almost any container that you will use as a water source. The storage container with water should be 1-2 meters above ground level.
Drip irrigation ZHUK with emitter tape
Drip irrigation ZHUK with emitter tape comes in 12 and 24 meters. Let's look at them in more detail in the table.
Drip irrigation ZHUK with emitter tape: equipment
These types are suitable for beginners, their size is small.
| System type | 12 meters | 24 meters | |
| Equipment | Main hose, m. | 4 | 6 |
| Connection connection to the container, pcs. | 1 | ||
| Fitting 1/2-3/4, pcs. | 3 | ||
| Large tee, pcs. | 2 | ||
| Level tube transparent, m. | 1 | ||
| Suspension for level tube, pcs. | 1 | ||
| Clamp for main hose, pcs. | 2 | ||
| Shilo, pcs. | 1 | ||
| Fine filter, pcs. | 1 | ||
| Crane, pcs. | 1 | ||
| Clamp for main hose, pcs. | 4 | 8 | |
| Emitter tape, m. | 12 | 24 | |
| Start fitting, pcs. | 2 | 4 | |
| Plug for drip tape, pcs. | 2 | 4 | |
| Operating pressure in the system | 0.1 - 1 atm | ||
| Emitter Ribbon Wall Thickness | 0.15 mm | ||
| Emitter Distance | 30 cm | ||
| Water flow per emitter | 1.6 l/h | ||
| price, rub. | 691 | 913 | |
Now let's look at the Zhuk systems from the water supply system :
Packaging of the Zhuk system from the water supply for 30 and 60 plants
| System type | 30 plants | 60 plants | |
| Equipment | Main hose, m. | 9 | 18 |
| Microtube, pcs. | 30 | 60 | |
| Collet tee 1/2, pcs. | 1 | ||
| Collet clamp 1/2, pcs. | 3 | ||
| Collet angle 1/2, pcs. | 2 | ||
| Compensated dropper, pcs. | 31 | 61 | |
| Arrow with clip, pcs. | 30 | 60 | |
| Fine filter, pcs. | 1 | ||
| Clamp for main hose, pcs. | 2 | ||
| Clamp for main hose, pcs. | 8 | 16 | |
| Awl for main hose, pcs. | 1 | ||
| Irrigation area (sq.m.) | 6 | 18 | |
| price, rub. | 1370 | 1923 | |
| Price with timer, rub. | 3389 | 3942 | |
Now let's look at systems that operate on capacity :
Packaging of the Beetle system from containers for 30 and 60 plants
| System type | 30 plants | 60 plants | |
| Equipment | Connection connection to the container, pcs. | 1 | |
| Main hose, m. | 9 | 18 | |
| Level tube transparent, m. | 1 | ||
| Suspension for level tube, pcs. | 1 | ||
| Supply hose 40 cm, pcs. | 30 | 60 | |
| Droppers, pcs. | 30 | 60 | |
| Small tee, pcs. | 15 | 30 | |
| Crane, pcs. | 1 | 3 | |
| Angle for main hose, pcs. | 2 | 3 | |
| Large tee, pcs. | 2 | 3 | |
| Plug for main hose, pcs. | 2 | 3 | |
| Clamp for main hose, pcs. | 16 | 18 | |
| Awl for main hose, pcs. | 1 | ||
| 1/2″ fitting (for connecting to a container), pcs. | 1 | ||
| Fitting 3/4 (for mounting the filter), pcs. | 2 | ||
| Fine filter, pcs. | 1 | ||
| Irrigation area (sq.m.) | 6 | 18 | |
| price, rub. | 1231 | 1785 | |
| Price with timer, rub. | 3251 | 3804 | |
Watch the video about the product:
Both types, from water supply and container, have the same advantages and disadvantages:
| Advantages | Easy installation, there are fastenings for fixing the central hose to the ground. Clear instructions, sufficient quantity of all elements. Possibility of unlimited expansion of the system. |
| Flaws | The timer is included in the kit for an additional fee, it will cost about 2000 rubles. Inserting the droppers into the tube requires additional lubrication. Not very high quality material. |
For those summer residents who find the number of elements in the kit insufficient as it is used, the manufacturer offers to purchase an expansion kit for drip irrigation from a container and from a water supply system Zhuk 20 plants. The only thing that needs to be taken into account is that when expanding the drip irrigation system, the container with water must be raised even higher, since the load on it has become greater (in the case of using a system from the container).
Overview of two types in tables:
Packaging of expansion kit for Zhuk tank
| Type of expander | From capacity and | |
| Equipment | Supply hose 40 cm, pcs. | 20 |
| Droppers, pcs. | 20 | |
| Small tee, pcs. | 10 | |
| Crane, pcs. | 3 | |
| Angle for main hose, pcs. | 5 | |
| Large tee, pcs. | 5 | |
| Plug for main hose, pcs. | 5 | |
| Clamp for main hose, pcs. | 20 | |
| Angle for main hose, pcs. | 2 | |
| Large tee, pcs. | 2 | |
| Plug for main hose, pcs. | 2 | |
| Clamp for main hose, pcs. | 18 | |
| Dropper type | Droppers-arrows | |
| Dripper water flow | 4 l/h | |
| Operating pressure in the system | From 0.1 to 0.2 atm. | |
| price, rub. | 443 | |
Packaging of expansion kit from Zhuk water supply system
| Type of expander | From the water supply | |
| Equipment | Microtube, pcs. | 20 |
| Arrow with clip, pcs. | 20 | |
| Compensated dropper 4l/h, pcs. | 20 | |
| Collet tee 1/2, pcs. | 1 | |
| Collet angle, pcs. | 1 | |
| Clamp for main hose, pcs. | 2 | |
| Clamp to the soil, pcs. | 8 | |
| Dropper type | Compensated droppers Dr.Drop | |
| Dripper water flow | 4 l/h | |
| Operating pressure in the system | From 1 to 4 atm. | |
| price, rub. | 623 | |
You can also purchase separately:
- Main hose 20 m – 567 rub.
- Connecting coupling 1/2 - 1/2 - 40 rub.
- Collet angle 1/2 – 43 rub.
- Collet tee 1/2 - 1/2 - 1/2 - 63 rub.
- Irrigation filter – 239 RUR.
- Fitting for a barrel – 87 rub.
- Clamps for the main hose (2 pcs.) – 54 RUR.
- Clamps for the main hose (4 pcs.) – 21 RUR.
- Awl for the main hose (1 pc.) – 53 RUR.
- Arrows for drip irrigation from a container (10 pcs.) – 110 rub.
- Large tee for drip irrigation from a 1/2″ container (5 pcs per package) – 59 RUR.
- Supply hoses for drip irrigation from a container (4 m in a coil) – 176 rubles.
- Corner for drip irrigation from a 1/2″ container (5 pcs per package) – 53 RUR.
- Small tees for drip irrigation from a container (5 pcs per package) – 26 rubles.
- A set of 1/2-3/4 fittings for watering from a container (2 pieces per package) – 54 rub.
- Tap for drip irrigation from a container (1 piece per package) – 87 rub.
- Compensated drippers for drip irrigation from water supply (10 pcs. per package) – 365 rub.
- Arrow with a clamp for drip irrigation from a water supply system (10 pcs. per package) – 130 rub.
- Micropipe for drip irrigation from a water supply system (10 pcs. per package) – 143 rubles.
Website: firm-tsikl.rf
"AquaDusya"
The Belarusian manufacturer offers a universal drip irrigation system “AquaDusya” of two types - for 50 and for 60 plants. There are kits without automation, and there are automatic systems that allow you to forget about watering the beds for the season. All automatic elements of the system operate on batteries, so there is no need to be afraid of power surges.
AquaDusya Start 50
AquaDusya Start ZhKI 50
The set is quite complete. All you have to do is pick up a barrel and lift it 20 cm from the ground for Start +50 and 3 m for AquaDusya WATER TAR. The main advantage of the system, which is noted by all users, is the long service life and reliability of the structural elements.
AquaDusya Start 60
AquaDusya WATER TAR
| System type | Start +50 | Start LCD | AquaDusya +60 | AquaDusya WATER TAR | |
| Hose length, m. | 15 | 12 | 15 | ||
| Equipment | Hose 7/9 mm, m. | 2 | — | — | |
| Supply hose 7/9 mm, m. | 15 | 12 | 15 | ||
| Hose 12/15 mm, m. | 2,5 | 3 | — | — | |
| Hose 14/12 mm, m. | — | 3 | |||
| Hose 4/6 mm, m. | 10 | 12 | |||
| Droppers, pcs. | 50 | (compact) 60 | |||
| Large tee, pcs. | 1 | ||||
| Small tee, pcs. | 25 | 30 | |||
| Hose clamps, pcs. | 4 | — | — | ||
| Pump block, pcs. | 1 | — | — | ||
| Electronic starting device, pcs. | 1 | — | — | ||
| Corrugated protective tube, pcs. | 1 | — | — | ||
| Bracket, pcs. | 1 | — | — | ||
| Faucet timer, pcs. | — | — | 1 | ||
| Water intake | From container | From a container, from a water pipe | |||
| Irrigation area, sq.m. | 18 | 21 | |||
| Water consumption | 200 l/h | 125 l/h | — | — | |
| Timer | + | — | + | + | |
| Water flow regulator | + | — | — | — | |
| Connector for connection | + | + | + | + | |
| Watering mode | Every 6/12/24 hours, every 3, 4 days, once a week | — | Every 6/12/24 hours, every 3, 4 days, once a week | ||
| Lifting the container | 20 cm. | 2.5 m. | 3m. | ||
| Water consumption per dropper | 4 l. | 2.5 l. | — | — | |
| Hole spacing | — | — | — | 40 mm. | |
| Maximum pressure | — | — | — | 4 bar | |
| price, rub. | 5000 | 5500 | 1800 | 3100 | |
| Advantages | Automatic controller, reliability, designed for many landings. Now they are releasing the Start option for 70 plants, with the possibility of expanding to 100. | Budget price, long service life | You can set launch time intervals both by day and by hour. Reliability of the design. Can be used for underground installation. A more modern model, Water Tap 2, has been released. | ||
| Flaws | There is no way to connect to the water supply, not enough hoses, price. | No automation, no water connection | There may not be enough hoses for a large area; you will have to purchase them additionally. | ||
The manufacturer also produces automatic machines for greenhouse ventilation under the DusyaSan brand.
Website: aquadusia.ru
"Istok" CPC
The Samara drip irrigation system is designed to draw water from a container and a water supply system. Its kit includes drip tape and fittings for fastening, and the more modern modification of the KPK 24K is equipped with a controller for organizing automatic watering, which runs on three AA batteries. If desired, you can choose one of the available 16 programs, and place the drip tape itself both on top of the soil and inside it.
| System type | Istok KPK-100 | Istok KPK-24/24K | |
| Length of drip tape, m. | 100 | 25 | |
| Equipment | Water tap, pcs. | 1 | Tape, fittings, filter/controller |
| Reusable water purification filter, pcs. | 1 | — | |
| Adapters, pcs. | 4 | 2 | |
| Tees, pcs. | 9 | 3 | |
| Corners, pcs. | 2 | 1 | |
| Drip tape emitter type 16 mm, m. | 100 | 25 | |
| Retaining ring, pcs. | 11 | 4 | |
| Ring sealing | 1 | — | |
| Adapter, pcs. | — | 1 | |
| Irrigation controller, pcs. | — | 1 (24K only) | |
| Water intake | From a container, water pipe | From container | |
| Irrigation area | 100 sq.m. | 25 sq.m. | |
| Watering range | — | 0.3 m | |
| Water consumption | 1.4 l/h | ||
| Hole spacing | 300 mm | ||
| Connector for connection | + | + | |
| Timer | — | + | |
| Lifting the container | At least 1 m. | 8 m. | |
| Maximum pressure | 0.8 atm. | ||
| Price, rub | From 2000 | From 1000 | |
| Advantages | Large area, easy installation. | Budget price, it is possible to purchase a controller (about 2000 rubles). Designed for 83 plants. | |
| Flaws | There is no possibility to connect to the water supply in the basic configuration. | ||
Website: www.istokpkf.ru
"Water strider"
The manufacturer from Dubna offers two system options - Vodomerka-Eco (a budget irrigation option) and Vodomerka. The difference between them is that the latter has a battery-powered controller that allows you to automate the system without requiring human intervention.
Water strider IVF
Water strider
This design only works with a container; connection to a water supply is not possible. A barrel of water, as summer residents note, should be plastic for ease of fastening; a prerequisite is to raise the container by about 50 cm above ground level.
Watering sensor
Hose, droppers
Another advantage of this system is the presence of a ball valve rather than a membrane valve, which allows it to work properly at any pressure. If necessary, it is possible to supplement the basic version with an extension kit, which allows you to capture another 2 meters of beds.
| System type | Water strider | Water Strider-Eco | |
| Hose length, m. | 12 | 12 | |
| Equipment | Starting device, pcs. | 1 | — |
| Hose, m. | 12 | ||
| Crane, pcs. | 1 | ||
| Shaped connector, pcs. | 1 | — | |
| L-shaped connector, pcs. | 2 | — | |
| Connector, pcs. | 2 | Specified set. | |
| Filter, pcs. | 1 | ||
| Hose pegs, pcs. | 4 | — | |
| Hole punch, pcs. | 1 | — | |
| Droppers, pcs. | 40 | ||
| Microtubes 50 cm, pcs. | — | 40 | |
| Water intake | From container | From container | |
| Irrigation area, sq.m. | 12 | 12 | |
| Maximum pressure | 1 bar | — | |
| Timer | + | — | |
| Connector for connection | + | + | |
| Watering time | 2-120 min | — | |
| Interval | 6 hours – 7 days | — | |
| price, rub. | 3000 | 1300 | |
| Advantages | Automatic controller, reliability. | Budget price, long service life | |
| Flaws | There is no way to connect to the water supply, cost, fittings are only suitable for plastic barrels | ||
Website: msk.teplicy.ru
"Signor Tomato"
developed several configuration options for the same drip irrigation system “Signor Tomato”.
A simple option - emitter tape and fittings 24
The simplest option is emitter tape and fittings. The footage can be selected from 24 to 100 meters. Such a system is attached to a barrel raised above the ground, and the tape itself is placed on top of the ground.
A simple option - emitter tape and fittings 50, 100
Another configuration option includes not a tape, but a drip tube with branching hoses, designed for 60 plants. If desired, you can additionally purchase a timer.
"Signor Tomato" with drip tube for 60 plants
And today’s most modern variation of “Signora Tomato” is a fully automated drip irrigation system powered by solar panels. In addition, it is already equipped with a submersible pump, so there is no need to additionally raise the water container above the ground.
"Signor Tomato" automatic watering system
“Signor Tomato Eco” in the table
| System type | 24 meters | 50 meters | 100 meters | |
| Emitter tape, m. | 24 | 50 | 100 | |
| Equipment | Emitter type tape | 1 | ||
| Tap | 1 | |||
| Tee for irrigation tape, pcs. | 4 | 5 | ||
| Plug for tape, pcs. | 4 | 5 | ||
| Repair fitting, pcs. | 1 | 2 | ||
| Plug for hose, pcs. | 1 | |||
| Water intake | From container | From container | — | |
| price, rub. | From 650 | From 950 | From 1350 | |
| Advantages | Easy to install. Budget price, long service life with proper care. | |||
| Flaws | At the end of the season, it requires washing and blowing, and needs proper storage. | |||
Other more expensive options:
| System type | Signor tomato 60 | Signor-tomato machine | |
| Equipment | Supply hose 7/9 mm, m. | 18 | |
| Hose for droppers 4/6 mm, m. | 12 | 17 | |
| Large splitter with plug, pcs. | 1 | ||
| Small splitter, pcs. | 3 | 30 | |
| Dropper, pcs. | 60 | ||
| Insert for barrel, pcs. | 1 | — | |
| Adapter for insertion, pcs. | 1 | — | |
| Plug for supply hose, pcs. | 3 | ||
| Solar battery | — | 1 | |
| Controller | — | 1 | |
| power unit | — | 1 | |
| Pump | — | 1 | |
| price, rub. | 1600 | 5900 | |
| Advantages | Reliable design, long service life, it is possible to purchase an additional timer | Completely autonomous system. Powered by a solar battery, supplemented with a pump. | |
| Flaws | Price | ||
Website: signor-tomato.rf
"A drop"
This drip irrigation system is an emitter tape with a complex arrangement of droppers inside. It practically prevents clogging when watering from a container or water supply, but if you plan to take water from a well, you will need an additional filter.
“Drop” involves manual switching on and off; the kit includes plugs that allow you to water only selected beds.
The system is additionally equipped with a function that allows you to add fertilizers to the water to increase the yield of your crops.
The manufacturer offers methods for connecting both to the water supply and to the barrel for water intake.
| System type | A drop | |
| Tape length | 50 m | |
| Equipment | Drip tape, m. | 50 |
| Crane with bunks 1/2″ thread for hose, pcs. | 1 | |
| Triplets for garden pipe and drip tape, pcs. | 4 | |
| Repair connection for drip tape, pcs. | 2 | |
| Plug for garden pipe/hose, pcs. | 1 | |
| Water intake | From a container, water supply, well. | |
| Maximum pressure | 1 atm. | |
| Irrigation area | 25 sq.m. | |
| price, rub. | 1399 | |
| Advantages | Variable method of water intake, reliable design, ease of installation, function of adding fertilizers to water, operation with low liquid pressure. | |
| Flaws | No controller or filter. | |
Website: bashagroplast.com
Step-by-step installation instructions
In greenhouses, irrigation systems are used with:
- droppers,
- plastic tubes,
- bottles,
- drip tapes,
- an automated irrigation system is used.
The container is installed at a height of 30-50 cm to ensure the required water pressure. The coupling is cut in, the filter is connected, and main hoses are supplied in the form of rigid tubes made of polymer material, which are pressed to the ground with plastic clamps. If the system operates from water supply, a storage tank is not needed.
The tank should be made of opaque plastic to block the photosynthesis of blue-green algae, which forms a biofilm and clogs the system.
How to install droppers correctly?
Droppers are divided into adjustable and non-adjustable . Using adjustable droppers, the required water flow is manually set.
Unregulated dispensers are divided into compensated and uncompensated. In the first case, when the pressure weakens, the outlet hole expands, and the amount of water pouring out does not decrease.
Such drippers are installed when the beds are located at different levels , and water is supplied under pressure - from a water supply or using a pump.
When a gardener waters the beds by gravity from a barrel, he uses uncompensated drippers, which he attaches to the connector using long, up to 40 cm, thin tubes.
For installation you will need the following tools:
- piercer;
- adjustable wrench.
Materials:
- hard hose;
- connecting elements;
- droppers;
- stubs.
Installation consists of the following steps:
- A filter and a timer are connected to the water source.
- Mount the collector.
- The highway is assembled and stretched across the entire width of the installation.
- Pierce a hard hose.
- Insert a connector into the hole and attach a dropper or splitter to it to install several dispensers.
Greenhouses are located on leveled surfaces, and water is supplied by gravity, so gardeners prefer to use unregulated, uncompensated drippers.
From bottles
For installation you will need the following tools and materials:
- awl;
- paper cutting knife;
- plastic bottles with corks.
Installation consists of the following steps:
- Cut out the bottom.
- Punch 2-3 holes in the cork with an awl.
- They dig it into the ground and plant seedlings nearby.
- Water is poured by hand.
A liter bottle provides the plant with moisture for 4 days, a two-liter bottle for a week. This is the most economical drip irrigation system that does not require any cash costs. The disadvantage is the need to fill the containers manually.
Drip irrigation from bottles, video instructions:
From plastic pipes
To install durable drip irrigation, you will need the following tools:
- soldering iron for polymer pipes;
- adjustable wrench;
- electric drill.
Materials:
- polymer pipes with a diameter of 20 mm;
- filter;
- corners, valves, taps, adapters;
- stubs.
When installing the system, the following stages go through:
- A line is welded to the filter.
- Install a common tap.
- Attach the collector.
- Valves are installed on each pipe.
- Drill holes with a diameter of 2 mm every 30-50 cm.
- Install plugs on the end sections.
Valves regulate water pressure. The barrel must be elevated to provide sufficient pressure to allow water to pass through the ends of the pipeline. Clogged holes are cleaned with a sewing needle or drill with a diameter of 2 mm.
To prevent dirt from the barrel from entering the system, the tap is cut 5 cm above the bottom. To drain dirty water and wash the barrel, a second valve is cut into the bottom.
The video will show you how to make drip irrigation in a greenhouse using pipes:
Automatic
For installation use the following tools:
- adjustable wrench;
- piercer
Materials:
- pump, if water is supplied from a well or open reservoir;
- filter;
- pressure reducer;
- automatic electronic timer;
- main hoses;
- connectors;
- droppers;
- stubs.
The system is installed in the following sequence:
Install a pressure reducer.- Attach the filter.
- Install an automatic timer.
- Attach the collector.
- Collecting highways.
- They pierce the hard hose and install droppers.
- Set up drip irrigation mode. Check the operation of the system.
The device waters vegetables in a summer cottage, which the owner visits once a week. The water supply system is left on constantly.
After the water filter, a timer is installed and programmed to turn on at specified intervals. The device runs on batteries. The source of replenishing the tank with water must be turned on at all times.
Most timers have built-in solenoid valves that automatically fill the tank with water.
With drip tapes
For installation use the following tools:
- adjustable wrench;
- piercer;
- scissors.
Materials:
- filter;
- mechanical timer;
- main hoses;
- collectors;
- tees;
- garden hose;
- drip tapes.
The system is installed in the following sequence:
- A filter is mounted to the container.
- Set a timer.
- Attach a garden hose.
- The main hose is pierced and 2 connecting elements for drip tapes are inserted into the holes.
- The lines are connected with a tee, into the free end of which a garden hose from the barrel is inserted.
- Attach the tapes with the holes facing up.
- Cut off the excess with scissors, bend it across, then lengthwise and put a tube from a piece of tape on the end.
- Check the filling of the pipeline.
With low water pressure, the belt labyrinths become clogged with dirt, biofilms or precipitated salts. Therefore, after the main filter you need to install a mesh filter.
The video will tell you which drip tape to choose:
How to choose ready-made drip irrigation
All gardeners are divided into two types - those who permanently live in the country and those who come only on weekends and less often. When choosing a drip irrigation system, this fact must be taken into account. If you manage to get out to the dacha only a few times a month, purchase automated systems, taking additional care to ensure that the intake tank is filled with water on its own in a timely manner. The tank or barrel from which water enters the system must be in the sun; ice watering is detrimental to the roots.
The distance between the holes should correspond to the distance between plantings in the greenhouse. The most optimal step for crops familiar to our greenhouses is considered to be a step of 30 cm.
The average throughput of drippers for vegetable crops should be from 1 to 1.5 liters of water per hour. For trees, this figure is at least doubled.
Manufacturers offer three main types of drip irrigation system tapes:
- Slotted - inside it there is a branched channel that slows down the rate of water supply, which allows it to warm up evenly and not over-wet the plants.
- Emitter - flattened droppers are built inside it along its entire length. It is the most reliable type of tape today.
- Labyrinth - practically not used in modern designs due to unreliability and painstaking installation.
If a hose rather than a tape is used, then droppers are used. We discussed the types above.
Installation of the main pipeline
The usual method is to install a tap 1 meter high above the water source. Next, a hose is attached to it, which is pulled to the watering site. There a pipeline is attached to it, which ensures watering of all plants.
In order for the hose to hold well, it must be secured with staples made of wire. This way you can avoid accidental shifts. The pouring channel is a pipe. The length and diameter of which are selected specifically and how this is done will be described below. A filter system that purifies water must be installed on the tank from which the water is taken. The reservoir is necessary; it will protect against the effects of a possible failure in the water supply.
The faucet installation procedure can be carried out before and after the filter element. Regardless of the option selected, the device value will not change. It will regulate the supply time and water flow. Fertigation is a method of fertilization and its unit - often has an important role in the entire system. They are used by gardeners who decide to combine watering with the application of fertilizers and other chemicals. The systems in their modern form have already been tested and tested by time. This allows us to say that plants are guaranteed to absorb all the substances they need.
This has to do with automated systems that deliver moisture to greenhouse plants. But there are a number of cases where there is no need to use such features, since they will be superfluous.
For example, the organic method of growing plants does not involve introducing pesticides and liquid mineral fertilizers into the soil. This means that the corresponding nodes and their configuration are simply not required. In addition, creating a full-fledged irrigation structure is quite difficult, so many are afraid to take on it.
For this reason, there are trade-offs in solving the problem. For example, using plastic bottles or other means. With all the advantages of drip irrigation, we must remember that regardless of the type chosen, they must be carefully controlled. They require constant adjustment and reconfiguration, which is carried out depending on the needs of the plant and weather conditions.
The final elements are selected depending on which plants will be watered, what area will be watered, and, of course, financial capabilities.
They can be compensated or uncompensated. When using the device of the second option, at the beginning of watering more liquid is supplied, and closer to the end of the bed, it is supplied in less quantity. As for the first option, here the water will be distributed evenly, regardless of pressure surges. When the height has significant differences, the method of irrigation using compensated devices allows you to avoid negative impacts. Both devices do not pump out all the water, even if the operation has completely stopped.
This can be considered a plus, since when starting the system again, it does not waste time pushing the air out. Sometimes other systems can be used that can release water to more than just one plant, but they require large financial investments.
A collapsible type dropper is always made and does not depend on what kind of system is installed. When installing droppers, you must maintain a distance of 30 centimeters between them. However, this does not apply to all plants; there are those that require the use of other irrigation schemes. So-called "spiders" are used when growing perennial plants. They are considered the best option in this case. For them, the mains through which water flows must be suspended. To irrigate root crops, the installation should be at a distance of 20 centimeters. For melons and melons, a distance of 100 centimeters is maintained.
Advantages and disadvantages of the drip system
The initial goal when creating drip irrigation was to compensate for the insufficient amount of water for irrigating plants. Later it turned out that this method is preferable to traditional means. The following advantages are noted:
- saving water resources - there is no expense for row spacing;
- obtaining early harvests - the development period is reduced, the fruits ripen quickly;
- saturation of the root system - slow moisture supply ensures
- rapid growth and obtaining more nutrients;
- reducing the possibility of soil waterlogging - the risk of developing diseases (powdery mildew, various types of rot, black leg, etc.) is reduced;
- no burns on the leaves - water goes directly to the root;
- reduction in the number of weeds - there is no excess moisture;
- no risk of soil erosion - best aeration;
- increase in yield by 30-40%;
- application of mineral and organic fertilizers during irrigation.
At first, this system was installed only in greenhouses or greenhouses, but later it began to be used in open areas.
However, drip irrigation also has disadvantages:
- Control over devices - incorrect calculation of water flow will lead to excess moisture and death of plants. You need to monitor the filling of the barrel. To ensure automatic watering, a timer is installed.
- Cleaning the holes - they become clogged due to their small diameter. You can't increase it, because... water will flow out without reaching all the nozzles. Use a filter installed at the beginning of the system (a piece of foam rubber), which can be removed and washed.
- The barrel and the receiver-distributor must be covered - this protects from debris and insects.
Device
For drip irrigation of plants in a greenhouse, the following elements will be required:
A storage tank in which water is heated, chlorine evaporates if the water comes from a centralized water supply.- A filter that prevents clogging of droppers.
- Main lines with outlet hoses.
- Drip tapes.
- Cranes.
- Connecting elements.
- Controllers that set watering time and intensity.
- Timers to provide a special watering regime for a specific group of plants.
When watering from a water supply, a storage tank is not needed. If the water source is a well, wells, or pond, a pump will be required.
Types of drip irrigation
Several popular options for homemade drip irrigation:
Barrel - a tank with lines diverging from it from long hoses. The container is raised above the ground to a height of up to 2 m, which allows the liquid to fill all the guides and reach its destination.
Barrel irrigation
Bottle - plastic containers. Small holes (1-3 mm) are made in the bottom, and liquid is added as it is consumed.
Bottle watering
Install close to plants.
Bottle watering
Droppers - several pieces are fixed on a horizontal peg made of wood, metal or plastic.
The flow of water is regulated by a catheter directed under the root.
Plastic pipes - laid between rows and connected to a reservoir with liquid or a central water supply. Holes are drilled closer to the stems.
Plastic pipes
Fogging system for greenhouses
A special feature of the network is the method of delivering water to the plants. Moisture is sprayed using special sprinklers. They are installed under the ceiling of the greenhouse. This method of watering has a serious drawback: leaves that are exposed to drops can get sunburned. To prevent this from happening, the walls of the greenhouse must be made matte.
This irrigation method is suitable for crops that require high air humidity. For installation you will need:
- storage tank;
- controller;
- seals;
- air humidity sensor;
- LDPE pipes;
- electromechanical valve;
- battery;
- pump;
- couplings;
- filter;
- foggers;
- rubber plugs;
- props.
Fogging system for greenhouses
Irrigation rain network is made according to the following scheme:
- A pump, filter, and valve are connected in series to the reserve through seals and a PVD pipe system.
- An overhead line placed on supports along the beds is connected to the pipeline through couplings.
- Foggers are connected to the main line.
- The ends of the pipes are closed with plugs.
- The power supply (battery, uninterruptible power supply, etc.) is connected to the pump, valve, sensor, controller.
- The controller and sensor are configured to turn on at the required air humidity.
Types of droppers
External drippers are specially manufactured devices for inserting into laid pipelines. Their ends are small tubes that allow you to regulate the amount of water supplied.
There are three main groups of droppers, differing in design.
Adjustable
With real water consumption. It is installed according to the instructions.
There are also unregulated ones.
Uncompensated
There is less water at the end of the bed than at the beginning. Suitable for flat terrain or with slight elevation changes.
Uncompensated drip
Compensated
The liquid is dispensed in doses (there is a membrane, a valve). Ideal for use in areas with different levels.
Compensated drip
Droppers-spokes, arrows
This is a plastic tube in the form of a stand, in which there are channels through which water flows. Connect using adapters and splitters. Branched - for several plants at the same time (spider).
Anti-drainage
In addition, droppers can be anti-drainage. Water is present in the system even when the supply is stopped. This speeds up the restart, because no need to remove air.
Anti-drainage drip
It must be possible to disassemble. The cap is usually removed to clean when clogged.
Features of automatic systems
The automatic drip irrigation system operates without user intervention.
The command to supply water is executed by a control unit (controller), which monitors environmental parameters using sensors:
- soil moisture;
- presence of rain;
- water temperature (watering plants with cold water is contraindicated);
- pressure in the pipeline.
There are extensive functions for programming the device: you can set your own watering mode for different days. There are models with a GSM module, controlled remotely from a mobile phone.
The controller controls the operation of a water tap equipped with a solenoid. When power is applied to the solenoid coil, it retracts the core and the valve opens - watering begins.
Planting plants with drip irrigation
Creating a system begins with drawing up a planting scheme - a drawing with the indicated sizes of beds and intervals between seedlings.
This allows you to take into account all the features, requirements for the amount of water and soil moisture, and calculate the required fluid consumption per day.
Some parameters are collected in the table:
| Plant | Amount of water per day, l | Distance between bushes, cm |
| tomatoes | 1,5 | 30 |
| cucumbers | 2 | 20 |
| cabbage | 2,5 | 40 |
Nozzles (sprayers) should be near each plant.
