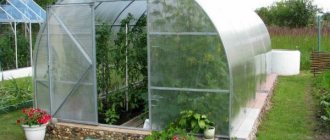
Why is it necessary to ventilate a greenhouse and how to organize it?
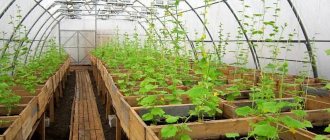
The thing is that simply raising the air temperature to increase plant growth is not enough. In the greenhouse you need to create the desired temperature and humidity conditions. Both temperature and humidity should not exceed comfortable values. The sun very quickly increases the air temperature in the greenhouse; on hotter days it rises to 60-70 degrees, and at the same time the humidity increases greatly. Poor plants in such an environment can simply boil. And different plants like different humidity conditions. While cucumbers and peppers tolerate high humidity well, tomatoes love drier air. The air temperature in the greenhouse should be in the range of 25-35 degrees, otherwise the greenhouse turns for its inhabitants not into a home where they are cared for, but into a torture chamber.
Manual ventilation
Ventilation of the greenhouse
To lower the temperature and humidity, ventilate the greenhouse. For this purpose, special windows and two doors are usually provided. Hot air leaves the greenhouse and allows cooler air to enter. But this process needs to be monitored regularly. On normal days, the greenhouse is opened in the morning and closed in the evening. And if the weather is changeable, because it often happens: either rain or suddenly bright sun, then you have to open and close the greenhouse several times a day.
And for many summer residents, who can only come to the site on weekends, such a ventilation regime becomes impossible. In addition, even if it is possible to live at the dacha in the summer, all the same, when you go away during the day on business or to work, you are worried all day long by the thought that it will suddenly rain and suddenly become colder.
Automating greenhouse ventilation can help solve this problem. Now it is often used by those who have a greenhouse. There are different possibilities. You can buy a ready-made system. You can make it yourself. Let's look at the main automation options.
Automated ventilation
Automated ventilation can be organized in several ways. The main ones:
- automatic electronic systems;
- automatic autonomous systems.
Automatic electronic systems
Advantages:
- High level of accuracy;
- The ability to create a full cycle of plant care including watering;
- High reliability.
Flaws:
- Very high cost;
- For self-production you need appropriate knowledge;
- Dependence on electricity.
Automated electronic systems are based on the use of sensors and relays. These systems are offered ready-made, made to order, and you can do it yourself if you have certain knowledge and patience. Despite their great attractiveness, their installation is not always advisable. They are installed in farms where they purposefully grow vegetables and plants year-round. And a serious disadvantage is their dependence on electricity.
Autonomous automatic systems
These are devices that use the properties of materials to change their volume and size with changes in temperature. Thus, the physical properties of the material are used and no additional sources are required to power these systems, which is why they are called autonomous.
Main types of autonomous systems:
Advantages:
- Availability;
- Independence from power supply;
- Possibility to make it yourself.
Flaws:
- Fairly high cost;
- Manufacturing requires special skills and tools.
Autonomous systems are:
- Hydraulic;
- Two-component.
Hydraulics use the properties of gases and liquids to expand when heated. The principle of hydraulic cylinders is used. Compressed air, freon, paraffin, water, machine oil, etc. are used as expander substances.
Various types of these devices are commercially available. You can also make them yourself from purchased components or make them yourself, including using old shock absorbers. But these jobs require certain skills in working in a metal shop, being able to use welding and work with metal. In addition, in homemade oil cylinders you need to be able to accurately fit the parts so that the oil does not leak.
Two-component devices use the properties of two materials to change their length differently when heated. Use bi-metal or metal-wood. A plate made of a material that expands faster when heated becomes longer and pushes out (opens) the transom. When cooling, the reverse process occurs.
The simplest machine for small structures
For very small greenhouses, you can make an extremely primitive, but reliable device for automatically closing and opening the windows. This will be a simple hydraulic cylinder that works great on the most ordinary machine oil, even dirty. And it works accurately and efficiently. To do this, you need to pour 800-1000 g of oil into it and place it under the roof of a greenhouse or greenhouse. As soon as the air temperature in the greenhouse begins to rise from 20° to 35°, the piston will easily lift a part of the greenhouse roof above itself by a full 15 cm, which can weigh up to 10 kg. Those. On hot days, 2-3 frames connected together will rise without problems. And it’s easy to make such a hydraulic cylinder - the only main thing is that no oil leaks between the walls and the piston of the structure, but the piston does not move too tightly. But in general, the operation of such a hydraulic cylinder is trouble-free - as soon as the temperature inside the greenhouse begins to rise, the frames will immediately open, and as soon as clouds roll in, they will close.
You just need to make one or another model of an automatic hydraulic device for ventilation based primarily on the size and design features of the greenhouse itself. Read more in the article: Thermal drive for a greenhouse: review of 3 homemade options for auto-ventilation.
Window in a greenhouse: an important detail
To maintain optimal temperatures in a polycarbonate greenhouse, from +10 to +28 C, windows are installed. The main function is ventilation and air circulation. Many gardeners mistakenly think that an open door is enough. But on sunny and hot days, air circulation will only be near the door, and the rest of the room will overheat. For fruit-bearing plants, it is better if the window is located far from it. The vents should not create a draft that could harm the fruit, but should allow warm air to escape.
Another problem is humid air. The temperature here is high, which means condensation is inevitable. To reduce humidity, vents are placed every two meters along the entire perimeter of the greenhouse.
Important! If you make holes only in the side walls, then at the top, an air cushion of hot air masses will form, which will fry the plants.
When setting up a greenhouse, you need to pay attention to the location of the vents so that when opened they do not create a draft.
Ventilation of a greenhouse is an important factor in obtaining a good harvest. The timely release of hot air and the entry of fresh air masses will create comfortable conditions for plants in a polycarbonate greenhouse.
Three ventilation methods:
- Compulsory is used in industry. This is done using fans.
- Natural active ventilation requires human participation.
- Natural passive ventilation is carried out using automatic mechanisms and does not require human intervention.
Add a comment Cancel reply
You must be logged in to post a comment.
In order to obtain a high yield in a greenhouse, it is necessary to ensure proper ventilation. The window will cope well with this task. Such a design must be of high quality and highly efficient. To achieve this result, you should familiarize yourself with the design features of greenhouse vents.
Purpose
A favorable climate can be created in a greenhouse at the dacha only by organizing ventilation. It is not enough to simply install windows; you need to do it correctly, this is the only way to prevent the appearance of microorganisms and bacteria. Forced ventilation of the greenhouse is one of the options.
A good option is polycarbonate, which allows light to pass through, but not air. A window is extremely necessary for cucumbers in winter and other crops. Most often, there are two vents so that the plants inside do not burn from the elevated temperature, but their number depends on the size of the room. Usually they organize the structure on a gable roof and other options.
There are ready-made options, or you can create it yourself using suitable tools. It is the window that contributes to the hardening of planted crops. They become more resistant to adverse conditions.
All ventilation structures can be divided into such large groups as:
- mechanical;
- automatic from shock absorber or hydraulics;
- with opening system.
Automatic polycarbonate windows are equipped with an electric drive. This option is more practical than the mechanical one, since the system reacts to rising temperatures thanks to the installed transom. Thus, the microclimate inside remains at the required level, which simplifies the process of caring for plants for the gardener.
Windows with automatic installation are as follows:
- with hydraulic system;
- electrical workers;
- based on the principles of metal compression.
You can understand which option is preferable only by assessing the advantages and disadvantages of each design.
Hydraulic
A simple system, built on built-in hydraulics, is connected to the window structure. It is reliable and autonomous. You can create a design of different power. The principle of operation is that delta measures temperature and humidity, and also decides whether it is necessary to ventilate the room.
Two containers with liquid represent a lever; they are connected to each other by a hose. They are located at different levels of the greenhouse - below and above. The container at the bottom acts as a temperature regulator; it is completely sealed, and the top flask is a weighting agent.
Everything works according to the simplest laws of physics. When the air temperature inside the greenhouse rises, the air in the lower container also heats up, and liquid is forced out under pressure, causing it to move upward along the hose.
When the weight of the flask from above increases, the window opens. When the liquid cools, the structure will close; on average, this is 20 minutes. You can create such a device yourself.
The only drawback is the inability to protect plants from sudden cold snaps, since even minor exposure to low temperatures leads to damage to some crops. To create a system yourself, you can use simple jars. 800 ml of water is poured into a three-liter jar and rolled up. A hole is made in the lid into which a hose is inserted, which does not reach the bottom by 3 mm. A plastic lid is put on a smaller jar and a tube from a dropper is inserted; it will play the role of a pneumatic siphon. Both openings must be sealed. The system is placed inside the greenhouse and adjusted to the frame of the counterweight beam.
Electrical
The design of such a window includes a fan and a relay. When it gets too hot inside, the relay activates and the fan turns on.
Some of the main advantages are the following:
- sensitivity;
- power;
- compactness;
- possibility of adjustment.
The main disadvantage is that when the power goes out, the system stops working, and the plants may suffer from humidity and high temperature. Sometimes in greenhouses they leave one window that can be opened manually to prevent negative consequences. You can also install a backup power source, for example, a solar panel or battery, or a generator will do. In any case, a manual ventilator always helps to solve the problem.
Bimetallic
The drive of such vents works based on the differences in the properties of different metals, which can be compressed and stretched. The base uses two metal elements that have different heat coefficients for expansion. When one heats up, it bends and opens the window; as soon as the structure cools, it closes.
The main disadvantage is its low power, so the system can only be used in small greenhouses.
Pneumatic
The operation of pneumatic thermal actuators is based on the supply of heated air from a sealed container into the actuator piston. When the container heats up, the expanded air is fed through the tube into the piston, which moves and opens the transom. As the temperature drops, the air inside the system compresses and pulls the piston in the opposite direction, closing the window.
Despite the simplicity of this design, it is quite difficult to make it yourself. It will be necessary to provide a serious seal not only to the container, but also inside the piston. The problem is also complicated by the ability of air to be easily compressed, which leads to a loss in the efficiency of the entire system.
Electrical
The electric type of ventilation is equipped with temperature relays and fans. When the air overheats, the relay is activated and turns on the hood. This system is powerful, compact, and quickly responds to temperature differences. A significant disadvantage is the dependence on electricity. If this type of ventilation is used in the greenhouse, the purchase of backup power supplies will be required.
The use of alternative energy sources (solar panels, wind power) will help protect plants from overheating in the event of a power outage. Due to the need to purchase additional elements, these systems are expensive. But it is possible to choose the power of the electric motor. For heavier structures, you will have to spend money on a strong drive, while for lighter ones, low-power ones are suitable.
How to make a window in a polycarbonate greenhouse with your own hands
An automatic window for a greenhouse made of polycarbonate is practical, reliable, profitable, and expedient. The easiest way to organize smart ventilation is to buy a ready-made device and install it yourself.
Quantity and sizes
The size and number of windows are of great importance when organizing a greenhouse. For 6 linear meters, three vents are needed, since one structure is installed for every two linear meters. To ensure normal ventilation inside a greenhouse measuring 3x6 m, at least 4 structures are installed. The total area should be 25 percent of the surface area of the room. If there is a partition, windows are located in each compartment.
Location
If you purchase a ready-made greenhouse, it will include drawings where the windows will be located. The designers have already provided for the abundance of precipitation and other factors that should be taken into account in the region. Sometimes a hole is made on the roof, but side ventilation is considered no less effective. Since warm air is concentrated under the ceiling, vents made there are more effective. With a lateral arrangement, the height is approximately divided into three parts and the structure is installed, retreating 2/3 from the ground.
If the window is organized independently, then the following requirements must be taken into account:
- there should be no windows near the entrance;
- the first structure is installed in the middle of the greenhouse;
- best location from the south.
What tools will you need?
What tools will you need to make a window for a polycarbonate greenhouse with your own hands? To make a window, you will need a screwdriver and self-tapping screws. Choose those that have a special O-ring. Buy screws with a wide head. To process the edge of the profile, use a file.
Buy a hacksaw for metal; a U-profile will be useful to create the structure. If you cannot buy it, then replace the fasteners with perforated tape. For work you will need polycarbonate sheets and tape.
The choice of fastening is also very important. For windows, use the following fastenings:
- on hinges;
- on rotary mechanisms.
The type of fastening does not affect the ventilation of the greenhouse. But when installing automatic systems, it is better to think about this point in advance, this will allow you to avoid future difficulties with ventilating the room. Having chosen the method, install the windows.
Installation consists of the following steps:
- Cut out part of the wall. Work carefully, paying attention to the size of the window.
- Take a profile and use thinner sheets than on the greenhouse itself. Cut a piece. To increase strength, add stiffeners, or make a tie using mounting tape for this purpose.
- Attach the frame to the location where you are going to install the valve. If the edges line up with the hole, take a file and file the edges with it.
- Buy a light-colored primer. Cover the structure or paint it with regular paint. This will protect the material from environmental influences.
- When the frame is ready, screw the polycarbonate. Carefully trim those parts of the sheet that protrude beyond the contours of the frame.
- Take sealant or tape. Carefully cover all joints with them. Carefully protect the bottom edge of the structure. If you wish, cover the edges of the window with rubber.
- Attach the hinges and place a pinwheel with a limiter, which will act as a lock.
- Install a window.
It is quite easy to design and install a window for a greenhouse on your own. Using the valve, you can ventilate the greenhouse at any time when the need arises.
And here is a video on how to make a window in a greenhouse with your own hands.
This video discusses a budget option for a greenhouse with a window on the roof.
Mounting options
The design of each window necessarily provides for the presence of clamps; they are responsible for the opening angle.
Today the devices are presented in two options.
- Comb. It is a simple element through which the window is fixed in the required position. It is not used in automatic systems because it limits the mechanism, which leads to rapid breakdown.
- Spring on a chain. The automatics are equipped with limiters on a chain with a spring, which protect the system in strong winds.
One of the options for fastening windows is rotary hinges. The choice of what design the phragm will be will not affect the microclimate in any way. If there was no preliminary calculation of the temperature regime, then they do not make a frame; the polycarbonate is cut on three sides and the edge is folded, which should move freely. A stiffening rib is created at the lower level; a rail or profile can be used as it. This design can help out until a ventilation system is organized.
The vents must be vertical, but on the windy side, since a draft negatively affects the humidity level. It is important to maintain natural circulation. If the greenhouse is long or tall crops are planted inside, then the created ventilation system will not work; a different type is required.
You can find out if there are enough windows inside by looking closely at the walls. If condensation is collecting, it's time to upgrade the design.
Ventilation system using bottles
Scheme for ventilating a greenhouse using bottles.
An alternative to the hydraulic system is a mechanism made from plastic bottles. Such materials are found in almost every home. This system works for several years without requiring additional diagnostics.
To create a greenhouse ventilation system, you need to select several plastic bottles of 6 and 1.5 liters. Special fittings are installed in the lids of each container, which are used to connect tubes in medical droppers. The dropper parts can be fixed with caps using epoxy resin. A prerequisite is that a pair of bottles must communicate freely with each other through this tube.
A window in a greenhouse should be created according to the principle of a dormer window, when the axis of the structure falls on the middle part of the frame. The underside of the window should be slightly heavier than the other parts. This is necessary so that it can slam shut under its own weight. It can be fixed in several ways: vertically on the wall at the end or horizontally on the roof of the greenhouse. The short and lighter part of the window should be equipped with a small plastic bottle. As in the case of jars, its weight will provoke the opening of the window after water enters.
Each bottle should be hung with the holes facing down. Up to a liter of water is poured into a larger container, after which you need to screw the lid tightly.
A hole should be made in the bottom of a small bottle to ensure free air circulation.
In order to correctly select the temperature at which the window will begin to operate, you need to decide at what height the larger bottle will be suspended. So, the higher the bottle is placed, the sooner the window will begin to open. You can also create additional pressure in a larger bottle by turning the empty bottle upside down and pouring water into it using a smaller container. It must be hung again with the hole facing the bottom.
During the day, due to the increase, the bottle will heat up, which will cause air to expand, which will cause the displacement of water into the small bottle. When the mass of a 1.5-liter bottle exceeds a 6-liter bottle, it will lower and the window will close. After the temperature drops after airing, the large bottle, cooling down, will begin to suck water back from the smaller one, and the structure will slam shut
It is important that the tube is always in a free position, regardless of whether the window is closed or not. It is also undesirable for plants to come into contact with it as they grow.
Wooden windows: main options. Manufacturing process. Remaking window sashes
Often, in Soviet-era apartments, window units with a narrow sash are installed, which, according to the designers, is intended to serve as a window. However, it is not always convenient to open it, so many home craftsmen are forced by necessity to make a window themselves.
In addition, the need for its production may arise in the “blind” window sashes of old private houses.
Wooden window with a window
To help in this matter, next we will look at how to make a window in a wooden frame yourself.
Materials and tools
Before making a window in a wooden window, you need to prepare some materials and tools:
- Frame bars with a cross section of approximately 50x60 mm (selected individually);
- Calipers;
- Carpenter's chisel;
- Hammer;
- Roulette;
- Hacksaw;
- Electric planer;
- Roulette.
Note! In order for the product to last for a long time, the wooden blocks must be dried and of good quality - without knots or cracks. In addition, they must first be treated with an antiseptic agent to prevent wood rotting.
In the photo - timber 50x60 mm
Drawing
After preparing the tools and materials, you need to complete the drawing. To do this, first of all, you should measure the timber from which the sash is made in order to make a window from the same parts.
On the diagram it is necessary to indicate in millimeters all the dimensions of the window frame, sash and all other elements. Having a drawing will allow you to correctly cut the materials and avoid mistakes during the work process.
Remaking window sashes
First of all, it is necessary to redo both window sashes.
Instructions for doing this work look like this:
- The first step is to dismantle the glazing beads and pull out the glass.
- Next, you need to dismantle the top sash strip and shorten the uprights. If you cannot dismantle the top bar, you can cut out part of the racks in the middle.
The parts are connected using wood glue. If you have a router, you can make a connection using the tenon/groove principle. If it is not possible to cut grooves, you should strengthen the connection with metal corners or strips.
- Then you need to shorten the glass and glazing beads so that they can be inserted into the frame.
The second, outer sash is done in exactly the same way, the only thing you should take into account is that it must be smaller than the inner one so that it can open freely.
Advice! Ordinary curtains interfere with the use of the window. Therefore, you can purchase special roller blinds for wooden windows with a window or blinds.
Example - blinds on wooden windows with a window
Manufacturing
Now you can start making the window.
The work is performed in this order:
- First of all, it is necessary to make the frame of the future design, which, in fact, is an analogue of a window sash, but in a smaller version. At this stage you will need a router to make the grooves.
If there is no such tool, you should seek help from a carpentry workshop, where, according to the drawings, specialists will quickly process the timber. As a rule, the price for such work is low.
- Next, according to the drawing, cut the timber into planks and make cuts at 45 degrees.
- On the sections it is necessary to make spikes and eyes, with the help of which the frame parts will be connected to each other.
- Then you need to cut the glass to size and insert it into the frame. You can secure the glass with cutting beads from the frame.
- Next, the structure is attached to the window frame using hinges and fittings.
Example of a finished product
Advice! Before working on manufacturing, you should “get your teeth into”, for example, first making wooden windows with a window for a summer house.
The second sash is performed and installed in the same way. After this, you just need to paint the finished products or open them with varnish. This completes the manufacturing process.
It should be noted that wooden windows with a double-glazed window are made somewhat differently, since they have double sashes, however, the principle of operation still remains the same.
There is an exit
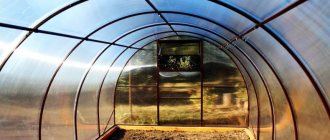
The ideal material for greenhouses is cellular polycarbonate - a very durable and lightweight cellular material that retains heat well. In terms of heat transfer coefficient, it is close to a double-glazed window. Polycarbonate loses an order of magnitude less heat than glass or film. Almost all sunlight passes through. In severe frost, such a greenhouse will “work” perfectly! But in hot weather it will need stronger ventilation, which can be easily solved constructively.
This material does not break, does not break, can withstand frost, and is very durable. Perfect for arched structures. It bends very easily and is joined end-to-end, forming a continuous sheet with virtually no gaps.
Spring in the greenhouse
To maximize the use of sunlight and heat, the greenhouse must:
- let in maximum light: then we use polycarbonate, if the greenhouse is glass, then the glass must be clean, if it is film, then the film must be new, with a minimum of ceilings and frames;
- reflect less heat: in this case, leave the ground bare or use black mulch film;
- be airtight: for this we carefully seal all the cracks;
- store heat in water: put black containers filled to the top in greenhouses, covered with film or lids, possibly with mullein dissolved in water;
- and finally, we use double films and additional cover for plants inside the greenhouse.
Summer in the greenhouse
To reduce overheating, the greenhouse must:
- let in less light: then we cover the top with translucent materials and use shading;
- reflect heat from the soil: use light mulch;
- increase ventilation: increase the number or area of the upper vents, ensure that the transoms open automatically.
In conclusion, we can say with confidence that for a real gardener, a greenhouse is a temple where, at best, he stands bowed, or even kneeling, working diligently and praying for the harvest!
Ready-made windows: manufacturers, rating of the best and prices
Today there are many manufacturers on the domestic market that offer ready-made solutions for greenhouses of various sizes.
Such structures are reliable, stable and are made taking into account the climate.
Will
Characteristics:
- The basis of the window is a frame made of galvanized metal. The system is assembled using nuts and screws.
- The window covering is cellular polycarbonate.
- Painting: polymer coating.
- Dimensions - 910x500 mm.
- The weight of the window with fittings is 4 kg.
Cost - from 916 rubles.
Innovator
Characteristics:
- Material: profile metal pipe with a diameter of 20x20 mm.
- Painting: polymer coating.
- Dimensions - 930x510 mm.
- The weight of the window with fittings is 4.3 kg.
- The kit includes fittings for fastening and mounting polycarbonate.
Correct breathing
In a well-designed greenhouse there are at least two vents, and they are located at the extreme vertical points: one at the bottom, and the second under the ceiling, so that natural air circulation occurs. To ventilate a small room, this is usually sufficient.
Installation of ventilation vents
But sometimes an abundance of tall plants, or a greenhouse tunnel that is too long, does not allow air to circulate properly. This is very easy to determine by the abundance of condensation, which settles from the inside on the polycarbonate and then rolls down onto the plants, which is very undesirable. In such cases, the owner of the greenhouse has to modify the structure of the structure with his own hands. As a rule, additional windows are installed on the ceiling.
Opening system
Window vent clamp for greenhouses
Additional windows must be equipped with special clamps - devices that control the opening angle of the window.
Window vent clamps for greenhouses can be of several types
There are several types of latches, which are selected depending on the operating principle of the window:
- The latch is a comb. This is a simple stopper that allows you to fix the window in the open position at the desired angle. The comb is not installed if the window has automatic control: the latch, in this case, will limit the working stroke of the mechanism, which will lead to its breakdown.
- Limiter with a spring on a chain. Such a lock must be installed on automatic windows: it reliably prevents the machine from breaking during strong gusts of wind.
Fasteners often come complete with a finished window. If you are making a transom yourself, then the retainer can be purchased separately or made by yourself. The comb is easily made from a pressure mechanism from a silicone construction gun, a spring and a hexagon.
Features and principle of operation of the mechanism
There are two methods of ventilating greenhouses: manual and automatic.
Did you know? According to archaeological data, the cultivation of various plants at home began in Ancient China.
Let's consider the operating principle of each mechanism, as well as its advantages and disadvantages:
- Manual ventilation method. By determining the temperature using a thermometer and hygrometer, you independently set the ventilation mode or create additional heat for the plants. This process is carried out by opening and closing the window at the time you need. The advantage of this method is the low cost of the devices. The disadvantage is the constant connection of the sensor to devices to determine their indicators. If you do not have the opportunity to constantly be in the greenhouse, then you need to optimize the principle of operation of the mechanism; for this, self-opening windows or automation are suitable for you.
- Automatic ventilation method . This method is easy to use; it creates the necessary climatic conditions for the crops grown in the greenhouse. At the same time, you do not need to constantly be in a room with plants to control when you need to open and close the window, since the opener regulates the process. This method has many advantages, the most significant is that there is no need to constantly monitor the operation of the system. The disadvantages include the fact that making such a system will be quite difficult and will require investing more money than in the previous version. There are also several types of automatic method, you will learn about them in more detail below.
Video: Installing a window with automatic ventilation of a greenhouse
TEFFY is considered the best greenhouse from manufacturers, since plants can be grown in such a greenhouse even in winter; it includes a door and two windows for ventilation.
Types of ventilation
If a fruit-bearing plant is not properly cared for, it will not bear fruit and will die. Currently, there are two types of ventilation of artificial structures:
- automatic;
- manual (mechanical)
Automatic ventilation can be done:
- bimetallic;
- electrical;
- hydraulic
The manual version of ventilation (ventilation) involves the presence of a different number of vents and doors; it is simple and accessible.
The advantages of such air ventilation for homemade greenhouses:
- No costs for special devices.
- Saving electrical energy.
The disadvantage of manual ventilation is the mandatory presence of the greenhouse owner.
Those who do not have the opportunity to constantly care for plants try to use automatic greenhouse ventilation made by themselves. Advice! It is not necessary to look for a specialist to create ventilation; it is quite possible to cope with such a task on your own, using a ready-made algorithm of actions.
Among the advantages of the automatic ventilation mode, we note the chance to create the necessary climate regime for certain plants.
Let us consider in detail the algorithm for creating automatic ventilation of a structure.