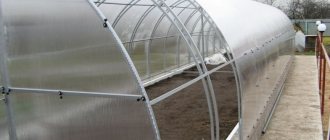
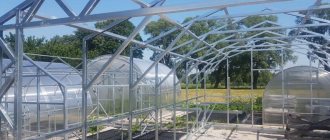
There are a huge number of types of foundations, and it’s easy to get confused among them. Let’s try to tell you simply and clearly what type of foundation is suitable for your goals, conditions and budget, and how to build a foundation for a future greenhouse.
Novice gardeners mistakenly believe that during the construction of a greenhouse on a site they can completely do without a foundation. In fact, this only applies to a “disposable” film greenhouse, which is installed for one season. If you want to build a good-quality polycarbonate greenhouse that will serve you for many years, you will have to spend money on a high-quality base for construction. Otherwise, you risk finding yourself in the same situation as the careless Nif-Nif from the fairy tale “The Three Little Pigs,” whose straw house flew away at the first strong blow of the wind.
How to make a light pipe foundation for a greenhouse
Hello, our dear friends.
Did you know that even such a seemingly flimsy structure as a greenhouse also needs a foundation? This is not very good news, especially if you plan to arrange a covered bed in your garden. You're not going to dig trenches there and then pour concrete into them? After all, a greenhouse is a temporary structure, but a stone ribbon in the middle of a vegetable garden is for life.
It was by solving such problems that the foundation made of pipes for the greenhouse gained the right to life. But how to make one? And is it even worth doing this? – We will discuss this in our review today.
Types of pipe foundations
Pipe foundations should be considered one of the varieties of pile foundations, where metal, asbestos-cement or even PVC pipes are used as supports.
Metal pipe foundation
The most common and beloved by summer residents is, of course, a foundation made of metal pipes. Yes, that’s understandable. The metal is strong enough that it can simply be driven into the ground, leaving behind everyone’s least favorite excavation work.
But this is where the charms of such an undertaking end. Without a special protective coating, which, for example, is applied to screw piles, ordinary steel pipes quickly succumb to corrosion and therefore collapse.
On the other hand, with driven express installation, the pipe cavity is filled with earth, which eliminates its internal concreting. As a result, the metal corrects not only the outside and the inside of the product, and this, again, is a huge minus for durability.
Asbestos cement pipe foundation
A foundation with asbestos-cement or PVC pipes is a completely different matter. This will really last for centuries and can even be used in the construction of capital structures. It provides for mandatory internal concreting with the same mandatory reinforcement.
But bored piles, which is what they usually call such foundations, cannot be called cheap. In order to install such a pile, a shaft must be drilled under it, and this is excavation work, which we really wanted to avoid.
In addition, if the greenhouse is dismantled, the same concrete columns will remain in the garden, which will be no easier to dig than the above-mentioned reinforced concrete strip.
So what to do? - You ask. After all, these arguments will not make the problem disappear. And the greenhouse will not build itself.
Meanwhile, there are exactly two ways out.
- The first is to use screw piles as a foundation. This reliable and proven foundation has already been successfully used for the construction of gazebos and fences, so why not use them for the construction of greenhouses? Moreover, if necessary, the screw pile can be easily dismantled, which means that after the demolition of the greenhouse, the remaining space can be used as you please. The only pity is that really high-quality piles cost good money and will cost the owners no less than the polycarbonate greenhouse itself. And handicrafts will differ little from ordinary pipes.
- The second option is to come to terms with the fact that we don’t have the money to buy screw piles, but we need our own greenhouse on the site. And it is better for it to stand for 5-6 years on a pipe foundation and during this time earn a quality foundation than not have it at all. Still, you can disassemble most modern greenhouses without much damage to the materials used. Put a new foundation, and then put everything back together as it was. Yes, this is additional labor costs, but what can you do? Holes in the budget always have to be patched with physical labor.
Which type of foundation is better?
If the listed advantages convince you that a foundation for a greenhouse made of timber is the optimal scheme, it is worth familiarizing yourself with its varieties. And at the same time with the rules for choosing the most suitable type. Generally speaking, a wooden base is a large frame that is either slightly buried in the ground or mounted on point supports. In the first case, it is a shallowly buried strip base. In the second - a grillage resting on low pillars.
Structural modifications appeared due to differences in the geological and hydrogeological conditions of suburban areas. Based on the “natural data” of the site, the most suitable type of foundation is determined:
- frame, which is fundamentally a foundation strip. Installed when groundwater is low, in low-moisture sands or in bulk gravel and crushed stone replacing natural soil;
- grillage on low point supports. Installed at high groundwater levels, on poorly drained areas with characteristic excessive soil moisture during periods of heavy rainfall;
- a combined type of wooden foundation, in the construction of which the supports are used only partially. It is installed in areas with uneven terrain if the owners do not want to level and plan their own non-standard land.
In fact, an elementary frame is the basic version of all types of timber foundations of any degree of complexity. It is the easiest, fastest and cheapest to build. However, for sites with complex terrain and difficult hydrogeological conditions, the simplest wooden tape is absolutely not suitable. Therefore, we will consider not only the basic type, but also present several improved designs.
The modernized options will give craftsmen their own ideas for constructing timber foundations, taking into account the individual characteristics of the site.
DIY pipe foundation for a greenhouse
So, if you have found a compromise with your conscience, and it will not gnaw at you for some deviations from construction truths, let’s see how to make a more or less decent pipe base with your own hands.
Let's agree right away. We are the ones who are planning to build a greenhouse in the garden, and therefore we happily skip the garbage collection and leveling of the site and go straight to marking.
We look at our project and transfer the center lines of the greenhouse to the construction site. This does not mean external boundaries, but rather axial lines.
Let's explain. If we plan to use a board with a cross-section of 150×50 mm as a grillage (and we are planning it for these purposes), then the center lines will run 75 mm earlier than the contour boundaries of the building. In addition, if the greenhouse has a series of central supports, then you will have another axial one that runs through the center of them.
In our case, the markup will look like this.
Where we have dotted lines, your lacing should be tight. Moreover, the pegs need to be driven in not at the intersection of the lines, but at least half a meter behind them.
Now arm yourself with a shovel (well, you can’t do without excavation work in the garden) and select one and a half bayonets worth of soil inside the resulting contour. In practice, this will be about thirty centimeters. Not so much.
Just work under the lacing. The walls of the pit should be smooth and vertical.
A product with a diameter of 80 mm and a wall thickness of 4 mm is quite suitable for work. Cut it into pieces of 1600 mm (the freezing depth of the soil in the Moscow region is 1400 mm) and get to work.
The first thing you need to do is hammer the pipes into the corners of the dug pit, so that fifteen centimeters of metal remain above the surface.
Moreover, it is strictly not recommended to hit the end of the piece of iron with a sledgehammer. Use a piece of board or timber instead of a gasket, this way you will protect the pipe from deformation.
Now, pull the bolt straight along the pipes, and place eight more blanks along it, two on each side of the rectangle, keeping the step in the range from 1500 to 2000 mm.
When all the pipes are in the ground, take a level and the already familiar sledgehammer and level the piles so that all their ends are in the same horizontal plane 70-100 mm above the ground level.
It will be easier later. Purchase a galvanized mesh with a cell cross-section of 20x20 mm and cover the bottom of the pit with it. If it doesn’t work out with galvanization, you can also paint a regular steel product. Such a procedure will not ruin you, but the metal will last much longer.
Why is this necessary? If anyone doesn’t know, this is a simple way to protect a greenhouse from moles.
But that was just a warm-up. Now take a grinder, a drill, a welding machine in your hand and equip all the pipes with these shoes.
Steel should be purchased no thinner than 3-4 mm. So you will have to sweat with the shoes, and quite a bit at that.
Did you manage? Well, then, in fact, that’s where all the difficulties end.
All that remains is to install the sides from corrugated sheets or flat slate over the walls of the pit...
...Cover it with earth again...
And screw the boards to the shoes, having previously placed pieces of roofing felt under them.
Calculation
It is better to calculate the materials according to the finished dimensions, so it will be possible to accurately determine the pitch and number of pipe supports. In other words, the foundation must be built for a specific version of the greenhouse, and not then selected for the supporting structure.
Reference. Based on the width and length of the greenhouse, you can calculate the amount of materials. To do this, the perimeter of the greenhouse must be divided by the approximate distance between the supports.
The ideal pitch for tubular supports is a distance from 2000 mm to 2500 mm, but it is worth considering the design of the greenhouse itself - the number of frame axes, the material of the walls. If the axes are located quite often, or glazing is used, then the load on the base will be large. In this case, the step should be shifted to a smaller direction.
To determine the degree of depth, rely on the soil freezing depth and soil category:
- For mobile “floating” soils, deeper installation of supports is required.
- For central Russia, this freezing index is from 1400 to 1600 mm, the same depth is necessary for reliable fastening of piles on peat or sandy-clayey soils.
The depth of driving the pipe must be no less than these indicators.
Do-it-yourself greenhouse made from profile pipes 20×20 and 40×20. Drawings and photos of homemade greenhouses
Good day to all.
When you decide to build a greenhouse, the first question that arises is: what material to use? In this article, I decided to review how to make a greenhouse yourself from a durable profile pipe. Using it you can make a reliable frame that will last for many years.
On the Internet you can find a lot of advice on assembling a structure, but most experts describe the manufacturing process from a pipe, but not a profile one.
You need to understand that the profile pipe, unlike its traditional counterpart, has a rectangular or square shape.
Despite its low weight, this material is quite durable. If you plan to make an arched greenhouse, it is recommended to use a 40×20 profile. For jumpers, a pipe with dimensions 20x20 is better suited.
What functions does the base for a greenhouse perform?
Any stationary greenhouse needs a strong foundation.
At the same time, there is no point in installing a foundation if the greenhouse will change its location throughout the year. If a permanent location for the greenhouse is chosen, then the presence of a base is mandatory, since it performs important tasks:
- The foundation provides support for the greenhouse structure. The durability and stability of greenhouses directly depends on the quality of their installation;
- the foundation serves as a thermal insulation material. The temperature inside a greenhouse made without a foundation is 10% less than the temperature inside greenhouse structures that are equipped with a foundation.
The vegetation inside such premises will be reliably protected from various atmospheric influences.
Making a homemade greenhouse from a profile pipe and polycarbonate
There are several options for greenhouse shapes, but I decided to focus on a review of the arched type. If you have some skills in such work, then there should be no problems with assembly.
When choosing a location for a future greenhouse, you need to take into account the maximum illumination, so it should face strictly south. Surface differences should not exceed 10 cm.
To make arches, you need to prepare a profile with a cross-section of 20×40 in the amount of 10 pieces (profile pipe). The approximate length of the pipes should be 5.8 m (you can immediately cut them upon purchase, or take 6-meter pipes). To form arcs, it is recommended to use a pipe bender; if you do this by hand, it will be difficult to achieve high accuracy.
For the frame jumpers, you need to prepare a profile with a cross-section of 20×20 mm in the amount of 40 pieces. The length of the pipes is 67 cm.
Using pegs and rope, mark the future structure. To achieve an even structure, you need to check the markings diagonally.
Dig a pit to a depth of 80 cm, then fill it with cement mortar to the level of the longitudinal base, the height of which should be about 15 cm.
At the next stage, the transverse bases are welded to the longitudinal ones. To add strength and reliability, it is recommended to use metal corners.
Lay a brick under the base; if necessary, you can make a small groove for masonry.
Before erecting the frame, you need to lay out polycarbonate sheets, lay arcs on top and outline them with a marker. You can cut the material using a construction knife, leaving a margin of about 2 cm.
When the solution has completely hardened, you should begin installing the frame from the profile pipe. The first arch needs to be welded to the longitudinal bases.
It is important to note that installing the first and last arch is a responsible step, so it is recommended to use a plumb line.
Using jumpers, the remaining arches are welded sequentially. Experts recommend starting to weld the arc to the upper jumper. After the last arch is installed, you need to weld the end jumpers from a profile with a section of 20x20, since they do not carry a large load.
Polycarbonate is attached to the structure using special self-tapping screws and washers. Before covering the sheets, it is necessary to remove the protective film. The first piece should protrude beyond the structure by about 15 cm.
After attaching the polycarbonate, you need to cut holes for the windows and doors. All joints must be treated with silicone.
The service life of such a homemade greenhouse is more than 10 years. Moreover, the structure does not require any maintenance.
Advantages and disadvantages
Like any design option, a foundation for a greenhouse made of pipes has its advantages and disadvantages. The main positive characteristics include:
- Small financial investment.
- Easy installation without large-scale excavation work.
- It is quite easy to remove if there is a need to place the structure in another place.
- Suitable for regions with deep soil freezing.
- It is a reliable foundation on all types of soils - clay, loam, peat, black soil, sandy soil, the main thing is to correctly calculate the depth of installation of the support.
- It is possible to build a foundation with a recess - additional protection from gnawing pests and the formation of a microclimate, including with a different type of soil.
The first two points, unfortunately, do not apply to structures made from asbestos-cement pipe foundations or bored piles, however, investments in drilling mines and labor costs will pay off with a long service life (several decades), and the strength of such a foundation will be comparable to the foundation for a residential building .
The main disadvantages of a base made of metal building materials:
- Low strength resource (suitable for lighter and smaller structures).
- Short-lived - susceptible to corrosion, service life up to 8 years.
Greenhouse drawing and assembly (video)
When preparing a drawing of a greenhouse structure, it is important to take into account that the pipe has standard dimensions from 3 to 12 m. Therefore, you need to find out this point from the seller. This will allow you to avoid overpayments and work without trimming.
Important! The section of the profile pipe for the main parts should be 20x40, as well as 20x20 for the connecting elements.
The following information must be indicated on the diagram:
- Foundation.
- Vertical racks.
- Roof structure.
- Top harness.
- Windows and door.
- Spacers.
First of all, you need to decide on the distance between the vertical posts. Experts recommend 1 m. In the case where the greenhouse is supposed to be covered with plastic film, the distance can be reduced to 0.6 m. This is necessary to reduce the load on the pipe. If you need to increase the distance, then additional reinforcement is needed.
Creating an arched greenhouse requires a slightly different approach. After all, here you need to correctly bend the profile pipe at a certain angle. If it is assumed that the height of the greenhouse will be 2 m, then you need to purchase a 12-meter pipe. The distance between the arcs is recommended to be no more than one meter.
All arcs are attached to each other, in addition, to secure the structure on each side you will need to use profiles. Please indicate additional spacers on the fronts.
It should be understood that, if necessary, any parts can be made from a pipe, so it is possible to create a lean-to, triangular, or spherical shape of the future greenhouse.
You probably understand that the structure will turn out to be quite heavy, so you need to prepare the foundation. The foundation is made at the discretion of the land owner. It is recommended to immediately insert anchors into the cement mortar, to which the frame is welded for reinforcement.
The assembly process is simple:
- For vertical posts, cut a profile pipe of the required size.
- Weld the vertical posts to the base, using a building level.
- You need to fix the outline on top of the racks.
- Take measurements and cut pieces for the vertical posts.
- Connect and secure all the racks with crossbars.
- Make a door and install it in the intended location.
Some gardeners and gardeners prefer to make a frame on the ground and then secure it to the foundation. To avoid distortions, such work should be done only on a flat surface.
To make an arched greenhouse yourself from a profile pipe, you will need to use a pipe bender. If it is missing, to bend you need to do the following:
- Cut the material to the required length.
- Make cuts.
- Bend the pipe.
In this case, experts recommend starting assembly from both sides. This allows for structural strength to be achieved.
After installing the frame, you need to secure the polycarbonate. But there are several nuances here:
- The front side is the one on which the protective film is applied.
- The sheets must be secured with self-tapping screws with a rubber cap.
- The sheets are connected to each other by metal plates.
- The joints are treated with sealant.
- After fixing the material, remove the protective film.
I also recommend watching a video on the topic:
Greenhouse floors laid on the ground
In the case of a slab foundation, its surface is an excellent base for a floor that is not afraid of any rodents. If necessary, hard insulation, rolled waterproof film is laid on top and soil is poured.
When installing a point foundation, beams are mounted on pillars or piles, along with logs and rigid flooring. Then everything follows the same pattern.
The base of the greenhouse is on poles - the floor will be mounted on beams
But when using a foundation tape, it becomes possible not to raise, but, on the contrary, to deepen the greenhouse. In some regions, this allows you to do without purchasing floor insulation at all - it is enough to make the structure of the bed multi-layered.
Here are the steps after the foundation has hardened and the greenhouse frame has been installed on it:
| Steps, photo | A comment |
| In the inner perimeter of the foundation, soil is removed to a depth of 30 cm. A metal or polymer mesh with fine cells is laid on the bottom, extending onto the walls, which will protect the greenhouse from the penetration of rodents. |
| Layers are laid along the width of the beds on both sides of the greenhouse, the first of which are large branches. |
| Then dry leaves. |
| Cardboard and paper. |
| Grass or hay. |
| Fertile soil is poured on top. The grass, rotting, will serve as an excellent fertilizer. Between the beds, a compacted sand base is made, on top of which paving slabs are laid. |
| All that remains is to make the sides for the beds, for which you can use flat slate. They attach it to a T-shaped aluminum profile, which is simply driven into the ground with a sledgehammer. |
Note: If the soil freezes at significant levels, the floor of the greenhouse can be buried a little more - 80 cm from the surface of the earth. What to do when it freezes to 120-150 cm? In this case, branches and cardboard will not be enough, and the floors will have to be insulated with rigid material (foam glass, polystyrene foam), and a heating cable will have to be installed. We won’t go into details of the structuring; everything is perfectly shown in the photo below.
Option for structuring the floor of a permanent greenhouse
Do-it-yourself greenhouse made of profile pipes and polycarbonate
Making a greenhouse from a profile pipe will require you to have skills in working with metal and welding.
- profile pipe 20x40 mm (20x20 mm);
- cellular polycarbonate with a minimum thickness of 6 mm;
- H-shaped connecting strips;
- set of washers for fastening polycarbonate;
- turned door awnings;
- roofing screws 19 mm;
- thermal washers for polycarbonate;
- electrodes 2.5–3 mm;
- cutting and grinding discs;
- three-in-one primer;
- a few bricks, concrete.
The roof of the greenhouse will be semicircular, with low side walls. The frame is assembled by welding, and the polycarbonate is attached to the frame with self-tapping screws. The height of the structure will be 1.8 m. The arcs of the greenhouse are positioned so that the polycarbonate sheets are joined on the arcs. H-shaped strips are used to seal the joints between sheets. The greenhouse is stationary, so the ends of the frame should be concreted. Using a shallow strip foundation under the entire structure, the soil inside the greenhouse is further isolated from the environment.
Geological and hydrogeological circumstances
When choosing a foundation, the type of soil and the depth of its freezing are of great importance.
A big mistake is choosing a support only on the basis of the estimate allocated for construction. A weak foundation will not last long, and the greenhouse with all its contents will be destroyed along with it. The main criterion for selection is the soil characteristics of the site. The type of material, type, depth of installation, hydro- and thermal insulation depend on its type.
It is advisable to familiarize yourself with the properties of soils that can be found on private property:
- Sand. Easily allows moisture to pass through, sag under pressure, and does not expand when frozen. The best choice is surface or shallow support.
- Clay. Absorbs and retains water. Gives in under heavy weight. It bulges, increasing in volume up to 10%. Deep pile or strip foundations are used.
- Rocky ground. It is durable, pressure resistant and retains volume under all conditions. A surface columnar or strip base is suitable.
- Clastic soil. The pointed stones contained in the composition provide stability and prevent deformation. Shallow or surface construction is practiced.
- Quicksand. It is characterized by mobility and instability due to water-saturated silt. Slab or pile support is recommended. At particularly low soil static rates, combination is possible.
Repairing the base is quite difficult, and replacing it is almost impossible. Therefore, you need to be extremely careful when choosing technology and materials.
Preparation of frame elements
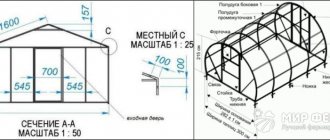
The frame of the greenhouse is made up of a number of parallel arcs of a profile pipe, as shown in the figure.
The vertical section is taken with a size of 0.5 m. The height of the arc remains 1.3 m, this will be the radius of curvature from which the length of the sector can be calculated: L = 3.14 * 1.3 = 4.1 m. By adding one meter to the result on vertical sections on both sides and 0.5 m for deepening, you will get a total pipe length for each support of 6 m, which corresponds to the standard length, and you will not have to cut them.
What will you need for the job?
In addition to the pipes themselves, to organize the foundation installation process you will need:
Shovel, sledgehammer, drill, drill, screwdriver, welding machine.- Pegs and cord for organizing markings.
- Polycarbonate, smooth slate or corrugated sheeting - for mounting the sides of the greenhouse base.
- Galvanized mesh for the base.
- Steel 3-4 mm thick - for platforms. The size of each platform is 150*150 mm, so when purchasing metal, proceed from these indicators and a quantity equal to the number of supports.
- Board (timber) with a cross section of 150*50mm for strapping.
- Ready-made concrete or its components, if concreting of pipes is planned.
- Fasteners (screws, bolts).
Frame installation
In the chosen location, dig two holes 50 cm deep. At a distance from each other equal to the resulting width of the greenhouse - 2.6 m. Lay a brick at the bottom of the hole. Install the arc and fix it in a vertical position, checking the position using a bubble level. Fill the holes with concrete, tamping it well with a bayonet.
1. Support leg of the arc. 2. Brick. 3. Concrete. 4. Soil
Set the distance between the first and second supports to 95-100 cm. Subsequent supports are located at a distance of 105 cm from each other. Between the penultimate and last support there should be the same 95-100 cm as at the beginning. Dimensions are indicated between the midpoints of the support profile.
In order not to constantly run around with a tape measure, prepare in advance several 101 cm long slats so that they can be rested against the end between the supports.
The distances between the arcs are indicated taking into account the standard width of the polycarbonate strips - 1.05 m, so that the joints fall in the middle of the profile. The width of the H-shaped joining strip and the margin to compensate for thermal expansion are taken into account.
You can control the height of the entire structure by placing a section of profile pipe and a level on top of the arches.
At a height of five centimeters from the ground, taking into account the horizontality of the area, between the arcs, on both sides of the greenhouse, weld jumpers for rigidity. To evenly support the polycarbonate, it is advisable to place the jumpers also at the beginning of the bend of the arc at the top point and in the middle between them. For these jumpers it is easier to use a corner with 20x20 mm shelves.
The base of the greenhouse is ready.
Sealing the ends of the greenhouse and installing the door
At a height of five centimeters from the ground, weld the shelf to the arches at the end of the greenhouse opposite the entrance to it. At a height of one meter from the welded pipe, weld another section. Maintain a flat surface to secure the polycarbonate.
From the entrance to the greenhouse, install two vertical pipes, oriented in the center, at a distance from each other equal to the desired width of the door, for example 950 cm. Weld the upper edge of these racks to the arc, and concrete the bottom at the ground level.
Between the supports of the doorway, weld a horizontal lintel at the desired height of the door. Attach horizontal pipe sections to the right and left of the doorway, at a distance of five centimeters from the ground, and also at a height of one meter.
Make the greenhouse door from a profile pipe by welding a frame of the appropriate size. The size of the door frame is two centimeters in width less than the resulting doorway.
Choose the height of the door so that there is a one-centimeter gap between the opening at the top, and at the bottom the door does not cling to the ground. Weld a diagonal in the rectangle for rigidity.
Weld the hinged frame into the opening. Weld metal stoppers to limit the opening of the greenhouse door inward.
Be sure to paint all frame elements.
