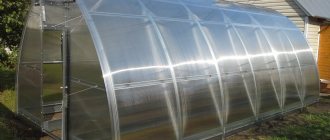
Polycarbonate, as a covering for greenhouses and greenhouses, is perhaps the most optimal solution today. The advantages of this material are discussed below, because first you need to think about how to practically and rationally use the area of the land plot - especially if it is small. Simple geometry suggests that the most economical solution in terms of space occupied will be a square polycarbonate greenhouse, which has a simple design and does not create problems during installation.
Advantages and disadvantages of greenhouses and greenhouses made of profile pipes
Homemade greenhouses and profile greenhouses have the following advantages:
- withstand high mechanical loads;
- they transmit light well, so they are suitable for growing even light-loving plants;
- have a long service life (at least 30 years);
- not subject to fire;
- have mobility (they can be disassembled, moved, reassembled, added additional sections, etc.);
- are affordable (profile pipes can be purchased at any hardware store);
- facilitate the installation of communications from inside the structure (automatic watering, heating, power supply).
But still, such structures also have disadvantages:
- At the design stage, you need to think about a reliable foundation, because a greenhouse frame made from a profile pipe will have a lot of weight.
- The material bends poorly, which makes it somewhat difficult to create a structure of a certain shape.
- Profiles are not cheap, but they pay for themselves due to their long service life.
Read the article: the best DIY greenhouse projects.
Advantages of using polycarbonate for covering greenhouses
Polycarbonate has long and firmly gained popularity, and not by chance. The numerous advantages of this material have earned it recognition among gardeners and gardeners. Among the technical and physical characteristics that distinguish polycarbonate from other materials are the following:
- 8mm cellular polycarbonate sheets provide twice the thermal conductivity of double glazing;
- polycarbonate transmits about 80% of sunlight;
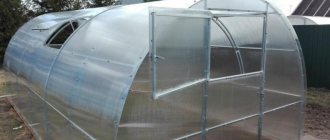
- a rectangular polycarbonate greenhouse will withstand not only strong and large hail, but even a blow from a stone;
- special coating of the sheets prevents the penetration of ultraviolet radiation into the greenhouses;
- polycarbonate is an elastic material, easy to cut and process;
- does not require special care.
Regarding care - to clean the surface of polycarbonate sheets, you should use ordinary, mild products, without aggressive substances and solvents. Abrasive additives can harm the surface, so they are also best avoided. It is also not recommended to use garden tools to remove the snow layer.
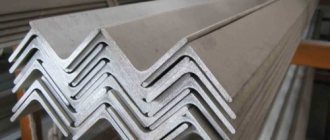
How to choose a profile pipe
Profiles are coated with polymer paint or zinc. The first option is cheaper in cost, but over time the top layer may peel off. This will not only deprive the greenhouse of its neat appearance, but will also lead to corrosion.
Thanks to the galvanized coating, the pipes will not rust and are not afraid of sudden temperature changes. That is why, when choosing profiles for a greenhouse or greenhouse, it is recommended to give preference to them.
Range of steel profiles
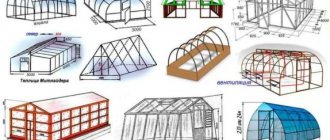
Types of greenhouses and hotbeds made of profile pipes
Let's look at a few main ones:
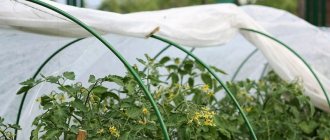
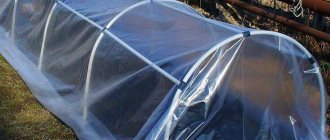
- Arched. They have the shape of an arc. Such greenhouses are assembled fairly quickly and withstand strong gusts of wind well. Thanks to the arched shape, they transmit light perfectly and are suitable for growing light-loving plants.
- Lancet (Droplet). They are similar to the previous type, but their top is more elongated, with a pointed end. Such greenhouses are resistant to deformation and distortion. Thanks to the special structure of the roof, snow immediately rolls down, which prevents damage under its weight.
- Pyramidal. The walls are inclined inward at a slight angle and are connected at the top. Thanks to this shape, the structure can withstand strong gusts of wind and snow does not accumulate on its roof. In the morning and evening, the sun's rays penetrate well, and in the midday sun the edges reflect them, which prevents the plants from overheating.
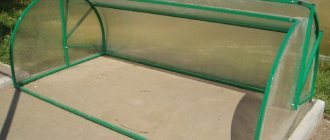
- Gable (gable) or tent-type greenhouses. Such structures do not have curved parts, which facilitates the construction process. The shape resembles an ordinary house with a ridge on the roof. Even tall crops can be planted in such greenhouses. Please note that more material will be needed to create. A greenhouse can also have a gable roof.
- Single-pitch. One side of this structure is higher, resulting in a sloped roof. Typically, such greenhouses (and this is a greenhouse, not a greenhouse) are mounted to another building, for example, to a house, gazebo, etc. That is, one side turns out to be adjacent. This allows you to save space on the site and consumable materials.
- Breadbox (Fedorov's greenhouse). Intended for planting low-growing plants. The doors of such a greenhouse open like a bread box, hence the name. This ensures free access to crops.
Helpful information! It is recommended to install the arched structure in the spring-autumn period. In winter, snow can accumulate on it, leading to damage. If you plan to use the greenhouse year-round, then it is better to give preference to those types on the roof of which a snowdrift will not form (for example, lancet or pyramidal).
Drawings of greenhouses and greenhouses made of profile pipes, diagrams with dimensions
When drawing up a diagram of a greenhouse or greenhouse from a profile, you must rely on its length.
For example, elements of an arched structure should be located at a distance of 1 m from each other. Thus, for a 3*6 greenhouse made of a square pipe, you will need six profiles in the form of arcs. The standard length of the profile is 6.1 m. It will make a semicircle with a radius of 1.9 m.
Helpful information! If you plan to make the walls of the structure from cellular polycarbonate, it is better to choose a greenhouse height of 1.85-1.9 m with a bottom width of 3.7-3.8 m. This will help save on materials, because standard sheathing sheets 6*2.1 m.
When constructing a greenhouse with a gable roof, the height of the walls should be 1.7-2 m and the width 4 meters (with a slope of 30-45 degrees, length 2.25-2.45 m). Jumpers on such a structure are mounted in the upper part of the arches and in the middle of the slopes (2 pieces on each side). The back wall must be secured with a pair of crossbars. There is an opening for the door on the facade. Based on its dimensions, the amount of additional material is calculated.
The best profile for a greenhouse is a profile with a wall thickness of 2 mm or more, with a cross-section of 4*2 cm or 4*4 cm. It is highly durable. For horizontal screed, pipes with a thickness of 1-1.5 mm are suitable.
The drawing must indicate the exact dimensions - length, width, height. Without accurate measurements, it will not be possible to build a high-quality and durable structure.
Based on the size, the required amount of materials is purchased. It is important to consider that pipes should always be taken with a margin of 10% (in case they suddenly become damaged during transportation or installation). First you need to draw up a drawing, then calculate the amount of material for construction.
Some installation features
In principle, assembling and installing a rectangular polycarbonate greenhouse on site is a simple matter, however, you still need to refer to the simple and clearly illustrated instructions included in the delivery kit. A few basic rules should always be kept in mind:
- The structural parts should be installed in such a way that the profile flanges “look” at the coating.
- Fixation of structural parts is carried out by applying profiles and subsequent fastening using nuts and screws.
- Extreme care is required during installation, as parts can be damaged.
- Greenhouse manufacturers, as a rule, specifically stipulate that parts must be fixed in all available holes. Failure to comply with this requirement usually results in the company withdrawing its warranty obligations.
- In order to avoid damaging your hands on the sharp corners of some parts, work on assembling the greenhouse should be carried out wearing thick gloves.
Following these rules will allow you to quickly and efficiently install a square polycarbonate greenhouse on your garden plot.
Step-by-step instructions for building a greenhouse with profile pipes and coating materials
Let's look at how to make the simplest arched structure. Before making a greenhouse, you need to think in advance about the necessary tools. Will need:
- shovel for leveling the area;
- drill for installing racks;
- grinder for cutting pipes;
- screwdriver for installing fasteners;
- pliers and hammer;
- measuring instruments (angle, level, tape measure);
- welding machine;
- a hacksaw if the walls are planned to be made of polycarbonate;
- wooden stakes and rope for marking the area.
It is recommended to install the greenhouse on sandy, dry soil to avoid stagnation of moisture. The long side of the structure should face the south side so that the crops receive maximum light. It is also important to take into account design features during installation. So, for gable and arched greenhouses, the longitudinal axis should have a direction from north to south, a deviation of 15-20 degrees is acceptable. And if, for example, you decide to build a simple greenhouse with a pitched roof, the slope must be made to the south.
In the selected area you need to make markings using pegs and rope. And also dig a trapezoidal trench into which to pour biofuel to quickly warm the soil.
Foundation
For a profile greenhouse, a columnar foundation will be sufficient:
| Illustration | Actions |
| Make holes in the ground located at the same distance from each other. Their diameter should be 1-1.5 cm larger than the circumference of the posts. | |
| Place asbestos pipes inside. Fill the gap between the pillars and the ground and compact it with a sand-crushed stone mixture. | |
| Pour cement inside the pipes so that there are no voids. Place a metal plate or piece of reinforcement into the concrete. In the future, they will become the connecting link between the foundation and the frame. |
For an arched greenhouse, you can also make a strip foundation, but this will take more time.
Cold and hot pipe bending step by step
To give the pipes an arc shape, you can contact specialized companies; they will bend them using special equipment.
You can do this yourself in several ways. One of these technologies is called cold. For cold bending of pipes, a spring with a diameter such that it can be inserted inside the profile is used. Thanks to the spring property, it is possible to change the cross-section and change the shape.
If the profile is less than 1 cm, it does not require filler. When the pipe is thicker, you need to pour rosin or sand inside. In winter, you can pour water and wait for it to freeze.
Another technique is called hot, because. produced by heating profiles. It can be used at any time of the year. It is recommended for pipes with large thicknesses. To carry it out you will need a manual, factory or stationary pipe bender.
Step by step steps:
- Make a pair of plugs for both ends of the profile. Their length should be 10 times greater than the width of the base. The wide part is 2 times the circumference of the pipe opening.
- Make grooves in one plug to allow gas to escape when heated.
- Heat the pipe bend.
- Sift and dry the river sand. Heat on a sheet of metal to 150 degrees until the moisture has completely evaporated.
- Install a plug without gutters on one side of the profile.
- Pour calcined sand from the other end, periodically tapping the walls so that it compacts.
- Attach the second plug.
- Mark the fold location with chalk.
- Fix in a vice, placing it on the template.
- Heat the metal until red and bend it with a smooth, precise movement.
- Compare with the template, if everything is correct, you can remove the plug and shake out the contents.
Note! If the profile has welding seams, after bending this line should be located on the side. It is not advisable to bend along it.
Installation of arches
If you plan to make the greenhouse collapsible, then it is recommended to use bolts for fastening. They are also used to secure the doors (by the way, they are often used for greenhouses, for example, the Butterfly or Bread Box design). If the structure is stationary, it is better to weld its elements.
It is necessary to cut the racks to which the arcs are later attached. Also required are strips that will connect the bent pipes. The joints are fixed with crabs or a welding machine. The frame is placed on the foundation and attached to metal plates or reinforcement.
Helpful information! If there are welding seams, it is recommended to seal them with a primer. This will make the structure more reliable.
Sheathing
The following materials can be used for cladding:
| Type of coverage | Advantages | Flaws | Material cost |
| Polyethylene film | It's cheap Easy fastening. Quick replacement. Little weight. Ideally attached to the zigzag profile. | It quickly becomes unusable (service life is about 2 years). Deteriorates under the influence of ultraviolet rays and breaks easily. It transmits light poorly and poorly insulates. | From 30 rub. per linear meter or from 3000 rubles. per roll (1 m * 100 m) |
| Non-woven fabric | The service life is longer than that of film, about 5 years. It allows sun and moisture to pass through well and protects crops from aggressive environmental influences. | It breaks easily, for example, under strong gusts of wind. | 20-150 rub. / lm (depending on thickness) |
| Glass | Available in many areas after renovation. It transmits sunlight well, protects from frost and retains heat inside. Tomatoes, cucumbers, peppers, etc. grow well in such a greenhouse. Fire resistance (for those structures that are heated additionally). Low sensitivity to temperature changes. Easy to care for. | Difficult to install. High fragility. In hot weather it lets in too much light, in cool weather it cools the greenhouse too much. Heavy weight. | Window glass – from 800 rub. per sq.m. |
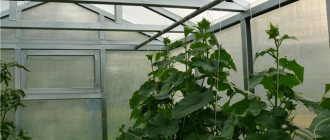
| Polycarbonate | Solid polymer with high strength and low weight. Provides diffused light, retains heat well, is fairly easy to install, fire resistant, and durable. Perfectly protects against UV rays. | High price. Intensity of thermal expansion. | From 1000 rub. per sheet |
Note! If the structure will stand in winter without a canopy, it is recommended to use polycarbonate sheets for cladding, because they can withstand the weight of snow.
Rules for fastening polycarbonate
Rectangular polycarbonate greenhouses should be properly covered with sheets. The quality of the work performed will depend on this. It is necessary to comply with certain conditions so that you do not have to redo it later.
Preparation
First, we prepare the material.
- 10 cm of film from both sides of the sheet . A perforated tape will be attached here (aluminum can be used);
- Remove temporary stickers along the edges of the sheets. We glue sealing tape along the contour of the upper edge. And we process the bottom edge with perforated. Be sure to process both sides of the panel;
- For high-quality fastening of panels, experts recommend using a U-shaped or F-shaped profile. Next, we make holes in the bottom of the sheet using a drill; their diameter should be 3 mm. They will help the outflow of sediment.
Rules for fastening sheets
Polycarbonate is a good material. But like all materials, its connection should be done in accordance with the following rules.
- To paint the frame, give preference to light colors. This will avoid additional heating. Dark colors warm up faster, and when in contact with polycarbonate, heating will occur much faster and the material will lose strength;
- The edges of the sheets should allow precipitation to drain freely, and not vice versa;
- Treat sheet joints with a special profile that will protect the connection line;
Attention: If the joining of elements will be done in an overlapping manner, in this case, treat the joints with tape. This will prevent moisture from getting into the joints of the elements and prevent lensing in sunny weather.
- When installing sheets to the structure frame, use special thermal washers or use seals. All fastening elements are made with a special leg, which is made along the length of the sheet; they are completely designed specifically for this purpose and will not press through the surface of the sheet;
- The holes for fastening should be made 5 mm larger , from the leg itself. After putting on the polyurethane ring, it will serve to seal the joint and will not allow moisture to penetrate the joint area. The screw is made in such a way that when fastening it simply flares the surface, which serves as a guarantee for the quality of the connection;
- At connection points, use special plugs;
- If you have chosen a sheet with a thickness of 4 mm, then the distance between the joints should be about 40-50cm. When choosing a sheet of 6 mm. the connection is made no more often than every 60 cm . This size is provided for both horizontal and vertical fastening;
- Immediately determine the side to perform the fastening. In factories, a film is applied to the material on both sides, this is done to transport the material. One side is coated with white or transparent color, and the other, usually blue. The one that is blue and protects from ultraviolet radiation, attach it correctly, otherwise you will get the opposite effect. You can remove the blue film after installation;
- If the sheet width is more than one meter, additional types of fastening should be used along the entire length. If this is not done, the sheets of material may shift under the pressure of snow in winter;
- Do not overdo it when tightening the bolts; you may damage the surface of the sheet or deform it;/
Caring for polycarbonate
Proper care of the structure will extend its service life.
- Use only a mild product to treat the surface; do not use various solvents. Also, do not use abrasives that can damage the surface. Don't forget, it protects against ultraviolet rays;
- Do not light a fire near the greenhouse. Polycarbonate will not catch fire, but melting may occur;
- Do not use garden tools to remove snow, as this may damage the surface.
The greenhouse is ready and we have given recommendations. We hope the design, made with our own hands, will serve its owners for a long time.