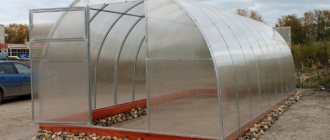
A winter greenhouse made from a PVC profile is 30-35% cheaper than models with an aluminum frame. The design consists of classic metal-plastic frames, single-chamber double-glazed windows with reliable rubber seals. A door, automatic shutters for ventilation, the ability to install additional equipment for heating, additional lighting, watering and air exchange in winter - at ZimSad you get a full-fledged turnkey winter greenhouse.
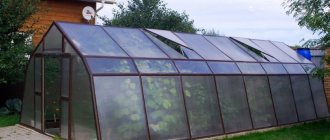
It can be designed in the form of a house 3 meters wide with a door at the end or a vestibule on the side (English style model). The building looks great (the standard frame color is white) and allows you to maintain the same temperature inside all year round.
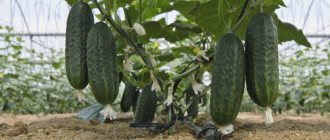
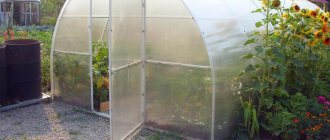
Greenhouses made from PVC profiles allow you to harvest crops up to three times a year, unlike seasonal greenhouses under glass. It is perfect for those who permanently live in private homes.
Winter greenhouse: heating
The customer can independently install a system for heating the soil, premises, or take advantage of the offer of the ZimSad company and receive a winter greenhouse with double heating:
- Mats to maintain the required soil temperature. The thermal cable is laid under the ground and turned on using a thermostat.
- Convectors for heating the air.
Comfortable soil temperature and warm air circulation help plants feel great and produce crops all year round. If you need to create different climatic zones in the greenhouse or grow plants that conflict with each other, install a partition with a door. In this case, you will be able to set the required temperature in each zone.
Technological path “from the reverse”
Surely, after familiarizing yourself with the simplest principle of constructing a greenhouse, doubts remained about the logical sequence of actions. Everything was good and simple until we got to arranging the ends. Then it is necessary to try on the already installed frame more than once to determine the appropriate position of the windows and doors. It is not easier to start by making the ends, as in the method described below:
- To the board, the length of which is 10-12 cm greater than the width of the planned greenhouse, we temporarily screw a 6-meter section of pipe with self-tapping screws to form the outline of the structure. We screw it in lightly at first so that the pipe can be slightly rotated to adjust the configuration. As soon as we achieve the ideal shape of the end, we screw it in with some effort, without being too zealous, so as not to damage the polymer part;
- We will make a frame for the door frame from a 2 cm thick board, selecting the optimal position of its parts at our discretion. To strengthen the frame, we will install oblique struts;
- glue the intersections of the door lintel and jambs, then screw two screws into the crosshairs;
- outline the outline of the arch on the wooden frame parts to saw off the excess;
- drill a small diameter hole in the center of the crosshair. We pass a plastic clamp through it to connect the frame and the plastic arch.
- We will strengthen the connections with plywood elements.
We do the same with the second end; we check its congruence with the first during the manufacturing process. It is very convenient to adjust parts of the structure until they are installed in the planned place. The second end can be equipped, by analogy with the first, with the same opening door. However, it is better to install a window into it, for the installation of which another smaller frame will need to be placed inside the existing frame.
An interesting point is the sheathing of the end with polyethylene, performed according to the following algorithm:
- We spread polyethylene on the ground, on which we place the previously made end face down;
- We fasten the covering with a stapler to the trim board from above so that the metal fastening brackets are on the inside of the future structure;
- wrap the free edge of the polyethylene over the end;
- We attach it to the slanting slats that strengthen the frame and cut off the excess;
- cut a hole in the middle of the polyethylene-lined end, departing 10-15 cm from the existing outline of the opening;
- We cut a hole in the corners, not reaching the frame 0.8-1.0 cm.
The final step is to fold in our plastic allowance and staple what we have folded.
The frame assembly scheme will be slightly different from the previous method. And although the greenhouse is installed on the ground by analogy, the lower frame - that is, the base in its normal sense - is absent. The first step is to hammer in the reinforcing pins, then install the ends. Then connect the installed elements into a single structure with one or more ties. But there is less fuss with arranging the openings and it is easier to attach the light-conducting coating.
The polyethylene sheet is simply fixed on both sides at the base of the frame. A strip is simply placed on top of it, which is screwed to the plastic arches with self-tapping screws. Around the ends, the polyethylene must either be assembled as a frill, or attached to the end arch using clamps cut from a slightly larger pipe.
Ventilation
The basic kit includes an automatic ventilation system with hatches and vertical sashes, but in winter, open communication with the street is not recommended - heating costs increase and there is a possibility of frostbite of plants near the windows.
For safe air supply, the catalog of additional services includes recuperators - equipment that uses the temperature of the outlet air to heat the incoming air. As a result, warm air flows inside and ventilation occurs without a significant increase in heating costs. The cost of ventilation and prices for equipment can be viewed by clicking on this link.
Tips for choosing material
You will need to buy large-section plastic pipes from which the frame is made. In addition to the main frame parts, smaller diameter tubes will be needed. The elements will connect the main arcs with each other. This is necessary to give rigidity to the structure.
Plastic tubes can be easily cut, bent, glued and welded. In greenhouse production, polymer elements are often fastened with self-tapping screws, since liquid will not flow through the parts. The manufacturability of plastic makes it possible to implement projects of almost any complexity: from a greenhouse or a small arched greenhouse to a huge all-season product with a gable roof. You just need to first decide on the design and buy the necessary equipment and materials.
The following pipes are suitable for the manufacture of the structure:
- Rigid products made of polyvinyl chloride. They are not elastic. They are used for the manufacture of gable, single-pitch and other buildings with straight lines and edges.
PVC pipes - Flexible products made of polypropylene. With their help, it is possible to construct rounded roofs over a rigid frame made of hard plastic parts, metal profiles or wooden slats.
Polypropylene pipes
All types of plastic pipes are sold with fittings, including:
- cross and tee splitters;
- swivel connectors;
- adapters for joining tubes of various sizes.
The use of fittings will speed up the process of construction work several times, but at the same time will increase financial costs.
Fittings for plastic pipes
It all depends on the capabilities and preferences of the owner. He must choose whether to use fittings or not.
To fix the frame, you will need metal rods 1.2 m long. Their diameter should be such that the rod fits freely into the tube.
Sides for fencing are made from edged boards. The recommended cross-section is 150 mm. The number of parts and length will depend on the dimensions of the greenhouse.
The transverse parts of the frame are fixed using plastic tees, which are used for plumbing. Another option is to use steel wire.
At the end, the structure will need to be covered with a reinforced polyethylene or polycarbonate film.
There is one more nuance that is important to consider before the start of construction work. A greenhouse made of plastic pipes can be stationary or portable. In the first case, the parts will need to be welded or glued; in the second, the elements are fastened with screws.
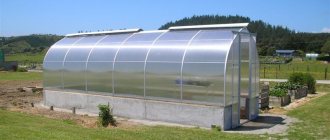
Greenhouse project made from plastic pipes
The choice must be made based on needs.
Characteristics and advantages of PVC winter greenhouse
- Available materials. The price for the manufacture and installation of a winter greenhouse made of PVC is 30-35% lower than when using an aluminum profile.
- Reliable and durable design. The service life is the same as that of plastic windows - up to 50 years or more.
- Corrosion resistance. The materials are ideal for working in wet environments.
- Up to 95% of the surface transmits light. The PVC frame does not block the passage of sunlight.
- Possibility of installing additional sashes in an unlimited number.
- Design warranty.
What is a double glazed window?
A double-glazed window or, more simply, a plastic window is a structure consisting of several layers of glass, which are connected to each other by a special metal frame (the so-called frame). The space between the glasses is filled with dry air - you get a kind of “package” with it. Hence the name – double-glazed window. By the way, due to this air gap, plastic windows are able to retain heat so well (according to some data, no worse than brick).
What is a double glazed window?
Plastic windows are used for glazing of various buildings and structures: for example, almost all residential buildings already have plastic windows instead of ordinary wooden ones. The fact is that double-glazed windows have certain advantages: they retain heat perfectly, relieve room owners from drafts, are strong and durable, and are not afraid of winds and frosts. They are completely sealed and can consist of several layers of glass.
Types of double-glazed windows
On a note! The service life of a plastic window is about 40 years (subject to proper use). And it is completely impossible to squeeze glass out of a plastic frame.
Table. Main types of double-glazed windows.
| Type of glass unit | Description |
| Single chamber | This is a standard type of double glazing. It consists of two layers of glass mounted in a plastic frame. There is a layer of air between the glasses. The thickness of the glass unit is small. In apartments, they are usually installed only in those rooms that open onto a glazed loggia. These double-glazed windows are a good option for creating a summer greenhouse, but it makes no sense to build an insulated one from them. |
| Double chamber | This double-glazed window has two air chambers located between three panes. Its noise and heat insulation characteristics are several times higher than those of the previous version. Allows you to create an insulated greenhouse. |
| Three-chamber | This is a double-glazed window with three air chambers. Note that there are windows that have all five air chambers, but there is no point in purchasing them. |
Due to their excellent physical characteristics (high ability to retain heat, excellent light transmittance, etc.), double-glazed windows are now used in the construction of greenhouses for growing various crops.
Installation (assembly of structure, construction of greenhouse)
Delivery within 30 km from the Moscow Ring Road is free. A professional team quickly assembles the frame, connects communications, starts up and checks the equipment.
As a result, the customer receives a turnkey greenhouse - a structure with the necessary additional equipment and automatic systems. All that remains is to fill the soil, add fertilizer and plant the first batch of plants.
On the market of translucent structures, only the ZimSad company offers industrial production of winter greenhouses from PVC profiles - this is our own development. The team is constantly working to modernize the design, offering customers more and more affordable and practical solutions.
Have questions?
Base for polymer frame
Before delving into the question of how you can make a reliable structure from plastic pipes yourself, you need to understand the basis. Those. with a frame that will hold the super-light frame and maintain its geometric parameters. The choice of the best base option is not related to the project and type of structure. Rather, it depends on the degree of capital of the building and on the funds available to the owner.
To make the base frame you can use:
- board, thickness 6, even better 8mm;
- timber with sides 6×12, 8×12 or more;
- a rigid plastic pipe that can only perform the function of the bottom trim.
Most often, the base for a light plastic frame is made from a thick board, because its load-bearing capacity is quite sufficient. For those who do not experience financial constraints or are planning to install a complete greenhouse, timber is suitable. It is connected by cutting half a tree without using hardware. This means that there will be no rusting metal parts in the wooden frame.
The timber base can be buried in the ground, for which you first need to dig a trench. First, roofing felt is laid around the perimeter of the trench, covering the bottom and walls of the dug trench, and then a wooden frame is installed.
A frame made of a polymer pipe cannot be considered an independent basis. It is constructed if there is a wooden, brick or concrete foundation. They are fastened either with staples to the timber or to anchor bolts fixed in the concrete during its hardening or in the brickwork during its construction.
All of the options listed are compatible with any plastic greenhouse project. However, you need to take into account that if you have a foundation, you will have to forget about periodically changing the location of the green house. Therefore, we will consider the procedure for manufacturing the most popular and simplest type of base - a plank frame:
- We are preparing the site for construction. We remove a layer of turf from the area so that the area freed from it is longer and wider than the future structure by about a meter, so that it is retreated by half a meter around each side.
- We measure the surface with a construction spirit level. If necessary, level the site. The permissible height difference is 5 cm, distributed over 2 m.
- We assemble a wooden frame from four thick boards with pre-calculated individual dimensions. We fasten with two, preferably three, galvanized screws or nails. The length of the hardware is determined based on the thickness of the attached element: it should be at least 2.5 times the thickness of the board.
- Using a tape measure, measure the frame diagonally in two directions. If the diagonal indicators match exactly, the base came out perfectly. If not, we look for and eliminate flaws.
- We install the assembled frame in the intended place and strengthen it by driving four pieces of reinforcement into the inside of the corner. The length of the rod driven into the corner is 70-80 cm. The reinforcement sections need to be driven almost flush with the frame.
The process of making a board base will be demonstrated in the photo:
The wooden frame will be in contact with wet soil and will have to withstand the onslaught of precipitation. Therefore, the board or timber for the base should be well dried and treated with hot bitumen before assembly. It is also advisable to soak it in kerosene-butum antiseptic.
Installation of canopy and installation of doors and windows
Upon completion of all work on arranging the frame, you can cover the greenhouse with the selected material. If it is a film made of dense polyethylene, then it is simply nailed to a wooden base, pressing the material with wooden slats.
The window and door are also very easy to assemble from pieces of PVC pipe. They can also be covered with film and installed in prepared openings.
Sheds can also be made from PVC pipes, but the cross-section of such pipes must be larger than the materials used in the frame.
Video course “Greenhouse with your own hands” Part 3 Making an arc
Reviews:
Ural Estate Greenhouses
writes: My hands are itching
void
writes: don't waste your time
Alexey Baev
writes: Complete hemorrhage! The video itself killed the viewer a lot of time with a useless, time-consuming plot!
Alexander Pitkevich
writes: Why did you make a cut every 15 cm, wouldn’t it be better to make about 5-10 centimeters, it would have turned out smoother and more beautiful to me, and what role does the wire play as an amplifier or so that the profile simply does not bend during installation?
Stas Frolkin
writes: I think it’s easier to buy it than to do it with such hemorrhoids. There are much simpler solutions. For example, I saw polypropylene arches being put on meth. frame. You can make a simple pipe bender on the edge (or buy a used one) and bend regular rectangular profiles. Respect, of course, for the great desire to design and do something with your hands, but it is very ineffective and labor-intensive. and there is a lot of water in the video
Fastening for arched spans
To assemble the arched structure, you first need to cut 14 pieces of reinforcement, 65-70 cm each. Now on the wooden base you need to mark the installation locations of the arcs. Starting from the very edge, make marks every 90 cm. Using these marks, on each side of the greenhouse from the outside, reinforcement rods are driven in close to the frame, deepening them so that a segment of 30 cm remains above the surface. A central point is found along the width of the wooden base and placed marks 40 cm from it on both sides. Reinforcement rods are also driven in at these places.