Russia has vast territories that are located in different climatic zones. Climatic conditions in most parts of the country do not allow harvesting throughout the year.
The natural wisdom and ingenuity of the Russian people made it possible to significantly increase the growing season of plants. By productively using greenhouses of various shapes and designs, amateur gardeners have the opportunity to obtain early and late harvests.
A more competent approach to greenhouse construction will allow you to obtain crops throughout the year. In this article we will try to tell you how to make a greenhouse with your own hands.
Requirements for a homemade greenhouse
First of all, the future owner of the structure needs to determine what the greenhouse will be like:
- Quite voluminous, but at the same time, compact structure. Modern summer cottages are not pleasing with the available free space, which means that square meters need to be saved.
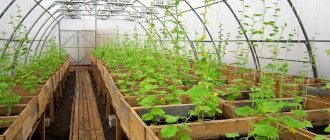
- For optimal organization, it is better to make several tiers in the greenhouse, on which plants are placed in large boxes. On the lowest floor you can fill up entire soil areas for tomato bushes and climbing cucumber crops.
- Sufficient level of natural and artificial lighting. After daylight hours end, many plants require additional lighting. In order to save energy and at the same time provide sufficient lighting, you can use fluorescent lamps (energy-saving option).
- Durable frame. Today, there are both mobile and stationary models of greenhouses. However, in regions with an unstable climate, preference should be given to stationary types of structures with a reliable frame.
- Preservation of natural air circulation in the room. Constant renewal of air allows plant crops to grow in better conditions, with a sufficient level of oxygen supply.
- The material used to cover the prepared frame must dissipate the harmful spectrum of sunlight. All types of polycarbonate have these characteristics.
When preparing a drawing, you should definitely calculate the possibility of connecting communications (water supply, electricity, heating) to the greenhouse. During assembly of the product, it is necessary to ensure that the structure is as tight as possible.
Drafts and cold air can damage young plants within a few hours. The best DIY greenhouse projects from A to Z can be found on practical gardening web resources.
Vegetarian Ivanova
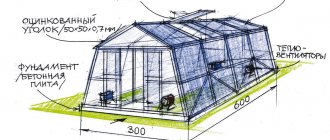
This design allows you to solve all the problems that accompany conventional greenhouses. A prerequisite is the location on a slope of 15-20 degrees. In this case, three walls and a flat roof are made of polycarbonate, and one wall must be solid and covered with a mirror surface to reflect rays. Such a building increases the penetration of solar rays, and the lower the sun, the more efficient the energy absorption.
The air and heat exchange system in the greenhouse is quite interesting. So, thanks to the presence of a pipe system under the greenhouse, a fan and a pair of dampers, during the day, even in winter, the air temperature can reach 33 degrees, and through the pipes it is pumped into the ground, warming it up to optimal levels, and at night the soil, like a heat accumulator, heats the air. Moreover, even in winter you can do without a heater, but for the coldest days, a regular heater can sometimes be used.
The heat exchange system works in the same way in the summer, only here the coolness is transferred, as a result the soil and plants do not overheat. This principle is also good because it preserves moisture and carbon dioxide. In the process, the soil is also moistened by condensate obtained by cooling the air. Such a system can be called ideal, it allows you to save 60-80 times more energy than a conventional one, and if the temperature is above -10 degrees, then you can do without a heater altogether.
Choosing an installation location
An important criterion that should be given special attention is the installation location of the future greenhouse. For independent work, stationary models are most often chosen. The site selected for the location of greenhouses must meet a number of characteristics:
- Do not contain underground currents located in the upper layers.
- Be located far enough from latrines and livestock burial sites.
- Should not contain karst voids.
Before starting work, the site is thoroughly cleared of debris and weeds. Check the acidity level of the soil and, if necessary, fertilize the soil until the desired values are obtained. A similar procedure is not required if a concrete base is laid on top of the ground.
In the form of a cabinet
Not the most practical option, since it is only suitable for growing small portions of crops. But how beautiful such a glass cabinet looks as a temporary home for seedlings!
It is perfect for an open sunny veranda and will look great next to the facade of the house. Suitable for compact gardens, as it is equipped with shelves and meets the principle of vertical storage.
Beautiful greenhouses will significantly increase productivity and become a wonderful addition to the landscape.
Tools and materials for work
To begin the construction process, you need to prepare the following set of materials and tools:
- Grinder and welding for working with the frame.
- Cement, sand, gravel for laying the foundation.
- Wooden boxes of sufficient depth and width to organize unpaved areas.
- Wooden or metal parts for mounting shelves.
- Polycarbonate or other materials for covering the prepared frame.
- Fasteners (screws, self-tapping screws, nails, thermal washers).
- Rotating fittings for mounting doors, vents and ventilation hatches.
- DIY greenhouse drawings.
You will also need barrels for settling water, hose systems for organizing drip irrigation, and trellises for stretching climbing crops. For heated buildings, you can choose a traditional wood-burning firebox, an electric stove or an air “gun”.
Care
All parts of dismantled structures must be cleaned of dirt and dust at the end of the season. To do this, you can use a solution of potassium permanganate or mustard. After this, they are thoroughly dried and stored in a dry room protected from precipitation.
In the case of stationary structures (with a foundation, glass or polycarbonate), seasonal maintenance should be carried out more thoroughly.
To prevent the proliferation of pests, the walls of the greenhouse are treated with a solution of potassium permanganate, the old soil is removed by 10-15 cm, after which new soil is added, and ash, sand, humus, and sometimes wood are added to it. Then it is carefully dug up and treated with a sulfur bomb.
The greenhouse, ready for the new season, is left open until the onset of frost or until the first snowfall. In winter, it is advisable to close the greenhouse tightly to protect it from snow and gusts of wind.
It will be useful to leave some snow in the greenhouse. In spring, melt water can have a beneficial effect on soil quality. In case of heavy snowfalls, the greenhouse must be cleaned with a shovel or broom; in case of moderate precipitation, it can be left alone.
Choice of material for the frame
First of all, the master must choose the material for making the frame. This can be either purchased material or a lot of improvised means. The following types of frames are most optimal for work:
- Metal frame (both sheet material and reinforced iron will be relevant in the work).
- Do-it-yourself greenhouses made of PVC pipes.
- Wooden slats.
It is most rational to use these materials in your independent activities. All parts are absolutely safe, have adequate strength and durability.
Reinforced iron frame
For quality work, you need skills in handling welding and a grinder. The metal frame is very strong, resistant to moisture (if pre-coated with an anti-corrosion compound), capable of holding a significant weight of snow in winter and wind in the off-season. It is easy to mount polycarbonate sheets to the metal frame using thermal washers.
Note!
The staircase to the second floor in a private house is an example of beautiful design. Layout diagrams, instructions, layout + photosBeautiful private houses - the best ideas and examples of beautiful home design. Photos of the coolest ideas of 2022!
The best ideas for a summer house | Review of stylish and original solutions for country houses and cottages
Wood for frame construction
Wood should be selected for work only after pre-treatment with moisture-resistant compounds. In addition, it is imperative to assess the condition of the parts before assembling the structure - for damage, cracks, and pest passages.
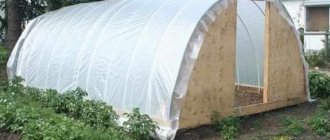
An antipyretic layer will reduce the risk of fire. Greenhouses made of wood covered with film are quite easy to assemble with your own hands using step-by-step instructions.
Polycarbonate sheets
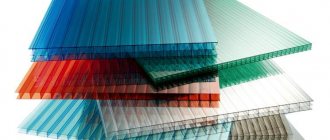
Polycarbonate has a particularly durable structure and creates an excellent protective layer from the scorching rays of the sun. Cellular polycarbonate, which diffuses sunlight, deserves special attention.
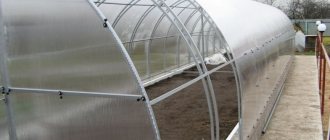
As a result, the spectrum of ultraviolet radiation, which is harmful to plant crops, is eliminated. Do-it-yourself polycarbonate greenhouses are durable and extremely practical.
Ecogreenhouse
The eco-greenhouse is based on the principle of interaction between all organisms in the ecosystem; it is then that it will be in a state of harmony. The design itself is as follows: the greenhouse is stretched from east to west, its northern wall is covered with white plastic to reflect rays, the roof is made flat, slightly inclined to the south and as airtight as possible, and the walls are made of fiberglass. In general, maximum attention is paid to tightness here.
The main feature is that on the sides of the greenhouse there are areas for breeding animals, for example, rabbits and chickens. Pipes with holes pass from the menageries into the greenhouse, through which nitrogen, carbon dioxide, as well as moisture and heat enter the room in small quantities. As a result, plants receive the elements they need, and animals' air is purified.
The composition of the soil also has some features: it includes turf soil, sand and compost, which is prepared from animal droppings. Proper drip irrigation is also organized, and all plant residues are used as animal feed. The cycle is completed. At the same time, the emphasis is placed on the fact that animals are an excellent source of heat, because, for example, a rabbit can provide as much energy in one year as is obtained from burning 10 liters of oil.
Another heat carrier is water - the greenhouses have several large tanks, and their contents are heated using solar energy. So, under the roof itself there is a fan that is powered by solar panels, and when it is warm outside it turns on and heats containers with water, which are fenced off from the plants during the day. At night, the so-called radiators release the accumulated heat.
Containers of water also help balance the temperature on hot summer days. In general, ventilation is rarely used in such a greenhouse, since the design allows hot air to quickly leave the premises.
Window frames
After replacing old wooden windows with new plastic models, you should not recklessly throw away the frames with glass. Such designs are ideal for arranging a full-fledged greenhouse.
Glass does not protect plants from sunlight, but this defect can be easily corrected by covering the glass with a special film. Double frames have particular advantages, between which heat is well retained.
Norway
In 2011-2013, on the island of Sandornoya in the northern part of Norway, enthusiasts erected a domed greenhouse house Naturhuset. The place has a harsh climate; strong winds and cold are common in the Norwegian Arctic. The peculiarity of the building lies in its protective shell - a glass geodesic dome, under which is located not only the house itself, but also a small plot of land with plants.
Greenhouse house Naturhuset in Norway above the Arctic Circle
The structure of the house is as follows. At the base there is a basement floor made of cellular concrete with a monolithic reinforced concrete floor. A geodesic dome was erected above it - an aluminum frame with glass panels (360 pieces) which covers an area of about 180 sq.m. The diameter of the dome is 15 m, the height is 7.5 m. The glass is single, 6 mm thick. The geodome was erected by a specialized Norwegian company, Solardome.
Geodesic dome made of aluminum frame with glass panels
The construction of the house box itself was carried out inside the dome, in “greenhouse” conditions. The house was built from straw and clay by the couple and their friends. The house is a two-story building with a flat roof. It has five bedrooms, a spacious living-dining room, two bathrooms, and utility rooms.
Greenhouse house Naturhuset in Norway
Behind the walls of the house there is a garden and a vegetable garden. In the short northern summer, the most heat-loving vegetables and fruits - apricots, grapes, kiwis, plums, tomatoes, cucumbers - have time to ripen here. Inside the dome, the growing season lasts five months longer than outside. In winter, however, it is impossible to grow anything at all - since there is no sun for 3 months beyond the Arctic Circle.
Naturhuset greenhouse house - an energy-efficient solution for the Norwegian Arctic
DIY greenhouse assembly
Having decided on the basic materials, you can begin assembling the structure. Initially, a drawing is prepared that shows the dimensions of the future structure, the foundation (if provided for this model), all support posts, doors, and ventilation hatches.
You can do the greenhouse project yourself, or use a ready-made plan. Separately, in the second drawing you can display the layout of electrical wiring, outlet points and arrangement of lighting and heating devices.
If there is a motor or pump for drip irrigation, its location is also displayed on the plan diagram. Further work is carried out according to the following instructions on how to make a greenhouse with your own hands:
- After clearing the prepared soil area, the foundation (strip or pillar) is poured; otherwise, the soil can be covered with soil.
- During the solidification process of the foundation, its surface is periodically moistened with water to prevent the appearance of cracks.
- After a few days, you can begin assembling the frame from the selected material. Reinforced iron is secured using welding. For PVC pipes, cold welding and additional clamps are useful. Wooden parts are secured using self-tapping screws or self-tapping screws.
The next step is the installation of polycarbonate sheets, polyethylene film or old window frames. Be sure to check the reliability of fastening and the quality of sealing. Install doors and ventilation hatch covers.
Next, you should deal with the internal arrangement of the greenhouse: installing tiers, shelves, trellises for climbing plants. High-quality operation of the greenhouse for plants can be ensured by following each stage of the prepared work plan. Also, if you lack experience, you can watch video tutorials on creating a homemade greenhouse.
Greenhouse ideas
Do you love the look of these Victorian conservatories with their impressive vaulted ceilings and all-glass walls? They are intricately decorated and look like ordinary buildings, only transparent. Modern conservatories have the same impressive dimensions, but lack the intricate details and have a larger glass area.
A greenhouse and a greenhouse are not the same thing. If you need a space suitable for living, which can also be used for growing plants, then you need a greenhouse. If you want something more rural, with a focus on crop production, then a greenhouse will suffice.
Greenhouse kits are available for sale to make creating one easier and more affordable. However, a greenhouse will cost more than a greenhouse. Plan a large plot of land for the construction of your structure. Then you can get creative with the interior by adding a seating or dining area.
