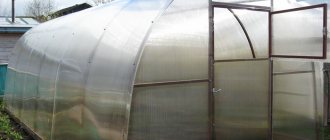
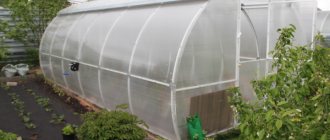
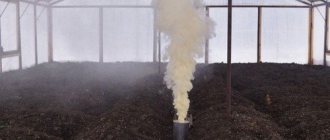
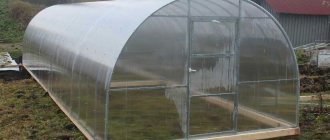
The key to a rich harvest of tomatoes, cucumbers and other heat-loving crops in the fall is a good quality greenhouse. For many years now, structures made from metal profiles and coated with polycarbonate have been in great demand on the horticultural market. Many summer residents, after reading reviews and looking at plant houses built on the plots of other gardeners, purchase such structures for their own garden. But it’s not enough to buy a structure – you still need to assemble it correctly. How is a polycarbonate greenhouse assembled? Fortunately, everything is not as difficult as it seems.
Assembling a polycarbonate greenhouse
Where to place the greenhouse
Modern greenhouses can be disassembled and moved from one place to another, but this is a troublesome task, and it is not always possible to preserve the coating in its original form, since under the influence of natural conditions it gradually loses its properties.
Therefore, the choice of location for a house for plants must be approached thoroughly, and a number of rules must be taken into account:
- The distance between the main buildings and the greenhouse should be at least 2-3 m. A little shade and protection from the winds by the main buildings will benefit the structure, but strong shading is unacceptable.
- It is advisable to locate the greenhouse according to a geographical principle - from east to west. In this case, there will be the best illumination of the plants by the sun's rays and warming up of the entire building.
- Tall plants are not very good neighbors. In strong winds they can break and damage the lightweight coating. In addition, a powerful root system draws moisture and nutrients from the soil.
Common Build Errors
Polycarbonate structures also have disadvantages. But they can be attributed more to the human factor. For example, the wrong period of year for installing a greenhouse. After all, deformation of the material during installation is possible if the ambient temperature drops below 10 °C.
Fastening the end parts Source teplica2013.ru
See also: Catalog of companies that specialize in the design and installation of metal structures (canopies, greenhouses, etc.)
Choosing a permanent location for the greenhouse is important. In this case, there is no need to use temporary collapsible structures, which, unlike all-welded ones, lose strength. The latter are more reliable, have a maximum service life, and their installation is much faster and easier.
The above also has a direct bearing on lightweight structures. Their choice is completely unjustified. Meanwhile, structures with a reinforced frame do not even require additional maintenance.
The penetrating ability of sunlight is significantly affected by the angle of inclination of the polycarbonate sheet to the surface. In arched structures, part of the light is reflected from the surface and does not reach the plants. This is indicated by bright highlights on the rounded parts of the greenhouse. Therefore, assembling a polycarbonate greenhouse with flat surfaces is more preferable.
Laying sheets and fastening them Source scratchru.ru
But there are two main problems when working with polycarbonate. And the first is the use of low-quality material. After all, not all of its types are suitable for arranging greenhouses. In order not to complicate the checks, you can use the simplest of them. It is enough to weigh the polycarbonate sheet in the store. And if a shield with dimensions of 120 by 600 centimeters weighs less than 10 kg, then it must be discarded immediately.
The second biggest problem is the use of incorrect fasteners. To save money, some developers use ordinary self-tapping screws. And you only need to use polycarbonate thermal washers. And nothing else.
Types of foundations for a greenhouse
Modern greenhouses can be installed without a foundation; you just need to provide a connection to the ground using anchors or hooks. As a rule, they come complete with ready-made buildings and have different designs.
Most often this is a T-shaped or cross-shaped product at the end. Anchors are buried in the ground every 1-2 m, and firmly fastened to the base of the building with bolts. Thanks to this grip on the ground, the greenhouse will not fly away during periods of strong winds.
For a more stable position of the greenhouse, it is advisable to make a foundation. This issue is especially relevant if the site has a slope.
The most popular designs are:
- From timber. Easy to install, has excellent thermal insulation properties. Dimensions in diameter are 150x150 mm to 100x100 mm. The wood must be dry, treated with any means that protect against rotting;
- Columnar. The basis of such foundations are columns made of various materials. For light greenhouses, a reliable and fairly durable option. For large-sized models, the base is additionally strengthened;
- Tape. The simplest and cheapest type of foundation, which will ensure the strength and stability of the entire structure and protect the plants. The presence of a concrete mixer will simplify the work;
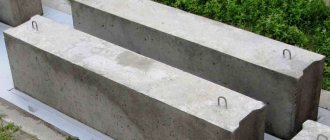
- Pile-grillage. It is used in areas with uneven ground and consists of a group of supports installed in the ground below the freezing mark. The strapping is made of rolled steel or reinforced concrete. The tape grillage is made of concrete, expanded clay blocks, brick, and stone.
What to do with the soil
When choosing a location, you need to examine the soil. To do this, it is recommended to dig a special hole with dimensions of 70 cm by 70 cm and a depth of 1 meter 20 cm. Now you need to determine the type of soil. This is easy to do if you take a handful of it and try to make a ball. It was possible to roll a ball or sausage - there was a lot of clay, but it didn’t work out - sandy soil. Sand is a very good basis for greenhouse soil: it allows water to pass through, and excess water will prevent the roots from rotting. If the soil is clayey, it will have to be replaced.
To replace the soil under the greenhouse, you need to dig a pit at least 70 cm deep and fill it with 40 centimeters of sand, leaving the top 30 cm to be filled with a fertile mixture. In addition, it would be good to know the depth of the groundwater. If they are found higher in the pit, you will have to make drainage grooves to drain excess water.
Preparing the site for placing a greenhouse
Before installing the greenhouse and a small foundation, it is necessary to prepare the space allocated for it. This procedure will protect against possible distortions during the construction of the main structure and will increase the service life and normal operation.
First you need to clear the area and level it.
- It is best to use a building level attached to a long block or board.
- After this, mark the overall dimensions of the future structure and drive in pegs.
- Carefully measure all sides and, to check accuracy, find out the size of the diagonals of the rectangle.
- They must be equal. Only then can you begin to build the foundation.
Site development
For example, you have a site for building a greenhouse measuring 3x8 square meters. Let's assume that the groundwater is deep and there is no need to develop a drainage system.
The site is prepared taking into account certain points:
- An area measuring 4x9 meters is marked (pegs are used for marking).
- In the designated area, you need to clean off the mounds, remove the turf, and check the levelness using a building level (differences should not exceed 5 cm).
- Next, you need to retreat 0.3 meters from the edge of the site, forge a trench 0.4 meters wide and 0.3 meters deep.
- The outer wall of the trench is lined with roofing felt or slate.
To check the level of the day, a construction spirit level is used. This will prevent the need to lay bricks due to the structure being skewed in the future.
Making a greenhouse frame
If you make a greenhouse yourself, then any of the materials will do:
- Galvanized profile;
- Wooden beam;
- Polypropylene pipe;
- Profile pipe.
Factory structures are made mainly of galvanized pipe. Depending on the operating conditions, the cross-sectional dimensions vary for a standard greenhouse - 20x20 mm, increased strength - 25x25 mm, maximum - 20x40 mm. The step between the arcs is either 0.65 m or 1 m.
When assembling a purchased greenhouse, you must strictly follow the instructions.
Step-by-step frame assembly
- The end parts of the structure are assembled. The end is placed on a flat base, face up. A polycarbonate sheet is placed on it with the marked part facing out. The lower edge of the polycarbonate is aligned with the bottom of the structure. Use a marker to draw the blank. Next, the remaining third is cut out for the end. Both blanks are attached to the profile with bolts and cut along the edge with scissors. The fittings are attached to the window and door.
- The guide bases are assembled using T-shaped connecting elements and secured with roofing screws.
- The arcs are inserted into the protrusions of the guides and fastened using a bolted connection. The main tightening will be done through the tension tape during the installation of the polycarbonate.
- The top and side guides are attached to the arches using bolts, washers and nuts.
- The finished ends are connected to the guides: the lower ones with self-tapping screws, the upper ones with bolts.
- The hooks are dug into the ground and attached to the greenhouse only after the building has been assembled and completely leveled.
Useful tips
Experts recommend:
- Buy polycarbonate sheets with a thickness of 6 to 8 mm. It is best to have UV protection.
- If you treat the lower part of the frame with bitumen solution, the service life can be significantly increased.
- Materials labeled “Eco” should be discarded. It has low strength due to the use of crushed recycled materials. It is better to give preference to a conventional primary polymer.
- To increase the stability of the greenhouse during strong gusts of wind, each arc of the frame is equipped with amplifiers.
Sheathing a greenhouse with polycarbonate (instructions)
Synthetic polymer material has found wide application for covering greenhouses. It has sufficient strength and resistance to climatic conditions of all latitudes of our country, where farming is possible. Polycarbonate is easy to cut and easy to install.
- After forming the ends and installing the frame, it is necessary to lay flexible material on the base of the structure. The sheets are laid crosswise.
- If the greenhouse is 3x6 in size, then the sheets are first installed and secured at the ends with tie tape, and only then the third sheet is thrown in and overlapped.
- It is also secured with tightening tape and self-tapping screws along the entire length into the lower guides.
Please note that the screws must be tightened without allowing deformation of the cellular polycarbonate. The protective film must be removed before or immediately after installation of the sheets.
In order for the greenhouse to overwinter well, it is necessary to place spacers under the arcs every 2 m during the cold period to avoid destruction from the weight of wet snow.
Pros and cons of the material
Other advantages of polycarbonate: there is no need to remove the greenhouse for the winter; the endurance period of polycarbonate is more than 10 years. In addition, it perfectly withstands mechanical loads and can even be repaired. The material is flexible, does not break, and is resistant to temperature changes and fertilizers. Due to the multilayer nature of the material, it has increased thermal insulation.
Polycarbonate is one of the best materials for making greenhouses Source 2gis.ru
Polycarbonate also has disadvantages: it is expensive, requires forced ventilation, and has low light transmittance. However, in any case, a polycarbonate greenhouse will cost less than a glass structure. If the client decides to choose this particular greenhouse, then he needs to contact installation specialists.
Photos of greenhouse installation examples
Installation on timber
We begin assembly by leveling the surface of the area selected for installation, so that the height of the unevenness is no more than 5 cm. We install a foundation for the greenhouse, for example, a 50*100 board, or 100*100, 150*100 timber, or sleepers.
Attention!!! The base of the greenhouse is attached along the outer perimeter (edge) of the foundation. If a wooden beam is used as a foundation, it is necessary to dig the foundation with earth to prevent the greenhouse from turning over or moving under the influence of strong winds). Foundation installation algorithm:
1. Lay out the timber around the perimeter.
2. Level the timber.
3. Secure with a corner.
4. Align the diagonals (d1=d2).
How to make a greenhouse with your own hands from old window frames
teplica-piter.ru
- Assembly difficulty: average.
- Foundation: desirable.
- Cost: minimal.
- Variations: you can combine frames with film to make a roof, side walls or doors.
The main advantage of this design is its low cost. Old window frames can be found, if not free, then for a nominal price. In addition, glass transmits light much better than film and polycarbonate. The windows already have vents for ventilation, and if you select a balcony block, you will also have a ready-made door.
- The size of the greenhouse depends on the size of the frames and the interior space you need. Aim for a width of about 2.5 m to give a passage of about 60 cm and two beds of 80–90 cm.
- Windows and glass have considerable weight, so it is advisable to install them on a solid base. This can be a shallow strip foundation, a massive wooden beam or a metal profile.
- A wooden frame or pillars are installed on the foundation at the corners, and frames are attached to them and to each other. The gaps between each block are covered with putty and clogged with strips of laminate backing or a thin wooden strip.
- A door is made in the front wall. Its role can be played by one of the windows, a balcony door or a wooden frame covered with film. Ventilation is provided through window vents.
- To reduce weight, it is better to make the roof from wooden beams and film. You can use the same window frames, but in this case you will have to reinforce the structure with supports in the middle of the passage so that it can withstand a lot of weight.
