Cucumbers are heat-loving vegetable crops, which requires creating the most comfortable conditions for their growth and development. It is especially difficult to grow a rich harvest in regions with long winters and short summers. But there are special designs with biological fuel that can provide plants with the necessary heat and nutrients. Thanks to this, it will be possible to harvest an early harvest and reduce labor costs when caring for seedlings. There are several ways to make a warm bed for cucumbers in the fall. It is important to familiarize yourself with the features of each and adhere to the manufacturing technology.
Why is it better to make a warm bed for cucumbers in the fall?
When arranging a warm bed in the autumn, experienced gardeners highlight the following positive aspects, which are the determining factor in the implementation of work during this period:
- heated soil;
- the presence of plant material (fallen leaves, tops, weeds) in sufficient quantity;
- the owner of the site has more free time;
- a lot of time for effective reheating of organic raw materials;
- By spring, the place for planting vegetable crops is completely prepared.
Important! To prevent rodent infestations, a metal mesh should be placed under the improved compost heap. It is also effective to place prickly branches of raspberries, gooseberries, and conifers on the bottom.
Conditions for growing cucumbers in a polycarbonate greenhouse
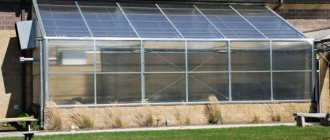
The polycarbonate greenhouse and the cucumber seem to be made for each other. Polycarbonate can not only protect plants from the cold, but also prevent sunburn and drying out. The microclimate in such a greenhouse allows you to grow cucumbers much earlier than is possible in open ground.
Even if the outside temperature corresponds to the required one, a cucumber bush in open ground will lag far behind in growth and development from a bush in a greenhouse planted at the same time. The greenhouse allows you to maintain not only the air temperature from +25 to +28 degrees, but also the air humidity of about 80%; these conditions are the most optimal for cucumbers. To maintain such parameters, it is necessary to equip the greenhouse with windows for ventilation and thermometers to control the temperature of the air and soil. If the air is too dry, water the plastic with a hose and place open containers of water inside the greenhouse.
Attention! Air humidity above 90% can negatively affect plants, and too high a temperature will interfere with pollination. If the permissible values of temperature and humidity are exceeded, urgent ventilation or forced ventilation is required
Temperatures below the required level also negatively affect plant development. If the greenhouse cools down to +10 degrees, the root system can be severely damaged, so those who want to grow early cucumbers should equip the greenhouse with heating devices.
Growing
The soil humidity in the greenhouse should be within 60%; if the seedlings dry out, they will not receive the necessary moisture and nutrition, and if the humidity level is exceeded, the roots will rot.
Cucumbers also require sufficient lighting. The greenhouse should be installed in a place well lit by the sun. If cucumbers are planted at a time when daylight hours do not yet exceed 10 hours, then it is recommended to use artificial lighting.
Attention! In order to ensure fire safety, it is necessary to reliably protect all electrical appliances from moisture penetration into them.
Types of warm beds
There are several types of warm beds.
Buried (trench)
It is recommended for use in regions where there are difficulties with hydration. This structure is made below ground level and can last for 3-5 years. You can use a warm bed both in open areas and in greenhouse complexes. Among the advantages they note: economical consumption of both effort and money, reduction in the frequency of watering, and does not require digging every year.
But when there is heavy precipitation, there is a high probability of their erosion. In addition, water in the soil can stagnate, which provokes the development of putrefactive processes on plant roots. Also, agricultural crops more often suffer from attacks by parasitic individuals. You should not place a warm bed in the shade, otherwise the seedlings will not receive additional sunlight and will begin to get sick. In such buried beds there is a high probability of damage to the planted plants by returning frosts.
Elevated
This option for a warm bed is relevant for the regions of the middle and northern zone. It is built above ground level and can be useful for 3-5 years. Such a warm bed is used for growing cucumbers in open areas. It is valued for its rapid warming up by the sun, low probability of damage by return frosts, ease of cultivation and good moisture retention. In addition, no crawling pests will be able to cause damage to the future harvest; you can place a warm bed even in an area unsuitable for cultivating vegetable crops.
But there are some nuances here: it requires some effort to arrange it, carry out frequent irrigation activities, and in the heat, cucumbers can burn.
At ground level
The height of the structure above the soil level is only 3-5 cm, and it lasts for 1-2 years. Among the advantages of this variety are:
- ease of manufacture;
- good yield of cucumbers;
- no significant costs.
But with irrigation and frequent rains, the edges of the bed can be washed away, resulting in the loss of useful components from the soil. Taking these points into account, such beds need to be restored to their original form and corrected every year.
Important! Organic raw materials with signs of disease or rot cannot be placed in a warm bed. Otherwise, the planted plants will become sick and there will be no expected harvest.
The benefits of vegetables
Plants such as tomatoes belong to the nightshade family. The culture was first developed by the Dutch and juicy tomatoes gained great popularity. The range of tomato varieties today allows you to choose the optimal type for specific purposes. There are varieties even for harsh climatic conditions, but such tomatoes require a careful approach to cultivation.
Bright, juicy and extremely healthy fruits have many properties. They contain various minerals and vitamins. Eating fresh tomatoes has a positive effect on the health of the body.
Particularly popular is canning tomatoes, preparing snacks and other various dishes. The quality, appearance, benefits and richness of the harvest depend on regular and appropriate care, because such plants are quite demanding.
Tasty and juicy cucumbers have been known since ancient times. The wild variety of this crop does not have a very pleasant taste, but technology has made it possible to develop different varieties of this plant. Probably every gardener grows cucumbers in beds on their plot and knows that the vegetable really loves favorable and moist conditions. Both temperature conditions and abundant watering and prevention of exposure to pests and diseases are important. Timely and correct actions will allow you to get a rich, healthy and tasty harvest of cucumbers.
How to make a warm bed for cucumbers in the fall
There are 2 ways to make a warm bed for cucumbers in the fall, both in a greenhouse and in an open area. The main difference here lies in the use of raw materials.
With manure
Thanks to manure, all laid vegetation begins to rot faster and more efficiently, working, releasing the heat necessary for the normal growth of cucumbers. The use of such universal structures based on biological fuel is especially effective in Siberia, where growing vegetable crops in open ground conditions is extremely problematic. In such cold areas, reliable greenhouse complexes with additional heating are built. Work on arranging the bed should be carried out taking into account the following algorithm of actions:
- Dig a trench 90 cm wide, arbitrary length, depth - the bayonet of a shovel.
- Place a fine-mesh anti-rodent metal mesh at the bottom.
- Then lay down paper, branches, chopped tree trunks, fallen leaves and manure.
- Pour a layer of fertile soil on top.
- Pour boiling water over everything and cover the warm bed with plastic material.
A clear sign of the normal process of decomposition of organic matter in a warm bed is the presence of condensation on the film.
No manure
It is possible to build a structure suitable for growing cucumbers without the use of manure. Various plant residues and kitchen waste are used for these purposes. A warm bed can be located above ground level or in the form of a trench. The technology for making a warm bed consists of the following steps:
- Digging a trench.
- Laying vegetation from the garden.
- Sprinkle it with fertile soil, the layer should be 10 cm.
- Water with hot water and cover with film to quickly decompose waste.
It is recommended to plant cucumbers in such beds only 10 days after filling it with plant debris. An early harvest of cucumbers is possible only from the second year.
Important! To prevent plant roots from ending up on the surface of the earth, the raw materials should be well compacted and compressed.
Fertilizer use
It is not enough to know what kind of soil cucumbers like; it must be fertilized. Fresh manure is considered the ideal fertilizer for this crop. If you can't get it, you can use other components:
- thin tree or spruce branches;
- hay;
- crushed reeds;
- seaweed;
- sawdust;
- bark of tree;
- urea;
- lime, etc.
All components are applied in a certain sequence depending on the composition of the soil on the site.
Ideally, the soil for cucumber seedlings should resemble a layer cake, which consists of the following components: pine sawdust, humus, peat, sawdust, manure, black soil. All layers are laid out in even layers. This composition of soil for cucumbers will provide them with all the necessary elements.
Caring for a warm bed
Growing cucumbers on a warm compost heap has its own subtleties in care, especially with regard to irrigation measures. It is recommended to moisten the soil in raised structures almost every day, since the soil dries out quickly and the plants lack moisture. As far as feeding procedures are concerned, there is no need to use nutrient formulations in the manure bed. Considering that during the process of decay, organic raw materials produce more nitrogen than phosphorus, potassium and other useful elements. Therefore, cucumber bushes should be fed with wood ash to compensate for this deficiency. As an option, a complex mixture for cucumbers is also suitable; it must be used in strict accordance with the manufacturer’s instructions.
Another point when cultivating vegetables in boxes is the inability to install trellises for them. It is better to give preference when choosing planting material to bush-type seeds. Tall plants will require a bed that is sunk or level with the ground.
How to prepare the soil for planting cucumbers
At the end of autumn the area is dug up. In the spring, it is recommended to duplicate the digging. Manure and fertilizers are added to the soil. For 1 m2 of soil, 1 liter of manure dissolved in water is used.
You should also not forget about the use of mineral fertilizers, which are applied in the spring. You can enhance the effect of fertilizing by applying them not at once, but at short intervals. Afterwards, experienced gardeners recommend cultivating and compacting with a light roller.
The best predecessors for growing cucumbers are:
If we talk about plants after which it is not recommended to grow cucumbers, these include:
These plants deplete the soil, making it poor and infertile.
Wood chips are a good way to prepare soil
Advice from experienced gardeners
To obtain not only a quantitative, but also a high-quality harvest, you must adhere to the following recommendations:
- It is better to choose a place for arranging the structure in a sunny clearing where there are no drafts.
- Use only warm water to irrigate plants.
- You need to sow the seeds at the end of April, then the chances of a rich harvest are much greater.
- Weeds must be removed without fail.
- If you plan to sow cucumber seeds in a place where these crops also grew before, then it is necessary to completely replace the top layer of soil.
- The best predecessors of cucumbers are tomatoes, onions, cabbage, and garlic.
Land preparation
Preparing the soil in a greenhouse for cucumbers in the spring is carried out in several stages. It must meet certain requirements:
- good air permeability and moisture absorption.
- Soil fertility should be as high as possible.
Important! The best option for planting cucumbers is turf soil or humus. You can use humus or peat as a base.
If you plan to additionally add a complex of nutrients to the soil, soil for cucumbers can be made from the following components:
- peat - 50%;
- humus - 30%;
- field soil - 20%.
This composition will have a positive effect on the yield of cucumbers.
Cucumbers in a greenhouse
When preparing the soil for planting cucumbers, experienced gardeners recommend following the following technology:
- Clean up all plant debris and debris.
- 25 - 30 days before planting cucumbers, dig up the ground.
- Prepare biomass.
- Form beds.
- Plant seedlings.
- Cover the top of the soil with a layer of humus.
- Water the soil with warm water.
Important! If cold water is used for watering, it is possible that the cucumbers will become sick.
If the soil for cucumbers is prepared correctly, the seedlings will quickly take root and the plants will be strong and strong.
Composition and properties
Cucumbers love fertile, humus-rich soil. These can be loams or sandy loam soils. If there is only alumina on the site, adding sand will improve the situation (a couple of buckets are enough for 1 sq. m.). In addition, the level of acidity plays a big role.
A neutral pH is required for a rich harvest. Slightly acidic soil is also acceptable. But highly acidified soils require preliminary liming. The dosage of lime is determined by the current acidity level, usually from 250 to 550 g per square meter. m.
Ideal soil for cucumbers should contain:
Assessment of soil acidity level
The easiest way to determine soil acidity is to use litmus paper. To do this, mix the soil in half with distilled water and lower the strip there for a few seconds. By comparing the result with the color scale, you can fairly accurately determine the level of soil acidity.
On soils with acidity suitable for cucumbers you can find plants such as:
- cornflower;
- fern;
- bindweed;
- burdock;
- wheatgrass;
- coltsfoot;
- bird knotweed.
You can use table vinegar; if it does not react with the soil, then it is clearly acidified. When bubbles appear on the surface, this indicates weak acidity.
Although autumn is coming, greenhouse owners do not have to worry about rising prices for vegetable products - with proper care, even in an unheated greenhouse you can get a good harvest. Of course, for this you will have to work hard, and most importantly - to correctly and timely apply the most modern methods of fertilizing plants and treating them with effective preparations. Experienced gardeners claim that even in summers that are not the most favorable in terms of weather conditions, throughout the season from 10 sq. m of greenhouses you can get about one and a half centners of cucumbers. The yield indicator is also influenced by the conditions of the climatic zone in which the vegetables are grown.
Content
- Growing cucumbers in a greenhouse in the fall video
- Greenhouse in the fall - what work should be done before the onset of cold weather
- How to properly clean greenhouses after harvesting the last harvest
- Soil disinfection video
- Digging up the soil
- Caring for a greenhouse with a removable cover
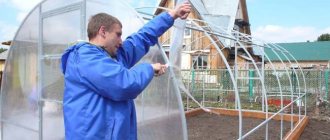
- How to strengthen a greenhouse frame
- How to prepare a tomato greenhouse for wintering video
Growing cucumbers in a greenhouse in autumn
A very important point in the successful cultivation of cucumbers is the timely application of complete organic and mineral fertilizers. But even with proper care, at the end of August there may be a deterioration in the growth of leaves and a massive appearance of spots on them. Therefore, plants should definitely be sprayed with Epin, and the root system should be fed with slurry with the addition of urea.
After some time, the plants recover and resume fruiting. Rational care of cucumbers in a greenhouse in the fall consists of the following steps:
- adding fresh soil in the area of the root system to prevent exposure of the roots,
- piercing the soil with a pitchfork - to ensure active air flow to the roots of the plant,
- since the central shoot has already worked in the summer, it can be unloaded from leaves.
This will stimulate the development of side shoots and increase the number of ovaries on them. The tip of the central shoot will begin to develop more actively.
If we talk about varieties that can bear fruit until late autumn, then we should remember the hybrids Valentina, Vernissage, Opla, Druzhok, Severny. If necessary, you can keep sweet peppers in the greenhouse along with cucumbers in the autumn.
Fruiting of cucumbers in an unheated greenhouse in the fall usually continues until the end of September - beginning of October. In addition to cucumbers, in a greenhouse in the fall you can get a good harvest of parsley, dill, and lettuce - these plants develop well at moderate temperatures, provided the soil is sufficiently moist.
Greenhouse in the fall - what work should be done before the onset of cold weather
Harvesting the last harvest and removing plant remains from the greenhouse does not mean that the owners can indulge in relaxation. It is during this period that you will need to do a little more work and properly prepare the greenhouse for wintering and for the next season. If you approach the issue of preparation correctly, then by next spring you can get nutrient-rich, soft and loose soil, sufficiently moistened and saturated with oxygen. Even if the plants were not sick, the greenhouse will still need to be treated in the fall - this will rid the soil of fungal viruses and various types of pests. Also, due to the coming winter, it will be necessary to install additional supports on the frame.
How to properly clean greenhouses after harvesting the last harvest
The very first thing you need to do is remove all remnants of plants and their roots; it is also recommended to remove the top layer of soil - from 5 to 7 cm and take it outside. You should not ignore harmful insects and their larvae, which can damage the seedlings next spring. For example, to get rid of the mole cricket, it will be enough to dig the beds deeply. Getting rid of cockchafer larvae will be much more difficult - they can only be destroyed physically. To do this, you will need to dig up and sift the soil in the greenhouse. Even severe frost will not kill wireworm larvae, and they are not afraid of digging up soil. Before frost sets in, you should also clean the walls of the greenhouse from dust and dirt accumulated over the summer. Next, you can start cultivating the soil.
Soil disinfection
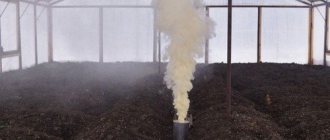
It is in the fall that it is desirable to get rid of the pathogens of fungal and viral diseases accumulated in the soil and in the wooden structures of the building. Fumigating a greenhouse with sulfur is considered a very effective procedure. To do this, you will need 100 grams of sulfur or smoke sulfur bombs weighing 60 grams per square meter. Sulfur or checkers are placed on metal sheets inside the greenhouse and set on fire. To protect yourself from harmful fumes, you should work in a gas mask and follow all rules for handling flammable materials.
The greenhouse with the smoking bombs is left tightly closed for 1 hour.
To enhance the efficiency of fumigation, the surface of the walls of the greenhouse and the racks located in it are well moistened. After finishing the treatment, the greenhouse is opened for ventilation.
All glass surfaces are washed with water with the addition of pemoxol (1 - 2% solution). The easiest way to apply the solution is with a sprayer, then wipe the surface with nylon brushes and wash it clean with water from a hose. Disinfection of a polycarbonate greenhouse in the fall is carried out similarly to a glass one. Some gardeners very successfully use this same method to treat their cellars.
Digging up the soil
Next, you can start digging up the soil, then evenly cover the entire surface of the soil with a layer of humus and peat for every square meter. Half a bucket of organic fertilizer should be added. Based on 1 sq. m is added in a liter jar of river sand and ash.
The surface of the soil is covered with straw, and with the onset of winter, snow is brought into the greenhouse. It will prevent the soil from freezing, and with the onset of winter it will saturate it with melt water.
Caring for a greenhouse with a removable cover
If the greenhouse cover is removable, made of plastic film, then you will initially need to wash the film and dry it thoroughly. Only then carefully remove the film. It is advisable to remove the polyethylene covering from greenhouses for the winter - even its durable types cannot withstand low temperatures and quickly collapse.
After this, the frame of the structure is treated with a bleach solution. The solution is prepared at the rate of 400 grams of lime per 10 liters of water. Infuse the lime for 4 hours, stirring occasionally. The liquid that settles on top is used to spray the soil; the structural material is treated with the sedimentary mixture using a brush. All equipment used in the greenhouse should also be treated with a bleach solution. A wooden structure can be treated with a mixture of freshly slaked lime and copper sulfate. Treated surfaces will retain their color for a long time; after such treatment, the greenhouse becomes clean and bright.
To process high-quality galvanized steel, you do not need special tools - you can use the same lime mortar. If the structure contains non-galvanized fittings (door hinges, handles, latches), they are covered with a layer of paint.
If the greenhouse is built from painted or unpainted material of a different origin, then it will not be possible to do without treatment with special means and painting. Otherwise, the structure will be slowly destroyed by corrosion processes.
All cups for growing seedlings, boxes, and other containers must be doused with boiling water.
How to strengthen a greenhouse frame
If the construction of the greenhouse was done with your own hands, often without special engineering calculations of strength, then you can quite reasonably fear damage to it from snow accumulating on the roof. However, a large accumulation of snow masses on the roofs of purchased super durable greenhouses can have negative consequences. One should not hope that practically weightless snowflakes will not be able to damage a durable structure - even the double structure of the so-called “Kremlin” greenhouse, which can easily support the weight of several people, can also be destroyed. During heavy precipitation, such an amount of snow accumulates that its pressure can reach critical figures exceeding a ton per square meter. m. If these indicators are compared with the figures indicated in the passport of the purchased greenhouse, then the cause of the destruction is easy to understand - the bearing capacity of their structures reaches from 200 to 500 kg/sq.m.
Therefore, strengthening the greenhouse with additional supports will not be superfluous even in the event of a not very snowy winter. You can use additional arcs; sometimes they are offered to be purchased along with the greenhouse. You can also use wooden supports in a "T" shape. You can make them yourself. They are able to create sufficient support for the ridge of the greenhouse.
It is important to remember that a greenhouse of any strength can withstand a load created by a maximum of 70 cm of fluffy snow or 30 cm of compacted or wet snow.
Calculating the required number of supports is not difficult: for a six-meter greenhouse you will need at least 3-4 of them. If the greenhouse is located in such a way that there is a risk of creating snow caps, for example, near a high fence or in a leeward place, then twice as many supports will be required.
To prevent the supports from sinking into the ground and falling, they are attached to the top crossbar of the greenhouse structure, and a solid support is placed under their lower end, for example, scraps of a wide wooden board.
How to prepare a tomato greenhouse for wintering
If the greenhouse is intended exclusively for growing tomatoes, then autumn work is carried out according to the following scheme:
- After the last harvest, all stems and roots are removed and dried, then burned. Tops damaged by rot or mold cannot be used.
- The ash is collected in a container and stored - it will be needed for fertilizer and pest control.
- Next, the soil is treated with a solution of iron sulfate: take 250 grams of sulfate per bucket of water.
The soil is dug up in a special way: they dig a row, put dry leaves or grass into the resulting groove, and sprinkle it with soil from the next row. With the onset of sunny spring days, moistened waste will begin to rot and generate heat. This fact will help optimize the temperature in the greenhouse; the tomato roots will receive sufficient heating to actively stimulate the growth and development of seedlings.
Be sure to remove all grass around the greenhouses - aphids or whiteflies can establish their wintering grounds on it.
Having processed the greenhouse in the fall and properly prepared it for wintering, you can safely expect the onset of frost and snowfall. Next year the greenhouse will definitely delight you with a bountiful harvest of vegetables.
Author: Sergey and Svetlana Khudentsov
10
Compliance with the temperature background
The crunchy vegetable prefers warm soil. Cold and heat will have a negative impact on yields. It is allowed to plant only after the soil temperature does not drop below + 15 C for 5-6 days. If the indicator drops below + 15 C, crispy fruits stop developing. The seedlings are covered with a protective film. Sudden cold snaps or frosts are detrimental to the vegetable’s immune system. A person’s task is to monitor the weather forecast. Other recommendations:
- the soil temperature should be + 2 C + 3 C above the ambient temperature;
- comfortable temperature range for seedlings: + 17 C + 30 C;
- humidity: from 75% to 85%.
The humidity level in the area is monitored every day. The guest takes the land, handing it over in his fist. If water droplets appear, the reading is above 80%. Imprints that appear on compressed soil indicate 70% humidity, and the crumbling of a lump indicates a humidity of less than 50%.