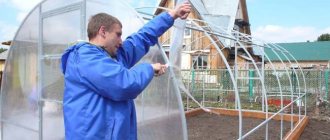
How to prepare a polycarbonate greenhouse for winter is a topical question with the onset of autumn. The main harvest has already been harvested, only the beds with greens and late vegetables remain, which means you can start cleaning the interior space, treating the walls and frame, renewing and feeding the soil, adjusting the beds, strengthening the structure so that the snow does not crush it.
In the article we will share useful tips from experienced gardeners on how best to care for the building, we will outline in detail a set of measures on how to prepare a greenhouse for winter, video and photographic materials will help explain the important points of the process.
Invalid Displayed Gallery
Preparing for winter
Leaving everything in the greenhouse as is and waiting for heat will not work. Such mismanagement will lead to contamination of the greenhouse with bacteria, which, having successfully overwintered, attack the planted plants. And you can no longer expect a good harvest. All work to prepare for winter must be carried out before frost.
Why do you need to prepare for winter?
It is with the protection of the plant home from the appearance of harmful organisms that the preparation of the greenhouse is associated. It is necessary to remove all remaining plants, tidy up the soil, thoroughly disinfecting every centimeter. You also need to check the walls and roof and treat them against pathogenic bacteria. Moreover, you need not to miss a single nook, not a single depression, so that pests do not manifest themselves in the spring.
Much attention should be paid to strengthening the greenhouse itself so that wintering does not become its last. Ventilate well after disinfection, and then strengthen the walls and frame - mandatory work.
When to cover grapes for the winter
Pros and cons of polycarbonate greenhouses
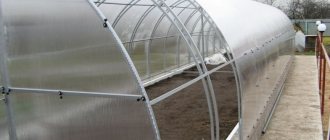
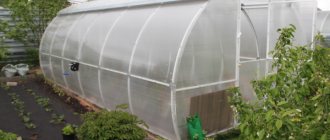
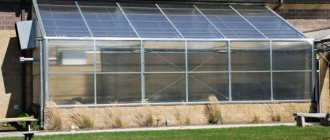
A polycarbonate greenhouse is quite popular; gardeners are happy to install these on their plots. The polycarbonate greenhouse is large in size, so you can stand upright in it. It is spacious and you can plant a lot of plants in the area. In such a house for seedlings it is easy to install a heating system, which may be needed under unfavorable natural conditions. In good weather, hot air is generated in the greenhouse, which is necessary for the growth and development of plants.
Another undoubted advantage of polycarbonate is its elasticity, which makes it easy to attach the covering to any roof shape. It is worth noting the strength of the material: it is not afraid of minor damage and temperature changes. The durability of polycarbonate is decent - up to twelve years with proper use.
Polycarbonate also has disadvantages. There are no one-piece greenhouses made of polycarbonate; each consists of separate sheets fastened together. Therefore, if any holes are overlooked, water will begin to get inside. This is dangerous - freezing is possible during frosts. As a result, the material will become brittle and unsuitable for further use.
A significant drawback is the inability to pollinate plants. Plants that are planted in an open area do not have this problem. It is preferable to grow self-pollinating varieties in a polycarbonate greenhouse. The color of the material is also of great importance. Thus, polycarbonate painted in a dark color does not allow sunlight to penetrate, which negatively affects photosynthesis.
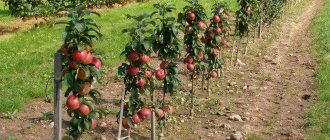
How to prepare fruit trees for winter
What to do in the fall
Autumn preparatory work consists of harvesting, cleaning and disinfecting the soil, as well as digging up the soil. You should also not forget about washing the walls and ceiling of the greenhouse - from the inside and outside of the building. At the same time, it does not matter whether the building will be used in winter or not. These are a kind of preventive measures to extend the service life of the structure, as well as disinfection of the soil from pests and fungal organisms.
Note: ardent opponents of chemicals can use ordinary boiling water as a soil disinfectant - simply pour it generously on all areas of fertile soil. But you cannot do this with polycarbonate - here you will still have to resort to various detergents (laundry soap or dish gel).
spring-cleaning
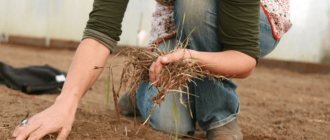
In the fall, the greenhouse needs to be thoroughly cleaned. All plants are uprooted and removed. It doesn't matter if the plants are annuals or perennials basking in the warm, humid greenhouse climate. They cannot be left over the winter. They can become a source of diseases for new plants. Annuals should be pulled out and disposed of. Diseased leaves of perennials are removed, then the plants are dug up by the roots. In the spring, new young specimens are planted.
After the plants are removed, the greenhouse needs to be washed. To avoid leaving scratches on the covering material, you need to use a soft cloth. A sponge will also do. Dirt is washed off with a soapy water solution. Then everything needs to be rinsed with clean water. After arranging ventilation, dry the greenhouse.
How to treat diseases and pests
To ensure that no pathogenic bacteria remain in the greenhouse, it must be treated from the inside. The soil must be disinfected with humic acids, and the greenhouse itself must be treated with urea. To do this, you need to prepare a solution by combining urea with water. A quarter glass of urea contains up to 10 liters of water. You can water only when the urea is completely dissolved in water. Moreover, water not only the ridges, but also the aisles.
The inside of the greenhouse is also fumigated with sulfur. This sulfuric smoke allows it to penetrate into every crevice, leaving no chance for pests. Sulfur can also be fumigated outside. However, if the greenhouse has a metal frame, fumigation with sulfur is prohibited, as it will disrupt the structure of the metal. Sulfur smoke is prepared as follows: add sulfur to kerosene and set it on fire. You can just take a sulfur bomb. The procedure lasts up to two days - when fumigated with smoke obtained from kerosene with sulfur. If fumigation is carried out using a sulfur bomb, then a quarter of a day is enough.
For disinfection, the frame can be treated with a solution of vinegar and water, using boiling water.
The polycarbonate greenhouse itself must be disinfected using a hot and saturated solution of potassium permanganate. The greenhouse is washed both inside and outside. Then it needs to be left for airing.
How to treat currants in the fall against pests and diseases
How to clean the greenhouse after growing tomatoes
If the tomato beds have not been attacked by fungi or pests this season, you need to carry out scheduled cleaning and prepare the greenhouse for the next season. In this case, the following work is recommended
- cleaning of plant residues;
- restoration of soil quality;
- cleaning the greenhouse structure.
If pests or diseases are noted on tomato bushes in a greenhouse, thorough disinfection of the soil and structure is necessary.
Tops cleaning
After harvesting, it is necessary to collect and remove all plant debris from the greenhouse - tomato tops, remaining fruits, weeds. It is recommended to burn biomaterial, even if the plants are apparently healthy: minor damage by insects, as well as the appearance of diseases in the later stages of the growing season, can go unnoticed by the gardener. It is on the leaves and stems of plants, including weeds, that fungal spores, viruses, and pest eggs most often remain (but some species go into the soil). A mild winter in closed ground increases the likelihood of their return next season.
Healthy! Before burning, tomato tops should be dried in the sun, otherwise they will burn poorly. The ashes left from plants are not inferior to wood ash as a fertilizer; in addition, they can be used to dust bushes in pest control.
It is necessary to select plant rhizomes from the top layer of soil. To do this, dig the soil to a depth of 5-7 cm using a pitchfork. Order needs to be restored not only inside, but also outside the greenhouse, clearing the space around the structure of weeds and remnants of annual crops.
Improving soil for growing tomatoes
After growing tomatoes, it is necessary to restore soil fertility. To do this, organic fertilizers are embedded in the soil or a layer of green manure is placed. A mixture of fresh manure, peat, compost and humus is suitable as an organic fertilizer. This mass should be applied in a volume of 5 to 12 kg per 1 m2, depending on the depletion of the soil.
Mustard, lupine or legumes are recommended as green manure for tomatoes. This method is suitable if the greenhouse is intended for growing early ripening varieties and is vacated by the end of July or mid-August, since the plants must have time to grow by autumn. After the green manure grows green mass, it needs to be cut off at the root level and spread on the surface of the soil in a layer of 5-10 cm.
After adding organic matter or a layer of green manure, the soil should be watered with biological products with effective microorganisms (Vostok, Baikal, Siyanie and others). The microflora contained in these products, as a result of their vital activity, will not only enrich the soil with humus by spring, increasing its quality, but will also destroy harmful bacteria and fungi in it. Watering with EM preparations is especially important if fresh manure has been added to the soil, since pathogenic microflora is actively developing in it. To prepare the solution, you need to dilute 150 ml of the drug in a bucket of water. You need to irrigate the soil at the rate of 3-5 liters of solution per 1m2.
Once every 2-3 years, depending on the characteristics of the soil, it may be necessary to bring its indicators to the standards required for tomatoes, that is, alkalization or acidification procedures, the addition of baking powder, etc.
Optimal soil parameters for tomatoes:
| soil parameter | optimal performance for tomatoes |
| structure | loose |
| type | loamy or sandy loam |
| acidity level | pH 6.0-6.8 |
| fertility level | average (4%) |
| content of nitrogen, phosphorus, potassium | 350 ml per liter (each element) |
| groundwater level | deeper than 1 m from the surface |
Advice! If it is not possible to remove the shelter for the winter, after snow falls it is recommended to spread it in the greenhouse in a layer of 25-30 cm. In spring, melt water will saturate the soil with oxygen.
Structure processing
Before cleaning, the greenhouse should be disassembled (if the design allows this), since some areas of the frame cannot be properly processed when assembled. It is necessary to wash all the parts of the greenhouse - covering, frame, fasteners.
Elements of the structure made of plastic, polycarbonate, metal and glass, as well as film, should be washed with soapy water. For preventive disinfection, a strong soap solution (a bar of laundry soap in a bucket of water) will be sufficient. When cleaning, you need to take into account the requirements of the material:
- Polycarbonate surfaces should not be cleaned with hard brushes or burlap rags. For washing you need to use sponges and soft cloths.
- The film coating is never left for the winter, otherwise it will become unusable. The film should be rolled up, after washing and drying, and stored.
- After washing, the metal frame must be thoroughly wiped with a dry cloth and repainted.
- It is recommended to whitewash the wooden frame with slaked lime.
With the onset of frost, it is recommended to open all the windows and doors in the greenhouse. This will reduce the load from snow on the roof and prevent the formation of ice on the walls of the shelter, which is caused by temperature differences.
Autumn processing of beds
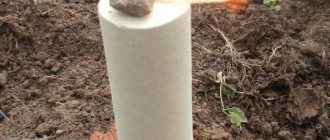
Preparing the soil for wintering is labor-intensive work. In autumn it is necessary to remove the top layer of soil. Minus fifteen centimeters - no more and no less. This soil should be dumped onto ridges in the garden plot where plants grow in the open air. Can be placed under trees. However, before disposing of the top layer of soil from the greenhouse, it must be freed from possible bacteria.
A new one is placed in place of the removed top layer. This can be fertile land purchased at the market, or prepared independently.
Disinfection of a greenhouse with chemicals
Complete disinfection of a polycarbonate greenhouse consists not only of treating the structure, but also disinfecting the soil.
For sanitary treatment of soil use:
- sulfur bomb;
- cutting sulfur;
- copper sulfate;
- potassium permanganate;
- bleach;
- Bordeaux mixture.
Before starting disinfection, the top layer of soil should be replaced. There are practically no nutritional elements in it, but the concentration of fungi, bacteria, and larvae of harmful insects is considerable.
A simple garden drainage system: do it in the spring so that there are no floods after rains in the summer
Use a shovel to remove a 5-10 cm layer of soil, replacing it with fresh soil. Then they begin disinfection.
Sulfur checkers
The most common method of disinfecting polycarbonate structures is fumigation with sulfur bombs.
Sulfur bombs are tablets with an active substance (sulfur) and a wick for ignition. The number of tablets used depends on the size of the greenhouse. To fumigate 10 m3, one stick weighing 600 g is enough.
Burning sulfur releases toxic substances, so the procedure must be carried out in a gas mask.
The fumigation process goes as follows:
- All cracks and holes are hermetically sealed.
- The internal surfaces of the greenhouse are moistened with water.
- The tablets are placed on metal stands.
- The checkers are set on fire, starting from the far edge of the room towards the exit.
- When leaving, close the doors tightly.
The checker burns for 60-70 minutes, but you cannot enter the room for 3 days. After this time, the greenhouse is opened for ventilation.
The effectiveness of the method is explained by the fact that smoke is able to penetrate into the most inaccessible places, destroying fungi and bacteria.
When igniting sulfur bombs in greenhouses with a metal profile, all elements must be impregnated with a protective polymer layer, otherwise fumigation will lead to corrosion.
Cutting sulfur
The use of cuttings of sulfur is also unsafe for humans, as is the treatment with sulfur bombs. Therefore, before disinfection, you should use personal protective equipment.
Before use, sulfur is crushed by mixing with charcoal. The resulting mixture is poured into metal containers and placed around the room (0.5 kg of sulfur for every 5 m3).
Burning sulfur is left inside the greenhouse for 5-6 days, then ventilated for 15-20 days. No work is carried out in the greenhouse during this period.
Bleaching powder
The soil, frame, polycarbonate surface, garden tools can be treated with bleach (400 g) dissolved in water (10 l). The mixture is thoroughly stirred, leaving to infuse for 4-5 hours.
Before use, the top layer of the mixture is poured into a spray bottle, then sprayed over the soil and the inner surface of the greenhouse. The remaining sediment is used to whiten the wooden frame elements. After treatment, the room is closed. After 2 days, the room is opened for ventilation for 2-4 days.
Copper sulfate
One of the effective fungicides that helps in the fight against diseases and harmful insects is copper sulfate. For treatment, the substance (50 g) is diluted with water (5 l). The resulting suspension is used to disinfect the soil. By adding laundry soap to the solution, the frame and covering of the greenhouse are disinfected.
Mold in a greenhouse: is it dangerous and how to deal with it
When working with copper sulfate, you should adhere to certain rules:
- treat only with freshly prepared solution;
- dilute the mixture in a non-metallic container;
- work with the drug wearing gloves and a mask.
Copper sulfate not only has an antiseptic effect, but also replenishes copper deficiency in the soil.
Bordeaux mixture and potassium permanganate
The Bordeaux mixture contains copper sulfate and lime. Each element is diluted separately, then poured into a spray bottle, where it is thoroughly mixed. The process of preparing Bordeaux mixture:
- Mix copper sulfate (100 g) and warm water (1 l).
- Lime (150 g) is quenched with boiling water (1.5 l).
- Both solutions are thoroughly stirred, water is added until the volume reaches 5 liters.
- Pour slaked lime into a spray bottle, then vitriol and stir.
The resulting mixture is sprayed onto the surface of the greenhouse and the soil. The room remains closed for 2 days after treatment, then opens for ventilation for 2-3 days.
Potassium permanganate is considered a good antiseptic. Disinfect the soil with a bright pink solution, which is sprayed with a spray bottle. The solution is applied to the walls and frame using a brush.
Soil disinfection
Aphids, nematodes, spider mites and other pests can occupy the greenhouse, and the harvest can be forgotten. In addition, greenhouse plants can suffer from fungal diseases: late blight, powdery mildew and others. To get rid of bacterial and other diseases, you need to use antibacterial drugs. These can be ready-made anti-pest compounds, for example, Fufanon. “Thunderstorm” will help against slugs. "Muracid" will save you from the invasion of ants. There are other drugs. The main rule is that you must strictly follow the instructions.
To till the soil, complex tillage can be carried out. Every gardener has copper sulfate and bleach, as well as Bordeaux mixture. All these compounds are used only after general cleaning has been carried out, the greenhouse has been washed and dried. The best time for such disinfection is immediately before preservation.
How to get rid of aphids in the garden forever
Features of wintering polycarbonate greenhouses
Only after all these operations have been completed correctly can we say that you have prepared properly for winter. If a polycarbonate greenhouse is not equipped with heating, then usually from November it begins to be empty. This means that it needs to be prepared for winter.
The main task is to protect it from snow, which can deform the frame. Harmful microorganisms and pests should not be allowed to multiply in it. It is necessary to protect the room from excess moisture so that it does not begin to destroy the structure.
Photo: Wintering the greenhouse.
In general, such structures winter very well; if you carry out even a minimum of operations, giving preference to other work, then the greenhouse will last the coming winter and for sure a dozen future winters.
Laying new soil
The fertile soil layer must meet the following requirements. The soil must have the required structure and moisture capacity. This means that there should be no dust or large stones in it. The structure of the soil should be such that moisture is well retained in the ground, no matter what the temperature in the greenhouse. The soil should contain peat, river sand and compost. This is the ideal composition of fertile land that can produce high yields. Good soil allows you to do without frequent loosening.
The fertile layer must have high nutritional value. If the nutritional value is weak, the plants will not be able to gain strength. There should be no mineral salts in the soil, since tender young seedlings are not able to assimilate such “heavy food”. The soil must have a neutral background, which means that alkali and acidic salts must be present in equal quantities. Also, the fertile layer of soil must be thoroughly disinfected. To do this you need to use humic acids. The drug "Ftorine-S" will help solve the issue of disinfection.
After the new soil has been laid, it is covered with straw on top. This layer should be at least 5 cm. After a while, when snow falls, it must be placed on straw. This way you can create protection for the ground from freezing. In the spring, when the snow begins to melt, the soil will be fed with melt water. This will help the soil acquire the necessary moisture.
How to treat a greenhouse in the fall after harvesting
Chemicals
You can disinfect the soil in a greenhouse using a number of chemical solutions. Experienced gardeners say that the following methods are the most effective:
- Copper-based compounds. This method should be chosen if there were outbreaks of late blight or other similar infections in the greenhouse during the past summer season. This procedure can be carried out no more often than once every 5 years. A solution of copper sulfate (0.1%) is prepared. About 9 liters of product will be required per square meter.
- Chlorine-containing compounds. Bleaching solutions will help against almost all types of pathogenic phytoflora. Dry lime is scattered on the ground. You will need 1 glass per square meter. Lime is worked into the soil using a rake.
- Solution with potassium permanganate. To carry out high-quality disinfection, prepare a saturated solution. It should have a bright purple hue. Water the soil generously with the product.
Strengthening the frame
Gardeners often receive an unpleasant surprise in the spring - the greenhouse is tilted from the weight of the snow. This is no longer suitable for growing plants. Therefore, in the fall it must be prepared for wintering.
Supports will come to the rescue with which you need to tuck the roof. The more supports, the better. If the greenhouse is located in an area where the wind blows, it should have many supporting devices. These devices should not be on the ground, as under the weight they will sink into the soil “knee-deep”, so there will be no benefit from them. Supports are placed on a hard surface - boards, metal sheets.
When preparing supports, you need to take into account that the polycarbonate coating can withstand a layer of snow up to 70 cm. A layer of 80 cm already becomes critical. A 40-centimeter layer of compacted wet snow will also be dangerous for polycarbonate. Therefore, the area where the greenhouses are installed must be regularly inspected in winter and snow removed from the surface.
Heating in a polycarbonate greenhouse in winter
After all this work is completed, check the heating system. There should be no water left in it during the winter, otherwise the pipes will freeze. All water must be drained and the pipes from the compressor must be blown out to remove excess moisture from them. If possible, it is better to dismantle valves and pipe joints to prevent them from defrosting. This should be done if the room is not heated in winter, that is, the heating is turned off.
Photo: Heating system.
Next, you need to pay attention to the frame and protect it from deformation by installing supports.
Reviews
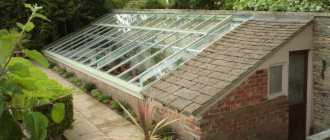
I usually have glass greenhouses on my property, but it’s hot in them in the summer - I don’t have the strength, and the leaves were fried under the sun, as if they were burning under a magnifying glass. Polycarbonate is probably better. I read about the quality and decided that I should buy it.
Vladimir, Ulyanovsk
I always remove old plants in the fall. I would like to give gardeners advice: never throw old tops into the compost. This is how you can get infected! Suddenly there are pests in the tops...
Olga, Vologda
What kind of supports are best? Wooden, or what? So, probably, their top should be wider than their bottom. Otherwise they won't be able to withstand the snow.
Nikita, Ekaterinburg
I always use store-bought soil. It’s very convenient, it’s already completely ready. Just plant!
Alina, Krasnoufimsk
Is it possible to do without a sulfur bomb? It's probably enough to just rinse with potassium permanganate. All the pests will die from the cold anyway...
Evgeniya, Petushki
My grandfather also used sulfur smoke, and my father and I follow their advice. It seems to me that this is the surest remedy.
Andrey, Krasnoufimsk
Autumn chores and work in the greenhouse will be worth it. If you keep it in good condition, it will last for many years. The main thing is to prepare the house for the plants in time for wintering.
Health to you and your loved ones! Natalya Belokopytova.