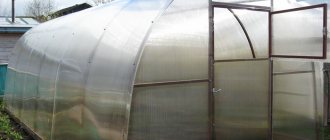
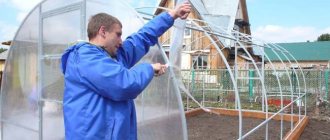
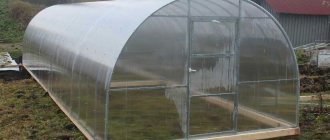
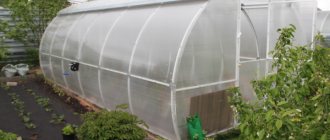
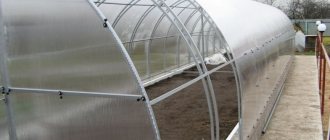
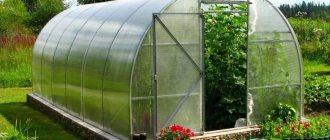
Are you the owner of a small but cozy dacha plot and are you thinking about starting the dacha season as early as possible? Or are you simply planning to grow heat-loving crops? Then you need to purchase a greenhouse or greenhouse. And the “Dachnaya-Dvushka” greenhouse is an excellent option for a small vegetable garden, since it takes up quite a bit of space, but will delight you with an excellent harvest in the fall.
Greenhouse "Dachnaya-Dvushka"
Technical characteristics and equipment of the greenhouse
The manufacturing company is the Volya enterprise, which has established itself as the creator of durable and reliable structures made of metal profiles among hundreds of gardeners and gardeners from amateurs to professionals.
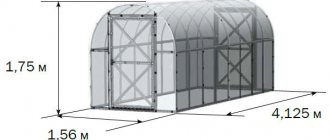
The frame of the structure is made of a metal profile with a high snow load coefficient, which is 120 kg/m². The end parts of the greenhouse have doorways, one on opposite sides, into which a door and a ventilation window are built. The length of the structure can vary from 4 to 12 m; with the use of additional inserts it can be increased to the required size.
Other parameters are close to standard:
- width - 3 m;
- height - 2 m.
The greenhouse frame is fastened using special endings in the shape of the letter T. The top of the greenhouse is covered with polycarbonate panels. Inside the room, at the joints of polycarbonate sheets, spacers are installed to impart rigidity to the structure; they can be located every 0.5–1 m. To cover the frame, polycarbonate is used, the thickness of which is 4 mm. It promotes the distribution of sunlight in such a way that there is an almost uniform flow of light to the crops grown from all sides. This thickness provides the necessary protection from such difficult weather conditions as snowfall, hail, and strong wind.
Did you know? The Paradise Project was implemented in England - artificially created biomes, or biospheres, in which there are millions of plants from different parts of the planet. They are divided by climatic zones and located on 1.6 thousand m
². The dome of the structure is gigantic in size and has a height of 55 m, a width of 100 m and a length of 200 m. Almost half of the water for irrigation is taken from water storage tanks, where rainwater is collected.
Advantages
The modern country greenhouse “2-Dum” has many advantages over other similar structures, since during its design process many of the nuances and disadvantages of previous models were taken into account.
- The main positive qualities include:
- the ability to change the dimensions of the structure in accordance with the size of the summer cottage and the availability of free space;
- vents in opposite parts of the greenhouse, which allow you to create the necessary ventilation to eliminate high humidity;
- the possibility of installing additional stiffening ribs if necessary to increase the strength of the structure if there is a possibility of a large amount of snow falling;
- ease of transportation, since the greenhouse is sold disassembled, the parts are compactly packaged and do not take up much space;
- the package includes all the parts and materials necessary for the construction of the structure;
- the metal profile frame is protected against corrosion thanks to galvanized coating;
- the greenhouse can be assembled independently, since all parts are numbered;
- This model does not require disassembly for the winter.
Flaws
Negative reviews about the 2-Dum greenhouse were not noted on farming and gardening forums, however, it is worth noting that the assembly of the structure must be carried out in accordance with the manufacturer’s technology
Particular attention should be paid to the installation of polycarbonate profiles, since there is a possibility of damage to the sheets, which, despite their strength, are fragile at the edges
In addition, if the sheets are installed incorrectly, scratches may appear on them, which can affect the life of the greenhouse. Disadvantages also include difficulties in fastening doors yourself, so it is often necessary to turn to professionals for help when constructing a structure.
Preparing for construction
In the process of preparing for construction, the main point is the construction of the foundation, which will allow the structure to be more firmly strengthened and used for a long time. The manufacturer suggests installing the structure using only a mount with T-shaped legs, which can prevent the greenhouse from sagging, but this cannot guarantee its stability in aggressive weather conditions, for example, hurricane winds.
Experienced farmers recommend installing a foundation, the material for which can be:
- pipes or metal corners;
- stone;
- thick wooden beams;
- brick;
- reinforced concrete.
Self-installation of the 2-Dum greenhouse may take a lot of time. On average, this takes 2 days if you strictly follow the instructions in the instructions and follow the order of actions.
Greenhouse frame 2-Dum
Required Tools
During the installation process you may need:
- stationery knife or jigsaw;
- roulette;
- Phillips screwdriver or screwdriver;
- pliers.
Important! If metal structures are used to build the foundation, they must be coated with anti-corrosion material.
Step-by-step assembly instructions
All structural parts have their own number, indicated in the accompanying instructions for the greenhouse. There are also illustrations with detailed indications of all connections.
The order of work is as follows:
- Assembly of the frame begins from the end part. Part No. 2 (extension) is fixed with part No. 1 (arc) using 2 screws and nuts. 2 more arcs are attached in the same way. Then another extension cord is added to them.
- Part No. 4 (stand) is attached to the middle arc using a corner.
- Attach part No. 6 (door extension) to part No. 4. Assemble the second rack in the same way.
- Part No. 5 (threshold) connects the racks at the top. The second part No. 5 connects the 2 door extensions at the bottom of the structure.
Assembling the end of the greenhouse “2-Dum”
- Part No. 7 (the cross member of the end part) is connected to the arc using an angle on one side and to the stand on the other side, secured with 2 screws and nuts. A part symmetrical to it on the other side is installed accordingly.
- An angle is attached to the end of part No. 3 (stringer), after which it is secured perpendicular to the extension with two screws and nuts.
- Install part No. 5 (threshold) with two holes towards the stringer and four towards the doorway, securing it with screws and nuts. On the other side of the structure, a similar assembly is performed.
- One end of part No. 8 (mitter) is connected to the end crossbar using a screw and nut.
The other end of the part is attached at the junction of the door extension and the threshold. Install the bevel on the second side of the doorway. Did you know? The very first greenhouses appeared in ancient China. Mentions of them say that they were built for growing plants at home, which were used to prepare medicinal decoctions and potions. - At the end of part No. 3 (stringer), attach an angle and secure the part with two screws and nuts perpendicular to the arc. The same procedure is carried out to install 4 more stringers.
- The stringers are connected to each other by parts that form another arc (parts No. 2 and No. 1).
- Next, the stringers are lengthened by adding one more part No. 3 to them and fastening them with bolts. After which the operation of fastening the stringers with an arc is repeated using parts No. 1 and No. 2.
- Then half of the frame, which has already been assembled, must be turned over and installed in the place where it will stand in the future. The second half of the frame is assembled in the same way.
- Both halves are installed with a small gap between them.
- When assembling the basic kit, assemble the last arc from parts No. 2 and No. 1 and throw it on one of the parts of the frame.
- The two halves of the greenhouse are moved together and the stringers are fastened with screws, then the last arc is installed at the place of their connection and fastened to the entire structure with screws and nuts.
Video: Assembling the “2-Dum” greenhouse
- If the greenhouse is longer than standard, then all the necessary arcs are assembled separately and placed on one of the parts of the frame. After that, part No. 3 (stringer) and No. 13 (spacer) are connected, which are installed between the assembled halves of the greenhouses. Then all the arches are fixed to the required place.
- To provide additional rigidity, parts No. 14 (reinforcers) are installed at the junction of the arches and arches with extensions. The basic kit contains 3 parts No. 14, which are installed on the middle arc. In the case of constructing an extended structure, the package includes 3 more such parts, which are attached to 4, 7, 10 arcs, in accordance with the number of extension sets, every 2 m.
- In order to secure cellular polycarbonate, it is necessary to attach corners to the arc extensions on both sides of the frame.
Next, the doors are assembled. This process takes place separately from the installation of the greenhouse frame. After assembly, they are installed in place from one end and the other.
Then they begin to assemble the vents and install them.
Greenhouse cladding technology:
- Start the process from the end part. The sheet is marked and cut according to the sketch, after which the parts are attached to the end of the frame. If their edges extend beyond the frame, trimming can be done with a utility knife or jigsaw.
- Next, the roof is sheathed by bending polycarbonate sheets along the profile of the arcs. You need to know that the polycarbonate sheets must be overlapped, and the excess along the edges will serve as a canopy over the ends.
- Next, the polycarbonate is fixed using either a polypropylene tape, which is attached to the frame parts with a buckle and tightened, or a metal tape, which is pulled with screws to the frame on both sides.
Important! When installing polycarbonate, you must use washers and do not overtighten the screws so as not to damage the casing.
The “2-Dum” greenhouse is a modern and convenient model that will create optimal conditions for growing crops on your site.
The advantages of this design
This model was preceded by film greenhouses with wooden or quickly rusting metal frames. With the launch of production of the DUM line, consumers received an inexpensive greenhouse model that was well thought out in terms of ventilation and fastening. Its popularity increased every year:
- DUM greenhouses have become a symbol of almost every summer cottage.
- In the early 2000s, manufacturers, having analyzed the advantages of polycarbonate-coated greenhouses, decided to develop a model that combined all the best world experience for similar products.
Reasons for the popularity of greenhouse 2 DUM:
- Reinforced frame design (can withstand hurricane winds and snow loads of up to ten centimeters).
- Dimensions that are comfortable for working inside (high, wide, has two windows in the end parts).
- The design provides stiffening struts at the joints of polycarbonate sheets.
- Acceptable price.
- Compact packaging and easy delivery.
- Possibility of self-installation.
Technical characteristics of the greenhouse DUM 2
Model specifications
| Length options, m | Assembled dimensions, m | Accessories | Frame material | Weight(6m), kg |
| 4, 6, 8, 10, 12 | Height – 2Width – 3 |
| Cink Steel | 70 |
Why the DUM 2 greenhouse is superior to other models:
- Varying with the length of the greenhouse (from 4 m to 12 m).
- Anti-corrosion coating of parts.
- Possibility to use the lower parts of the model as a foundation.
- Complete set: from nuts to polycarbonate sheets.
- Easy to assemble: even a person who has seen the DUM 2 greenhouse for the first time can do it.
- The “step” between the arcs is half a meter, which is reliable insurance in strong winds and a thick layer of snow.
- Careful attention to detail: holes for fastening windows (see How to make a window in a greenhouse: tips), assembled transoms, doors.
- No need for dismantling during winter.
- The ventilation system is well thought out. When air stagnates, there is a possibility of temperature instability, so the presence of vents will help maintain good air circulation, and the DUM 2 greenhouse will be provided with the necessary humidity.
Selection criteria when purchasing
When considering options for polycarbonate greenhouses, first of all, you should pay attention to the following criteria:
- strength according to the passport;
- the presence of hot galvanized coating;
- the frame profile must be open;
- the distance between the arches should be no more than 1 m;
- thickness of polycarbonate and the presence of a light-stabilizing layer;
- convenient form of construction.
We recommend reading how to choose the best polycarbonate for a greenhouse.
As already indicated, the 2-Dum greenhouse meets these criteria, therefore it is ideal for growing tomatoes, eggplants, cucumbers and other vegetable crops in a summer cottage.
Care
Greenhouse 2 DUM has a long service life. But to ensure this, the greenhouse must be properly cared for. It must be washed regularly, otherwise dirt on the coating will prevent the passage of sunlight. In hot weather, the windows should be open to allow fresh air to enter. But you should not open the doors too wide to avoid a sharp rise in temperature.
The model easily endures winter, but during this season it requires special care.
- remove snow from the surface so that dents do not form on it;
- Install additional supports to prevent deformation;
- clean the surface of ice, it can cause polycarbonate ruptures;
Country model 2 DUM is a modern greenhouse model. For little money, buyers will receive a high-quality habitat for seedlings, which will provide them with excellent harvests for many years.
For information on assembling the “Dachnaya 2 DUM” greenhouse, see the following video.
Manufacturing materials
To create greenhouses of this brand, in most cases a metal frame made of a profile is used. Its advantage is reliability and convenient transportation - when disassembled, such products do not take up much space, so they are easy to transport. In addition, profile frames are more economical than pipe frames, which has a positive effect on the overall cost of the greenhouse. The manufacturer also divides structures into three categories, according to the strength of each of them:
- the most durable and reliable are titanic; representatives of this group include models called “Strelka”, “Optima”;
- the average option is guaranteed strength, for example, “Kopeck piece”;
- standard ones - such as “Perchina”.
Greenhouses, the strength of which is designated as titanic or guaranteed, are resistant to loads, so they can be used in any season without fear of safety. Standard ones need to be removed for the winter or additional supports installed to the existing frame so that the structure does not deform under the weight of snow. It is proposed to use polycarbonate as a covering, but there are also inexpensive economy-class greenhouses that are suitable for covering with film. As a rule, the latter are used only as a summer option. As for polycarbonate, it has many advantages:
- high level of thermal insulation;
- good light transmission;
- UV protection;
- strength and resistance to mechanical stress;
- durability.
Care
Greenhouse 2 DUM has a long service life. But to ensure this, the greenhouse must be properly cared for. It must be washed regularly, otherwise dirt on the coating will prevent the passage of sunlight. In hot weather, the windows should be open to allow fresh air to enter. But you should not open the doors too wide to avoid a sharp rise in temperature.
The model easily endures winter, but during this season it requires special care.
- remove snow from the surface so that dents do not form on it;
- Install additional supports to prevent deformation;
- clean the surface of ice, it can cause polycarbonate ruptures;
Country model 2 DUM is a modern greenhouse model. For little money, buyers will receive a high-quality habitat for seedlings, which will provide them with excellent harvests for many years.
For information on assembling the “Dachnaya 2 DUM” greenhouse, see the following video.
The procedure for carrying out installation work
Assembling the Dachnaya-2 DUM greenhouse is a simple and understandable process for everyone, which even a completely inexperienced user can handle. Installation time, as a rule, takes no more than a few hours.
Preparing the base for the structure
First of all, the foundation is laid out. If the site has hard soil, the construction of a foundation is not necessary; it is of greater relevance on weak and unstable soil, where there is a high risk that the structure will move. If you have a foundation, you can forget about such a nuisance.
The base for the greenhouse is leveled, sudden changes are unacceptable, after which the required markings are carried out.
To build the base, various materials are used, including stone, angle steel, brick or reinforced concrete. The best option is a wooden beam, which is laid in pre-dug trenches. Their depth is about 15 cm, the bottom is lined with roofing felt, and the beams are connected to each other using steel corners. The cross-section of the timber can be very different; often the size chosen is approximately 10x10 cm.
Foundation construction
Assembly stages and nuances
The assembly of the greenhouse “Dachnaya-2 DUM” continues with the installation of the frame, for which the following sequence of actions is observed:
- components are removed from the packaging, their integrity and completeness are checked;
- lay out the parts according to the markings;
- Arcs are assembled from individual components;
- install the end block, fix it and carry out vertical alignment;
- set up and connect the second arc to the corner;
- fix the guides to the arches, placing them horizontally to the base;
- install the second end block;
- doors and windows are fixed to the frame.
Features of laying polycarbonate
The main work has been completed and the Dachnaya-2 DUM greenhouse is almost ready. The final stage is polycarbonate cladding, it is carried out as follows:
- The lathing is covered with sealing material.
- A special profile is installed under the joints of the sheets.
- The sheets are laid out and pre-fixed with clamps. If fastening is carried out using self-tapping screws, holes are drilled - several millimeters larger than the diameter of the fasteners.
- Fix the sheets to the base.
- Insulation is carried out at the ends of the sheets. A special tape is perfect for this.
- The connecting profile is used to close joints.
- The ends of the sheets are closed using an end profile.
The final stage of assembly
Foundation
A polycarbonate greenhouse is light in weight, so the load-bearing capacity of the base has minor requirements. However, the large windage of the structure can lead to the movement of the entire structure across the site under gusts of wind.
Timber foundation
The cheapest, easiest to implement and short-lived. It is a frame made of wooden beams with a cross-section from 10x10 cm to 15x15 cm, depending on the size of the greenhouse itself. Structures larger than 3x6 m already require a more serious, permanent foundation.
Installation of timber lining on a sand cushion and on stones lying directly on the ground
You can also plant a wooden foundation on stones, blocks or bricks, placing roofing material under them. The gap between the ground and the timber is covered with film and sprinkled with earth.
More details about installing a polycarbonate greenhouse on the ground, video of the installation of a timber foundation:
Block foundation
The procedure for arranging a block foundation for a greenhouse is as follows:
- The soil at the construction site is cleared of 5-10 cm of top fertile soil;
- A 10 cm layer of gravel is poured;
- A small amount of thick sand-cement mortar is poured onto the gravel along the perimeter of the block, onto which concrete hollow blocks are installed;
- All installed parts of the base are aligned vertically and horizontally, and with each other according to the building level;
- The voids in the blocks are filled with more liquid concrete so that it can seep into the gravel bed, reliably holding the entire foundation together;
- The surface is smoothed and all seams are covered.
Do-it-yourself construction of a polycarbonate greenhouse, video of pouring a concrete strip shallow foundation:
https://youtube.com/watch?v=nLCcjmmWpXo
How to equip a polycarbonate greenhouse inside, photo of a concrete foundation as a base for the structure and a limiter for the beds
Brick foundation
Suitable for most medium-sized polycarbonate buildings, no more than 6x10 m. The sequence of construction stages is as follows:
Since installing a polycarbonate greenhouse on a foundation made of simple brick is quite unreliable, metal anchors are used
- A trench is dug 20 cm wide and 10 cm deep;
- Filled with concrete flush with the ground surface. No formwork is used in this case. In the case of soft and loose soil, the trench is lined with plastic film;
- The horizontality of the building structure is checked, all differences are smoothed out;
- Metal anchors made of 12 mm reinforcement are recessed into slightly set concrete. It is necessary to correctly calculate the distance equal to 3-4 bricks. Their height should be 2-5 cm greater than the brickwork;
- After a week you can start laying bricks;
- Roofing material is laid on the base, on which a wooden beam is installed, with holes pre-drilled in places where the anchors protrude.
- A polycarbonate greenhouse is being installed on a wooden grillage foundation.
Lighting
For greenhouse farming, the issue of lighting is important, especially if you will be growing long-day plants. The use of powerful lamps with reflectors provides both light and heating. Modern energy-saving light bulbs, despite consuming a small amount of energy, have only a small level of heating. For rapid plant growth, it is impossible to do without the necessary light waves, but not those that are detected by the human eye. Installing certain lighting promotes the development of shoots and fruit set. The selection of energy-saving lamps should be carried out by specialists.
If you equip the greenhouse with ordinary fluorescent lamps screwed into lamps, then comfortable conditions will be maintained for absolutely all plants. Although there is also the option of selecting a suitable lamp for each instance. High pressure sodium lamps are often mentioned. They have photosynthetic radiation and influence the active development of plants.
Tips from experienced gardeners
Owners who have been growing good harvests of vegetables and herbs for years after installing 2 DUM greenhouses give some recommendations:
- When installing additional U-shaped supports for the winter, it is necessary to do this based on the number of arches. In this case, the load on the greenhouse frame will be halved.
- To achieve absolute reliability of the greenhouse, you can replace the frame strips with bends at the installation stage, but this will significantly increase the cost of the greenhouse.
- To avoid loosening of the nuts (over time), during the installation of the greenhouse, you can simply coat them with paint.
- DUM 2 greenhouses will require careful selection of lighting. Consult with specialists, state your wishes, they will offer you a choice of different options for lighting fixtures with or without a heating function. Perhaps reflector lamps or high-pressure sodium lamps, which have a photosynthetic effect, would be suitable.
In early spring, when the temperature in the greenhouse is quite high during the day and still drops below zero at night, you can additionally cover the planted plants with a cut plastic bottle.
No. 6. Types of greenhouse coverings
It is easy to notice that the largest area of the greenhouse is occupied by the covering material, so summer residents pay maximum attention to its choice. Currently the following materials are actively used:
- regular and reinforced polyethylene film;
- glass;
- polycarbonate
Each of these materials copes with its direct functions differently.
Glass cover
Previously, glass was almost the only suitable material for arranging a greenhouse. Today everything has changed, but it continues to be used due to the following advantages:
- good light transmittance;
- high thermal insulation characteristics;
- resistance to temperature changes and chemicals;
- durability;
- aesthetics.
Minuses:
- heavy weight, requiring a very good frame;
- fragility. Hail can damage the material, and using laminated or tempered glass is too expensive;
- long and labor-intensive installation process;
- lack of a filter against infrared radiation, which can be harmful to some plants.
Glass should be at least 4 mm thick. The larger the sheets, the higher the light transmission (the area of the frame decreases), but the higher their fragility.
Polyethylene coating
It’s worth taking a look at any dacha cooperative to notice that plastic film is most often used to equip greenhouses.
Advantages:
- good light transmission and the ability to softly diffuse light;
- low price;
- ease of use and low weight;
- protection of plants from light frosts (down to -3C);
- Suitable for greenhouses of any shape.
Flaws:
- rapid wear, especially at fastening points, so the film will have to be changed every year;
- accumulation of condensation film on the surface, which can lead to a number of diseases in plants.
For the low price and ease of use, summer residents forgive polyethylene for its fragility.
If you look at it, the material is presented on the market in several varieties:
ordinary polyethylene film
Sold in rolls 120-300 cm wide, it requires special care when installing on a frame, since the slightest cut can soon increase significantly. It is better to seal especially dangerous places with tape to guarantee;
PVC film is more expensive than polyethylene film, but is much stronger, can last 5-7 years, retains heat accumulated during the day well, and blocks infrared rays;
reinforced polyethylene film can last for several seasons in a row, as it is equipped with an internal frame made of fiberglass, polypropylene, twisted polyethylene or other materials
Can withstand hail and strong winds.
Polycarbonate cover
- high strength, 200 times higher than that of glass. Rain, strong wind and even hail will not harm polycarbonate;
- excellent light transmission and much better heat retention abilities than glass;
- ease of work, since the material bends well, is easy to cut and drill, and is light in weight;
- relative durability (up to 15 years);
- great appearance.
When choosing polycarbonate for a greenhouse, you should pay attention to the thickness: it should be at least 4 mm, and preferably 6 mm; for arranging the roof of a greenhouse, it is better to look for sheets 7-8 mm thick. Without special protection, the material does not withstand sunlight well, so there must be a protective layer - do not believe sellers who talk about using protective additives in bulk, this is all a short-lived material
When heated, polycarbonate tends to expand, so experienced specialists recommend installation at a temperature of at least +10C and fastening the sheets overlapping.
Other materials for covering greenhouses
The following materials can also be used to cover the greenhouse:
- spunbond is a non-woven material obtained from a polymer melt with the addition of stabilizers for resistance to ultraviolet rays. This is a dense white fabric, often called agrofibre. It has good strength, light transmission, high thermal insulation properties, is resistant to rotting, temperature changes and chemicals, and will last up to 5 seasons;
- plexiglass is a durable material, suitable for northern snowy regions. The downside is the high price;
- Fiberglass is made from polyester resins, reinforced with reinforcement, and retains heat well.
Advantages and disadvantages
The high consumer demand and popularity of 2DUM greenhouses are due to a number of positive properties of their design:
- The absence of the need for winter dismantling allows you to get sufficiently warmed ground in the spring, which makes it possible to save time and start planting plants earlier than in a collapsible model.
- Cellular polycarbonate has excellent sunlight transmittance, high strength and heat resistance. The material perfectly withstands exposure to negative temperatures, does not burst or crack.
- The presence of a proprietary sealing contour ensures heat retention and prevents the penetration of cold masses into the greenhouse during frost periods and at night. The presence of special clamping devices allows you to tightly close the windows and doors, which completely eliminates heat loss in the room.
- Self-adjustment of the structure in height is possible thanks to the addition of frame arched elements. Extending the greenhouse will also not cause any difficulties: all you need to do is buy additional extension inserts and “build up” the structure.
- Galvanization of frame parts reliably protects the metal from moisture and ensures the safety of parts from corrosion.
- Having detailed instructions will allow you to assemble the greenhouse yourself without using additional tools or involving specialists. But it should be noted that installation of the structure is a rather complex process and requires care and precision.
- Transporting the structure will also not cause difficulties. All parts are compactly packed in bags and can be taken out in the trunk of a regular car.
- Installation of a greenhouse does not require the formation of a foundation. The stability of the structure is achieved by digging T-shaped posts into the ground.
- The arches are equipped with holes for installing automatic windows.
Country greenhouses "2DUM" have several disadvantages:
- Duration of installation, which takes several days.
- The need for strict adherence to the rules for laying polycarbonate. If the material is unevenly placed on the frame, moisture may accumulate in the honeycombs of the coating, followed by the appearance of ice in winter. This threatens to damage the integrity of the material due to the expansion of water when freezing, and may make it impossible to further use the greenhouse.
Recommendations
The structure of the installed greenhouse should not be subjected to excessive loads, which can lead to deformation and even destruction of the frame.
Try to avoid contact of the SPC with sharp and hot objects. The use of open fire near the greenhouse is unacceptable.
The polymer coating of frame elements damaged during installation or operation must be cleaned, degreased and coated with any weather-resistant enamel or varnish.
When operating a greenhouse in winter, it is necessary to reduce the access of cold air into the internal volume. To do this, use sealant or self-adhesive sealant to seal all visible gaps and joints of the greenhouse.
To prevent the spread of fungal and mold microorganisms inside the SPC cells (“blooming” of the SPC), prevent contact of the lower sections of the SPC with open ground.
Do not use abrasives or highly alkaline cleaning compounds to clean the sheets, and do not scrub the surface of the sheets with brushes, metallic cloths or other abrasives.
Cleaning/washing polycarbonate sheets
Rinse the sheet with warm water. Then wash the sheet with a mild soap solution using a soft cloth or sponge to remove any dirt and grime. Rinse with cold water and dry with a soft cloth to remove water.
Improvements
Even though the foundation is not a mandatory element for this model, it will never be superfluous. The greenhouse must be installed strictly on steel corners. In this case, problems with the soil will definitely not bother you.
If the quality of the soil on the site is trustworthy, it is recommended to treat the T-shaped ends of the greenhouse with an anti-corrosion compound.
Not all crops grown in a greenhouse have enough sunlight. To compensate for this deficiency, the building can be equipped with special fluorescent lamps. Their light is suitable for almost all types of plants. You can also use LED or infrared lamps, depending on the light required for the seedlings.
The most comfortable climatic conditions can be achieved through proper ventilation. Model 2 DUM is specially designed to maintain normal levels of humidity and oxygen, protecting seedlings from cold or increased heat. The main thing is to install the windows correctly to prevent drafts. And you shouldn’t open the door wide for ventilation.
How to care for the “Dachnaya 2DUM” greenhouse?
Caring for such a greenhouse is not difficult, but still necessary. So, at least 2-3 times during the winter, the snow from its surface must be cleared, otherwise it will gradually stick out from the polycarbonate and subtle, but still annoying and problematic cracks may appear along it. In addition, for some users who did not shovel snow in winter, one side of this greenhouse has shifted over three years, and it became noticeable to the naked eye that it is now crooked. In general, “Dachnaya-2DUM” can withstand a snow load of up to 120 kg/m2, and this is ten times higher than the strength level of greenhouses required by SNiP! And such amazing strength is precisely achieved by installing arc amplifiers, which are not included in the main kit, but which can be purchased additionally from the same company. And they need to be placed every meter - this will make the structure of the greenhouse more durable.
In April, when there is still snow, the temperature in the greenhouse reaches 20-25 degrees, but at night it does not drop below 5 (this is if there is no internal heating system). That is why, after Easter, you can safely plant seedlings in it, be sure to cover it with additional cut plastic bottles. In the summer, the Doom 2 greenhouse gets quite hot, so it’s even better to think through the ventilation system well in advance: open the doors in extreme heat, ventilate, water the polycarbonate with cold water, and even better, install automatic vents.
According to reviews from summer residents, the harvest in this greenhouse is always pleasing to the eye. It is convenient to make beds in it and attach plants to slats, and cucumbers, tomatoes, peppers and eggplants grow especially well in it.
Greenhouse assembly
The greenhouse frame is mounted using screws and nuts. Polycarbonate, to our great joy, is installed only once and forever - it does not need to be removed for the winter. But still, according to reviews from customers who have installed a greenhouse on their site, it is recommended to invite an experienced specialist for installation, which will significantly save time and nerves.
Some practitioners compare assembling a greenhouse to a Lego set for adults, since it cannot be called simple. On average, it takes an ordinary user at least two days to install a greenhouse. And for some, who are not so quick at work, it may take more than one week. The installation instructions are intended for professionals, not ordinary people, so understanding them is not at all easy. Installing doors in a structure is especially difficult. According to numerous reviews, the stage of attaching the doors and closing the cracks with rubber is considered very inconvenient. At the same time, it often slips, does not press well, and tightening it takes a lot of effort and nerves.
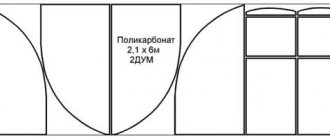
The packaged structure weighs from 60 to 120 kg. The largest volume in the package is polycarbonate, of which there are 5 sheets measuring 2.1x6 m per greenhouse.
The greenhouse kit is divided into 5 packages:
- Straight frame parts measuring 125x10x5 cm with instructions;
- End fragments (100x10x5 cm);
- Arcs (125x22x10 cm);
- Installation components with clamps (70x15x10 cm);
- Profile for sealing.
Following the advice of experienced summer residents, even when purchasing a greenhouse, you should ask specialists in the store to cut openings for windows and doors in polycarbonate. This service is not expensive and will certainly save you from unnecessary hassle. The greenhouse kit includes cellular polycarbonate, stencil-cut for the roof and side walls, fastening material and profiles for it. You will begin the installation from the ends of the greenhouse, and the excess will have to be cut off with a knife, so it is better to do this right in the store.
Strengthening the frame yourself
What to do if there is no welding machine, and there is also no opportunity to call specialists or buy materials? If winter is approaching, you can strengthen the greenhouse using improvised means:
First you should start preparing poles, for example, bars or small trees
It is important to choose the material according to its strength. Secure the reinforcement using wire or cord; several self-tapping screws should be used to secure it. You should duplicate the skeleton vertically and horizontally, and do the same with the ridge. It is necessary to fasten the crossbars across the entire width of the structure, taking steps of one meter. For this, the best option would be poles that do not have connections.
The emphasis should be placed on the walls of the greenhouse where the walls meet the roof, thereby fixing the structure. To prevent the frame from being pushed inward, you will need to install support pillars.
To protect the building from the wind, you need to use long pieces of reinforcement that should be dug into the ground from the outside of the structure.
This advice is not expensive; the main thing is that you need to spend a lot of effort and pay attention. During cold weather, it is better to check after snowfalls, and also regularly clean the greenhouse of snow caps
Characteristics of the greenhouse “Dachnaya 2DUM”
The frame of the greenhouse has the shape of an arch and is made of galvanized metal profile. The covering for the greenhouse is 4 mm thick cellular polycarbonate. This coating is ideal for greenhouses because it is resistant to temperature changes, withstands heavy loads, precipitation and has good light transmission.
The greenhouse kit includes branded seals, as well as detailed instructions on the assembly procedure. The frame of the greenhouse is compactly packaged, making it easy to transport along with rolls of polycarbonate coating in the trunk of a car.
Recently (since 2010), the configuration of greenhouses 6 and 8 meters long has been changed. Now it has changed and began to be called “Dachnaya 2DUM-4”. The changes affected only the number of bags with prepackaged parts, which made the process of transporting and storing the frame more convenient. But the number of parts, their quality and price remained the same.
Guarantees, details
Warranty
The manufacturer guarantees that the greenhouse frame meets the requirements of the technical specifications provided that the consumer complies with the conditions of transportation, installation and operation.
The manufacturer has established a warranty period for the greenhouse frame of 12 months from the date of sale.
Greenhouse frame model: “2DUM”
Date of sale: "___"_____________2013
I am familiar with the warranty obligations and operating conditions:
Buyer____________________ Full name __________________
The main advantages of this configuration over other models ↑
Among its competitors, Dachnaya-2DUM has a number of advantages:
- The length of the greenhouse depends on the wishes of the buyers. Using special extension inserts, you can change the size of the room.
- The frame is sold disassembled, which means that the greenhouse can be transported using a regular passenger car.
- Due to the galvanization of the greenhouse frame, the structure will be protected from corrosion.
- No additional equipment is required to assemble the frame.
- For fastening, T-shaped strong ends are buried, which means you can do without a foundation.
- The hermetic seal between the polycarbonate and the frame is firmly fixed with clamps.
- The “Dachnaya 2DUM” greenhouse can be assembled independently if you have the appropriate skills, since each of its parts is numbered.
- The greenhouse arches are equipped with openings for automatically opening vents.
- With a distance of half a meter between the arcs, the greenhouse becomes more durable. It is possible to additionally purchase reinforcing arches.
Greenhouse “Dachnaya 2DUM” on a foundation
This model is not without its shortcomings, but reviews of the greenhouse “Dachnaya 2DUM” indicate that in terms of price and quality ratio it has no equal in the modern market. It is an ideal option for growing garden plants.
Examples for inspiration
Many gardeners dream of building a real greenhouse on their plot - this is a place where they can grow not only the usual herbs and vegetables, but also all sorts of exotic plants and berries, and also get inspiration by producing magnificent roses, carnations or rare orchids.
A brick building is more suitable for a greenhouse - such a permanent structure will be a real home for plants. Although more modern materials are used for greenhouse buildings, greenhouses are still built using metal-plastic and cellular polycarbonate, and brick construction remains the most reliable.
First of all, you should purchase the necessary material for construction:
- bricks;
- mineral wool;
- cement and sand;
- board, timber for rafters;
- roofing material;
- window, door.
These are the main materials; the list may be expanded during the construction process.
The brick building differs from other buildings in that it consists of two rooms and a vestibule, where a heating system in the form of a boiler or stove is installed and all sorts of accessories for caring for plants and the main room are stored.
For the vestibule, choose small sizes, for example, 2x2 or 2x2.5 m. For the main room, the sizes can be any. A permanent partition with a door is placed between the vestibule and the main room. Typically, a brick greenhouse has transom windows.
When starting the construction of a brick greenhouse, you should pour a strip foundation. If the masonry is one brick, the foundation is poured half a meter deep. In order for a lot of light to enter the greenhouse, windows are made to let in fresh air and transoms are installed.
In a heated greenhouse, in addition to flowers, you can grow herbs and vegetables.
If you give preference to vegetables, then experienced gardeners recommend growing:
- cucumbers;
- tomatoes;
- peppers, sweet and bitter;
- leaf salad;
- Chinese cabbage.
In order to have a good harvest all year round, plants should be constantly cared for.
Particular attention is paid to soil preparation - the best for plants is considered to be light, fertile soil that has all the substances necessary for plants. Regular watering and fertilizing are important for vegetables and herbs.
If all conditions are met, you can build a greenhouse on the site to grow vegetables all year round and get a good harvest that will provide you with vitamins and essential minerals.
Construction of a greenhouse can be a stepping stone to creating a home business growing vegetables, fruits and herbs. Exotic vegetables and fruits, as well as fresh flowers, may be especially relevant for sale.
To learn how to build a winter greenhouse, watch the video below.
Assembly of a greenhouse with explanatory videos ↑
The kit includes all the necessary parts for installation and assembly of the greenhouse: not only the profile for the arches, but also fasteners (bolts, screws, nuts). Polycarbonate can be purchased together with the greenhouse or separately if you want to use products from another manufacturer.
The greenhouse is installed on the prepared base. This could be a frame made of wooden beams, a strip foundation, or simply a compacted and leveled area of suitable size. Tools you will need: a screwdriver (a Phillips screwdriver will also work), a stationery knife, a tape measure and pliers.
The area for the greenhouse must be level, otherwise it will be difficult to obtain a non-crooked structure, and the polycarbonate sheets will not lie as needed
The package includes instructions describing the step-by-step assembly process. It contains diagrams and drawings of each connection; for convenience, all parts are numbered. However, the design is quite complex, so it will be useful to watch the video instructions for installing the frame of the “Dachnaya 2DUM” greenhouse. There is an official video from the manufacturer, but it does not have a verbal explanation, so it is not entirely clear. We offer another video in which, despite the advertising, the essence of the process is conveyed much more accessible. The video shows in detail:
– how to properly assemble the frame, install doors and windows;
– how to assemble an additional section for the greenhouse;
– how to strengthen polycarbonate sheets.
Some people are especially puzzled by assembling the ends of the greenhouse: attaching the doors and installing the weather stripping. How to correctly assemble numerous parts is shown in the official video from the manufacturer:
The installation of the greenhouse is carried out by two people, at least fixing the polycarbonate sheets. If you are unsure of your own abilities, it is safer to contact a company offering assembly services (usually a greenhouse seller). When packaged, the greenhouse weighs from 60 to 120 kg. It is more convenient to purchase polycarbonate directly from the seller; in this case, parts for the ends (doors, windows) will be cut out according to the drawings. Sets of blanks easily fit into the trunk of a passenger car, but to transport polycarbonate sheets you will need a van.
