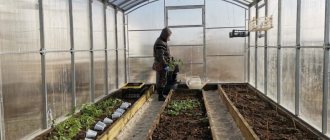
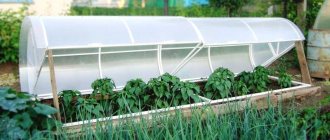
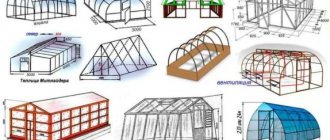
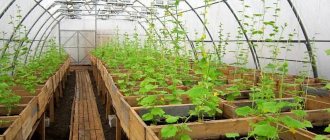
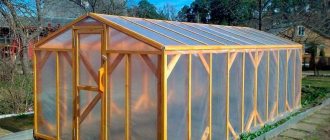
The vast majority of summer residents prefer not to deal with huge full-size greenhouses; it is expensive, quite troublesome and justifies itself only if you grow vegetables and seedlings on a professional basis. For an amateur country house option, a greenhouse made of wood under a film, made with your own hands and adapted to the nuances of a suburban area, is more suitable.
The classic version of a wooden greenhouse according to Mittleider, with treated wood and a special ventilation system
Features and types of designs of wooden greenhouses
There are more than enough reasons for such a choice:
- A do-it-yourself greenhouse made from wooden blocks will cost 60-70% less than a glass or metal structure. At the same time, the bulk of the material can be found at the dismantling of an old barn or purchased at a construction site;
- A light and simple greenhouse made of wood can be built with your own hands in literally two to three days. If desired, the design can be made according to a temporary scheme. At the end of the season, remove the film, polycarbonate and wooden planks for storage.
The main advantage remains the fact that almost any summer resident who is more or less familiar with carpentry can make a greenhouse from wood. Even basic skills in using a screwdriver, jigsaw and drill are suitable.
But before you try to make a greenhouse out of wood yourself, you must take into account that, due to the soft film cladding, the wooden frame requires denser and more frequent lathing than when using mineral glass. The film, as well as polycarbonate sheets, fails quite quickly, so wooden greenhouse designs are traditionally made with easily removable fastening of the cladding, usually using clamping strips and self-tapping screws.
Collapsible greenhouse made of wood and film
On the other hand, the use of film or polycarbonate cladding sharply reduces the requirements for the accuracy of manufacturing greenhouse parts made of wood. If something goes wrong, you can always finish the wood or correct any defects after the assembly is complete.
Projects and drawings with dimensions of a wooden greenhouse
Many wooden greenhouses are very beautiful in shape and design. The use of finishing and varnish makes it possible to turn a greenhouse structure into almost a work of art.
The tent version of a wooden greenhouse looks beautiful, but you can’t build it without specialists
But in most cases, building such a greenhouse from wood with your own hands without the participation of professionals and special design is almost impossible. There are too many nuances in the layout and arrangement of the foundation. It will be difficult to make a greenhouse out of wood yourself; in this case, you have to resort to the services of builders.
Failures in design have to be eliminated by installing wooden struts
Despite their apparent simplicity, greenhouse buildings with a wooden frame and film cladding require increased attention to the design of the basement and roof of the building. Therefore, the installation of a greenhouse on a wooden frame must be carried out using a foundation; without it, the frame structure will very quickly fail.
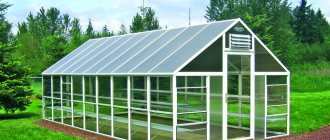
A simple version of a greenhouse with polycarbonate lining
Perhaps the best option for your first experience in construction would be the project below.
The greenhouse frame is reinforced with four horizontal wooden beams
It is not necessary to follow all the dimensional positions of the project; based on it, you can make your own drawings and diagrams for a greenhouse made of wood, but shorter in length.
This design is based on a wooden flooring assembled from boards measuring 2.5x2 m. The material is packed onto a beam with a cross-section of 10x10; in total, to make a wooden greenhouse under the film you will need at least 6 pieces of timber with a length of 240-250 cm. Each wall is assembled from five boards 50 mm, the front part of the greenhouse is assembled from seven boards. In addition, you will need at least 25 m of magpie slats, with the help of which the polyethylene film stretched over the frame of the greenhouse is fixed. In total, to build a wooden greenhouse in the country, you will need 0.8 m3 of lumber of 15 m2 and polyethylene film 0.5 mm thick.
For those to whom the proposed option may seem too small and unreliable, we can propose a project made from timber assembled on a foundation of concrete blocks.
A homemade greenhouse made of wood and polycarbonate, built according to this project, can withstand strong gusts of wind, up to 12-15 m/s, a thick layer of snow and heavy rain. The roof of the greenhouse structure is made of polycarbonate; the ridge beam is additionally protected by a metal plate made of galvanized iron. But the main thing is that the walls of the frame are strengthened with additional crosses and diagonal struts. The result is a wooden structure that can be used with almost no restrictions, even in snowy winter conditions.
Wind-resistant greenhouse made of wood and film
The use of polymer film cladding has always been a problem for most country greenhouse structures. You can try to solve the problem by using an unusual shape of the walls and roof. In this case, the owner chose to build a frame greenhouse made of wood with his own hands in the form of a tent or boathouse.
The wooden structure is based on a trapezoidal frame made of timber without a foundation, sewn to the ground using embedded elements and dowels. To reduce the pressure on the walls and roof slopes, the surface of the slopes is made in a streamlined arched shape. It is quite difficult to make rafters of this shape from wood, so internal aluminum and steel pipes are used as a supporting profile.
Metal arches are installed on a wooden frame
Gable semi-basement option
There is another way to combat strong winds in the area, for example, by significantly reducing the height of a wooden greenhouse above ground level. Below is a project for constructing a wooden greenhouse under polycarbonate with your own hands.
Despite its unusual layout, this wooden structure has several rather serious advantages:
- The greenhouse retains heat well; the wind is not able to release warm air from the cracks, as is the case with full-size greenhouses and greenhouse complexes;
- The use of corrugated polycarbonate slate significantly increases the strength of the roofing covering, while the thickness of the material is relatively small, 4 mm, the waves ensure normal drainage of rainwater and snow.
Advice! In general, the design is very simple and easy to implement, even from remnants of re-graded lumber purchased at a reduced price at a lumber yard.
It is clear that such a greenhouse project made of wooden beams can be built with your own hands only on very dense and non-heaving soils.
Single-sided greenhouse type
For summer cottages, you can offer a very interesting version of a greenhouse made of one-sided wood. Most often, such buildings are installed under the sunny side of a country house; this saves useful space on the site and at the same time simplifies the care of seedlings and plants grown in a greenhouse or greenhouse made of wood.
A greenhouse made of wood is very warm; cast polycarbonate is used on the frame
The main roof slope is lined with real monolithic polycarbonate. As a result, even with a small glazing area, the amount of light inside the greenhouse is sufficient to maintain positive temperatures even in severe frost.
In addition, there is a real opportunity to organize heating of the premises using a stove or boiler located inside the country house.
Classic version of a wooden greenhouse
For those who confidently possess the skills of a carpenter or carpenter, we can offer to build a full-fledged real greenhouse from wood with their own hands, drawings and photos are given below.
The design is based on timber 60x60 mm, boards 200x20 mm, 4 m long, and a metal corner. The frame turns out to be quite rigid, so most owners prefer to install a greenhouse made of wooden beams with their own hands on a regular pile foundation.
Polycarbonate greenhouse option
The main part of the building lasts for at least 15 years; the lining made of polyethylene film, under a successful set of circumstances, has to be changed approximately once every two years.
What wood is best to use
Coniferous wood can be used to build greenhouse complexes and greenhouses; it is inexpensive and easy to process. Species such as larch and oak may be better suited for constructing a frame, but the cost of wood is so high that it is cheaper to assemble a structure from an aluminum profile.
Often, to build a greenhouse or greenhouse complex, they use wood available on a summer cottage, for example, old fruit trees, walnuts, acacia, and anything that can be used for hemming the lower tier and tying are planted onto timber and slats.
What material is best to cover?
Small buildings with high roofs are mainly covered with cellular polycarbonate; if the size of the slopes exceeds 2.5 meters, then monolithic polycarbonate can be used to install vents or ventilation windows. The roof is critical to any greenhouse, so it is important to ensure that the surface has the best possible light transmission.
The walls and lower tiers of greenhouse frames can be hemmed with plastic film; this is another good way to ensure reliable insulation of the walls, especially when adjacent to the ground. In this case, part of the film is used to fill the building, after which the edge is simply covered with dry soil and pressed down with bricks or cinder blocks.
Construction of the greenhouse foundation
A trench is dug about 30 cm wide and 40 cm deep. A cushion of crushed stone and sand at least 10 cm high is made. Then brick is laid or formwork is made, and the space around the perimeter is filled with concrete.
The foundation of the greenhouse can be made portable, in this case it is made of wooden beams 150x150 cm. The trench is dug to a shallower depth, the bottom can be lined with bricks, and bonded formwork is placed on top. If you add mowed grass and dry leaves on both sides, you will get natural heating of the greenhouse.
Calculation of materials for a wooden greenhouse
You can estimate the costs of purchasing lumber and film using a classic rectangular building project measuring 3x4 m. In general, at least 0.5 m3 of pine beams 60x60 mm will be required for the manufacture of racks and two levels of strapping, and the same amount will be needed for the manufacture of rafter beams , spacers.
Hemming the base part of the greenhouse frame will require 20-25 m.p. edged board 150x30 mm. Approximately 20 m2 of polyethylene film will be needed for finishing and cladding the walls, and 20-25 m2 will need to be prepared for laying the roof.
Advice! If possible, it is best to use timber of one section when building a greenhouse made of wood; this not only reduces costs, but also significantly reduces the risk of misgrading the purchased material.
Special means against rot
Since wood structures are so common, the industry has developed various means to protect wood not only from rot, but also from various wood-boring beetles.
Wood protection is conventionally divided into two types:
- Chemical
- Biological
There are two types of chemical protection:
- Antiseptic
- Canning
Antiseptic treatment is the most popular and inexpensive method. Preservation of wood can only be carried out using special means using technological equipment. It is impossible to make canning at home.
Antiseptics are:
- Water soluble
- Water repellent
- Combined
In addition to complex chemical impregnations, wood can also be primed and painted or varnished. If you cannot buy antiseptic compounds, you must use folk remedies to protect wood from rot.
Folk remedies for protecting wood from rot
In order to reduce the cost of protecting wooden greenhouse structures, you can use waste oil from an internal combustion engine. To do this, you need to heat the oil to a temperature of 60-70 degrees Celsius and process the wood.
Where can I get used oil? From a neighbor, friends who have a car, or at a car service station. It is also available in large mechanical repair shops, transport companies, etc.
One of the ways to protect wood is burning it with a blowtorch. If bitumen is available, it can also be used for these purposes. To do this, you need to heat the bitumen and pour it in a thin stream into a bucket of diesel fuel. The bitumen will dissolve in diesel fuel and this composition can be used to treat the greenhouse structure.
Very useful advice: It is necessary to pour hot bitumen into cold diesel fuel, and not vice versa. Violation of this rule may result in severe burns from splashed bitumen.
How to build a greenhouse out of wood with your own hands
It’s one thing to choose a beautiful building based on pictures, but another thing to try to make a greenhouse out of wood with your own hands, even if guided by step-by-step instructions. Without practical experience and knowledge in assembling frame structures, the idea looks at least risky. First of all, you need to draw up your own drawings for making a wooden greenhouse. It is a detailed document that solves 99% of problems related to construction. If you have no experience in this matter, then you can use a very competent and detailed drawing of a wooden greenhouse under film, given below.
The diagram for building a greenhouse out of wood with your own hands is as follows:
- We mark the future foundation on the ground;
- We assemble the lower frame, install vertical posts, first in the corners, then along the long sides of the frame;
- We assemble the rafter triangles under the base of the gable roof and connect them with a ridge beam;
- We install doors and windows;
- We cover the wooden frame with plastic film.
Construction does not require special equipment; a small set of carpentry tools, a saw, a jigsaw, a screwdriver will be enough; you will need a sledgehammer, a construction tape measure and a hydraulic level.
Important! All work is done by one person, everything takes 2-3 days, depending on the weather and working conditions.
A team of three people can assemble the wooden structure below in 24 hours of working time.
Selection and preparation of a site
For the construction of a greenhouse or hothouse, almost any plot of land on a personal property is suitable, which is protected from gusts of wind by a fence, tall bushes and trees from at least two mutually perpendicular directions. At least the remaining two, the back and one of the sides, must be fully illuminated by sunlight at any position of the star in the sky.
As a rule, the site is not prepared in advance for the construction of a greenhouse; this makes no sense, since the structure will be installed on supports and will not touch the ground. It is enough to remove large stones, debris, pieces of branches, trim the grass, in general, everything that can interfere with work on the site. Particular attention is paid to the presence of surface slope. It is easiest to work on a flat area; the extension of the supports above the ground will be no more than 20 cm, so it is recommended that the height difference during control measurements at the ends of a three-meter strip should be no more than 5 cm.
Foundation arrangement
In this case, the wooden frame will be installed on a system of metal supports driven into the ground. Each such support is a piece of steel angle with a 4x50 mm shelf. The working end can be left straight or cut into a cone with a grinder. It all depends on how dense and heavy the soil is under the future wooden greenhouse, since you will have to hammer in the supports with a sledgehammer.
First of all, we install corner supports, driven into the ground one-fourth of the length, and carefully measure, first the distances around the perimeter, then check the geometry by measuring the diagonals. As a result, all four supports should form a regular rectangle measuring 6x3 m.
We level them vertically using a building level and drive them into the ground.
To simplify the work, we stretch a marking cord between the corners around the perimeter and drive the remaining supports into the ground.
How to make a greenhouse frame from wood
The advantage of this design is that the frame will be covered with ordinary polyethylene film, the weight of the material is small, so there will be practically no load on the base. Therefore, all vertical posts forming corners and walls will be attached to metal supports using conventional bolted connections.
According to the level of the marking cord, we mark the drilling points at the corners and make 8-10 mm holes with a regular electric drill and a metal drill. Next comes the most difficult part: you will need to align all the corner posts so that the points of attachment of the vertical beam to the metal are in the same horizontal plane. To do this, we cut out seven pairs of posts from the timber and fasten them with bolts to the corners driven into the ground.
The immersion height of each support is adjusted by tapping a sledgehammer, guided by the readings on the hydraulic level flasks installed on opposite stands. We check the vertical deviation with a regular building level.
After we managed to align all the posts, we lay out the top frame along the long walls of the greenhouse made of wood. It turns out to be a rather strange picture, similar to a pair of football goals installed opposite each other. The wooden structure is quite unstable, so we immediately return the remaining vertical posts to their place, and install at least one temporary cross member in the upper part.
Roof installation
The rafter system of the future greenhouse made of wood is formed from seven identical triangles, pre-assembled from 50x50 mm timber. Wood blanks can be cut in advance according to a template, the triangles will need to be assembled individually, checking the geometry of each, it is very important that there is no deviation from the plane, or the height of the central support post is different.
Rafter triangles for the roof of a greenhouse
We lift the finished parts of the roof rafter system onto the walls of the future greenhouse and fasten them with self-tapping screws to the framing beam. The work is very delicate, so it is best to assemble wooden parts in calm weather, and preferably with an assistant. As soon as the first pair of triangles is installed, between them it will be necessary to lay a ridge beam from the same 50x50 timber.
Installation of doors and windows
Before the cladding is laid, it is necessary to manufacture and install two vents. One photo is cut into the upper part of the door, the second is made in the upper part of the opposite side. The ventilation dimensions are small, but this is quite enough to ensure normal ventilation inside the wooden greenhouse.
The door is made from leftover wood and installed in the greenhouse last.
The door is assembled in the form of a regular frame, reinforced in the corners with struts and one central cross member. The wooden door is hung on regular door hinges, and the surface is sealed with remaining polyethylene after the construction work is completed.
Covering installation
Before laying the film, pieces of soft material are sewn with a stapler in places where the material is bent, so that the wood does not tear the lining during gusts of wind. Foamed polyethylene used as underlayment for floor coverings is best.
Polyethylene film is laid on the greenhouse in wide strips of 3 m, the joints between the individual strips are glued with double-sided tape
The laid cladding is fixed using wooden strips nailed on top of the rafters with ordinary nails; only this method of fastening ensures the safety of the polyethylene cladding even in the strongest winds.
The details and nuances that help you build a wooden greenhouse with your own hands are outlined in the video:
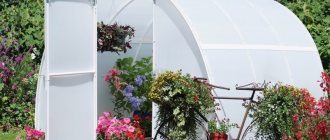
Advantages and disadvantages of the arched shape
Practitioners advise choosing the shape of the greenhouse depending on the purpose of use. An arched building has its own characteristics that you need to pay attention to before purchasing or building.
What is attractive about an arched greenhouse?
The advantages include the following characteristics:
- The area can be increased at any time by adding several sections.
- The structure may be lower than its counterpart with vertical walls.
- Easy to disassemble, carry and assemble.
- It transmits sunlight well.
- Tolerates harsh winters well. The snow just rolls off the roof.
- Resistant to wind loads. Arc roofs can withstand storms better than triangular roofs. The proof is in bird eggs, fragile but strong due to their shape.
- The walls of the arched greenhouse acquire an arched shape only from the middle. This means that tall plants can be grown under them.
- The absence of corners leads to a reduction in the required length of the covering material and an increase in service life.
- An arched greenhouse has a minimum number of seams, unlike a house-like structure.
- Building a building yourself is simple and inexpensive.
- The house for plants, which is carefully looked after, has been in use for more than 10 years.
Disadvantages of an arched greenhouse
There are not many shortcomings in the design, but it is better to know about them in advance:
- Difficult to provide optimal ventilation. Two windows and two doors on opposite sides create a strong draft. To eliminate the shortcoming, practitioners build side transoms along the entire length of the building.
- Limitation of types of coverage. Polycarbonate or film is ideal for an arched frame. It is almost impossible to cover a round structure with glass.
- It is inconvenient to place shelves along the walls.
- The arched shape reflects some of the sun's rays.
- Light enters through the south wall and leaves the room through the north. This is not suitable for sun-loving plants. The disadvantage can be easily eliminated by attaching a reflective film to the north side.
Preparing the greenhouse for use
Before the entrance doors and windows are installed, and plastic film is laid on the wooden frame, it is necessary to do a little preparatory work:
- The bottom part of the greenhouse is divided into three parallel sections; this can be done using boards or partitions knocked down from the remains of wood and lumber;
- In the central section, the turf and grass are removed, and most of the soil is cut out and laid out on the left and right parts, in which the beds for seedlings will be laid out.
If necessary, you can additionally lay a water supply and fill the path with gravel and sand. The easiest way is to complete all the preparation before completing the construction of the greenhouse, since individual parts and structural elements made of wood interfere with the work, especially if the beds have to be filled with purchased soil mixture for a specific variety of seedlings or flowers.
Selecting a location
One of the main questions that gardeners ask is where exactly to place the greenhouse . The best option is an unshaded place that is located at a sufficient distance from country houses and large trees. In other words, you cannot allow shadow to fall on the structure even for one hour a day, as this will negatively affect the yield of vegetables.
IMPORTANT! the door should be located on the leeward side (not on the north side and not on the side from which the wind most often blows).
