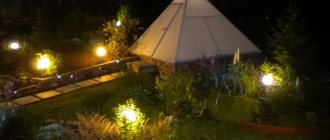
Specificity is now gaining popularity at breakneck speed. People are looking for new solutions so that their yards, gardens, and houses have at least a drop of zest, inspire and surprise passers-by. Few people are interested in banal houses made according to a standard template. The desire to distinguish themselves and build a specific house on their site forces many to turn to designers and professional builders. It is not at all uncommon to have hemispherical structures in the private sector. They are filled with grace, beauty and originality. But the dream of living in such a house under a dome is quite feasible without builders and designers. After all, such a unique residential structure can be built with your own hands from various materials.
Specifics of domed houses
The spherical design can withstand heavy snow loads and resist gusty winds. For regions with harsh climates, domed houses are an ideal option. This is a stable and powerful structure that does not have load-bearing walls. Thanks to the symmetry of the forms, the appearance of the dome is visually reduced when the space inside it increases. Getting the optimal amount of usable space, while the house itself takes up only a handful of space, is the main feature of these extraordinary buildings.
Houses in the shape of a hemisphere weigh little, since modest quantities of materials are used in construction. Thanks to this, you can save quite a lot in the construction of the base. The technology of the dome structure has its tricks, but it can be easily mastered.
Why is this design better than others?
The spherical shape of the geodome helps to harmonize the space, which is saturated with positive energy. Being in a spacious and incredibly cozy round room is good for your health. It’s not for nothing that domed buildings are classified as environmental structures. The advantages of lightweight geodetic structures include:
- no need for a solid foundation, which greatly simplifies and speeds up the installation of the facility;
- no need to use construction equipment, which significantly reduces noise during work.
The construction of geodomes is based on frame-panel technology, which makes it possible to quickly erect a number of structures for various purposes on a dacha or suburban area, for example:
- bath or sauna;
- home or summer kitchen;
- garage or shed;
- gazebo or children's playhouse;
- year-round swimming pool;
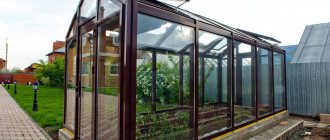
- greenhouse or greenhouse, etc.
Advantages of a house under a dome
An attractive round house has a lot of advantages, which lie not only in its uniqueness and appearance, but in the following useful properties:
1. Spheres can withstand loads better. 2. Spheres with the smallest area occupied by the surface have the largest volume. 3. The time for construction and arrangement of the home is minimal. 4. The ability to install the structure on the simplest foundation. 5. High thermal insulation properties. 6. Minimum material consumption. 7. Minimum material costs. 8. High strength and stability. 9. Original and aesthetic appearance. 10. Excellent sound insulation. 11. Free internal layout is feasible.
Due to their high energy efficiency, domed houses can be built with your own hands in any region. Also, these buildings are not afraid of hurricanes, snowfalls and other natural disasters, as they are much more stable than rectangular ones.
Making a ring for installing a dome on the roof
The question arose: how to firmly and securely fasten the dome to the roof so that it does not swing? I remembered how a decanter is plugged with a stopper, and decided to do something similar.
Firstly: I made the appropriate holes in the roof.
Secondly: I made a horizontal ring on the drum that will press the drum to the surface of the roof: - First, I cut out a ring from corrugated cardboard and glued it to the drum. — I plugged the gaps between the ring and the drum with small pieces of toilet paper and cotton wool coated with PVA glue. — Just like all other parts of the model, the ring was covered with putty and sanded several times.
Read also: How to make a suitcase-shaped box from a shoe box
And here's what the ring looks like after grinding:
And these are the mini-domes for the chapel and bell tower in the process of being painted. There is a matchbox nearby for size comparison.
Construction of a domed house
The nuances of building a domed house
Before constructing a hemisphere with your own hands, you should familiarize yourself with the following points: 1. The foundation of the house. There are no exact requirements for the support of a round building. The structure weighs little, so a shallow strip foundation would be an excellent option for it. 2. Material. The hemisphere is constructed mainly from wood. Taking into account the expected loads on it, the required cross-section of the beam is selected, usually 50x50 mm. It is important to use timber with an increased cross-section to create a dome, which they plan to sheathe inside and outside. You can find unsurpassed dome structures made of stone or concrete.
3. Assembly method. For the construction of large domes, it is essential to use connectors. Five-beam or six-beam connectors combine wooden structural elements. For modest domes, connectors are inappropriate. If there are enough skills in construction and woodworking, then you can generally refuse to use them. At the same time, it is necessary to make the ribs specifically to suit each other’s build. This ensures that there are a minimum of seams in the connection of all components of the sphere. 4. Roof. To create a roof, it is preferable to use flexible tiles; the use of roofing felt and aluminum sheet roofing materials is also acceptable.
DIY construction
The most suitable structures for dome construction can be considered small greenhouses, cozy gazebos or country houses. First you need to choose a place to build. If it is a greenhouse, then you need to find a well-lit area. A slightly shaded area is suitable for a house or gazebo . The area for any of these buildings is leveled, and then all debris and tree roots are removed from it.
Greenhouse
A dome greenhouse is the easiest to build.
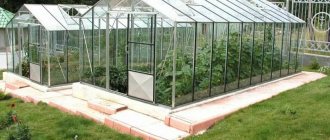
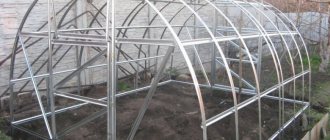
To assemble it, you do not need a foundation, and the material for the base can be ordinary boards, bars or metal pipes. On a previously prepared surface, it is necessary to begin assembling the base of the greenhouse-dome. First of all, the triangles are assembled and fastened together. In order not to confuse the edges, they must be signed and checked against the drawing. If the greenhouse is small, then during assembly the connecting connector should be replaced with simple mounting tape and fastening materials. The manufactured geodesic dome should be covered with a simple film. covered with polycarbonate sheets will look much better . Triangles cut from polycarbonate must be secured to the frame, and all joints must be covered with decorative slats. From the street, the geodome can be decorated with decorative stone, flowers can be planted, and a small fence can be installed. Such a domed greenhouse will be a unique decoration for any country house.
Alcove
You can build a gazebo in the form of a geodesic dome. To do this, you must adhere to the following recommendations:
- the best material for the construction of such a gazebo is a profile pipe;
- the ends of the prepared pipes must be flattened or bent at an angle of 12 degrees;
- holes should be made at all ends of the tubes;
- to assemble the structural parts, a connector is not needed, you just need to connect the tubes with bolts.
After manufacturing the structure of the domed gazebo, an equally important stage of work follows. It consists of covering a round gazebo with a dome. A variety of materials can be used for this. If the geodesic dome structure is not completely covered, and a couple of sections of the gazebo are left open, then they can be decorated with beautiful fabric. In such a comfortable gazebo, you can happily spend your free time with family and friends.
House
The dome can become the basis of a unique house on a summer cottage. The main difference from a gazebo and a greenhouse is the need to build a foundation. In order to build a domed house, you should adhere to the following recommendations:
- you need a well-insulated foundation;
- special corner posts are attached to the base of the foundation, which are strengthened with horizontal struts;
- the structure of the domed house is assembled;
- The outside of the house must be covered with plywood sheets.
Having installed the door and window frames, it is worth starting finishing the geodesic house from the inside. Good insulation is placed in all openings, which is sewn up with sheets of plywood. In order to build a domed house, no more than three months of work are needed. The shape of a geodesic dome will help save on the amount of materials .
When living in such a house, you can appreciate the main advantages of this design:
- a small area of the ceiling and walls reduces heat loss;
- rounded walls help air circulate well, creating a comfortable microclimate.
A domed building is the best option for a functional, cheap and unique structure on the territory of a summer cottage.
0
( 21 ratings, average: 4.38 out of 5)
Back
How to make remote lighting control
MORE
Necessary materials
Before construction, it is necessary to prepare absolutely all materials and devices, so as not to delay the construction in the future by searching for them.
Kit for constructing a hemisphere with your own hands: 1. Wooden beam. 2. Galvanized steel sheet. 3. Screwdrivers, screws and fasteners (screws, nails, etc.). 4. Foam for installation. 5. Roofing material. 6. Roofing scissors. 7. Corner and building level. 8. Hammer. 9. Roulette. 10. Hacksaw. 11. Electric jigsaw and drill. 12. Bulgarian. 13. Wood processing machine. 14. Brushes. 15. Protective gloves.
Dome building project
The dome housing project can be found on the Internet or ordered. The presence of drawings is mandatory, without them it is almost impossible to build a structure in the shape of a sphere with your own hands.
A selection of drawings for a dome house is presented in the pictures below.
Definition of a geodesic dome
Experts believe that most people have no idea about such a building design because it is very rare. That is why it is worth describing in detail all the features and technical characteristics of a geodesic dome .
Inventor Richard Fuller developed buildings with a load-bearing mesh shell. First he took a very strong structure in the form of a sphere and divided it into small triangles, whose sides were located on regular geodesic lines. Richard Fuller's calculations were able to make the construction of the dome simple and accessible to anyone. The inventor believed that such a unique building design was supposed to solve the problem of quickly building a cheap and comfortable house. This development was not appreciated by experts, and it is not used in mass construction . However, for building a unique cafe or a beautiful summer house, a Fuller geodesic dome is the best option.
Richard Fuller's design is a fairly stable design. A geodesic dome distributes the entire mass evenly, can withstand enormous loads and reduces financial investments in the construction of the foundation. The unique spherical shape is able to withstand the most powerful gusts of wind. Savings in the construction of such houses are due to a reduction in the total side surface area. In the dome itself, round walls help ensure high-quality air circulation, creating a comfortable microclimate.
The main disadvantage can be considered very complex, compared to simple houses, mathematical calculations. Since the structure consists of a huge number of parts , it is necessary to insulate quite a lot of joints. The geodesic dome has no other significant disadvantages.
Preparatory work
At the preparatory stage, the following must be done:
1. Project selection. The following points should be displayed in the project drawings: - the shape of the building; - square; - number of rafter elements; — cell parameters; — number of connectors, etc. 2. Selecting a location. At the chosen location for building the dome, markings should be made in accordance with the dimensions of the future building. 3. Manufacturing of necessary products for construction. Based on the drawings, you need to make your own connectors, rafters and plywood elements. 4. Materials processing. Wood naturally needs to be treated with an antiseptic; if metal connectors are used, they are treated with anti-corrosion substances.
Construction instruction
Dome: calculation, production of parts and assembly
1. Calculation of the diameter of circles.
This is a diagram of the dome, which I took from a book on the construction of Orthodox churches:
I copied this drawing into my notebook. Each layer must be cut from corrugated cardboard. I measured the thickness of the cardboard and divided the drawing with horizontal lines into layers of appropriate thickness.
If the circle has a wider diameter at the bottom, then this is the size that needs to be cut. And in order for the transition between the layers of cardboard to be smooth, carefully cut off the excess cardboard in the upper part of the circle using small scissors.
2. Cutting circles from corrugated cardboard.
We cut out circles from cardboard using an awl and a knife (see Cutting out shaped parts from corrugated cardboard). In the center of each circle a slot is made for a cross on which the circles will be strung. The bottom circle should have a hole inside the diameter of the drum - then it will be possible to place the dome on the drum, it will hold better:
Now you need to assemble the dome - you need to string cardboard circles onto a cross, greasing each circle with glue.
4. Pasting with paper, puttying and sanding.
When the dome is assembled, we process it using technology, which is described in detail in the article Putty and sanding.
First you need to cover the dome with toilet paper. In this photo you can see two domes. On the right - the dome is assembled from circles of cardboard, but is not yet covered; the layers of corrugated cardboard are clearly visible here. On the left - the dome is covered with paper, all the cracks are closed:
Then you need to putty and polish using the technology mentioned above. Thanks to this, the domes will become durable.
There are two mini domes in this photo, they are covered with putty, but not yet sanded. Their shape is clearly visible here: the bottom cardboard circle is made in the form of a ring, this will allow you to tightly “put” the dome on the drum so that it holds tighter. For this you also need a long pin, which is a continuation of the cross (large domes also have pins, but they are short and not visible in the photographs):
Step-by-step instructions for constructing a dome structure:
1. Creating a foundation. It is important to thoroughly clear the area where the sphere will be located from fertile soil layers. The excavation is filled with crushed stone and compacted. A mound of sand should be made on top of it and compacted as well. The best option is a pile foundation. The number of holes for the foundation and their placement must be done according to the diagram.
The support made of thick pipes deepened into the ground is quite strong, and thanks to the concreted reinforcement, the possibility of deformation of the piles is eliminated; it is also not so difficult to build this support with your own hands.
2. Foundation piping. This is a structure on which an entire house will stand, so its construction should be approached with particular scrupulousness. It is better to stock up on 10% more boards than indicated in the project, since after sawing there may not be enough meter for strapping. It is necessary to create 5 trapezoids from the beams. These trapezoidal-shaped elements will be laid on piles.
Before fastening the strapping, it is important to make sure that it lies clearly horizontally using a level. All elements are connected to each other with screws, and to the foundation - with anchor bolts 40 cm long. Instead of anchors, in order to save money, you can use reinforcement with a diameter of about 20 mm, and it is even more resistant to fastening with anchors. A hole should be drilled in the head of the pile and the reinforcement should be hammered into it with a sledgehammer. It is important to put roofing felt on the pile heads before connecting them to the beams. It is recommended to fasten the boards with additional corners, increasing their stability and fixation to 100%.
3. Arrangement of support beam. The geodesic house frame is assembled on support posts. A suitable beam is installed vertically at the corners of the trim. All vertical posts are fastened with screws. It is important to cover finished vertical walls with boards so as to prevent water and snow from entering the house.
4. Creating frames for windows and doors. In the manufacture of frames for mounting doors and windows, pairs of horizontal and vertical boards are used. It is advisable to connect the bars using the tenon-to-groove method, additionally reinforced with screws.
5. Making ribs for the main frame. Focusing on the project, you need to make panels of triangular and trapezoidal shapes in sufficient quantities with your own hands.
6. Frame assembly. Connectors are often used to connect finished elements; you can make them yourself or purchase ready-made products in a store. In order to make fasteners yourself, you need to have welding skills, a pipe and a metal sheet. It consists of a pipe and 4.5 or 6 metal petals welded to it
.
You can connect the ribs of a domed house without connectors if you assemble the dome from triangular-shaped elements, the boards of which are precisely fitted. Then all the panels of the outer dome are connected with screws.
When assembling the frame, you must leave openings for doors and windows. The assembly and finished dome are shown in the photo below.
7. Exterior finishing. For the exterior finishing of a hemisphere, it is easier to use roofing felt. Triangles should be carefully cut out of it, matching the inside of the triangular panels used in the construction of the frame. These triangles are fixed with special glue or melted resin on the dome.
8. Decorating a house in the shape of a dome. The following actions relate to the interior arrangement of the premises: - installation of doors and window glass; — arrangement of water supply; - electric installation work; — floor installation; — installation of a ventilation system; - insulation of the building. You can see how the domes are arranged inside in the photo below.
Ergonomic domed houses look great on the outside, but inside, thanks to a flight of fancy, you can create any layout and it will be amazing. And the main thing is that constructing such geodetic buildings with your own hands means significant savings on construction work and materials, as well as on operation.
Main types of geodetic structures
The designs of geodomes differ from each other in the frequency of dividing the surface of the sphere into triangles. The splitting frequency is usually denoted by the letter V. The number next to V indicates the number of different structural elements (ribs) used to construct the frame. The greater the number of ribs used, the stronger the geodome.
There are six types of geodomes, of which only five are actively used in the construction of objects:
- 2V dome (the height of the structure is equal to half the sphere);
- 3V dome (the height of the structure is 5/8 of the sphere);
- 4V dome (the height of the structure is equal to half the sphere);
- 5V dome (the height of the structure is 5/8 of the sphere);
- 6V dome (the height of the structure is equal to half the sphere).
It is easy to notice that the hemispherical shape of the object is achieved only with an even splitting frequency.
Diagram of a 2V geodesic dome frame for creating small structures. Ribs of different lengths are highlighted in color and indicated by letters
For small country houses, a 2V dome design is usually chosen. The frame is assembled from two types of ribs, indicated on the diagrams for convenience by the Latin letters A and B, and also highlighted in additional blue and red. The blanks are also color-coded to simplify the process of assembling the frame structure. To connect individual edges of the geodesic dome frame, special nodes called connectors are used. When installing a 2V dome structure, three types of connectors are used:
- 4-terminal;
- 5-terminal;
- 6-terminal.
To calculate the length of the ribs and the number of connectors, online calculators are used, into which the initial data of the object is entered: radius of the base, frequency of splitting, desired height of the dome.
Three types of connectors used to connect dome frame ribs that converge at one point (the vertex of the polygon)
Large hemispherical objects, the base diameter of which exceeds 14 meters, are built using 3V and 4V domes. With a lower frequency of splitting, the ribs are too long, which complicates their preparation and installation. When building a 3V dome, the length of the ribs is almost three meters. Assembling a frame from such long materials is quite problematic.
By choosing a different type of dome (4V), the length of the ribs is reduced to 2.27 meters, which greatly simplifies the assembly of the dome structure. Reducing the length of structural elements leads to an increase in their number. If a 3V dome with a height of 5/8 of a sphere has 165 ribs and 61 connectors, then a 6V dome with the same height of ribs already has 555 pieces and 196 connectors.
A pile foundation for the installation of large dome structures allows the structure to provide the necessary strength and stability
