Today, it is not a problem to enjoy a vegetable salad in the middle of winter: there is a rich assortment of plant products in stores all year round. But, besides the fact that the price for it is not the most affordable, and the taste leaves much to be desired, the benefits are also minimal, but it is quite possible to “enrich” the body with various chemicals. Therefore, despite the abundance in stores, winter greenhouses, which provide the opportunity to grow environmentally friendly and tasty vegetables or herbs for your family, have not lost their relevance. However, compared to summer greenhouses, winter greenhouses are more complex both in terms of construction and in terms of operation of the structure, and are more demanding in terms of materials. The participants of our portal are mainly engaged in seasonal greenhouses, but they also have experience in the construction and use of year-round greenhouses.
Consider:
- Structural features of winter greenhouses.
- Arrangement of winter greenhouses.
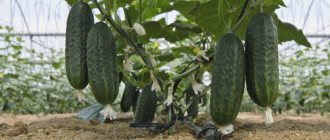
- What to grow in winter.
Metal profile frame
First, arched arcs are installed from one end of the polycarbonate winter greenhouse to the opposite wall.
Each part is leveled and attached to the base beam. Then the upper and lower guides are screwed or welded to the arches. This creates strength and stability of the structure.
Secure the polycarbonate using thermal washers and self-tapping screws. The fittings should not be tightened too tightly, and the polycarbonate sheets should not bend.
There is an easy way to attach a polycarbonate sheet to the end of a future greenhouse. It is necessary to cut a square with sides equal in length to the bottom of the greenhouse. Then attach the sheet to the end and carefully cut off the excess polycarbonate along the edges.
The idea of an eco-greenhouse and its structure
Now let’s move on to the description of the ecogreenhouse and find out which of the permaculture ideas it intersects with. The main feature of the building is that it is combined with a chicken coop. These birds are distinguished by a very high body temperature of + 40°C. And if you equip them with a separate room for living and connect it with ventilation to the greenhouse, then warm air with a high content of carbon dioxide and ammonia will flow into the latter, which will have a positive effect on the condition of the plants.
Features of the ecogreenhouse
Additional heating of the eco-greenhouse is carried out using heat accumulators. In the simplest version, these are containers with water or stones, placed in the same room with plants under the rays of the sun penetrating through polycarbonate, glass or film. During the day, the battery heats up and stores energy. At night, when the sun goes down and the outside temperature decreases, these stones or water give off heat and thus warm the soil and the crops growing on it.
Design example
In addition to producing heat and carbon dioxide, chickens in eco-greenhouses perform other tasks:
- production of eggs and their shells - natural fertilizer;
- production of manure - one of the components of compost;
- pest control on open ground - chickens eat insects;
- natural cultivation of open ground - chickens rake it in search of food.
One example of the use of permaculture technologies is the “chicken tractor” - a portable home for birds that is transported through vegetable gardens or fields. Chickens, looking for insects, loosen the soil and destroy pests, feeding along the way
The diagram shows the interaction of some of the components of a permaculture site.
Compost produced using chicken manure also finds its way into the ecogreenhouse as fertilizer for the garden beds and another natural source of heat for the soil. As for water, in such greenhouses it reaches the plants through drip hoses. At the same time, it partially accumulates due to precipitation in open containers equipped with filters.
Advantages and disadvantages
Before construction begins, a diagram for construction should be developed. If you plan to grow a winter garden, then you need a certain temperature regime, thanks to which it will be possible to grow tropical plants. For any structure, if it is created with your own hands, a solid foundation and a reliable frame are required.
Greenhouses intended for use all year round have their advantages and disadvantages:
- in a trench greenhouse, vegetables and fruits are grown all year round;
- the underground structure is characterized by cool temperatures on a hot day, which is necessary for most plants;
- these types of structures can be made independently using a diagram or drawing;
- have a low cost - during construction you can use budget building and finishing materials.
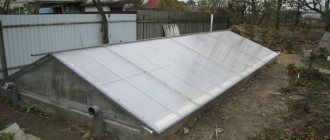
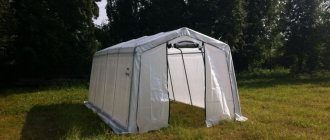
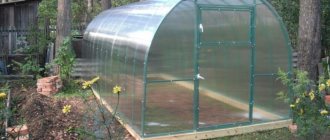
Particularly popular are hangar models covered with polycarbonate – this is evidenced by reviews from the owners.
Such greenhouses have many advantages:
- low cost;
- ease of assembly;
- excellent protection from snow and rain;
- plants receive the maximum amount of light.
Polycarbonate for building a greenhouse has excellent thermal insulation properties, it is very flexible, which allows it to be used for an arched greenhouse. Polycarbonate is a very light material - it is 16 times lighter than glass.
Metal-plastic can also be used for construction. Although independently constructing a metal-plastic greenhouse is not an easy task, they usually resort to the services of specialists for this. For such structures, it is better to make the frame to order - the result may not be a very profitable building in financial terms.
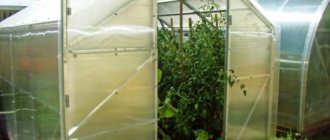
Installation of transparent greenhouses for use all year round
Scheme of a greenhouse with a metal frame.
Since they are most popular due to their practicality, it is worth considering the construction of a year-round transparent greenhouse using this material as an example. If you plan to grow vegetables and herbs in a greenhouse during the cold season, it is necessary to plan the greenhouse so that it stands on a foundation and in the future it is planned to place boxes with soil in it, since the cost of heating the ground, as a rule, is not justified. In this case, it is best to do internal heating based on heating elements or infrared lamps, but more on that later.
So, it becomes clear that a year-round polycarbonate greenhouse is a rather complex structure, which involves the construction of at least a minimal foundation, and in addition, double walls and a roof. When carrying out the work you will need the following materials and tools:
A greenhouse built from aluminum will last much longer than its wooden or plastic counterparts.
- foam blocks;
- concrete;
- insulation materials;
- steel pipes for frame
- sheets of cellular polycarbonate;
- mounting elements (thermal washers, self-adhesive, self-tapping screws, etc.);
- shovel;
- Circular Saw;
- facing materials, etc.
It is recommended to install a polycarbonate winter greenhouse on a foundation. In this case, it is not necessary to form a really strong foundation like for a building, since the foundation will be used to support a very light structure. To form the foundation for the greenhouse, you first need to dig a 50-centimeter pit. In order for the pit site to be as level as possible, you need to constantly check the level. Further along the perimeter, where the walls of the greenhouse will be located in the future, a foundation base is formed from foam blocks held together with cement mortar.
It is very important that the height of the foam block base is at least 10 cm above the ground level. Next, you need to arrange the base for the future floor; for this, first place a pie of 20 cm of sand, 25 cm of pebbles or crushed stone on the bottom
Can be filled with concrete and covered with tiles. After all the preparation work has been completed, you can begin installing the frame. It is worth noting that a steel frame is best suited for a year-round greenhouse, as it has sufficient rigidity for the greenhouse to easily survive possible heavy snowfalls. If it is not possible to purchase a ready-made frame, it can be welded from old steel pipes.
Block greenhouse
Year-round greenhouse
A block year-round greenhouse is built as nearby gable or arched structures that touch each other on the sides. At the junction it is necessary to make several support posts that can replace the wall. As a result, you can reduce the financial costs of building a greenhouse, but at the same time make a very impressive and functional structure that will serve for a long time if assembled correctly. The roof can also consist of several sections rather than one. Several gutters are also made in it to drain water that can accumulate during heavy rainfall.
The size of the greenhouses, their length can be absolutely any, and it all depends on how much planting the gardener will do in the greenhouse, and for what purpose they do it - for personal cultivation of crops, or for more extensive industrial production of goods. You can cover the greenhouse with the good old and well-known polycarbonate or glass. Film or any other agronomic material can also be used - it all depends on the degree of financial security of the gardener and on what materials will be most available to him in a particular period of time.
Block greenhouses have a number of advantages over any other types of greenhouses. These benefits include the following:
- the design turns out to be the most financially economical when compared with any other types of greenhouse buildings - at the same time, it is a very durable greenhouse that reliably protects plants from strong winds and drafts, but at the same time warms them up to the most comfortable temperatures. In addition, the greenhouse is very resistant to snow loads, it is not afraid of any precipitation - all parts of the greenhouse are perfectly illuminated, which is also an undoubted advantage of this design in comparison with other types of greenhouses - it is very easy to place an irrigation and heating system inside, and you can also install another lighting system so that the plants are illuminated not only during the day under natural rays, but also at night - if you make windows in the greenhouses, then everything inside will be perfectly ventilated through them. Also, vents can be placed not in the walls, but on the slopes of the greenhouse roof.
There are also disadvantages to this design
Due to the fact that a large number of technological paths need to be made inside, which are necessary for the gardener, there is not so much useful space left in the greenhouse, which is worth paying attention to when designing. The second disadvantage is that in some places the roof will deepen, snow or any other precipitation may accumulate there, and they will need to be removed from there yourself
It will be possible to install heating, but this will require additional funding for this building, which is worth paying attention to. In general, such greenhouses are mostly used to grow plants on an industrial scale, and therefore they are rarely installed on private land. In addition, for a gardener to privately grow plants, it is simply not economically profitable to install a block-type greenhouse on the site, so he needs to choose from the other types of greenhouses mentioned above.
Kinds
In order to have a harvest of fresh vegetables and fruits all year round, use:
- single-pitched structures;
- gable;
- arched;
- block structures.
A lean-to greenhouse can be called the simplest structure. Such greenhouses can often be seen attached to the main residential building.
Lean-to greenhouses have the following advantages:
- the design is inexpensive;
- has good thermal insulation properties, since the main wall creates an additional heat source;
- no snow cover remains on the sharp corners of the slope.
Single-pitched greenhouses are used only for home use, where you can grow fresh herbs for the table all year round or set up a winter garden. They are not used for industrial buildings.
Gable greenhouses are located from north to south. They are a separate building with different lengths and widths up to 12 meters.
This structure has its advantages:
- used in small farming, suitable for private use;
- can have different sizes: from 30 to 300 sq. m, which allows to reduce heat loss in the room;
- building with good thermal insulation and lighting.
A hangar greenhouse is a structure made of a gable or arched structure and has a maximum width of up to 25 meters. Due to the fact that there are no racks inside the greenhouse, you can make maximum use of the space inside the structure. Hangar greenhouses have a large width and a roof angle of up to 30 degrees, which means additional costs will be required to provide heating. For coating, reinforced film or polycarbonate is often used.
Hangar greenhouses have the following advantages:
- thanks to their design, plants receive the maximum amount of lighting;
- there is the possibility of using mechanics for maintenance;
- There is no need to remove snow from arched structures manually, as it comes off on its own.
Block structures are a series of greenhouses that are connected at the sides. A support post is placed at the junction points, which will reduce costs. The roofs are divided into separate sections with gutters for water drainage. Block structures can have different lengths - sometimes it reaches more than one hectare, so this type of greenhouse is used only for industrial use.
The advantages include the following:
- the cheapest design for industrial needs;
- has high resistance to wind and snow cover;
- all parts of the greenhouse have excellent lighting;
- you can easily place all systems for operation: heating, watering, lighting;
- the greenhouse is easily ventilated through the roof, on which vents are placed.
The disadvantages of this design can be considered that only up to 70% of the area is used. In addition, melt and rain water begins to accumulate in the recess on the roof, which requires an additional system for melting snow and draining melt water. Block tables are used only for industrial needs; they are not recommended for use in private households due to their size and cost.
If you plan to build a greenhouse on a small plot of land, underground or in-depth buildings are best suited, although for many, greenhouses built in the form of a house or an arched structure are familiar. If you build structures of this type, the plants will receive 20 to 35% sunlight, and when cold weather sets in, they will be quite cold.
School physics teacher Ivanov proposed a different construction option with a pitched roof, which has a slope of 20 degrees and a tightly closed wall at the back, which allows maximum use of solar energy. Thanks to this design, you can get a harvest much longer.
The construction technology is called Scandinavian, as residents of European countries with harsher climates began to use it. This unique design has virtually no disadvantages. Its main feature is that, thanks to a certain slope of the roof, the sun's rays do not slide across the surface, but fall perpendicularly - this allows you to harvest the crop much earlier.
Peculiarities
Many summer residents are accustomed to greenhouses, inside which temperature changes are felt. For greenhouses that are located in the ground, these disadvantages do not exist. In such buildings, the walls work like a thermos, so you don’t have to spend a lot of money on heating and electricity. A thermos greenhouse allows you to obtain a harvest of fresh, juicy vegetables and herbs all year round.
Underground structures are suitable for growing annual plants and perennial crops. In the greenhouse you can plant small ornamental and exotic trees and shrubs, and here you can also organize the production of roses or other flowers. Such a year-round greenhouse will allow you to regularly collect vegetables, fruits, herbs and citrus fruits not only for your own use - gardening products can be sold on the market, thereby creating your own small business.
Final works
Greenhouses for year-round use require a rafter system that is nailed to a support. After this, the jumpers can be removed. A ridge beam should be installed under the rafters. Now the front supports are placed under it. Their size is 880 millimeters. Greenhouses for year-round use with heating require the installation of a stove at the last stage, which is preferably located in the vestibule.
- Year-round greenhouse - myth or reality
- Installation of transparent greenhouses for use all year round
- Installation of a polycarbonate greenhouse
- Construction of a year-round mixed greenhouse
- Heating systems for greenhouses
- Additional lighting for greenhouses
Important Rules
Greenhouses should not be installed in dark places with minimal sunlight. Plants will need the maximum amount of solar heat to grow and develop quickly. In case of strong heating, the roof of the structure is shaded using improvised methods, for example, painted over with lime. The white color will repel excess ultraviolet radiation, but the plants will not be deprived of light.
Passage space
Like any structure, the greenhouse will need minor cosmetic repairs or major finishing during use. The owner must have easy access to it in order to quickly deliver the necessary building material or irrigation equipment. After a certain amount of time, the soil in the greenhouse needs to be changed. Her transportation should not be difficult.
The optimal size of the structure is selected depending on the area of the site, the amount of intended harvest and the season. For summer greenhouses, small removable structures are suitable, which serve more functions in the spring. During the hot period, they are disbanded, removing the roof and walls, and by winter they are put away in an outbuilding. Large stationary frames are installed for the winter greenhouse. Such models will withstand any unfavorable precipitation and protect the crop from frosty winds.
Basic costs
Assembling a greenhouse: how to assemble a Kinovsky greenhouse, instructions and videos, do-it-yourself photos, summer resident and hero A
winter greenhouse as a business requires significant initial investments. These include:
- Purchase or lease of land. The price depends on the distance. It is worth considering that a farm located far away increases transportation costs.
- Construction and equipment of a greenhouse. The most expensive option is a fully automated structure with a climate control system, drip irrigation, self-ventilation, fogging and shading.
- Purchase of planting material. The cheapest option is to buy seeds. Grown seedlings and cuttings for flower rootstocks are more expensive. In the future, you can allocate an area in the greenhouse for the constant cultivation of seedlings for yourself and for sale.
- Registration of a farm or individual entrepreneur. Necessary for entrepreneurs planning active work with retail and attracting employees. A small greenhouse on its own plot does not require registration, but it limits the farmer’s ability to find buyers for his products.
In addition to one-time expenses, the farmer also faces monthly expenses. These include:
- expenses for heating, lighting and plumbing;
- purchase of fertilizers;
- fare;
- employee salaries.
Do-it-yourself gable year-round greenhouse
Year-round greenhouse
The second type of greenhouse is a gable greenhouse. In fact, this is not one year-round greenhouse, but two, which are oriented in two directions of the world - south and north. On the north side it is recommended to install an insulated vestibule, and there can also be a very ordinary blank wall that will protect the greenhouse from cold winds, drafts or possible frosts. The size of the greenhouse depends on what planting area the gardener plans to place inside, as well as on how he basically sees it. The width can vary from five to twelve meters, sometimes more, the length can also be anything. The slopes have an angle from 25 to 35 degrees, again it all depends on the design and on the project, which is prepared in advance by gardeners and designers.
Despite the fact that the design seems very simple, it is particularly durable. It is recommended to make the frame on a metal base, and if these are small greenhouses, then wood will do. The slopes rest against racks, which are arranged in several rows, which makes the greenhouse even more solid and durable. In order to cover the slopes, you can use glazing for stationary purposes or frame glazing. Polycarbonate may also be suitable for these purposes, but its thickness must be at least six centimeters so that it can withstand this structure and not collapse. It is necessary to make a ventilation system in the roof, as well as in several places in the wall, so that the greenhouse does not become stuffy, mustiness does not form and, accordingly, various bacteria do not develop that will provoke diseases.
Gable greenhouses, of course, have their own special advantages. Among them are the following:
- gable greenhouses are ideal for use in private households, as well as on small farmsteads, since they are quite miniature and compact - the size of the greenhouse can vary depending on the interests and needs of the gardener. In general, it can be 30 square meters, or maybe ten times more - everything is determined by the guidelines and desires of the gardener himself in the construction of this structure - due to the fact that the greenhouse perfectly combines a convenient width and height, heat loss in such greenhouses is reduced to minimum. Here we should say thanks to the convenient and truly universal design.
Of course, it is worth paying attention to the fact that in gable greenhouses, if it is of a suitable area, then it is possible to organize some mechanisms, thanks to which the greenhouse can sometimes even transform, change its size, and its purpose. This is, of course, a small drawback
Another drawback is that the slope has a very small angle of inclination. Because of this, precipitation in the form of snow may accumulate in it, and therefore the gardener will need to independently clean the greenhouse from snow drifts. In general, this greenhouse design is in great demand today, and it can be found on the territory of various household plots.
Selection of materials
What to build from? There are many options. You need to choose such a material that the structure will last a long time, be strong, airtight, and economical. In this regard, the old film and glass classical buildings, equipped with frame structures using wood, are definitely a thing of the past.
Why are film, glass and wood not suitable?
Greenhouse made of wood and glass - photo
- Even a heavy-duty film can tear and heat will leak.
- Over time, cracks will certainly form in the frames and between them, through which heat will also escape.
- Glass breaks and in one layer has low heat transfer.
What materials to choose for a year-round greenhouse?
- The frame structure can be used when installing metal-plastic frames, provided they are double-glazed.
- The walls of the greenhouse can be made of polycarbonate on a metal base.
- For a year-round greenhouse, a brick building is suitable.
Reliability, long service life, protection of growing crops - these are the main parameters by which greenhouse building materials are selected.
Greenhouse heating
One of the most important aspects in the construction of a greenhouse is heating. This statement is quite reasonable, since plants, as is known, can neither grow nor produce crops without heat. Unfortunately, it is not always possible to provide heating to the greenhouse from the house itself. However, there are other methods of supplying a greenhouse with heating. The most common and convenient are electric radiators, infrared radiation, convectors, heaters.
Infrared devices would be a fairly economical and effective option. They not only provide plants with heat, but also provide a source of light, which is also necessary for the growth of vegetable crops. It is wise to place infrared equipment under the ridge to distribute light and heat evenly throughout the greenhouse.
Lean greenhouse for year-round cultivation
Greenhouse for year-round cultivation
Let's start with a description of a lean-to greenhouse. This year-round greenhouse is the simplest in design, and it is intended not for seasonal, but for year-round use. It consists of a blank wall, which is located at the back and faces the southern part, as well as a glazed slope, which faces all other cardinal directions (it is recommended that the plants receive enough lighting and sunlight and do not suffer from its lack). The wall, which is located at the back and is blank, is recommended to be built either from brick or concrete. At the same time, these structures can also retain heat in the greenhouse, which, of course, is a definite advantage. Lean-to greenhouses look very decorative and are not at all bulky; they can also be built not separately, but as extensions to the main house or to another outbuilding that is already located on the site. Then the gardener will save not only building material, but also his own time, and this plays a significant role taking into account the modern rhythm.
As for the frame, it is usually made of wooden beams. The slope can be either straight or slightly curved; everything here depends solely on the wishes of the gardener himself. Instead of glass, you can use polycarbonate or durable reinforced film - it all depends on your budget level.
There are also many advantages that a lean-to year-round greenhouse has, and we cannot simply ignore them:
- this is a fairly budget-friendly design, its construction will not require too much finance - the greenhouse retains heat perfectly, especially taking into account the fact that it can be wall-mounted - this is also another of its undoubted advantages - the main wall of the greenhouse is necessary in order to become an additional heat accumulator, since it is made of heat-insulating materials, and this is important - due to the fact that the angle of the slope is sharp, snow does not linger on it, it immediately rolls off, allowing sunlight to penetrate into the greenhouse through glass, polycarbonate or film . Also, this type of greenhouse has several disadvantages
Firstly, the area of the greenhouse can be quite small, so that crops can be grown inside it only for personal use. Secondly, in order for light to penetrate perfectly inside the greenhouse, it is necessary to specially arrange racks and terraces, and the design can take quite a lot of time, as well as the implementation of a given idea. Thirdly, it is necessary to maintain the orientation of the greenhouse with the slope towards the sun. If you design the greenhouse incorrectly, or incorrectly turn it to the wrong side of the world, this can lead to the fact that inside the greenhouse there will be a continuous falling shadow and, accordingly, there will be absolutely no use from it
This type of greenhouse also has several disadvantages. Firstly, the area of the greenhouse can be quite small, so that crops can be grown inside it only for personal use. Secondly, in order for light to penetrate perfectly inside the greenhouse, it is necessary to specially arrange racks and terraces, and the design can take quite a lot of time, as well as the implementation of a given idea. Thirdly, it is necessary to maintain the orientation of the greenhouse with the slope towards the sun. If you design the greenhouse incorrectly, or incorrectly turn it to the wrong side of the world, this can lead to the fact that inside the greenhouse there will be a continuous falling shadow and, accordingly, there will be absolutely no use from it.
Heating in a year-round greenhouse: types and diagrams
Vital for crops in a year-round greenhouse:
- watering (soil and air humidity);
- illumination;
- air circulation in space;
- heating.
Let us dwell in more detail on heating a year-round greenhouse. For these purposes, different types of heating systems are used.
Heating a polycarbonate greenhouse with an electric water heater
Electric heating is very popular among many greenhouse owners. There are various types of devices that demonstrate effectiveness during the operational period.
- Convectors.
- Heating mats.
- Heat guns.
- Electrical cables and other accessories.
Regarding the technical part, the difficulty here is the installation of special sensors and control of various modes.
Electric heating system
Stove heating of a greenhouse
A simple way to heat a heating system, taking into account the design. The stove can be located in different parts of the greenhouse, but it is preferable to install it near the entrance. When smoke passes through the chimney, the heat partially warms the crops planted in the building.
Advantages:
- A simple, well-known device.
- You can heat with wood and any other waste, which will save money.
Flaws:
- Inability to distribute heat evenly.
- Temperature changes
- The walls of the structure become too hot during combustion.
Construction of a furnace for heating a greenhouse year-round
Biological heating
To obtain heat, fresh mullein, branches, leaves, sawdust, etc. are used. During the decay of organic substances, heat is released.
To arrange the system inside the greenhouse, high beds are made, which can be additionally covered with plastic film. Elements of further rotting are first laid out on the bed, and they are covered with fertile soil on top.
Arrangement of a bioheated greenhouse in a greenhouse
Water heating of a year-round greenhouse
A fairly common option for heating a greenhouse structure.
To create a water system you need:
- Boiler.
- Pipes and radiators.
- Pump.
Operating principles:
- Water heated by electricity or kerosene circulates through the pipes under the action of a pump, moving heat.
- The cooled water flow returns to its original place and heats up again.
- The cycle continues until the optimal temperature in the building is reached.
Scheme for heating a year-round greenhouse with water heating
Gas heating
To install the system, gas heaters and burners are needed.
Work principles:
- Heat is obtained by burning gas in burners located in the greenhouse structure.
- Burners can be infrared or injection.
- When gas burns out, steam and carbon dioxide accumulate in the air, which are needed in small quantities for the development of plants.
Gas heating system
Air heating
With this heating system, air serves as the coolant.
A polyethylene sleeve is laid around the perimeter of the structure. Through which warm air is directed.
The advantage is quick heating of a year-round greenhouse of any size.
The disadvantage is a strong decrease in humidity.
Infrared heating
For infrared heating use:
- infrared heaters;
- infrared lamps.
The system has high efficiency. First of all, plants and soil are heated and only then the heat from them enters the atmosphere. Moreover, the temperature at the bottom of the building is higher.
Heaters operate intermittently, which helps save energy. To do this, the system is equipped with a thermostat.
Infrared heating system
Microclimate support system
An all-season greenhouse model must have a system for maintaining an optimal microclimate for plants, in hot and cold weather.
Greenhouse heating
Various types of heating systems are used to heat rooms:
- Electrical - imply that the building has the ability to connect to the electrical network. They are represented by all kinds of convectors, fireplaces, etc.
- Stove rooms are located at the entrance and imply the presence of a high-quality supply and exhaust system.
- Water - are a water heating tank that transmits heated liquid through a system of pipes located along the entire perimeter of the building.
- Gas - are gas burners and heaters.
- Air - involves laying a hose that supplies a flow of warm air around the entire perimeter of the greenhouse. Such a system can heat an area of any size in a few minutes, but it reduces the humidity too much.
- Infrared - represented by appropriate heaters and lamps. This system does not dry out the air and is economical in energy consumption.
Important! To avoid the spread of fungal diseases, immediately after completing all work, it is necessary to carry out a final disinfection treatment of the finished greenhouse with an antiseptic.
Soil heating
Heating the soil is best done biologically. To do this, even before starting construction, 30–40 cm of soil is removed throughout the entire territory. Then add 10 kg of fresh mullein, or even better horse manure, and compost for each 1 m². After this, the removed soil is returned to its place. When overheated, biomaterials will release heat and warm the soil to the optimal temperature.
Irrigation system
When equipping an irrigation system, you need to understand that regardless of the source of water supply, it must first be prepared for use:
- defend;
- warm up to ambient temperature;
- if necessary, add mineral fertilizers or soften.
In this regard, you will have to take care not only of connecting to a water source, but also of the presence of storage tanks, as well as a supply system. As a source, you can use a water supply or a well equipped with a pump. The type of irrigation system is selected according to the type of plant.
In total, there are 4 types of irrigation systems:
- drip;
- sprinkling;
- fogging;
- flooding.
In greenhouses intended for private use, watering and irrigation can be done manually.
Lighting and shading
In the autumn-winter period, most crops will have to be illuminated. The optimal length of daylight for plants is 10–14 hours.
Suitable for additional lighting:
- gas-charging sodium lamps (DNaT, DNaZ) - suitable for large premises; to connect them, you must first equip a trigger mechanism;
- mercury lamps (DRI, DRIZ) — not entirely safe due to the toxicity of the mercury contained inside;
- fluorescent lamps — most plants respond positively to additional illumination with such equipment;
- LEDs — the lamps do not heat up when connected, so they can be located in close proximity to the plant organism, but have a high cost;
- night lighting lamps are lamps of the green spectrum, the light of which the plant organism does not perceive as daylight, and therefore is at rest; they are advisable if you need to carry out agricultural work in the greenhouse in the evening.
Vegetables with reduced daylight hours and most flowers require shade. For this purpose, curtains, vertical or horizontal, are organized in greenhouse buildings. The first type involves curtaining the walls with a thick, light-proof fabric, the second - the ceiling.
Ventilation and carbon dioxide supply systems
In single-pitched and double-pitched models, it makes no sense to build a major supply and exhaust ventilation system - a few vents on the ceiling will be enough. But large buildings must be equipped with a supply and exhaust system with a recuperator.
To form chloroplasts in the plant body, all plants need carbon dioxide. In order to increase its content in the air space, greenhouses are equipped with cylinders that supply CO2 in doses.
Dimensions and supports
If you are building a year-round greenhouse, then you will need to install a support at the point, the last of which should have the shape of a triangle. The ridge support is necessary to support the beam. It must be taken into account that the support should not come into contact with the polycarbonate coating. The supporting part has the qualities of strength, but does not interfere with movement inside the greenhouse. This addition is required only when the length of the greenhouse is more than 4000 millimeters. If the structure has a more impressive length, then supports should be installed every 4 meters. As for the corner elements, they must be made from square timber, the side of which is 100 millimeters.
All-season greenhouse: tools and materials, foundation
Before making a frame for a greenhouse, the work involves creating a foundation. There are a large number of options for building a foundation for all-season greenhouses. They can be block, point, metal.
Concrete, stone or brick work well as a base for a year-round greenhouse.
Basic materials to use for building a 22 sq.m. greenhouse. m. the following:
- Building material: square pipe 15x15mm, l = 6 mx 30 pcs = 176.4 m;
- Window and door awnings;
- Grinder with 124 mm disc;
- Electrodes 6 kg;
- Discs D125 x 1 – 8 pcs;
- Protective glasses;
- Welding machine;
- Square;
- Roulette;
- Welding mask.
As a rule, a metal foundation is already sold ready-made in a specialized store. The point foundation is placed only under the pillars with support. The most popular type of foundation for the construction of all-season greenhouses is strip foundation.
Features of a year-round greenhouse
There are special requirements for the designs of all-season greenhouses: they must be durable, withstand snow and wind loads, warm, airtight, and drafts must not enter the room. The frame of a year-round building is made of metal, wood, or, less commonly, thick PVC pipes. Cover with glass, film, polycarbonate. A year-round greenhouse made of polycarbonate is most preferable, as it is much stronger and more practical.
Photo example of how to make a year-round greenhouse - a recessed thermos structure for growing garlic and herbs
Unlike a conventional greenhouse all year round, they have a number of design features:
- To retain heat in winter structures, double walls of translucent covering material must be provided, between which there is an air layer, for example, glass/film, polycarbonate/polycarbonate, film/polycarbonate.
- The walls of a year-round greenhouse can be built from logs, timber, foam blocks, and the roof can be made of glass or polycarbonate. This option for year-round construction will reduce heating costs, but energy costs for lighting will increase slightly.
- Not so popular, but no less functional, is an underground year-round greenhouse. The structure is sunk into the ground to a depth 2 times greater than the soil freezing level, and a translucent roof is installed on top, at an angle.
Watch a video about how a multifunctional, warm, underground greenhouse is made for year-round gardening.
Advice from experienced gardeners
We build a greenhouse from a profile pipe with our own hands: photo and video instructions for the process
Some tips from experienced gardeners:
- Be sure to install a year-round greenhouse on a solid foundation. This will help extend the life of the building by at least 20 years.
- Try not to skimp on materials, but select them according to quality.
- Disinfect the premises with antiseptic agents twice a year.
- You can cover the outside of wooden planks with plastic - this will help protect the wood from the influence of adverse environmental factors.
It is not so difficult to create a year-round greenhouse with your own hands. The main thing is to make calculations in advance and decide all the nuances regarding the types of climate control systems. A year-round home greenhouse can be a profitable investment if you sell the products you grow, especially in winter.
A year-round greenhouse seems to many to be just a myth, and its existence unreal. And yet, you can make such a greenhouse with your own hands, it’s just that many gardeners do not take on this task because of the difficulties that they will encounter on the way to what they want. In the modern world there are all the amenities and necessary materials to make an all-season greenhouse a reality. With a little effort, and with a little patience, you can subsequently grow vegetables in this greenhouse all year round.
Types of year-round greenhouses
A greenhouse for year-round cultivation can be of different types.
The most widely used devices are glass and polycarbonate. The side walls of such greenhouses are insulated because they are built in two layers, between which there is supposed to be an air gap that protects from the cold. Experienced gardeners prefer polycarbonate due to its high strength. The roof of such a greenhouse will not collapse even in the event of heavy snowfall. A device made with your own hands from the above materials requires good heating, but it is quite possible to do without additional lighting, since light penetrates well through the transparent walls and roof.
- Another type of year-round greenhouse is a mixed structure with foam concrete walls and a polycarbonate roof. Here you do not need to supply the device with heavy-duty heating, since foam concrete retains heat well. However, you will have to install additional lighting, since such a greenhouse is illuminated only through a transparent roof, and its walls create shadow. If there are no lighting fixtures in the structure, then only shade-loving crops can be grown in it.
- The least popular for all-season use is the semi-underground greenhouse. It consists of a pit over which a roof rises. The advantage is that this device is located below the freezing level of the ground, maintaining the temperature in it will not be difficult, and you will only have to spend money on lighting. The disadvantages are that such a greenhouse can only be built where there is no groundwater. In addition, for additional safety, you will have to equip the building with waterproofing equipment.
Hangar greenhouse
Year-round greenhouse
The next type is a hangar year-round greenhouse. These are also quite extensive structures that can have a gable or arched type of construction. The width can reach up to 25 meters; the dimensions generally depend on the guidelines and goals that gardeners set for themselves. At the same time, there are no racks inside the greenhouse itself, so you can use the entire maximum area that is available inside the greenhouse
Since there are no racks and supports, it is worth paying special attention to strengthening the roof, so much more professional construction material will be required. If you make mistakes in the design, it will simply collapse, which can be dangerous not only for the future harvest, but also for the life of the person himself, if at that moment he is inside the greenhouse itself
If the width of the hangar greenhouse is small, then the angle of inclination can be about thirty degrees. The volume of the greenhouse is still much larger than that of a gable greenhouse or any other subspecies. At the same time, such a greenhouse requires large expenses if we are talking directly about heating, because this is the essence of any greenhouse structure - to create maximum thermal insulation conditions in which the plant will be comfortable and it will be located in the safest zone.
If you are choosing a shelter for a hangar greenhouse, then polycarbonate or reinforced film is perfect for this. They are not very heavy, but at the same time very durable, they are easy to decorate the greenhouse with. It is best to construct a metal frame, since metal will be more stable, and if everything is done correctly, such a greenhouse will last for a very long time.
There are many advantages that the hangar type of greenhouse has. These include the following characteristics:
- the plants receive maximum illumination, nothing shades them and nothing prevents them from receiving sunlight and the appropriate energy - you can maintain and process the plants not independently, but thanks to some mechanical devices, which is also a huge plus. A person can save most of his time and physical effort, taking into account that sometimes there can be a lot of work on the site - the snow melts off the arched hangar greenhouses quietly, no intervention from the gardener or any other mechanical efforts is required in order to completely remove all precipitation that fell.
Also, of course, there are some disadvantages that we cannot fail to mention. Firstly, a fairly large amount of financial resources can be spent on heating a greenhouse. Secondly, it should be borne in mind that due to the large areas of the greenhouse, ventilation may be difficult, and because of this, harmful microorganisms and bacteria can develop inside the greenhouse. The third disadvantage is that the reinforced structure requires large financial costs on the part of the gardener. Construction of a greenhouse is a very responsible process, and in order for the result to be truly effective, it is necessary to follow all the rules in order to obtain a large, bright structure that functions in accordance with its goals.
Complete mechanical equipment for an indoor vegetable garden
The standard set of engineering and technological devices consists of a heating system, ventilation, drip irrigation and electric supplementary lighting. For industrial-scale greenhouses, shading systems, carbon dioxide fertilization and automatic microclimate control are additionally used. However, to start a greenhouse business, a basic list is enough.
How to ensure thermoregulation of a building
It is possible to create summer conditions in a greenhouse for growing vegetables all year round in winter due to good sealing and heating. Electrical installations are considered one of the best sources of heat - they are quickly installed and heat the air. However, heating the greenhouse with them to the required microclimate parameters is expensive, so farmers have to install more inert solid and liquid fuels, as well as gas boilers, using a bulky piping system.
Combined heating in a greenhouse
Gas lines, unfortunately, are not common everywhere, and their installation is associated with considerable hassle, since the gas heating project requires approval from officials.
Many people advise installing a heating system based on a long-burning solid fuel boiler - they are economical, easy to maintain and regulate. But there is also a drawback - a boiler with full automation is not cheap, and it is difficult to maintain a manually controlled installation.
For small year-round greenhouses (100–150 sq. m.), you can install a boiler that runs on gas from cylinders. The coolant is water circulating through plastic pipes through heating radiators, for example, previously dismantled cast iron radiators. The system must be supplemented with a circulation pump so that the return pipe, laid in a zigzag pattern under the ground, maintains a temperature sufficient to heat it.
It is better to mount radiators on a foundation base, for which it should be sufficiently wide. In order to reduce heat loss at the height of the batteries, it is recommended to insulate the greenhouse wall along the entire length with a layer of expanded polystyrene and penofol. If the boiler has enough power, it is good to install a third pipe at the top, along the ridge line - it will create a kind of cushion that prevents heat from rising and escaping through the roof of the greenhouse.
A winter greenhouse for vegetables must be properly equipped
How to add light to plants in a winter greenhouse
Ordinary incandescent lamps should not be installed in a greenhouse that operates all year round - they have too low efficiency and a light spectrum unfavorable for growing vegetables. Energy-saving fluorescent lamps are much more effective in this regard, but they have another drawback - the dependence of brightness on voltage. Since fluctuations often occur in rural areas, there is a risk that the lamps may not turn on at a critical moment.
Often used in industrial greenhouses, sodium light sources (SLSs) perfectly imitate sunlight, and mirror lamps for them are equipped with rotating reflectors.
Connecting these is not easy - for warming up and normal operation, it is necessary to include a starting and regulating mechanism (single-winding choke) and a pulse ignition device in the circuit. Therefore, if you have no experience working with the electrical network, it is better to turn to specialists.
Connection diagram for DNA lamps
Metal halide light bulbs (MHLs) provide a wide spectrum of light output and would be considered an ideal option if not for their high price and relatively short lifespan.
Instead, cheaper LED lamps have begun to be actively used, which can easily be switched to different operating modes, are economical and safe.
Regardless of the type of lamp chosen, it is necessary to connect electrical wiring to the greenhouse - underground or through the air. With the help of an electrician you must:
- Install posts or dig trenches 0.8 m deep (posts should be placed away from trees, the location of the trenches should be noted on a copy of the site plan).
- Place a control panel with sockets equipped with fuses in the greenhouse for year-round cultivation. It is advisable that the plugs under them be rubber and not plastic.
- Observing electrical safety precautions, lay the electrical cable in the trench (or attach it to a wire stretched between the poles) and connect it to the switchboard.
Once the power cable is plugged in, the sockets are ready for use.
Proper greenhouse lighting
Good ventilation is the key to healthy vegetable crops
Ventilation can be organized in two ways - natural and forced. Important factors when arranging the first option are the placement of the greenhouse according to the wind rose, the dimensions of the building, that is, the ratio of its length, width and height, as well as the total area of the installed ventilation transoms (at least 20% of the entire surface).
Automatic window
Of course, the windows can be opened manually, but it is safer if the process is automated.
For this, there are both ready-made devices powered by an electrical network, and home-made mechanisms, the operating principle of which is based on the ability of some materials to change dimensions when heated. An example of one of the simplest designs is a can design.
Two jars of different capacities (800 ml and 3 l) are filled with water and placed in such a way that when heated they can move and pull a lever attached to the window (the principle only works for transoms with a horizontal axis in the center). The build process looks like this:
- Pour 800 ml of water into a large jar and seal it tightly with a tin lid.
- Drill a hole in the lid and insert a brass tube 300 mm long and 5 mm in diameter into it so that there is no more than 2-3 mm from its end to the bottom of the jar.
- Silicone the hole with the tube or solder it.
- Repeat all steps with a smaller jar containing 200 ml of water, with the difference that the lid should be removable (polyethylene) and the tube should be flexible (for example, from a dropper, 1 m long).
- Drive a nail 100 mm long into the upper part of the window and hang a smaller container from it, and place the larger one higher - on a shelf or on the frame of the greenhouse.
- From the outside, attach a counterweight to the bottom of the transom - a beam of the appropriate length.
Schematic diagram of a machine from a can
As the temperature rises, the liquid displaced from the three-liter jar will flow into a small container, which will begin to put pressure on the upper transom and pull it down - the window will open. When it gets colder, the reverse process will begin. This is a fairly reliable and cheap way to provide air exchange.
Organization of drip irrigation
Successful construction of a greenhouse for growing cucumbers all year round, as well as tomatoes or more exotic crops, is unthinkable without the creation of drip irrigation. At very little cost, it saves a lot of time and effort, providing a significant increase in yield. To equip it, you need to select a container (a 200-liter barrel is suitable), a system of drip tapes and a set of adapters - crosses, tees, corners.
Drip irrigation installation diagram
To assemble the automatic watering system yourself, just follow the following instructions:
- Build a pipe with a valve into the lower part of the tank.
- After welding the metal frame, raise the tank to a height of 1–2 m.
- Immediately after the tap, install a fine filter and controller (if equipped).
- Place drip tapes along the future beds, connect them with a distribution hose with a diameter of 25 mm and connect them using start connectors with or without taps.
- Connect the distribution hoses into a single pipeline using suitable connecting elements.
- Seal the ends of the drip tapes with plugs.
- Fill the barrel with water and test the system.
If watering is not uniform enough, a pressure reducer should be added to the structure and adjusted to 2 atmospheres. Once the self-watering system is assembled, you can begin arranging shelving or beds and growing quality vegetables throughout the year.
How to properly organize the arrangement of beds in a round greenhouse
In this version of the greenhouse, the correct location of the beds determines how many of them will fit in a given area, how many plants will receive full lighting and warming from the sun's rays.
The first, central bed is the easiest to install. In order to place subsequent circles near the central bed, it is necessary to take into account the beveled angle - approximately 36 degrees of the subsequent bed.
The advantages of a round greenhouse include the ability to work while standing. This is achieved due to the possibility of placing beds at different levels.
If you look at the photo of a round greenhouse, you can see that more beds will fit here than in a rectangular shape. Unfortunately, it will be more difficult to drive a wheelbarrow into such a structure than into other greenhouse structures.
Some gardeners believe that building a round greenhouse with their own hands is not difficult. It is worth noting that the weak point of this design is its ventilation - here it is necessary to make forced ventilation or place one window around the perimeter.
Today, it is probably unlikely that anyone can be surprised by designer greenhouses. In Denmark, designer Simon Hjermind Jensen designed a greenhouse taking into account the difficult northern climate - the “Invisible Garden House”.
The greenhouse has 3 modular compartments - inside there are beds with garden crops.
All vegetation is protected from cold winds by transparent walls. Thanks to a special design, the domes are heated by the sun's rays, and a natural ventilation system regulates the temperature inside the greenhouse. This project has so far been built in a single copy in a private garden, not far from Copenhagen.
Incredible round-shaped greenhouses include the Studiomobile floating jellyfish greenhouse. Biologists worked on this design together with architects. The greenhouse design has 8 corners. Inside is about 70 sq.m. beds.
Thanks to plastic barrels connected to each other in a simple way, which form the lower frame, the structure is easily kept afloat. The jellyfish greenhouse is ideal for hydroponic plants.
Water flows inside the beds thanks to a special system of filters with pumps powered by solar batteries.
How to choose a site for a greenhouse
For a trench greenhouse, choose a flat area not shaded by buildings or trees
The sun is the main source of heat energy in recessed greenhouses, so it is important to find the most open location possible. Wind protection is desirable on the north side - a building, a high blank fence, a hedge
The orientation of the greenhouse relative to the cardinal points depends on the main purpose. If you plan to use a trench greenhouse year-round, it is better to position it from north to south, cover the northern side with an insulated vestibule, and make the southern gable transparent. In such a greenhouse it will be a little cooler in winter, but in summer the plants will not burn.
Greenhouse orientation for year-round use
When using a greenhouse mainly in the cold season, it is better to orient it from west to east. The northern slope of the roof is made solid and insulated, and the southern slope is made transparent. The northern wall and roof slope are additionally sheathed with reflective material or painted white. This will allow you to make maximum use of the sun's energy.
Greenhouse orientation for winter use
Weeding or mulching?
Caring for plants in a greenhouse can be greatly facilitated by abandoning traditional weeding in favor of mulching the soil. To do this, you can use black non-woven material or black thick film. Round holes are made in them for future plants. Then this mulching material is placed on hoses from the drip irrigation system laid out on the beds. A plant is planted in each hole.
The mulching coating protects against the formation of soil crust and the riot of weeds, and retains moisture in the soil for a long time. Therefore, one large barrel for drip irrigation will last a long time. By the way, you can also add liquid fertilizers here, then the automation itself will also feed the plants at the right time.
Design
As you know, the structure of a greenhouse can be very diverse. But if we talk about a structure that needs to withstand the loads of strong wind, rain or snow, then an arched greenhouse would be ideal. Its semicircular roof will not allow snow to linger above, and thanks to its streamlined shape, the wind will not exert significant pressure. If we talk about materials, then for a year-round greenhouse it is necessary to use polycarbonate. This is an ideal material for winter construction, as it is a multi-layer coating with air inside. Polycarbonate has excellent heat-saving properties. . .
. Wood and plastic – . .
A completely transparent structure, in which the roof and walls are made of polycarbonate, will require you to spend less on lighting, but more on heating.
The greenhouse can be made in another way, when only the roof is transparent, and its walls are made of brick or foam concrete. In this case, it is necessary to create high-quality artificial lighting.
In some areas you can see year-round greenhouses buried in the ground. The advantage of them is that they are created at a level below freezing, so heating them is much easier. But, in this case, you will also have to spend a lot of money on lighting. Underground buildings are an interesting and very economical option, but they cannot be organized in every area. For example, where groundwater lies close to the surface of the earth, an underground option cannot be built.
. Usually a simple strip foundation is quite suitable for this purpose. . . Assembling a greenhouse with your own hands is not difficult, especially if you purchased a ready-made structure. How installation is carried out is described in detail in the instructions. To fasten the parts together you will need bolts and nuts. But if you decide to assemble the greenhouse yourself inside and out, then the arched version will be quite difficult to make. To bend the metal frame you will need pipe benders. .
When assembling it yourself, you must keep in mind that the standard width of a polycarbonate sheet is 2.1 meters; accordingly, how the frame parts will be placed depends on this parameter. They are usually installed in 1.05 m increments.
The most durable structure is considered to be monolithic, so when creating it with your own hands, the frame parts must be connected by welding.
Polycarbonate sheets are attached to the frame using thermal washers. Sealing the winter structure is very important, otherwise you will not be able to create the necessary microclimate.
It is very important to install polycarbonate with the correct side
If you prefer year-round mixed-type greenhouses, then you will need to build the walls yourself from foam blocks or bricks, making a roof of polycarbonate. For this building you also need to organize a strip foundation. After this, it is necessary to make the walls a minimum height of 1.7 meters, which are plastered on both sides. Then you can start creating your own roof. To do this, metal rafters are formed and polycarbonate sheets are attached to them. Usually, after the first layer of material is fixed, metal profiles are attached to it and the second layer of polycarbonate is fixed.
Creating a foundation
The strip foundation is poured in the following sequence:
- they dig a trench 0.5 m deep, 1 m wide. As you can see, the foundation is shallow, since this structure is not in danger of destruction when exposed to the forces of frost heaving;
- pour a 10 cm layer of sand onto the bottom of the trench, wet it and compact it;
- a layer of crushed stone of the same thickness is poured on top and compacted, pressing it into the sand. The result is a drainage sand-crushed stone cushion, thanks to which the base of the foundation does not come into contact with ground moisture;
- They install formwork from boards so that the width of the foundation is 30 cm. Concrete is heavy, so they select strong boards and securely reinforce them with spacers. The elevation of the formwork above the ground is 10 cm;
- inside the formwork, the drainage pad is covered with rolled waterproofing, for example, roofing felt;
- a reinforcement frame is made and installed in the formwork on bosses so that under the reinforcement there is a protective layer of concrete 30-40 mm thick. Working reinforcement with a diameter of 10 mm is laid in the frame in the form of upper and lower working belts, three threads in each. The belts are connected into a single structure with vertical and horizontal transverse reinforcement with a diameter of 6-8 mm. The reinforcement cannot be welded; it is joined with annealed knitting wire;
- studs are screwed to the reinforcement to secure the greenhouse frame;
- Concrete is poured into the formwork. Ideally, this is done using a vibrating machine. If there is no such tool, the concrete is often pierced thickly with reinforcement, allowing the air to escape;
- level the surface of the foundation and cover it with polyethylene so that the water does not evaporate.
After removing the formwork after 7 days, the foundation is covered from the outside with extruded polystyrene foam, and from the inside it is coated with bitumen mastic and covered with roofing felt. Then the trench is backfilled.