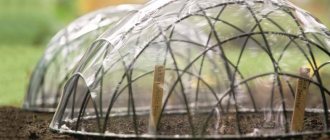
Fresh cucumbers from your own greenhouse in the middle of winter - what could be tastier? With the development of modern technologies, growing vegetables in winter greenhouses is no longer a rarity. Getting fresh cucumbers to your table or for sale is quite simple. You just need to properly equip the greenhouse and follow the recommendations of experts on the choice of varieties and technology.
Growing cucumbers in a greenhouse in winter
Greenhouse requirements
Cucumbers are heat-loving and moisture-loving crops, so any drop in temperature or humidity will inevitably affect the yield and health of the plants. A winter greenhouse for cucumbers must be insulated and equipped with a heating system.
Winter greenhouse for cucumbers
Best results can be achieved if the following conditions are met:
- correct design and placement of the greenhouse;
- complex heating of soil and air;
- adjustable humidity;
- additional artificial lighting;
- fertile loose soil.
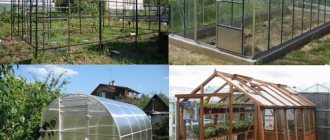
These conditions can be created in a greenhouse made of glass or polycarbonate. Film greenhouses are not suitable for winter use due to the low strength of the film: during heavy snowfalls, the film sags, snow lingers on it and can collapse the structure.
Polycarbonate greenhouse
Greenhouse prices
greenhouses
Greenhouse design
The main requirement for winter greenhouses is to protect plants from the cold and maximize the transmission of sunlight. The best characteristics are wall-mounted greenhouses with double frames and a sloping south wall. Glass or polycarbonate is used as a covering, the frame is made of a wooden block or a profile metal pipe. It is better to choose the height of the greenhouse so that the area-to-volume ratio of 2:1 is met - this is optimal for cucumbers.
Scheme of a wall greenhouse
The slope of the roof and south wall in such a greenhouse depends on the angle of the sun above the horizon in your region. It is optimal if the midday rays pass through the glass at right angles - the reflection coefficient in this case is minimal.
The angle of the sun above the horizon and the correct design of the greenhouse
For better heating, the beds in the greenhouse are also made inclined or in the form of stepped terraces. This will allow the sun's rays to illuminate each plant unhindered. It is recommended to paint the back blank wall white or cover it with foil - reflecting from it, the rays will illuminate the plants from behind.
Arrangement of ridges in the form of terraces
It is better to enter the winter greenhouse through a vestibule - this will protect the plants from cold air flows. A storage tank for water and heating equipment can be placed in the vestibule. The ventilation system, unlike summer greenhouses, cannot be done through windows - drafts are contraindicated for cucumbers. It is a supply and exhaust system and is made from plastic pipes.
Greenhouse with vestibule
Heating
Cucumbers do not tolerate too dry air, so it is not recommended to install heating devices in the greenhouse that dry the air: convectors, oil heaters, and metal stoves. It is better to install a water heating system: heat the soil using pipes laid in the beds, and heat the air using radiators or registers stretched along the perimeter of the greenhouse.
Water heating system in a greenhouse
A furnace or boiler is used to heat the coolant. The second option is preferable: the boiler burns longer, and the level of automation is higher. A boiler for heating a greenhouse can be gas, electric or solid fuel. The boiler power for a greenhouse with a height of 2-2.5 meters is selected at the rate of 1 kW per 8-10 m2 of area. So, for a greenhouse with an area of 30-35 m2, a 4 kW boiler is sufficient.
Heating boiler in a greenhouse
You can also connect the greenhouse to your home heating system if it is located in close proximity to your home. In this case, the boiler must have a power reserve sufficient to heat the greenhouse. There are other ways to heat a polycarbonate greenhouse in winter.
Greenhouse lighting
Winter days are short and sun activity is low, so cucumbers require additional lighting in winter. This can be done using lamps of different types, and two parameters must be observed - the level of illumination and color temperature.
Plants need light that is as close as possible to daylight, that is, having a color temperature of 5000 °K. Fluorescent, mercury vapor (MGL) and metal halide (DNaT and DNaZ) lamps have this light. At the same time, in the growth phase it is better to use lamps with a cooler color - 6500 °K, and in the flowering and fruiting phase - with a warmer one, i.e. about 4000 °K. At the same time, the plants do not stretch, remain strong and form ovaries well.
Color temperature of different types of lamps
In terms of light output, fluorescent lamps are much inferior - much more of them will be needed for the same area. At the same time, their price is lower, and they practically do not heat up. A comparison of the light output of different types of lamps is shown in the figure. The specified number of different lamps will allow you to obtain a luminous flux of 50,000 lumens, which corresponds to lighting 4-5 m2 of a greenhouse for cucumbers.
Luminous flux of different types of lamps
The number of lamps required to fully illuminate winter greenhouses of different sizes is indicated in Table 1.
Table 1. Calculation of lighting for a winter greenhouse for cucumbers.
| Greenhouse area, m2 | Lamps DNaT, DNaZ, MGL, 400 W | Lamps, energy saving, 150 W | Fluorescent lamps, 54 W |
| 5 | 1 | 5 | 10 |
| 10 | 2 | 10 | 20 |
| 15 | 3 | 15 | 30 |
| 20 | 4 | 20 | 40 |
To illuminate plants, you can also use LED lights designed specifically for growing plants. Such lamps have a red-blue spectrum, which allows them to accelerate growth and improve fruiting.
LED phyto-lamps in the greenhouse
Note! Long-term exposure to the red-blue spectrum can have detrimental effects on vision. It is better to work in a greenhouse in natural light.
Prices for phytolamps
phytolamp for plants
Soil preparation
The soil in a greenhouse for cucumbers should be loose, fertile and moderately moist. This can be achieved by preparing a soil mixture suitable for plants and installing drainage.
Soil in a greenhouse
Beds in winter greenhouses can be of two types:
- insulated or heated box from below;
- a trench filled with biodegradable organic matter.
Both types of beds help protect plants from freezing roots. Insulation is carried out using polystyrene or polyurethane insulation boards laid on the bottom of boxes and trenches. Heating can be water, in the form of heating pipes, or electric (heating cable).
Ground heating with cable
Heating the soil with heating pipes
Warm beds with biodegradable organic matter are filled with wooden logs, branches, straw, dry leaves and grass, and topped with fertile soil. In this case, large logs and branches are placed on the bottom - they additionally play the role of drainage.
Preparing a “warm bed”
Types and arrangement of warm beds
The components of a warm bed after the start of decomposition of organic matter contain all the elements necessary for plants; it is enough to carry out regular fertilizing throughout the growing season. The soil for heated beds must be properly prepared.
Soil composition for growing cucumbers:
- last year's sawdust from deciduous wood - 1 bucket;
- humus - 2 buckets;
- peat - 2 buckets;
- wood ash - 1.5 cups;
- nitrophoska or nitroammofoska – 150 grams.
The specified quantity is enough to fill a bed 30 cm high and approximately 1.5 m2 in area. The components are mixed in a separate container or directly in the box, the bed is watered with a warm solution of potassium permanganate to disinfect it from bacterial infections. Then the soil is treated with a solution of “Fitosporin” against fungal rot.
After soaking for two days, the bed is watered with an EM preparation diluted in warm water (Baikal, Emochka, Siyanie) and covered with film or covering material for a week. During this time, the soil is structured, the active work of soil bacteria begins and the fertilizers are transferred into a form that is easily digestible by plants. The greenhouse is ready for planting seeds or seedlings.
Prices for humus
humus
Lighting in greenhouses when growing cucumbers or how to choose the best method of supplementary lighting
Correctly selected lighting is a guarantee of a good harvest
Short daylight hours and insufficient natural light intensity are the main causes of problems with growing seedlings and obtaining fruits. They can be solved by using artificial electric lighting in the greenhouse for cucumbers, tomatoes and other crops, including greens and flowers.
It is used not only in the middle and northern latitudes of our country, but also in the southern latitudes - in heated winter shelters. How much and what kind of light cucumbers need, and the choice of lighting method for growing them will be discussed in this article.
Variety selection and seed preparation
Not all varieties of cucumbers are suitable for growing in winter greenhouses. In order not to be disappointed with the result and get a decent harvest, it is important to follow several rules when selecting a variety.
- In winter, there are no bees or other pollinating insects in the greenhouse, so self-pollinating (or parthenocarpic) varieties and hybrids should be chosen. When choosing bee-pollinated varieties, it is necessary to carry out pollination by hand, and also plant several roots of cucumbers with a male type of flowering - they will provide the necessary pollen.
Cucumbers for growing in winter must be self-pollinating
- Natural light in the winter months is insufficient, and creating artificial light in a spectrum close to the sun is quite difficult. For this reason, light-loving plants will not produce a decent harvest in winter. Shade-tolerant varieties should be selected.
- Maintaining natural humidity in a winter greenhouse is quite difficult: heating dries out the air, and you have to moisten it with frequent watering or spraying. This creates fluctuations in humidity and creates conditions for the rapid development of diseases. You should choose varieties that are resistant to bacterial and viral infections and fungal rot.
- Shaping plants in a greenhouse is necessary - thickening of plantings leads to diseases. To make this task easier, it is worth paying attention to hybrids with limited branching - these do not produce long side branches, directing all their forces to the growth of the main stem. It is convenient to form them vertically, with a garter to the supports.
- Cupid F1;
- Cheetah F1;
- Dynamite F1;
- Berendey F1;
- Garland F1;
- Courage F1;
- Ant F.
Hybrid varieties of cucumbers for greenhouses
For guaranteed results, it is better to plant two or three varieties; The following hybrids meet all the described requirements:
After purchasing seeds, it is necessary to prepare them - this will allow for uniform germination and uniform growth of seedlings, as well as simultaneous fruiting. Preparation consists of several stages.
Preparing cucumber seeds for sowing
Step 1: Seed calibration. Dilute a teaspoon of salt in a glass of cool water and put the seeds there for 10-15 minutes. The ones that emerge are removed - they will not sprout or will produce weak plants. In a winter greenhouse, it is not practical to waste time and space on them.
If the seeds are expensive and it’s a shame to throw them away, wash and dry them, and then use them for summer planting.
The remaining heavy seeds are washed in running water. Seeds can also be calibrated by size, choosing the smoothest and largest.
Seed calibration
Step 2. Disinfection. To prevent bacterial infections, selected seeds are dipped for 20-30 minutes in a bright purple solution of potassium permanganate or three percent hydrogen peroxide.
Treatment with potassium permanganate
Step 3. Treatment for fungal infections. For fungal rot, seeds are soaked for 2-3 hours in a Fitosporin solution, which is prepared according to the manufacturer’s recommendations indicated on the package. Wash and dry the seeds.
Treatment of seeds in Fitosporin solution
Step 4. Warm up. It is carried out to prevent viral diseases and increase female flowers on the plant. It is most convenient to warm up the seeds in a thermos - it maintains a constant temperature. Pour water with a temperature of +60°C into a thermos, put the seeds in there and keep them for 4-8 hours.
Warming seeds in a thermos
Step 5. Hardening. For winter greenhouses, it is important to grow plants that are resistant to temperature changes and short-term drops in case of severe frosts or interruptions in heating. The seeds are placed in a napkin, moistened and placed on a saucer. Hardening is carried out on the bottom shelf of the refrigerator at a temperature from 0°C to +2°C for 2 days.
Hardening of seeds
Step 6. Stimulation. This technique speeds up germination and activates plant immunity. Stimulation is carried out in a solution of the drug “Epin” or “Zircon” according to the instructions on the bag. A folk recipe gives good results: tear off an aloe leaf, cut it in half lengthwise, place the seeds on the cut, cover with the cut part and wrap it in a napkin. Leave it overnight and plant it in the morning without washing.
Stimulation of seeds in "Epin"
Note! Most purchased seeds are already processed! Follow the manufacturer's information on the packaging!
Prices for Epin Extra
Epin Extra
Wiring Tips
To organize lighting in a greenhouse, be sure to use the advice of experienced specialists:
- Before you start installing lamps, be sure to plan the location and the required quantity;
- the housing of the lighting equipment in the greenhouse must be connected to protective grounding in accordance with clause 1.7.51 of the PUE ;
- all wire connection points are fixed by soldering, crimping or clamping in accordance with the requirements of clause 2.1.21 of the PUE ;
- At the entrance to the greenhouse, install a shield and equip it with a protection system against overloads and emergency modes;
- When mounting lamps in polycarbonate greenhouses, use special stands or frames.
Source of the article: https://www.asutpp.ru/osveschenie-v-teplitse.html
Planting cucumbers
In winter, cucumbers can be planted directly in the ground or in seedlings. The second method has its advantages: you can plant plants with a reserve, and then choose the strongest and healthiest ones. In addition, it is much easier to provide the conditions necessary for germination at home.
Scheme of planting cucumbers in a greenhouse
To make it easier for the plant to tolerate transplantation, it is necessary to choose the right seedling cups. The root system of cucumbers in the first phase of the growing season develops not in depth, but to the sides, so the glasses should be wide enough. The volume of the cups is at least 0.5 liters.
To plant seedlings, you can use soil prepared for a greenhouse or a purchased mixture. It is advisable to disinfect the homemade mixture by heating it to 80 degrees for an hour.
Step 1. Preparing cups for seedlings. The glasses are treated with a solution of potassium permanganate and filled halfway with the soil mixture, lightly crushed and watered. Leave for at least 2-3 hours so that the moisture is evenly distributed throughout the entire volume.
Preparing seedling cups
Step 2. Landing. The treated seeds are placed flat on the soil. Often in the literature there is a recommendation to plant 2 seeds in each glass, so that later you can choose a stronger sprout and pluck out the second one. However, this technique is rarely used for expensive hybrid seeds: they usually germinate well, but it’s a pity to throw away healthy sprouts. Place 1-2 cm of dry soil mixture on top of the seeds. There is no need to water the planted plants - there is enough moisture from the lower layers of the soil for germination, and the upper dry layer will allow the seeds to breathe.
Planting seeds
Step 3. Germination. The cups with seeds are covered with film or glass and placed in a warm place. The temperature before emergence should not fall below 25°C, optimally 28-30°C. Light is not important at this time; seeds germinate in the dark. The cups are inspected twice a day, while simultaneously removing the film for 10-20 minutes for ventilation. When shoots appear, the cups are immediately removed under the lamp.
Germination
Step 4. Cotyledon phase. The most important stage during which the strength and productivity of the plant is established. When a loop appears, the sprouts are placed under a lamp and for the first 2-3 days they are illuminated for 18-20 hours a day. This will prevent the plants from stretching out. If the sprouts still stretch out, add soil up to the very cotyledons.
Seedlings under a lamp
Step 5. Phase of the first two or three leaves. The plants get stronger and grow quite quickly. The backlight is reduced to 14-16 hours a day. In the phase of the second or third leaf, fertilizing is carried out with a complex fertilizer with microelements (Kemira, Zdraven). A few days after fertilizing, the plants can be planted in a greenhouse, choosing the strongest ones.
Planting in a greenhouse
Note! If you plant cucumbers directly in greenhouse beds, they need to be provided with the same conditions.
Planting a cucumber directly in the ground
Video - Winter planting of cucumbers
Required amount of light for different crops
For good growth of any plant, both in natural and artificial environments, light is necessary. For greenhouse plants, along with the amount of light, its quality is also important: light spectrum and photoperiodism (alternating lighting and shading).
Advice. Most plants need at least 12 hours of light per day, so when organizing a greenhouse it is important to take into account its location: the best place will be an unshaded, open space.
This condition must be observed in order not to resort to artificial lighting in the summer, and to make the most of sunlight in the winter.
Tomatoes, cucumbers and greens are light-loving plants, so during cold weather, when the length of daylight hours is reduced, they need additional lighting. For each of these crops, according to experienced breeders, it is necessary to provide individual lighting conditions:
Most plants need up to 12 hours of light
Care during the growing season and fruiting
Cucumbers are planted in prepared and warmed soil. To do this, prepare holes, water them and wait for moisture to be absorbed. Carefully remove the plant from the cup, place it together with a lump of earth in the hole, deepening it to the cotyledon leaves, and sprinkle it with earth.
Planting cucumbers in warm beds in a greenhouse
After planting cucumbers in a greenhouse, it is necessary to provide them with conditions for the best growth and development. Cucumbers do not like strong changes in day and night temperatures: rot of various origins appears, growth is inhibited, ovaries fall off, and the fruits become bitter. Optimal conditions for cucumbers in a greenhouse are shown in Table 2.
Table 2. Microclimate in a winter greenhouse for cucumbers.
| Parameter | Optimal values | Critical values |
| Daytime temperature, °C | 23-25 | Below 8, above 37 |
| Temperature at night, °C | 17-18 | Below 8, above 37 |
| Soil temperature, °C | 20-22 | Below 15, above 35 |
| Humidity, % | 75-80 | Below 40 |
| Illumination, lux | 10000-15000 | Long lasting below 2500 |
Watering cucumbers
The soil for cucumbers should ideally be moderately moist. This can be achieved using drip irrigation or regular watering at the root. Cucumbers are watered only with settled warm water at a temperature of 25-27°C until a ten-centimeter layer of soil is moistened. To reduce the amount of watering, the beds are mulched with sawdust, peat or straw.
Watering cucumbers from a watering can
To soften the water, you can add a minimum amount of organic fertilizer to it - 5-10 ml of mullein infusion or bird droppings per bucket of water. With this type of watering, root feeding with organic fertilizers will not be needed; the plants will receive nitrogen fertilizers with watering. Soft water is better absorbed by the roots.
The best varieties of cucumbers for polycarbonate greenhouses
The choice of varieties depends on what kind of cucumbers you plan to cultivate and what expectations you have for the future harvest. Now there are many such varieties of seeds on the market, but in order to choose the most suitable option, we recommend reading this article.
Fertilization and disease prevention
It is necessary to fertilize plants regularly - cucumbers build up a large vegetative mass and quickly consume useful elements from the soil. A lack of nitrogen affects the growth of bushes and the process of photosynthesis, a lack of phosphorus and potassium affects the shape and size of the fruit.
For feeding, use an infusion of mullein 1:5 or chicken manure 1:15. To enrich the infusion with potassium, calcium and microelements, add wood ash to the solution - a glass in a bucket. Stir the components in water and leave for two to three days.
Preparation of chicken manure solution
You can also use complex fertilizers for melons and melons to feed cucumbers. They are bred according to the instructions and watered at the root or sprayed on the leaves.
Note! When the fertilizing is infused, carbon dioxide is released from organic matter. It is beneficial for plants, so a bucket of infusion can be left in the greenhouse near the ridges.
Video - Feeding cucumbers
To prevent diseases, plants are sprayed with Fitosporin three times during the growing season with an interval of 15 days. It helps prevent the occurrence of fungal diseases. You can also use watering the soil with warm solutions of potassium permanganate and boric acid.
Spraying with Fitosporin - prevention
Forming and collecting fruits
To prevent plants from shading each other, they must be formed correctly. In greenhouses, cucumbers are grown vertically - this ensures ventilation, reduces the likelihood of diseases and makes access to the plants easier. In addition, with a vertical garter, more plants can be placed on one meter of area.
Rules for shaping cucumbers
After the plants are planted and the first flower stalks appear, the main stem is tied with twine to the supports or structures of the greenhouse. The first flower stalks are immediately torn off - they mainly consist of barren flowers, but at the same time they inhibit the growth of cucumbers. After the first side shoots appear, pinching begins according to patterns depending on the variety.
Cucumbers with a bouquet type of fruiting produce many fruits in each internode. The main harvest of such varieties and hybrids is obtained from the main stem. Their side shoots are pinched, allowing the plant to yield maximum yield.
Forming cucumbers of bouquet type of flowering
Cucumbers with a small number of ovaries in each internode are formed differently. On the fifth and sixth side shoots, one leaf and ovary are left, on the subsequent ones - two leaves and two ovaries. This way the yield will be maximized.
Forming parthenocarpic hybrids of cucumbers
Video - Forming and gartering cucumbers
After the start of fruiting, cucumbers are collected regularly, ideally daily. Even one large fruit left on the plant inhibits the setting of new cucumbers and the growth of the bush. Harvesting is carried out in the morning or evening. It is more convenient to do this after watering - this way the cucumbers prick less.
Picking cucumbers
Cucumbers from the winter greenhouse will delight you throughout the cold months. To extend the period of active fruiting, they can be planted in several stages, constantly renewing the plantings. With the right agricultural technology and selection of varieties, fresh vegetables will always be on your table.
Video
You can also watch a video where they will tell you in detail how to make lighting for cucumbers in a greenhouse and what agricultural technology should be used for growing cucumbers.
This information should not be taken as advertising for one type of greenhouse lighting. Yes, LEDs have many benefits, but they also have other bulbs. Only you can decide which one suits you best and create your own DIY oasis for your favorite vegetables.
Source
Preparatory work with soil
In a fully equipped greenhouse, the next step is to prepare the soil for growing. This procedure takes time, so it must be carried out about a month before planting.
Ready beds with soil
Methods for soil disinfection
Before use, the soil must be cleared of weeds (their seeds) and disinfected, especially if it was taken from the garden or used to grow other crops. The easiest way is steam treatment, after which most of the pathogenic microorganisms die. More effective methods are the use of toxic substances and special preparations that require strict adherence to the instructions for use:
- Copper sulfate - 7% aqueous solution is used to treat the soil at the rate of 0.5 liters per square meter.
- Formalin is poured into narrow ditches, the greenhouse is hermetically sealed for a while, and then the windows are left open for 14 days to allow the substance to volatilize.
- Store-bought drugs - use in accordance with the attached instructions.
The treated soil can be brought into the greenhouse after 3-4 weeks.
Preparing the soil mixture
The preferred soils for growing cucumbers in greenhouse conditions in winter are sandy loam and loam, enriched with mineral and organic components. To give lightness to such a substrate, you can add a little sand or pine sawdust. The ideal mixture is a combination of turf soil and ordinary humus. Or you can make a substrate for growing based on peat, for which you take the following in appropriate proportions:
- peat – 5 parts;
- compost or humus - 3 parts;
- garden soil - 2 parts.
To enrich with minerals, add ammonium nitrate at the rate of 15 g per square meter, superphosphate - 40 per square meter, ash or potassium salt - respectively 200 g or 25 g per square meter. To impregnate the soil with fertilizers, leave it under plastic wrap for 3-4 weeks.
Tips for arranging beds
When forming beds, it is necessary to take into account the size and location of the greenhouse. Their most advantageous direction is from north to south.
Dividing a large-scale greenhouse into beds
The beds should be formed in such a way as to best distribute the space and not experience inconvenience in the future when caring for plants. First, the ground is thoroughly dug up, loosened, and then the number of ridges is determined:
- One bed in the center is easy to maintain, there is access from all sides, but the area is used irrationally.
- Two beds, separated by a central, side and transverse paths, further simplify care, but from the point of view of space planning, they are not economical.
- Two side wide beds with a single path in the center are quite good to use, the area is used efficiently.
- Three beds are the optimal solution for a wide greenhouse, especially if the bed in the center is large and the side beds are narrower.
The number of beds varies depending on the size and allocated area of the greenhouse. Wooden beams are used for marking, which will maintain the shape of the ridges. The width of the path should be at least 60 cm; it can be laid with stone, brick, paving stones or simply covered with gravel.
How to pollinate?
Let's find out right away how to do artificial pollination . First you need to learn to distinguish between male and female flowers (in the center of the female flowers there is a tiny semblance of a small cucumber, but in the male ones there is not).
Pick the corolla of a male flower, lightly touch it to your palm and check if the pollen falls off.
If everything is in order , begin pollination by methodically touching the stamens to the pistils.
Then all you have to do is observe: on flowers that have been successfully pollinated, the ovary will grow, and unpollinated ones will simply wither and fall off.
pollination in another way: with a soft brush (for example, a cosmetic one), touching the stamens and pistils in turn.
