Review author: Terrari School of Design
What summer resident does not dream of a greenhouse on his plot. After all, growing crops is a noble, healthy activity, and also tasty. But not everywhere in the warm season is hot enough to grow a rich harvest of strawberries, cucumbers, peppers and other crops.
Therefore, there must be at least one greenhouse on the site. You can buy or order a ready-made version, but it’s best to make it yourself. And before building a “fortress” for plants, you should decide on a number of points.
What do you plan to grow in the warm weather?
Based on what crops are supposed to be grown and in what quantities, you should understand what size the greenhouse should be.
After all, greenhouses are divided into two types according to the mobility of the structure:
- Portable
- Stationary
This is a matter of taste, but installing a temporary greenhouse or building a portable one is much easier.
Once it has been possible to determine the planting area, as well as the expected height of the crops, we can judge the future dimensions. When this issue is resolved, it is worth considering the next point.
Features of structures for growing seedlings
If you are planning to build greenhouses for seedlings of peppers, then be sure to consider the following points that are mandatory for this vegetable crop:
- providing light;
- the presence of abundant regular watering, without waterlogging;
- heat preservation;
- If the environmental climate allows, then it is necessary to carry out regular ventilation.
When building, you must follow the rules:
- The foundation must be located at a certain height; to provide the required amount of heat and lighting for the peppers, the height should be 40–45 centimeters.
- Maintaining a certain height and creating a semicircular base structure. Experts recommend maintaining a height of about half a meter; such dimensions ensure the growth of pepper bushes.
- Availability of optimal air humidity, soil and light. To create such conditions, it is necessary to select the correct coating for the structure; film and polycarbonate must ensure uniform penetration of light onto the plants.
Greenhouse material
Now you need to decide on the material of the greenhouse, because this can seriously vary the cost of construction. In addition, there are additional parameters, including the weight of the structure itself (to build a heavy glass structure you need to have “golden hands”).
Almost always, every summer resident faces the following choice:
- Cellular polycarbonate
- Glass
- Film
Each of these materials should be discussed in more detail.
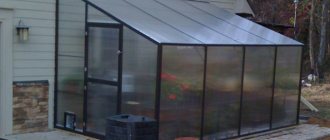
Cellular polycarbonate
This material is light in weight and also allows you to reduce the number of parts of the greenhouse frame itself. In addition, with cellular polycarbonate, you can completely abandon the foundation, since the material in question is durable and not subject to deformation (it also cannot be broken). The service life can be up to 25 years.
For most people, a polycarbonate greenhouse is the best option in terms of price-quality ratio.
In addition, the material transmits sunlight well.
Glass
This material is very heavy and fragile - breaking it is easy. However, this is an ideal option for a greenhouse that should last more than 20-25 years. If the glass is installed correctly, it will have a very neat appearance.
At the same time, glass has much less thermal insulation than polycarbonate, and therefore the greenhouse effect is much lower.
Film
This material is the lightest, but requires reliable fastening on a strong frame. The service life is extremely short (maximum 3 years), since it tends to deteriorate under the influence of ultraviolet rays.
After a year of operation, it may partially lose the properties of the greenhouse effect, and also conduct ultraviolet radiation worse.
Each of the proposed options has its own advantages, but in terms of disadvantages, the leader is polycarbonate (this material has no disadvantages).
Next, you should decide on the type of greenhouse, as well as the material for the frame.
What is it needed for
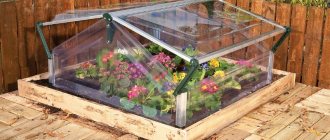
Mini-greenhouses are used for growing cultivated plants not only in a summer cottage, but also within the walls of a city apartment. It is suitable for planting whimsical and heat-loving varieties.
- Protects young plants from winds, drafts and precipitation.
- Provides the necessary climatic conditions for plants.
- Young seedlings do not get sick when transplanted into open ground, as adaptation occurs slowly and gradually.
- Caring for plants is quite simple.
- They are easy not only to install, but also to store.
Most summer cottages are small in area. Installing a full-fledged greenhouse is impossible. Since such structures occupy most of the site.
You may be interested in:
How to make a greenhouse with your own hands Building a greenhouse with your own hands is not the easiest task. But today there are tips on the Internet...Read more...
Types of greenhouses
There are a huge number of options for what you can make a greenhouse from: it all depends on the gardener’s imagination and the available materials, as well as the expected size. After all, if you wish, you can even cut holes in the barrel, which can then simply be tightly covered with film so that warm air does not escape.
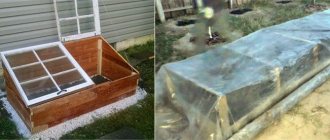
In addition, some craftsmen manage to simply adapt a wooden box and make a simple lid, which consists mostly of glass or film to transmit ultraviolet radiation.
Here's another interesting example: for a couple of single small plants, an umbrella with transparent material was simply carefully stuck in, which does its job perfectly.
However, it is still better to make one high-quality greenhouse that you are not ashamed to show to your neighbors. In these photos, the greenhouses are made with your own hands.
And it doesn’t matter at all what the greenhouse is made of: either from a profile pipe or from wood. The main thing is that it is strong and stable. And then properly cover it with any transparent material discussed earlier, so that warm air does not escape beyond the structure itself without the knowledge of the owners.
Therefore, further we will consider the main types of greenhouses, as well as methods of construction.
Beautiful examples
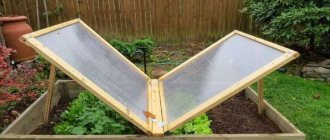
If you want to get not just a structure made of boards and metal, but a real masterpiece, then you should not stop at recommendations for making standard greenhouses. Create the design yourself, and don’t limit your flight of fancy. (Images 1 and 2).
Image 1 Image 2
Greenhouse - a butterfly does not have to be made from window frames. We take the idea as a basis, and select a different material: rice. 3
Image 3
Packaging for cakes and pastries is also suitable for germination: rice. 4, 5
Image 4
Image 5
An interesting solution for germinating seedlings would be a greenhouse on the windowsill and a greenhouse house, which would be advantageous on the balcony: Fig. 6, 7
Image 6
Image 7
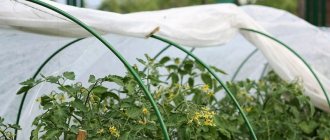
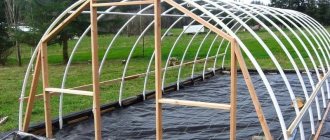
How to assemble a greenhouse from arcs
If you plan to use such a bed for several years in a row, without moving the arc, then you can perform the following operations:
- Prepare a wooden frame that will fit tightly to the ground. The width of the boards depends on the wishes of the gardener himself. After the structure has been assembled, it should be pressed as tightly as possible to the ground so that there are no gaps left.
- The next thing is to drive wooden sticks into the ground 30-50 centimeters deep to secure the structure to the surface.
- Next, the arcs are attached to the base using a metal perforated tape on both sides from the outside or inside.
- Afterwards, you can safely prepare the future bed.
- The last step will be to secure the film to the frame using double-sided tape or special clips for fixing the films.
In addition, you can attach a wooden block along the edges of the films. It is only necessary to lay some material between the nails or staples and the film itself: thick braid or an ordinary, but dense strip of fabric.
The main thing is that in the end there are no gaps left so that the heated air cannot escape on its own.
Some useful tips
- If the greenhouse being built assumes an arched structure, you should remember that the polycarbonate sheet should be bent only across the direction of the stiffeners.
- You should not save on building a frame. If the frame is wooden, the wood should be chosen even and dry. If it is metal, it is better to take a galvanized profile.
- It is necessary to try to avoid the formation of cracks in the greenhouse structure. Through these cracks the structure will inevitably lose such valuable heat.
- The optimal time to build a greenhouse is early spring or late autumn. During these periods, the average air temperature is as close as possible to the ideal for working with polycarbonate (from +10 to +12 degrees Celsius).
How to assemble a triangular greenhouse
This greenhouse can also be made independently, although its construction takes more effort. Here you should follow the following scenario:
First of all, you need to make a wooden frame of the required size. Afterwards, you should place it on the surface, pressing it tightly to the ground (if there are gaps between the ground and the board, then it is better to fill these gaps with earth). Next, wooden pins are driven into the ground to a depth of 30-40 centimeters. After that, the wooden pins must be connected together with the frame using nails or self-tapping screws.
The next step is preparing the bed itself. Next, two inclined boards are fastened at the top, forming a triangle. To ensure that the structure is reliable and durable, the tops are fastened together with a long wooden beam or pipe along the entire length of the future greenhouse.
The remaining boards are added around the entire perimeter. In this case, it is most convenient to make fasteners using self-tapping screws.
Finally, the film is stretched or polycarbonate is installed:
- If we are talking about film, then it is attached using double-sided tape, as well as screws or staples (in this case, you should use a gasket between the fasteners and the film itself so that it does not tear too quickly).
- In the case of polycarbonate, self-tapping screws should be used. In this case, it is advisable to use a standard roofing screw.
It should be borne in mind that the polycarbonate sheet on one side has UV protection, which must be placed on the outside. As a rule, a shipping film with appropriate markings is glued to the side with a protective coating.
In the case of polycarbonate, you should think about the door that will open. Or you can provide for the possibility of harmlessly dismantling the sheets in order to ventilate the bed or gain access to it. In this case, you can install tight-fitting hooks and clamps on the walls so that you can remove the “door” without consequences.
Bush formation
It is necessary to form a bush in order to increase the yield. There are varieties of pepper that do not need to be formed, among them are weakly branching varieties and hybrids of pepper: Lastochka, Topolin, Zodiac, Florida, Barguzin, Dobryak and others.
If the pepper bushes are short - about 50 cm, then it is enough to simply cut off the weak shoots. Tall ones become heavy and large, and there are not enough nutrients for the development of fruits.
Tall bushes are those whose height is more than a meter. In such conditions, diseases develop and pests appear. To avoid this, you need to make the bush less frequent, and also improve the conditions: lighting, temperature and air humidity.
The formation of a bush occurs in several stages:
- If you grow seedlings yourself, then you should start forming a bush when the stems are about 15 cm tall. At this height, the stem begins to divide into branches. A bud appears at their junction. It's best to remove it.
- When you transfer the seedlings to the greenhouse, plant them in such a way that the bush can be expanded by several branches. Usually such peppers are planted 4-6 pieces per 1 square meter.
- To form a bush, you need to remove excess fruitless shoots and trim the plant. The shoots and leaves that are located below before the first branching should be removed.
- The branches that were formed after branching are called lateral branches of the first order. They grow as a stem with leaves. In the axils of these leaves shoots, stepsons, are formed. They should be removed by pinching.
- The middle branch of the first order is divided into 2 shoots. It is necessary to leave the stronger one along with the leaves and buds. And the weaker shoot must be removed.
- The same must be done with third-order branches.
- When inspecting the plant, always remove shoots without buds and yellow leaves.
All these actions must be performed until the growth of the bush reaches 1-1.2 meters. Then you need to trim the top of the plant, this will help redirect all the vitamins from the stem to the fruits themselves. And a month and a half before harvesting, it is necessary to cut off the tops of all orders.
Greenhouse-breadbox
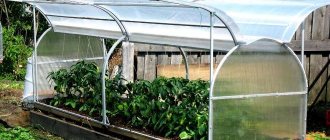
This type of greenhouse is so called because of its clear resemblance to a bread box. The double-leaf design allows you to care for the planted crop without any hassle. A greenhouse bread bin can be assembled from any material, but most often profile pipes are used as a frame.
Polycarbonate is used as a coating. In the greenhouse, as mentioned earlier, there are two doors, and they should open towards each other.
Main disadvantages
Like any design, a mini-greenhouse has not only positive aspects, but also negative ones. These include:
- do not tolerate strong winds well;
- the range of plant varieties grown is narrow, since the height of the greenhouse is small;
- It is difficult to replace the covering material if it is damaged, since the attachment to the frame is complex.
How to assemble a greenhouse-breadbox
As a rule, the procedure for creating this type of greenhouse is as follows:
- First of all, you need to prepare the design details: use a pipe bender to make half-arcs; in this case, two half-arcs must be smaller in size, and the other two must be larger.
- Next, the side parts are welded with horizontal jumpers
- The next step is to weld the frame of the required dimensions and increase the frame to the required height
- After the bed is ready, you should begin installing the greenhouse and fastening it with wooden or metal pins stuck into the ground to a depth of at least 50 cm.
- Next, all the elements are sheathed with polycarbonate using self-tapping screws, and then on each side of the base, the half-arc sidewalls are connected using a hinge method.
This design can last forever, sometimes changing the polycarbonate sheets and treating the hinge structures with an oily substance.
All greenhouse projects have their advantages and disadvantages, however, it is necessary to take into account the size, cost, and duration of use of the greenhouse.
Determining the location of the structure
When choosing a specific location, there are several important factors to consider:
- The place should be well lit and have a flat surface without ditches or depressions. The greenhouse must be installed at a distance from trees and outbuildings;
- According to scientific data, the structure should be positioned in the east-west direction; such a landmark creates optimal conditions for the growth of pepper;
- Pepper does not tolerate waterlogging and waterlogging, so the land plot should be located on a flat soil surface;
- The recommended parameters for greenhouses are structures with a width of 1 meter, a length of 3 meters and a height of about 1 meter.
DIY greenhouse photo
Planting correctly
When 12-13 true leaves it is time to plant the plants in a greenhouse . During this period, buds begin to form on the peppers, the root system is fully formed and ready for growing in a greenhouse.
To avoid unnecessary stress on plants during transplantation, it is advisable to take the boxes with plants into a greenhouse a week before planting . They must be closed at night, and during the day, depending on the air temperature, they are opened partially or completely.
Planting in a greenhouse can be done when the ground warms up to 15-16 degrees. In unheated greenhouses this happens no earlier than mid-May.
Before planting, the soil in the greenhouse is specially prepared. Compost or humus and phosphorus-potassium fertilizers are added.
IMPORTANT! Do not apply fresh manure under the pepper, this will cause the ovaries to fall off and there will be no fruit on the pepper.
For planting peppers
the optimal width is within 1 meter, the row spacing is 50 cm. Low-growing varieties are planted at a distance of 20 cm from each other, medium-growing ones - 25-30 cm, high ones - 35-40 cm. Plants are planted in holes well-drained with warm water .
You can see how to properly and quickly plant pepper seedlings in a greenhouse in this video:
ATTENTION! Do not bury the pepper stems above the level at which they were in the cups. After planting, the soil should be crushed, watered and mulched.
Choosing a tree for building a greenhouse
To make greenhouses, bars with a cross-section of at least 50 millimeters are used. It is important to choose the most dried wood that does not have knots, chips, discoloration and other troubles that can lead to rapid destruction of the frame.
Larch is considered the best material. It copes remarkably well with unpleasant weather conditions, has increased strength and only strengthens its properties over time.
Spruce and pine have good properties; an additional bonus of this material will be the pleasant smell and phytoncides emitted. But such wood requires constant monitoring of its condition and taking timely measures to impregnate it with special means.
Timbers made of oak, beech, and hornbeam have proven themselves. The wood is very dense, so it will serve you happily for a long time. But the price of this durable material will not greatly please home-made carpenters and joiners.
Biofuel
Many gardeners often practice placing a heating element in the soil for a future greenhouse. Any organic material is suitable to provide heat:
- chopped stems and branches;
- manure;
- fallen leaves;
- mown grass;
- straw.
Phased arrangement:
- At the selected location, dig a trench or hole in accordance with the parameters of the mini-greenhouse.
- Fill the cavity with a mixture of organic matter to 2/3 of the height.
- Water generously and fill with fertile soil level with the ground surface. The soil layer should be sufficient for further planting.
- Install a greenhouse.
Related article:
How and with what to cover a greenhouse: 5 types of coatings and their features
During the process of rotting and decomposition of organic residues, heat will be released for accumulation inside the structure.
