Growing seedlings in a greenhouse has its advantages: it turns out to be hardened, strong and very viable. The seedlings are not at all like the stunted, elongated creatures that grew on your windowsill. But such a result requires certain conditions. The Butterfly greenhouse can provide them on your site. Today, the editors of HomeMyHome.ru decided to study in detail the design features of such a mini-greenhouse, as well as talk about its advantages and disadvantages. In addition, for our readers we have prepared a detailed master class on making a greenhouse.
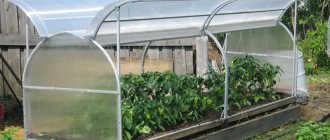
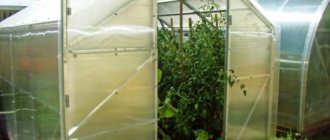
The Butterfly model greenhouse is deservedly popular among Russian summer residents
Distinctive features
A greenhouse is a structure made of film, glass or polycarbonate and metal or wood. You can grow seedlings in it much earlier. This is due to the fact that greenhouses are able to accumulate and retain heat, and their transparent walls allow natural light to penetrate inside. They are especially indispensable if there is no space for a full-fledged greenhouse, and you really want to grow crops earlier. In such structures it is easy to create the necessary microclimate for many plants in any region. One of these convenient greenhouse structures is the “butterfly”.
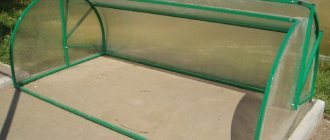
This greenhouse received its unusual name for the peculiarities of its structure, more precisely, the side walls-windows. If necessary, they can be raised and the interior space ventilated. In this form, the greenhouse resembles a beautiful butterfly that has spread its wings. The compact dimensions of this design make it very convenient. Working in such a place is pleasant and easy. There is no need to even walk through the beds. At the same time, the internal space can be used with maximum efficiency.
Another advantage is that there is no need to allocate too much space for such a greenhouse. As a rule, the length of the “butterfly” is about 2-2.5 m, the width is 1.5 m, and the height is a little more than a meter. On average, this structure can be placed on five square meters. As for the mass of the greenhouse, it is approximately 30-32 kg. The butterfly-type greenhouse structure is sold in specialized stores. However, if you wish, it is easy to make it yourself. When purchasing such a greenhouse, you need to make a choice in favor of a metal frame. The best coating is cellular polycarbonate. If the structure is properly cared for, it can last ten years or more.
Assembling the greenhouse according to the instructions is very simple. It accurately and clearly indicates each of the stages by which installation is carried out. The ease of assembly allows you to rearrange or even transport the greenhouse anywhere if necessary. It does not require a foundation; any soil is suitable for its installation.
Incredibly, it is recommended to plant seedlings in such a greenhouse even earlier than in conventional greenhouses. And there is an explanation for this - the space inside is smaller, in fact, as is the amount of soil, which means it will be warmed up faster by the sun. As a result, it will take less time to create the desired microclimate. Summer residents consider the “butterfly” to be a reliable greenhouse that can withstand bad weather and allows you to achieve good results faster.
Installation
All construction is based on preliminary calculations and drawings. It is necessary to carefully plan everything and calculate the required amount of materials. To do this, first of all, the dimensions of the butterfly’s greenhouse are calculated. Do not forget that the main task is the convenience of harvesting. The size of the greenhouse is chosen depending on the needs and the number of crops to be grown.
The simplest and most affordable material for the frame will be wood. No special knowledge or equipment is required to process it. The best option would be boards 2.5 cm thick. First of all, you need to make the sides, they can be:
The frames of the wooden frame are covered with durable polyethylene (some summer residents use 2 layers of film to increase strength). There are also other options:
To work with the latter, clarity and accuracy are required. It should also be noted that today glass is a fairly expensive material. Both glass and polycarbonate will protect plants from exposure to ultraviolet radiation, which has a detrimental effect on the growth and development of fruits.
Prepared frame elements are installed on pre-marked ground. All sides must be fitted as tightly as possible. The frames are secured to the base using metal hinges.
How is it different from a greenhouse?
Experienced gardeners clearly understand that a greenhouse and a greenhouse are different structures. Of course, they are similar in appearance, but their differences are very significant. First of all, they differ in size. Greenhouses are more compact, their height is less than human height. When working with a greenhouse, the summer resident is outside. Access inside is provided by sliding or folding walls and a lid.
The main difference between a greenhouse and a greenhouse is the heating itself. In the first, this process occurs only due to heat from the sun and compost. As for the latter, they quite often use additional heating in the form of various heating systems. The simplicity and lightness of the greenhouse design make it convenient both to install and place. Even when installing it in a new place, one, maximum two people can handle it. In addition, there is no need to lay a foundation, which simplifies the work.
It should be borne in mind that greenhouses are suitable for planting seedlings, as well as low-growing plants. For example, it is convenient to grow onions, garlic, lettuce, and strawberries in such structures.
Greenhouses do not have any automated systems, such as watering, ventilation, additional heating or lighting. As a result, caring for plants in them becomes a more labor-intensive process. The production of greenhouses makes it possible to grow many plants earlier and cheaper (compared to greenhouses) due to the special microclimate. The main work in such a structure is done by the greenhouse effect.
Rules for effective use of the structure
Often one greenhouse is used to grow several types of crops. In this case, we recommend constructing dividing strips along the building using plastic film.
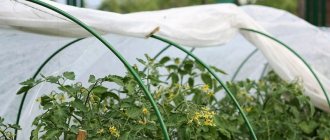
On warm days the frame can be left open all day. But with the onset of the cold season, it is worth increasing the protection of plantings, at least in such a simple way as slatted frames with stretched film. As a result, we get a greenhouse with double protection - in addition to the main frames, light frames will also stand in the way of cold air, which will increase the efficiency of heat conservation inside the greenhouse structure. The warm microclimate in the greenhouse will allow planting to begin in the spring a couple of weeks earlier; in the fall, the not yet harvested crop will be protected from early cold weather, and at the same time, the fruiting period of some crops may be extended by a month or a month and a half.
When growing melon plants in a greenhouse, measures should be taken to ensure that their vines do not come into contact with the soil. To do this, supports are used in the form of U-shaped elements, on which slats are laid at intervals of 7-8 cm. As soon as the height of the seedlings is equal to the height of the supports, slats must immediately be laid under the lashes, otherwise the plants will be damaged later.
Advantages and disadvantages
Like any structure, the “butterfly” has a number of advantages and disadvantages. Experienced summer residents note that one of the positive aspects is that its internal space can be used very effectively. There are no passages inside the greenhouse, and frames that open easily allow you to gain the necessary access to the plants. This is especially appreciated by gardeners whose plots are not very large and every meter is very valuable.
The butterfly design is very convenient, as it allows you to easily reach any plant inside. There is no need to put extra effort into this. Another advantage is the simple and quick installation of the structure. It doesn’t matter whether the structure was purchased ready-made or made independently, installing it is completely easy. This task is within the power of any summer resident. No special wisdom or skills are needed here.
An important advantage of “butterflies” is their low price. If you compare them with other greenhouses, it will become clear that they are one of the cheapest. However, this does not affect the seedlings grown in them at all.
The strength and durability of these structures are also considered advantages. If you look at their technical characteristics, you can see that greenhouses can withstand winds of up to 20 meters per second and snow cover of up to 10 centimeters. Moreover, if necessary, it is possible to strengthen the structure using special supports. Another nice thing about such greenhouses is easy maintenance.
The “butterfly” structure has slightly fewer disadvantages, and, as practice shows, they do not interfere with summer residents at all. Among the shortcomings, the most common are imperfections in the edges. However, interfering irregularities can be easily removed using a regular file. Also quite often there are designs with insufficiently reliable hinges on which the frames are held. Of course, if desired, they can be replaced with better and more durable ones.
DIY “butterfly”
Since the wooden frame is used more often by summer residents, we will get acquainted with the instructions for creating a greenhouse based on this particular material.
Step 1. Create a drawing of the structure you want to get. It should be as detailed as possible, indicating all dimensions - this will simplify the process of creating a greenhouse.
Drawing of a greenhouse “Butterfly”
Step 2. Always start by making the sides. Cut out all the wooden elements shown in the drawing from the boards.
Wooden elements are cut from boards
Step 3. If you look at the drawing, you can see that the sides of the greenhouse consist of 3 pieces of boards connected together. Connect them together using a block and screws or nails. Prepare the second side wall in the same way.
The side walls consist of 3 boards
Step 4. Now take the boards intended for long walls. The boards must be the same. Make grooves in them 4 mm wide and 2.5 cm deep - this is necessary so that the frames lie flat.
In this place you need to make 4x25 mm grooves
Step 5. Connect these boards using bars at the corner joints and self-tapping screws to the side walls.
Wall connection diagram
Step 6. Take the ridge board, also make grooves in it (they should be on the same level as the previous ones) and attach it with screws between the corners of the side walls so that its edges rest on the longest block connecting the three side boards.
Attaching the ridge board
Step 7. Make supports for the wings. Their number depends on the number of wings themselves. They should be positioned in such a way that the doors installed later seem to rest on them and do not fall inside the greenhouse. The supports are two narrow boards that are installed in the grooves prepared earlier.
Support with groove for water drainage
Step 8. Make shallow grooves on the outward facing side of the supports to allow rainwater to flow through them.
Step 9. Also install bars under the supports that will support them.
Location of support bars
Step 10. Install the ridge head by screwing it in place. Don't forget to make two 45 degree chamfers at the top.
Greenhouse end drawing
Step 11: Paint the wood frame with paint suitable for exterior use.
The next stage is painting the structure
Step 12. Start making the wings. Cut out all the wooden parts for the sashes according to the drawings
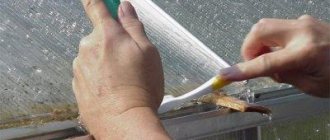
Work with glass very carefully using a glass cutter
Scheme for making wings for a greenhouse
Step 13. Make bevels along the upper end of all the sashes - they will make it easier to close the sashes in the future; there are folds on the inside so that glass can be placed there later.
Cross-section of some greenhouse parts
Step 14. Using glue and furniture dowels, assemble the main parts of the doors and let the products dry overnight. Dowels can replace small nails without heads.
Step 15: You will need top wooden covers for the glass to keep it from falling out. They need to be painted to protect them from rotting.
The arrow points to the glass covers
Step 16. Place the cut pieces of glass into folds, cover them with covers, and secure with self-tapping screws.
Step 17. Install the sashes onto the frame. They should protrude slightly beyond the edges of the main frame. Attach them with loops.
The sashes are installed on the frame
Step 18. Cut out and attach stops to the frames from the inside using canopies and self-tapping screws, which will hold the frames open as needed and will be able to fold.
The “butterfly” is ready. Now you can install it in a place convenient for you and use it for your pleasure.
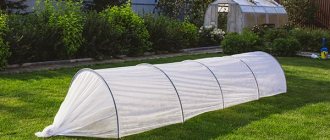
Greenhouse "Butterfly" devices from old window frames
Some assembly tips
- The boards at the sides should fit tightly to each other, without gaps.
- For melons, it is better to make the sides partially glazed so that the crops get more light.
- To prevent the greenhouse from bending under the weight of the glass, it can be reinforced with a metal pipe along the ridge or wooden supports can be made under the ridge part.
- Cords attached to them, secured to hooks or pegs, will help keep the frames in one position and protect them from slamming by the wind.
- Lay the sides where they come into contact with the ground with linoleum for better protection from moisture.
How to choose?
When choosing a greenhouse for your site, you should first find out reviews about this or that option. A clear idea of what it will be used for can help you make your choice. For example, a greenhouse made of film is suitable for cucumbers, but for growing strawberries it is better to choose a polycarbonate structure. If you have time and opportunity, then, of course, it is better to make a greenhouse yourself. Both metal and wood are well suited for the frame. However, it must be borne in mind that in order to avoid corrosion, you should choose galvanized or painted metal. Of course, to work with it, you need special tools and skills. At a minimum, you must be able to work with welding.
When there is a desire to make a “butterfly” with your own hands, summer residents recommend choosing wood for the frame. This material is easy to work with and easy to purchase at an affordable price. However, in order for such a structure to last longer, it is advisable to treat it with paint. Otherwise, the “butterfly” may quickly rot or be attacked by parasites.
The coating should be selected based on how many seasons the greenhouse will be needed. If it's just for a couple, then a cheap film will suffice. This option will also be good if the structure is installed only for the spring season and then removed. For more durable use, you should choose polycarbonate or glass. Of course, preference should be given to modern polycarbonate, as it withstands impacts better, is lighter and is easy to process.
When choosing a greenhouse, special attention should be paid to fastenings, fastening elements and various accessories. Both in a purchased and a home-made structure, all these elements must be of high quality. This will allow the design to be more comfortable and durable.
How to do it?
It is not surprising that summer residents like the simple and convenient butterfly design. As a result, many people want to create it themselves. This option allows you to avoid many of the disadvantages that are found in purchased models.
Preparation
The creation of a greenhouse should begin with preparation. It's best to make drawings first. Then you should take care of the necessary materials and tools. You should have a hacksaw, tape measure, hammer, screwdriver, scissors or construction knife on hand, as well as nails, self-tapping screws, metal corners, handles, and canopies. When all of the above is ready, you can choose a place and prepare it for installing a greenhouse.
The place where the structure is planned to be located should be well illuminated by sunlight. Therefore, you should not opt for low-lying areas. Places where groundwater or precipitation accumulates are also not suitable. Otherwise, the plants in the greenhouse will rot and rot. It is desirable that the length of the structure be located in the north-south direction. If it is planned to create a buried structure, then it will be necessary to make a pit in the form of a trapezoid. The depth of the hole should be approximately 30-90 cm. This parameter should be selected based on the local climate and what the “butterfly” will be used for.
To strengthen the walls, it is best to use boards, and put a mixture of manure, rotten leaves and peat on the bottom. You can also use other mixtures that will be loose and generate heat. Soil 20-30 cm high is placed on top of the layer. Large logs are placed on it, which are recommended to be knocked down. The result should be a contour that, in all its parameters, should correspond to the dimensions of the future greenhouse structure.
Frame
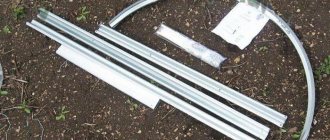
Upon completion of all preparatory work, you should proceed to the assembly of the frame structure. The simplest option is an arched frame. To make it, take beams with a diameter of 0.5 cm; if they are not long enough, they are knocked down. The result should be two slats with a length equal to the length of the structure. The coating will be attached to them. The frame can also be assembled from metal-plastic pipes, which are easily bent into the desired shape. However, it is more difficult to assemble a frame from them at the stage when it will be necessary to form the opening doors. According to experts, it is better to choose wood or a galvanized metal profile for the frame.
Installation of sheets
When the frame is ready, you can begin preparing the coating. The simplest option is to make the doors from polycarbonate. To do this, you need to take a regular sheet measuring 210 by 600 cm. Then cut it with a slender knife into 4 parts, 3 of which will be the same size. Now the canvases can be laid out on the frame so that their wide side runs along the bar. Polycarbonate should be secured with screws. It is best to lay the canvases overlapping. To glue the top sheet after fastening, you should use tape. When laying the sheets, it is important that the solar control film on them faces outwards.
Assembling a Butterfly greenhouse made of polycarbonate
The Butterfly greenhouse, made of gable polycarbonate, will be an excellent solution for every summer resident. You can install the finished kit quickly and easily yourself, without putting in significant effort. Each complex is accompanied by detailed instructions.
Assembling a greenhouse involves sequentially performing the following actions:
- Connection of all frame elements;
- Attaching support beams;
- Installation of polycarbonate.
To assemble the greenhouse you will need a set of screwdrivers and wrenches. Thanks to these simple steps and strictly following the instructions, you can quickly install a greenhouse that will last for a long period of time.
Important! Before starting construction, you definitely need to decide what exactly the shape of the doors will be, since they can be made straight or arched.
A Butterfly greenhouse less than 4 meters long with polycarbonate is an original and functional design that is quite possible to build yourself. To make a Butterfly greenhouse yourself, you need to choose a location, prepare the required materials and tools, make a foundation, and assemble the structure.
Recommendations for use
A butterfly greenhouse will last for decades if used correctly. For this, experienced summer residents recommend carefully closing the doors, without popping. If the structure is not removed for the winter, it is better to supplement its internal space with supports. This will allow the greenhouse to better withstand snow piles. It is also necessary to wash polycarbonate or glass sashes well.
To install the “butterfly” it is better to choose a flat area. In the fall, it is imperative to disinfect the soil inside the structure using special means. The greenhouse should be regularly coated with paint, and the metal frame should also be treated with an anti-corrosion agent. If damage or chips appear on the painted surface, they must be treated as soon as possible. In order for the structure to last as long as possible, it is better to build a small foundation.
To learn how to assemble a butterfly greenhouse, watch the following video.
The Butterfly greenhouse appeared on the market several years ago. Since then, many similar greenhouses or outright fakes of the Butterfly greenhouse have been added to the market. But the quality of some of them leaves much to be desired and largely depends on the manufacturer.
People began to search the Internet for answers to their questions and reviews: is the butterfly greenhouse terrible? Is the butterfly greenhouse convenient or not? We will try to answer these questions and analyze the positive and negative reviews from summer residents from the forums.
A lot of incorrect information comes from sites that advertise. They put everything together and often it’s just water or information contradicts each other. Even more questions and doubts about the correctness of his choice appear in the buyer’s head.
Let us immediately note that many bad moments and shortcomings are very easy to avoid - just buy a real Butterfly greenhouse made of polycarbonate. You can do this by following the link in our online store of greenhouses and greenhouses.
Tips for care and use
Summer residents who have already tried such a greenhouse share additional tips on operation. In order not to break fragile structural elements, the doors are opened and closed only by the handles, as carefully as possible, without slamming or tugging on them. If the greenhouse remains on the site for the winter, several supports are placed inside to help withstand the snow masses.
Attention!
If the greenhouse is not used in winter, it needs to be cleaned, inspected, and, if necessary, repaired and painted in the fall. The product can be stored assembled or disassembled; the room should be spacious with good ventilation.
In the fall, the walls inside the greenhouse must be disinfected, otherwise the microorganisms that have accumulated over the summer will move onto the plants in the next season, and then it will be more difficult to get rid of them. If chips or other damage occurs on the frame, repairs are carried out immediately; corrosion on metal surfaces requires especially rapid treatment. It is better to install the greenhouse on a foundation, so the lower part of the frame will be less susceptible to moisture.
You may be interested in:
Polycarbonate greenhouse on a frame made of plastic pipes Polycarbonate is often used as a covering material for the greenhouse frame. But what exactly to use for...Read more...
Among summer residents, the Butterfly greenhouse is in great demand, as it is a simple, practical and at the same time quite reliable design. Owners of small plots will be able to rationally use the free space. Gardeners from the northern regions will not have to build temporary shelters every year to protect especially heat-loving crops from return frosts. This design deserves attention.
Owners of large plots can afford to install large heated and unheated greenhouses. In closed beds you can grow heat-loving vegetables in cold regions or harvest any crops in the first half of summer. For those whose dacha occupies a relatively small area, large structures are not suitable, they have to look for other options. A good solution is the Butterfly greenhouse; it is small, convenient and easy to install, dismantle and move to another place. You can make a mini-greenhouse yourself using ready-made diagrams.
Is the butterfly greenhouse terrible? Reviews
Review 1: you need to use high-quality 10 mm polycarbonate
This year I bought a butterfly greenhouse. Especially for growing early seedlings. As a result, due to his gullibility and lack of professionalism, the sales consultant started the season a few weeks late. The reason is that 6 mm polycarbonate was mounted on the greenhouse. The seedlings felt good as long as there were no frosts on the soil surface. But then it hit -3 and even placing a breeze heater in the greenhouse at night didn’t help. Everything is frozen. As it turned out later, for early seedlings you need polycarbonate of at least 10 mm and ideally two-layer 12 mm.
Comment to the review: This is an absolutely wrong opinion, 10 mm or 12 mm polycarbonate will only double the cost of your greenhouse. Even in industrial greenhouses up to 7.5 meters wide, it is recommended to use 8 mm polycarbonate. For ordinary greenhouses and greenhouses, 4 mm of polycarbonate is enough; you cannot even bend 10 mm for such a small greenhouse. The main thing is to choose high-quality polycarbonate; you can use greenhouse soil heating systems, but in this case it is irrational and expensive.
Review 2: when assembling, be more careful with the installation of polycarbonate
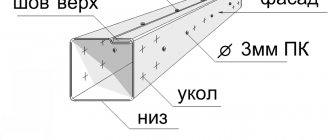
I bought a butterfly greenhouse 2 years ago. At that time I had no experience at all, either with greenhouses or with the materials from which they are made. As a result, I made many unforgivable mistakes, which I will now tell you about. After a fairly simple assembly, the frame was simply anchored to several wires bent with a staple. As a result, even with a slight wind, the greenhouse flew away with open wings. Not far, but the sprouts were crushed and one sheet of polycarbonate was cracked. The ends of all profiles must be sealed either with special plugs or silicone sealant. MAIN! Properly protect the ends of the polycarbonate. The honeycombs should be directed vertically from top to bottom. The upper end (when closed) is closed with a sealed tape, and the lower end with a special tape with micropores so that condensed moisture can escape. You also need to use special screws with silicone gaskets for fastening. If you don’t do this, then within 2-3 years everything inside will become moldy and the light transmission capacity will drop significantly.
Commentary on the review: To attach the greenhouse to the ground, you can use special lugs in the shape of an inverted letter T; they are made of a galvanized profile and are buried 20-25 cm into the ground. It is not recommended to use sealant in greenhouses; for this there is a special perforated tape and a sealing profile . But 100% sealing will still not be achieved.
Review 3: bought in Vologda, a lot of shortcomings, but in principle we can put up with it
I bought a 2x4x1.5 m greenhouse from a 25x25x1.5 mm profile. Arcs on the wings every 65 cm with longitudinal guides. In general, a reliable design for polycarbonate that is not afraid of snow. Powder paint, but not anti-vandal, but with varnish, came off in some places during transportation, when screwed, it cracks at the fastening points, I had to buy additional washers. The fastening strips that were included in the kit did not fit in width and there were fewer of them in terms of footage, perhaps the sellers simply mixed them up, but they had to be attached with self-tapping screws, having previously drilled holes. Not all holes were drilled in the fastening areas. According to the instructions they are marked, but in reality they are not. There are no seals for folding wings, and without them, the efficiency of heat conservation drops significantly. There are no pins for fastening to the ground, I had to lay a beam and screw it to it.
Comments on the review: the dimensions of a real Butterfly greenhouse are 2 or 4 meters long, 1.3 meters wide, 0.89 meters high when installed in the ground and 1.14 meters when installed on a foundation. The original Butterfly is not painted, only an open profile of 20×20 mm galvanized on both sides and a metal thickness of 1.2 mm. Everything that is painted is done in artisanal conditions; only the TMKN Nizhny Novgorod plant produces real galvanized butterflies. Tapes for fastening polycarbonate are also not used; the kit includes roofing screws with rubber washers, only this option allows you to securely fix the polycarbonate.
Collecting a butterfly from a plant
When assembling the greenhouse yourself, you must follow the manufacturer's instructions. The algorithm indicates what to connect to what.
Approximate assembly diagram. Drawing attached. Using hardware, you should assemble the frame of the greenhouse using it. Each element is connected in the form of the letter “t” or secured with an angle. By fastening in the form of a cross, it is necessary to strengthen the supporting elements with a length of more than two meters. The assembled frame must be covered with polycarbonate or polyethylene material. Factory algorithms may differ, but the basis for assembling the frame is identical.
Great choice for small areas
I have been using the butterfly greenhouse for 3 years now. I am harvesting excellent tomato harvests. What is the advantage of this design - it takes up very little space, and the usable area inside is used entirely. There is no need to trample paths; in fact, you can plant 3-4 rows of tomatoes and 5-6 radishes. Very convenient care of plants, the approach is open from any side. It ventilates well and retains heat inside just as well.
The design has few disadvantages. But the execution of specific products itself leaves much to be desired. Firstly, the anti-corrosion coating is weak. During assembly, the paint came off on the arches where the bolts were attached. After the first year it started to rust and had to be cleaned and repainted. Secondly, the assembly itself cannot be completed without a file, since almost all the holes have burrs, and the bolts simply will not fit through. The problem is easily solved with a round file, but it still infuriates.
Greenhouse butterfly model Radish, if your husband is not friendly with his hands, better not take it
This year we bought a Radish greenhouse with a folding butterfly top. This design was fundamental, since the greenhouse is located in a narrow place in the garden where there is an approach from two sides and the most convenient access was needed.
Yesterday my husband started collecting it. I’ll immediately note the main drawback, the disgusting quality of painting. A layer of paint remains on the tape with which the arcs were rewound. After assembly, I had to buy additional oil enamel with a brush and go over the entire structure again. The hinges on which the wings are supposed to be held are very flimsy; during installation, one flew off immediately, and the other was bent. My husband replaced it with normal door ones, drilling additional holes. But they had to be used every day.
The arcs themselves do not coincide in curvature with the frame, where there is more, where there is less. The instructions say that both polycarbonate and film can be used as a coating. But in fact, when covering with film, such gaps will remain that heat preservation is out of the question.
Which greenhouse is better for a summer residence: “Butterfly” or “Breadbox” - choose the option for yourself
The “Breadbox” differs from the “Butterfly” model in that only one half of it opens. If you don’t need a wide greenhouse, you can get by with just one flap. But for proper care of plantings, the “Butterfly” is still more convenient, because you can approach the garden bed from both sides.
In terms of construction cost, the Bread Box wins because it has fewer moving parts, which means it will cost you a little less
Another reason for comparison is the assessment of tightness. The “bread box” retains heat better due to its design. But in the warm season, “Butterfly” is better ventilated. Which of these models to choose is up to you to decide. It all depends on the tasks you set for this greenhouse.