SHARE ON SOCIAL NETWORKS
FacebookTwitterOkGoogle+PinterestVk
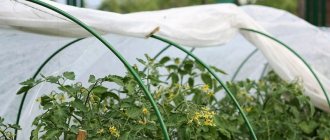
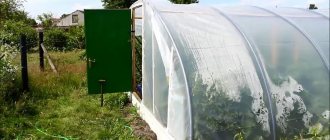
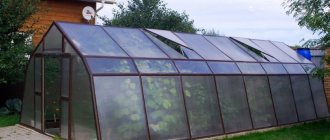
Growing various crops in greenhouses is an activity loved by many summer residents. But there is not always room on the site for large and bulky structures suitable for this purpose. As an alternative to a simple and convenient option, a Butterfly greenhouse can be used, the design, features and advantages of which will be discussed in this article.
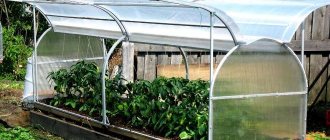
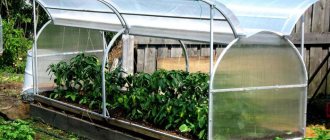
The Butterfly greenhouse has a convenient design that provides access to plants from both sides
Design options for the “Butterfly” greenhouse
The type of greenhouse is determined by the type of crops grown and the area that the structure should occupy. Highlight:
Greenhouse with parameters: 400*150*110 cm
For its construction, a 7 m long polycarbonate sheet with transverse lines reinforcing the structure is required.
On arched covers, the distance between the stiffeners should not exceed 50 cm and 45 cm at the ends.
In order to strengthen the base, strips of 30*400 cm are provided. Three arcs are attached to the ground, an additional arc-shaped support is installed in the center.
Greenhouse for tall plants
When growing tall crops, a “ridge” is installed strictly in the center, allowing you to increase the area of the structure and its height.
Model with separate “wings”
The design is convenient in that it saves heat.
Greenhouse "slope type"
Typically, the height of such structures reaches 130 cm. The model is convenient in that it allows you to do without arc-shaped parts.
Construction of the foundation
A butterfly greenhouse made of polycarbonate can be installed without a foundation. It will be required if you do not plan to change the location of the structure in the future. To create a foundation, you will need to mark the site, prepare a pit up to 60 cm deep. Fill it with reinforcement and other metal elements. Attach the sides to the base. Install support posts made of metal or wood in the center of the building. Strengthen the upper part of the greenhouse structure with posts, attach the frames with a piano loop to the upper part, install polycarbonate. Some experienced gardeners believe that a foundation is not needed. In practice, it won’t hurt; you can also build it from wood or concrete.
The sequence of assembling and installing the “Butterfly” greenhouse with your own hands
Selecting a location
The determining factors in selecting a site for construction of a structure are:
- level of illumination - the optimal orientation is from north to south with sufficient insolation (the possibility of shading from trees or nearby buildings should be taken into account);
- landscape characteristics - it is better to place the greenhouse on a flat surface; eliminating the possibility of flooding - it is recommended to avoid low-lying areas;
- direction of wind force - neglecting the wind rose can have a negative impact on the strength of the structure.
Material for making the frame
It is recommended to make the arched frame from lightweight metal structures that are resistant to corrosion. Metal arcs can be ordered in the workshop based on individual calculations. If the greenhouse is manufactured according to standard parameters, it will not be difficult to purchase additional parts from any manufacturer.
In some cases, metal is replaced with wood or plastic. The average service life of a pine frame without special care is five years.
When using plastic pipes, it should be taken into account that it is vulnerable at the bend, which experiences increased loads.
Sheathing material
In practice, the following is used for lining a greenhouse:
Agrofilm - the disadvantage is the low safety margin, because of this, even with its low cost, the total costs can be high.
Glass – it is important to use a symmetrical number of window frames.
The disadvantages of the material include:
- relatively high weight;
- the presence of an optical lens effect;
- inconvenience when opening and closing windows;
- fragility;
- the inability to give the glass an arched shape, which is of fundamental importance for proper lighting and heat transfer (flat glass quickly heats up in sunny weather even at sub-zero air temperatures).
Polycarbonate – different:
- ease, which makes it possible to transport it;
- strength and durability (300 times stronger than glass);
- flexibility, which allows the production of arc-shaped structures;
- transparency - the ability to transmit and scatter sunlight (transmission is 90%, there is no effect of an optical lens);
- the ability to block ultraviolet rays, which has a beneficial effect on cultivated crops;
- the ability to use light filters: red and orange favor plant growth; yellow is characterized by a repellent effect on potential insect pests;
- high heat-saving ability.
Therefore, the most preferred material for sheathing is polycarbonate sheets. The material can be cast or cellular. Cellular is characterized by increased heat-saving ability (due to the cellular structure), greater lightness, similar strength and lower price (due to material savings), due to which this particular type of polycarbonate has become more widespread.
Greenhouse "Butterfly": drawings with dimensions
When starting to prepare a drawing, you should take into account not only the materials that you plan to use, but also the varieties of plants planned for cultivation, as well as the possibility of artificial heating and the parameters of the structure required for them. It is also useful to take into account the likelihood of disassembling or transporting the greenhouse, which will definitely affect both the complexity of the elements used during installation and their weight. Based on the above, the total cost of the project is calculated.
Drawings of several models of the Butterfly greenhouse:
Standard sizes are 4 m long, 2 m wide and 1-1.5 m high.
Design Features
First, let's remember what a greenhouse is. This is a low design that allows you to start the summer season earlier due to its ability to perfectly retain heat and transmit light. Greenhouses are necessary to create a favorable microclimate for plants that need more comfortable growing conditions than those found in most regions of Russia.
On a note! The “Butterfly” greenhouse was named so because of the special design of the side windows-slopes, which, rising for ventilation, become like the open wings of a butterfly. The slopes (or, as gardeners call them, wings) are usually semicircular or straight in shape - when folded, a factory greenhouse looks like a small arched greenhouse or has two even slopes.
Greenhouse "Butterfly" in open position
This compact design is very convenient to use. By the way, it is much more convenient than a greenhouse, although it performs almost the same functions. Working in the Butterfly greenhouse is a pleasure: you don’t need to walk through the beds, you can reach any bush from the very edge. And the space inside is fully used - there are no paths between the rows.
In addition, the design does not take up much space. The length of the greenhouse usually does not exceed 2.6 m, the height is just over 1 m, and the width is approximately 1.4 m. The average area occupied by the structure is about 5 m2, and the mass of the industrial structure is about 32 kg.
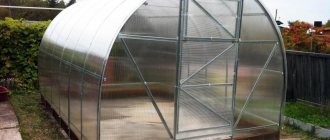
An example of a “Butterfly” greenhouse made of polycarbonate
Note that a “Butterfly” type greenhouse can be bought in stores or made independently. It's quite simple and we'll learn how to do it later. If you buy a ready-made “Butterfly” in a store, then remember that its frame is usually made of a strong metal profile 2 * 2 cm. The greenhouse cover, in theory, can be anything, but ready-made options are still available with cellular polycarbonate. The average lifespan of a Butterfly is about 10 years with proper care.
Varieties of the Butterfly greenhouse
By the way, the assembly of the finished Butterfly greenhouse is quite simple - the package includes instructions that detail all the stages of installation of the structure. And it’s also easy to assemble, rearrange and transport. And for installation you don’t need a foundation - the “Butterfly” will fit perfectly right on the ground.
Greenhouse-greenhouse "Butterfly". Assembly instructions. Downloadable file (click the link to open the PDF in a new window).
Assembly instructions
Interestingly, you can plant seedlings in the Butterfly earlier than in the greenhouse. The fact is that there is less space and soil in a greenhouse than in a greenhouse, and therefore they are heated faster by the sun's rays. This means that the microclimate necessary for plants to grow and develop appears faster.
Among summer residents, the Butterfly greenhouse has established itself as a fairly reliable design that copes well with adverse weather conditions.
Greenhouse “Butterfly”, 6 m
Step-by-step instructions for assembling the “Butterfly” greenhouse
If desired, it is easy to install a “Butterfly” greenhouse with your own hands. When assembling a greenhouse 4 m long and 1.6 m wide, you will need:
- polycarbonate sheet – 2.1× 9 m,
- two antiseptic-treated timbers 3.9 m long and two 1.6 m long with a cross section of 10*10 cm.
- metal arcs – 3 pcs.;
- transverse metal beam 1560 mm – 3 pcs.;
- top stringer, side 1980 mm – 12 pcs;
- stringer for sashes 1830 mm – 4 pcs.;
- lug 450 mm – 6 pcs.;
- handles and stops for sashes;
- door hinges – 8 pcs.;
- corner and intermediate brackets – 4 and 2 pcs.;
- triangular and square scarves – 32 and 8 pcs.;
- turntables – 8 pcs.;
- corner – 32 pcs.;
- fastening elements - nuts, screws, washers, metal screws and roofing screws.
The sequence of actions looks like this:
| Illustration | Step by Step Actions |
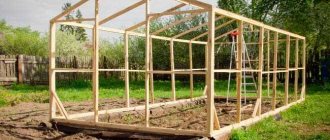
| A foundation of wooden beams is installed. | |
| Parts of the base are attached using metal corners. To check the evenness and diagonals of the structure, it is recommended to use a water level and a tape measure. | |
| The next step is to install the metal base on the prepared foundation. | |
| After which the arc parts are attached to the base of the greenhouse. This is done using fastening “whiskers” inserted into the grooves and secured with self-tapping screws. | |
| The film is removed from the front part of the polycarbonate sheet. Half of the sheet is laid on the end arched part and fixed with self-tapping screws. | |
| Excess polycarbonate is trimmed off. The second end part of the greenhouse is prepared in a similar way. | |
| The finished end parts are attached using self-tapping screws to the base, after which the greenhouse frame is installed in a similar way. | |
| The next step is to fix the upper ties on the frame with self-tapping screws. | |
| Arcs with a pin are fixed on the frame. | |
| To increase strength, the corners of the greenhouse are reinforced with metal ties. | |
| The film is removed from the polycarbonate sheet, after which it is cut into two equal parts, which are then applied to the frame. | |
| After leveling in the middle, as well as along the bottom, they are fixed with self-tapping screws in increments of 10 cm on all metal elements of the structure. | |
| Excess polycarbonate is trimmed off. | |
| Handles are screwed to each sash. |
The greenhouse is ready for use.
Making a “butterfly” from a metal profile
The principles of constructing a greenhouse using metal profiles are the same as those made from wood. I only recommend starting installation from the side parts.
- You need to assemble the frame based on the drawing. It should have a central beam on which hinges for the “wings” are attached. The opening leaf can be single or double. Accordingly, it is necessary to provide a folding mechanism.
- Next, the frames are assembled. They are attached to the central beam.
- On the sides you need to mount supports that will hold the open doors.
- The greenhouse frame is covered with polycarbonate. It is better to cut it on a hard surface, taking careful measurements. There should be no gaps.
Greenhouse Butterfly from a profile pipe
Rules for using a polycarbonate greenhouse
To make the greenhouse happy for gardeners and plants, it is useful to follow a few simple tips:
- monitor the air temperature - open and close windows if necessary;
- It is more logical to separate the different crops grown with film;
- it is necessary to water the plants regularly;
- after winter, the greenhouse should be prepared by cleaning, checking for possible damage and, if necessary, repairing it;
- In order to eliminate the negative influence of pathogenic fungi and bacteria, it is recommended to disinfect the soil before planting.
How to prepare a greenhouse for winter
To prepare the greenhouse for winter, when the product is on the site, it is necessary to install supports in order to counteract the possible pressure of the snow cap. In October-November, wood is disinfected and disinfested; if necessary, paint is applied to wood and metal structures.
Once assembled, the Butterfly should be stored in assembled or disassembled form in a room with good air exchange.
Operating rules
If the weather is warm, the frame can be opened all day. With the onset of cold weather, the vegetation will be protected by light slatted frames, which are covered with film.
It is permissible to use a polycarbonate structure with double fastening - from light and main frames. In this case, the heat will be better retained inside. And the period of planting vegetable seedlings can begin 10 - 15 days earlier than the recommended time. In the fall, if you use the building correctly, the crop will be stored normally inside it. To organize an irrigation system, there is no need to come up with something complicated - a simple watering can is enough.
When growing melons, it is necessary to install supports so that their vines do not lie on the ground. For the winter, polyethylene is removed from the frames, washed and dried. Other materials are also washed. Before winter, plants are removed from the building. The frame is cleaned to prevent pests from appearing, and the soil is disinfected. If necessary, repair the frame without leaving it until the spring.
Better models: characteristics and prices
The most popular are the standard and shortened versions of the “Butterfly”:
| Model | Dimensions, m | Characteristic | price, rub. |
| "Zucchini" gray | 4,0*1,6*1,1 | The frame is made of galvanized metal profile 25 mm * 25 mm. There are lifting covers with stops on both sides. Cellular polycarbonate with a thickness of 4 mm was used as a coating material. | 11 346,00 |
| 2,0*1,6*1,1 | 6 556,50 |
Examples and options
Below are examples of the greenhouses under consideration.
The design of a butterfly greenhouse can be made in such a way that the structure is located on the site as compactly as possible.
Many people prefer a wooden frame. It is easy to process and also looks aesthetically pleasing.
The profile pipe construction is highly durable.
Such a greenhouse may have a rather unusual design.
Drawings with dimensions
The drawing is an important stage in the formation of a greenhouse. For competent construction, preliminary calculations will be required.
It is important to calculate the size, prices and number of materials. First you need to lay out the foundation
It’s not so important whether you make a foundation or not, but the sides are important
First you need to lay out the foundation
It’s not so important whether you make a foundation or not, but the sides are important
The sides can be single or double, the layer is 2.5 cm, and the height depends on the specifics of the selected crops.
Melons - up to 20 cm, cucumbers require much more height.
There should be a main beam on top of the system; the main component, the “wings,” is attached to it.
The height is no more than one and a half meters. When calculating the wood frame, log products are disinfected before painting.
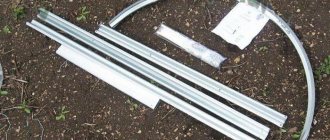
Complete set of 2 meter and 4 meter Butterfly greenhouse:
| № | the name of detail | Photo | Number of parts, pcs. |
| Butterfly 2 m | Butterfly 4 m | ||
| 1 | End arc (with holes for polycarbonate fastening) | 2 pcs | 2 pcs |
| 2 | Intermediate arc | — | 1 PC |
| 3 | Cross member 1260 mm | 2 pcs | 3 pcs |
| 4 | Side stringer 1978 mm | 4 things | 8 pcs |
| 5 | Upper stringer 1978 mm (with holes for hinges) | 2 pcs | 4 things |
| 6 | Upper lid stringer 1828 mm (with holes for hinges) | 2 pcs | 4 things |
| 7 | Bottom cover stringer 1828 mm | 2 pcs | 4 things |
| 8 | Cover arc | 6 pcs | 12 pcs |
| 9 | Grouser 450 mm | — | 2 pcs |
| 10 | End grouser 450 mm (with holes for polycarbonate) | 4 things | 4 things |
| 11 | Triangular headscarf | 24 pcs | 32 pcs |
| 12 | Square scarf | — | 8 pcs |
| 13 | Corner | 16 pcs | 32 pcs |
| 14 | Intermediate bracket | — | 2 pcs |
| 15 | Corner bracket | 4 things | 4 things |
| 16 | Emphasis | 4 things | 8 pcs |
| 17 | Pen | 4 things | 8 pcs |
| 18 | Pinwheel | 4 things | 8 pcs |
| 19 | Screw M5×30 | 86 pcs | 130 pcs |
| 20 | Nut M5 | 102 pcs | 146 pcs |
| 21 | A loop | 4 things | 8 pcs |
| 22 | Hinge cover | 8 pcs | 16 pcs |
| 23 | Screw M4×30 | 20 pcs | 40 pcs |
| 24 | Screw M5×16 | 8 pcs | 16 pcs |
| 25 | Nut M4 | 24 pcs | 48 pcs |
| 26 | Self-tapping screw 4×20 | 108 pcs | 162 pcs |
| 27 | Roofing washer | 108 pcs | 162 pcs |
| 28 | Cover stop | 4 things | 8 pcs |
| 29 | Passport | 1 PC | 1 PC |
| 30 | Insert with complete set | — | — |
Sources
- https://ogorod-bez-hlopot.ru/parnik-babochka-stoit-ono-togo.html
- https://homius.ru/parnik-babochka.html
- https://teplicaexpert.com/stroitelstvo-teplicy/babochka/
- https://MrDachnik.com/parnik-babochka-svoimi-rukami
- https://remoo.ru/postrojki/parnik-babochka
- https://b-online.ru/malye-formy/teplitsa-babochka-iz-polikarbonata-kompaktnaya-i-udobnaya-konstruktsiya-svoimi-rukami.html
- https://stroy-podskazka.ru/parnik/babochka/
- https://sdelairukami.ru/parnik-babochka-iz-polikarbonata-svoimi-rukami/
- https://BestForHome.ru/teplica/slava/parnik-babochka/sborka-svoimi-rukami-chertezhi-s-razmerami
Tips from users of the Butterfly greenhouse
Dmitriy . When installing the greenhouse, I chose the wrong thickness of polycarbonate. 6 mm was not enough. As a result, all the seedlings froze. I advise you to use a material at least 10 mm thick, or in two layers of 6 mm each.
Svetlana . My husband made a number of mistakes when installing the Butterfly. In particular, the greenhouse was not firmly secured. As a result of strong gusts of wind, the “Butterfly” simply flew away with its “wings” open. And before that, I crushed the seedlings quite a bit. It was very disappointing. Neighbors advised installation on a solid foundation.
Oleg . I advise you to use screws with silicone gaskets, and install the honeycombs vertically from top to bottom. It is better to cover the top with a sealed tape, and the bottom should be covered with tape with micropores, which will ensure the outflow of moisture. This will ensure high light transmission and protect the greenhouse from mold.
Natalia . The greenhouse is perfection. The only drawback is that you have to keep an eye on the paint. It often cracks, especially under the scorching sun, often in the places where the bolts are attached. I have to force men (I have two – a husband and a 14-year-old son) to clean the surfaces and repaint them. And the holes often have burrs, which is very inconvenient and requires additional processing.
How to choose the right place for a greenhouse
What is important for choosing a location for a small greenhouse? First of all, pay attention to the quality of the soil in the selected location. In principle, it is possible to completely replace the soil under the greenhouse, but it is much easier to immediately install it on suitable soil.
If the ground is too soft, the greenhouse may sag, so immediately consider installing a small foundation
Advice! Avoid areas with clay soil and high groundwater levels when installing a greenhouse or greenhouse - clay retains water, and plant roots will rot from excess moisture.
Another significant point is the direction and strength of the wind on the site. With the top open and closed, the structure has a decent windage; if you place it in a heavily blown place, the greenhouse will periodically blow away. The third important factor is the level of illumination of the selected area. It is recommended to install greenhouses in the south and southeast. The sun here not only fully illuminates the plants, but also warms up the greenhouse.
Do not place the structure near a high fence, building or tree
It is not advisable to install “Butterfly” or “Novator” type greenhouses on a slope. If the situation is hopeless, you will have to make a foundation and level the ground.
Related article:
DIY polycarbonate greenhouse. Drawings, types of structures, step-by-step construction, advice and recommendations from experts and much more in a separate publication on our portal.
Features of the “Butterfly” greenhouse: convenient or not
The compactness and simplicity of the structure determine its advantages and disadvantages.
Advantages
The undoubted advantages of the structure include:
Convenience:
- the ability to quickly warm up without creating shadows on the site;
- possibility of cultivating common crops, including flowers, vegetables and melons.
Simplicity of design:
- it’s easy to build a greenhouse with your own hands;
- installation does not require a foundation, although many summer residents recommend not abandoning it in order to prevent excess moisture.
Practicality and ease of use:
- the design allows sunlight to pass through and retains warm air;
- the ability to open the side windows simplifies the care of grown plants, creating conditions for gas exchange, allowing you to do without greenhouse paths inside and grow crops in two rows.
Reliability:
- the design is resistant to winds up to 20 m/s, and in winter – to snowfall;
- The service life of the structure is relatively long.
Transportability (when disassembled, the greenhouse can be easily transported by car).
Flaws
The greenhouse is not without a number of disadvantages:
- The need to frequently open and close windows presents certain inconveniences.
- Metal structural elements without paint are susceptible to corrosion. To avoid this, you should remember to paint vulnerable surfaces, first cleaning them from rust. You should not skimp on paint, which must be of high quality. This will save the gardener from possible problems.
- Wood fragments are susceptible to rotting and attack by insect pests. To combat these negative phenomena, special wood treatment is required. Glass has low impact resistance, and polyethylene has a short service life.
- The weak points of the greenhouse include the hinges that hold the doors. To avoid this, it is useful to inspect them regularly, lubricating them if necessary.
- When making holes for fasteners, burrs may appear, which can be removed with a file.
- When using polycarbonate, deformation of the lower arches may occur, so when designing a structure, care should be taken to strengthen them.
We do it ourselves: materials and tools
This type of greenhouse can be built using a variety of materials. The choice may be affected by their cost, ease of processing, durability and much more.
Table. Materials that can be used to create a “Butterfly” greenhouse
| Material | Description and possibility of use |
| Tree | One of the best materials for making your own sides and frame. Easy to process and readily available material. Disadvantages - susceptible to rotting, can be attacked by wood borers. |
| Metal | Strong, reliable, durable material. Difficult to work independently. Sometimes used to make frames. Disadvantages – without painting it quickly rusts. |
| Glass | A good material for covering a greenhouse, easily accessible (you can use glass from old windows). Disadvantages: fragile and difficult to process independently. Durable if cared for. |
| Cellular polycarbonate | An excellent covering material that is not afraid of light impacts and does not break as easily as glass. Easily accessible and easy to process - can be cut with a regular knife. Durable. |
| Polyethylene film | The cheapest, but also short-lived covering material. It easily becomes unusable, and therefore it is better not to use it for the “Butterfly”. It only lasts for a couple of seasons, while previous options can last for 10 years. |
| Nails, screws | These and other small fasteners are necessary to connect individual parts during the creation of the Butterfly greenhouse. |
| Metal corners | They fasten all the corner parts of the structure - this will make the greenhouse more reliable. |
| Door awnings, handles | This and other fittings are necessary to make the doors easy to open. |
A frame greenhouse is very convenient for seedlings
The tools to create a greenhouse will require:
Experienced gardeners recommend using wood to create a frame. Yes, it is less durable than metal, but it is easy to process, and it will be easier to obtain it in the required quantity.
Advice! To work with metal, you will need a welding machine and welding skills. If there is no such “baggage”, then it is better to abandon the idea of creating a “Butterfly” from a metal that is difficult to process.
Advantages and disadvantages
The Butterfly greenhouse, like any other structure, has its pros and cons. And you need to know them before you decide to purchase this structure or choose to build it yourself.
Unusual design option
The main advantages of the Butterfly greenhouse.
- For its parameters, it copes well with adverse weather conditions. The Butterfly greenhouse will perfectly withstand quite strong winds - up to 20 m/s.
- “Butterfly” is not afraid of snowfalls - a 10-centimeter layer of snow is not at all scary for a greenhouse.
- A greenhouse does not take up much space on a summer cottage, and its low height is its advantage, because it does not shade the space around it.
- Plants in a greenhouse are very easy to care for. And in general, any work in the “Butterfly” is very simple - the small width and raised doors provide excellent access even to the farthest corners.
- Widely folding slopes allow for excellent air exchange for plants.
Widely folding slopes allow for excellent air exchange
The “butterfly” quickly warms up in the sun. It is easy to transport or move the factory greenhouse to another place - it is lightweight and quickly disassembled. It can be transported in any passenger car. The factory greenhouse is durable: the service life declared by the manufacturers is 10 years, and the metal profile of the frame is painted with powder paint, which protects against corrosion. There is no need to build a foundation for the “Butterfly” on a summer cottage - the greenhouse is lightweight and does not need it.
Butterfly design
But during the operation of the factory “Butterflies”, summer residents also identified the main disadvantages of this design. As it turns out, not everything is as rosy regarding the greenhouse as the manufacturer writes, and you can’t always trust it.
Definitely, the use of rising wing wings is very convenient in a small summer cottage, but the disadvantage of this design is that it will often have to be opened/closed. And in places where there are any friction, fastenings or screws, the paint peels off very quickly. Without this protective material, rust will quickly reach the frame
It is important to immediately touch up all those places where the paint has fallen off. Of course, I don’t want to modify the greenhouse after purchase, but what can you do? The greenhouse has to be opened/closed frequently
The greenhouse has to be opened/closed frequently
By the way, the hinges on the doors of a factory greenhouse are quite fragile - they do not always withstand the declared service life. Very often the hinges and canopies on the wings quickly break off.
Also, one of the disadvantages (not of the design itself, but of its configuration) is that the instructions are not always clearly printed. Some gardeners were unlucky enough to buy a “Butterfly” greenhouse and had to suffer with it during assembly.
Most likely, this is why many people build the “Butterfly” on their own. This is not difficult to do, but this design will be many times more reliable.
Open greenhouse made of window frames with seedlings
