Growing vegetables and other crops in a greenhouse allows you to protect them from frost and bad weather, as well as provide optimal conditions in terms of temperature and humidity. And as a result, all the time and effort spent on arranging the building and caring for the plants will more than pay off with a bountiful harvest of high quality. Do you like to do everything around the house yourself? Are you a "jack of all trades"? Then try making a greenhouse from a profile with your own hands.
Do-it-yourself greenhouse from a profile
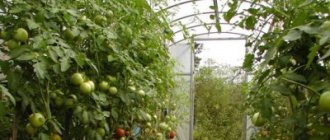
Greenhouse made of profile 25x25 mm
Drywall profile - the optimal frame for a greenhouse
Galvanized or aluminum profiles for drywall are very convenient to use. It is light in weight and easy to install. The price is quite affordable. It is easy to bend and cut with metal scissors; the strength of the metal profile is also worthy of respect. If it can support the weight of drywall, then why not use it as a base for polycarbonate?
Profile for drywall
Practice has shown that the idea is very productive. The World Wide Web is flooded with stories of craftsmen who have made and successfully operate such structures. As they say, as many people as there are... greenhouses. From the mass of stories, you can derive general principles of construction and focus on specific recommendations.
Materials
- Galvanized profile. Rack profile - vertical posts that indicate the height of the greenhouse. The guide profile is horizontal jumpers that make the frame strong.
- Galvanized square pipe 20/20,20/30 mm.
- Self-tapping screws for the profile.
- Crabs.
- Polycarbonate.
There is a zigzag profile for greenhouses on the market. If the greenhouse is being built seasonally, then you can use glass or film for the covering material. How to bend a profile for a greenhouse? To do this, cut the ribs with metal scissors and bend them to the radius required.
Advantages of a greenhouse made of metal profiles
Those who have already appreciated the convenience of using such greenhouses note the following advantages:
- greenhouses made of plasterboard profiles, built with your own hands, cost about half as much as purchased ones;
- Due to its strength and lightness, the design is more convenient than wood products. It can be disassembled if necessary. Such a greenhouse is more durable than a wooden one, it is not subject to corrosion, and is not susceptible to the influence of fungus or mold;
- Experts advise in the northern part of Russia to build a collapsible greenhouse roof and remove it for the winter. And in the middle zone and in the south, where precipitation is not so heavy, greenhouses made from plasterboard profiles winter well. The owners only clear the snow from them from time to time;
- a greenhouse made of galvanized or aluminum profiles can be placed on a foundation, and the covering can be constructed from polycarbonate up to 4 mm, which will improve the strength of the structure.
A profile greenhouse has a lot of advantages - low price, lightness of construction, durability
Main nuances
It often happens that greenhouses are installed on old foundations. Well, why not install it if you already have a similar blank. Moreover, usually developer companies that engage in such work refuse to work on creating a special model, non-standard sizes or shapes. For them, there is no need to complicate everything, everything is according to the template and nothing more.
The second nuance of constructing a greenhouse yourself is the free placement of window openings. As you can already see, professional firms also neglect this. They prefer to install standardly at the ends. And all because there are already ready-made drawings of such variations, and it is easier to do everything according to them than to create a new version for you personally. And even more so, with such an arrangement there will be excess materials, profiles, etc., which is also not needed by the manufacturer. The main thing is that most often they agree with this, because otherwise the work will not be carried out. And here, such a good option, is to create your own individual greenhouse by hand, of any shape and size. At the same time, you can even use computer technology and create your own 3D model.
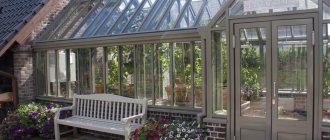
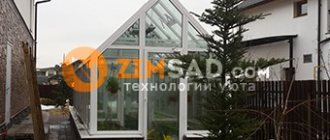
And, most importantly, you are not limited in forms. You can stop at the standard one, but you can get confused and do something like what is shown in the image below.
There is no doubt that a greenhouse welded from pipes will last much longer, but few people want to get involved with welding. But there is also a nuance: if you do everything correctly in the work and construction of such a greenhouse, then it will last no less. Almost everyone who uses such designs notices the benefits after the first year and says that the design is better and more reliable than many store-bought options.
The advantage of building from profiles
- the use of galvanized steel, i.e. the metal will not rust over time;
- cheapness;
- freedom of creativity - you can build a greenhouse of absolutely any shape;
- ease of construction, even for an inexperienced person;
- the structure is quite light and does not require additional support, i.e., a foundation.
Flaws
- The global disadvantage is the fragility of the structure. The profiles are not designed for large bending loads and if they are not strengthened in a special way, the entire structure can bend even under the weight of snow;
- The lightness of the structure is also a disadvantage since it requires additional fastening from the wind.
Choosing a suitable form for the greenhouse
Most often, greenhouses of the following shapes are built from metal profiles:
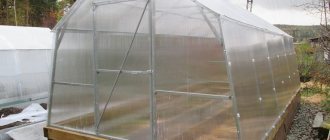
- Classic gable shape. This is convenient, since the snow will fall off it. The frame of such a greenhouse can be rigid, since there is no need to make arcs out of it.
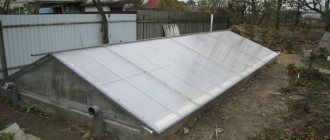
- A lean-to greenhouse is usually attached to the wall of a house, thereby saving on heating costs in winter. It should be taken into account that it is better to build this type of greenhouse on the south side of the house.
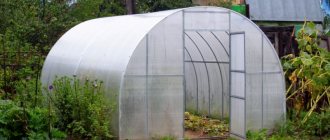
- The arched structure is spacious and wind-resistant. But the snow will need to be removed from it constantly.
- The Mitlider greenhouse is interesting for its ventilation system. The two-level roof and wide windows promote excellent air circulation.
Classic greenhouse with a gable roof
Let's start with the drawing
When you decide on the design option and the size of the building, you need to choose the most rational location. Typically, the greenhouse is located in a sunny place on the south or east side of the site. It is also important to take into account the direction of movement of the winds in order to place the greenhouse on its sides, and not on its ends.
Attention! When choosing a profile, bend it with your hand. If the metal bends slightly and returns to its original shape, then it is of good quality. If it remains bent, it is not worth purchasing.
Drawing of an arched greenhouse
Don’t forget to think in advance whether the greenhouse will be for winter or only for summer. It makes sense to build a summer version for now, but with the potential to install heating for the future. In this case, think about how the greenhouse can be heated. Using electricity or central heating from the house.
Have you finally thought of everything? It's time to start drawing. It should indicate the dimensions of the frame and roof elements.
Advice. If the building plan is ready, then it needs to be optimized with the dimensions of the polycarbonate sheets so as not to cut excess material.
Drawing of a greenhouse with a gable roof
Based on the drawing, the necessary building materials are already purchased. It is better to take them with a small margin, since no one is immune from mistakes. It is also necessary to take into account that the material will expand under the influence of temperature. This means that when fastening it is necessary to leave a small gap at the top.
For construction you will need:
- First of all, the profile for drywall itself. Typically, rack profiles of size 42 or 50 are used;
- self-tapping screws;
- sheets of cellular polycarbonate 4 mm thick;
- tools (screwdriver, tape measure, level, metal scissors).
Attention! The V-shaped plasterboard profile can fold under the weight of the snow cover. It is better to choose a U-, W-shaped or square section.
Selection of small things for connections
The selection of fastening elements should be approached seriously, because thanks to them the structure can become as stable and reliable as possible. Among the commonly used connecting elements are:
- Bolts.
- Nuts.
- Washers.
- Self-tapping screws.
The first three elements are used together, thanks to them you can create a collapsible building; for installation and dismantling you only need a set of keys of the appropriate type.
Self-tapping screws permanently fix the workpieces; after removing them, it will not be possible to construct a room using the old holes; it will lose its rigidity.
It is necessary to allocate another place on the material; holes will not only spoil the appearance, but will also cause rust, which will affect the service life.
Important! Elements with a press washer are very popular; due to their thin head, they do not interfere with further installation work.
What's the best way to pour a foundation?
They say that a greenhouse made of metal profiles can be installed in 1 day. Foundation work, of course, lengthens the process, but the reliability of the greenhouse increases. A shallow strip foundation is suitable for the greenhouse. To do this you need:
- Dig a ditch 60-70 cm deep around the perimeter of the building.
- Place a layer of sand and crushed stone about 10 cm.
- Build formwork using boards. Place reinforcement inside along the length of the formwork.
- Pour concrete.
- The formwork can be removed after a week. The foundation should last for about a month.
Foundation for a greenhouse
In conclusion
You can improve your garden plot with different items, be it a panel for fencing beds or car tires for a flower bed.
The main thing is that themed products are found all the time, which only makes “garden repairs” cheaper.
Start of construction
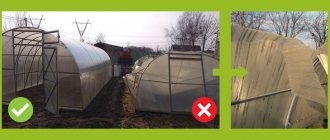
Advice. Some summer residents recommend cutting the profile with a grinder. In this case, the galvanized coating at the joints will be damaged and the metal will corrode. It is best to cut with straight metal scissors.
Fastening the metal profile
It will be easier for experienced builders to cut the entire drywall profile at once according to the plan. This will significantly speed up the process. Beginners are advised to do everything in stages, because during construction something will definitely have to be adjusted.
- You should start by assembling the end on the ground.
- The profile is fastened with self-tapping screws. For greater strength, it is recommended to bend the connections inward.
- When the end is assembled, the door is attached to the hinges. The second end is mounted in the same way.
- You can proceed to the base of the greenhouse. Already on it, if the structure is arched, arcs are attached. Once the greenhouse frame is assembled, it's time to install polycarbonate on it.
Polycarbonate fastening
Polycarbonate bends easily, so it can be used to build greenhouses of various shapes. Cutting it is also easy; for this you can use a sharp stationery knife, circular saw or band saw. Immediately after cutting, it is better to blow off dust from the cells and seal them with adhesive tape.
The covering material can be installed on sealants or on self-tapping screws with rubber gaskets. Please note that you need to fasten it so that the cells run vertically. So, if condensation accumulates in them, it will flow down. If you do not seal the bottom edge of the coating with tape, the drops will quietly flow down to the soil.
Attention! It is better to seal all joints with double-sided tape, because drafts are contraindicated for any plants. If you have planned two windows on opposite walls, then it makes sense to make them at different levels. This way the greenhouse will be ventilated by replacing air masses.
The carbonate must be attached to the greenhouse with an overlap. Install with the front side facing out, since it is on it that a layer protecting against ultraviolet radiation is applied.
If everything was done correctly, then you will have a great opportunity to grow several crops of tomatoes, peppers, eggplants, cucumbers, and maybe strawberries.
Now new troubles will begin with the delivery of soil, the location of beds, and planting planning. You may want to add heating, additional lighting, automated ventilation, or drip irrigation to your greenhouse. In any case, plants for which a caring owner has built their own home will be comfortable growing, blooming and bearing fruit there.
Fences for beds - universal purpose
Looking at photos of garden bed fencing, you can see a variety of materials used to build walls around crops.
This is very expressive, but the real uniqueness of thematic designs lies in the following properties:
- Do not allow the soil to spread beyond a certain area after precipitation;
- They prevent the weeds that are outside from growing deeper into the beds, and also contribute to the rapid collection of weeds inside the crop zone;
- They make it easy to install arcs to cover the beds with greenhouse film;
- They protect perennial crops in winter and, thereby, relieve the gardener from spring cultivation;
- They retain heat in the soil if the latter protrudes above the level of the main soil and has a warm organic layer underneath.
If you make fences of different heights, they will fill the landscape with shape by default. And this is not to mention the rational zoning of the site.
On a note. For the winter, inside the sides, if nothing grows there, you can “settle” a bunch of leaves and other waste to create compost. Plants and seeds can be planted in such a base without any fertilizing.