Perhaps all summer residents grow cucumbers. And this is not without reason, cucumbers are very healthy and dietary vegetables, which are 95% water. Some sow cucumber seeds first as seedlings, and then the already formed plants are transplanted into greenhouses, hotbeds or beds. However, you can plant cucumber seeds directly in greenhouses. With proper care, the yield of these vegetables does not fall and there is much less hassle with seedlings.
Sowing seeds directly into greenhouses allows you to get an early harvest. But in order to enjoy green vegetables as early as possible, it is better not to delay sowing.
Features of growing in greenhouse conditions
Growing cucumbers indoors has its own characteristics:
- the possibility of cultivating long salad cucumbers that are not suitable for open ground;
- carefully monitor the quality of the soil, since in a limited area the amount of nutrients is quickly consumed by plants;
- annual soil replacement or planting catch crops after cucumbers to prevent the development of diseases;
- obtaining a harvest at any time of the year, regardless of the climate;
- with the vertical growing method, the color of the fruit is uniform;
- absence of the likelihood of mechanical damage and the influence of weather conditions on the growing season of cucumbers.
Necessary equipment
To grow cucumbers indoors, two conditions are important: a suitable greenhouse and its equipment. When choosing a shelter, please note that polycarbonate greenhouses have more advantages than those based on film or frame. They are easy to transport, rearrange and assemble, wear-resistant, have minimal influence of weather conditions, and are more airtight.
The size of the shelter must be at least 10 square meters. m, and the height is about 2 m. It is not recommended to build a higher greenhouse, since maintaining the microclimate in it will be problematic due to the large layer of air. But a lower height when growing cucumbers is also unacceptable. This is due to the fact that cucumber vines, if placed vertically, will not have enough space; their length can exceed 3.5 m.
The choice of location for installing the greenhouse is of great importance. It should be a flat surface or a small hill so that groundwater does not flood it and cause mold to appear.
The greenhouse should be installed in a north-south direction to optimize the receipt of natural sunlight and heat.
Creation of necessary conditions at all stages
Although cucumbers are not a very fastidious crop, in the winter cold they require additional care. Special equipment will help maintain optimal temperature, humidity, light and ventilation levels.
Stove heating will provide the cucumbers with the right temperature
A little about heating systems
Growing cucumbers in a greenhouse in winter in areas of the middle zone and further north will not be possible without installing a heating system. It is necessary to constantly maintain the temperature in the room within the range of +18-25°C, and this is impossible to achieve even with the most thoughtful design and high-quality covering material. Therefore, based on the size and type of room, as well as the distance of heating communications, suitable heating devices are installed.
In most cases, autonomous systems are used, such as electric boilers, collectors, and stove heating.
The last option is the most economical and simple to implement, and if installed correctly, even gives a very high efficiency. Additionally, IR heaters or fan heaters are used to heat the room more evenly.
Artificial lighting is a necessary criterion
Without sufficient light reaching the plants, it is impossible to get a good harvest. Cucumbers require at least 14 hours of light per day, which the sun is unable to do on short winter days.
LED lighting for closed ground
For additional illumination, lamps and installations of various designs are used, but the most acceptable option for growing cucumbers in winter are LED lamps.
Although they are more expensive than, for example, mercury or fluorescent, their service life is much longer - about 10 years. In addition, the spectral characteristics of light waves are in a favorable range, and it is impossible for the plant to get burned from such lamps.
How to Provide Optimal Hydration
Cucumbers are a crop that feels best at maximum air humidity levels - 75-95%. In greenhouse conditions, when heating is on, it is problematic to maintain a high water content in the air. To do this, you can periodically spray water with a spray bottle, place vessels with liquid in the room, and use special humidifiers.
Plants require frequent watering, so for large-scale greenhouses, in most cases, automatic systems are used for this, or cucumbers are grown hydroponically. Installation of such equipment at the initial stage requires an investment of certain funds, but later they quickly pay for themselves.
Why do you need a ventilation system?
Without ventilation and free air circulation indoors, especially with high humidity levels, ideal conditions are created for the development of fungal and bacterial diseases. Therefore, a well-thought-out ventilation system is an important condition for successfully growing cucumbers in a greenhouse in winter. You can stimulate air circulation in 2 ways: naturally - through open doors or vents and forcefully - through ventilation devices.
The simplest fan
In winter frosts there is no question of ventilating through a window; this entails large heat losses and sharp drops in temperature. A regular fan can help, which must be turned on 2 times a day for short intervals of 5-10 minutes. Additionally, unless you are growing parthenocarpic varieties, aeration will aid the pollination process.
When purchasing a fan, you need to pay attention to its power: for an air volume of 10 cubic meters. m there will be enough power up to 200 kum. m per hour. Too powerful devices in a small greenhouse can only do harm.
Fans equipped with humidity and temperature sensors automatically turn on and off when the set values change.
Greenhouse preparation
After choosing a location and installing the shelter, preparatory work should be carried out. They consist of the following activities:
- Inspecting the greenhouse for cracks and eliminating them. This will protect the cucumbers from the negative effects of drafts.
- Be sure to treat the inside of the shelter with an antifungal compound to avoid contamination of the soil and seedlings.
- Consider the location of the beds and choose the method of their formation. Most often, longitudinal rows are placed along the shelter. Their width is approximately 50 cm, and the passage must be left at least 90 cm. If the size of the shelter allows, you can use a location method that involves building a shortened bed in the middle with a circular passage and 2 rows along the length of the sides of the greenhouse.
- Cucumbers are a heat-loving crop, so depending on your plans for growing them, you may need to organize a heated floor under the beds to warm the soil when growing cucumbers year-round.
- It is advisable to install containers with water in the shelter, which will perform 2 functions: warming up during the day, giving off heat at night and being a source for irrigation with warm water.
- Provide a ventilation system. These could be additional windows or an automatic ventilation system. Moreover, the location of the vents on the roof and along the walls under the ceiling makes it possible to ventilate the room without drying out the soil, as happens when opening a door and a vent on the opposite wall.
Why do cucumbers need film?
This film shelter has the appearance of a simple design. Often these are arcs over which a film is draped. It is secured with something or tied at the sides so that the wind does not tear it off. The shelter reliably protects cucumber plants from negative factors.
- From strong wind. Plants can be broken by sudden impulses. The wind damages the leaf blades and sometimes tears them off.
- By cold. Cold weather can occur both during the day and at night. This can happen in the summer.
- From the dew. Dew is moisture that accumulates on the surface of leaf plates. In the summer heat it can evaporate, causing burns. In addition, fungal infections can grow on damp leaves.
- From the scorching sun , burning the leaves and destroying the plant.
| Important! When constructing shelters over cucumbers, avoid cracks so that cold air from the street does not enter under the shelter and cause harm to the plants. If you eliminate cracks in the shelter, there will be no draft, this is also a definite plus. |
During the most important periods for plants, they must be kept under film. This is a period of active growth of leaf blades and shoot growth, which occurs at the beginning of the warm season. This also includes the period of active formation of the ovary - approximately the first half of the warm season.
Photo pixabay/AndyFaeth: The film will protect the plants from adverse factors.
Choosing the right variety
Growing cucumbers indoors means that pollinating insects will not have access to the plant's flower stalks. Therefore, for this case, choose varieties that can self-pollinate or those that do not need pollination at all - parthenocarpic. These properties are indicated on the seed package.
It is important to distinguish cucumber varieties from their hybrids. When planting varietal types of vegetables, their properties will be repeated from year to year, and it is possible to obtain your own seeds from the most successful harvest.
When using hybrids, self-collected cucumber seeds do not carry the properties and qualities of the previous harvest. This means that hybrid seed must be purchased annually.
Let's consider some varieties and hybrids suitable for growing in shelter:
- Adam F1. A hybrid from Holland with the ability to self-pollinate and obtain a rich, early-ripening harvest. The first vegetables can be harvested after 1.5 months, and the fruiting period is quite long. Under favorable conditions, cucumbers are tied in 5-7 pieces. in one node. The fruits are small in size, dark in color with small spines. Suitable for preparation and fresh consumption.
- Herman F1. A wonderful hybrid of Dutch selection. Very early, with a long fruiting period. Small cucumbers develop in bunches of 6-7 pieces. The fruits are juicy and dense. The hybrid is resistant to temperature changes and diseases. Good fresh and canned. Planting in open ground and greenhouses is possible.
- Son-in-law F1. Parthenocarpic hybrid. Fruits develop in nodes of 3-7 pieces. up to 10 cm long. Can be harvested at any stage of maturity. Cucumbers are delicious, yield up to 6 kg per plant. Resistant to powdery mildew and root rot. Adaptable to sudden changes in weather conditions.
In addition to the presented species, it is possible to sow seeds of the following cucumber varieties: “Metelitsa”, “Prestige”, “Ararat”, “Tatyana”, “Fed Papa”, “Everyone is Envy”, etc.
Early cultivation of cucumbers: where to sow cucumbers for an early harvest
To get an early harvest of green, vigorous plants, you will have to abandon the traditional sowing of seeds in open ground. Cucumbers love warmth, so spring frosts and temperature changes are destructive for them. In addition, in soil that is damp after the snow melts, the seeds can rot even before they germinate, and hungry mice will readily feast on them.
Therefore, it is best to germinate seeds for seedlings indoors at room temperature, then the first sprouts will appear within 1-2 weeks.
Note! The time for planting cucumber seeds for seedlings should be calculated taking into account the climatic conditions of your area.
The seedlings will be ready for planting in the ground 4-5 weeks after sowing the seeds. Leaving it in pots for a longer time will lead to thinning and weakening of the sprouts, which can reduce the future harvest of early cucumbers.
Soil preparation
For sowing cucumber seeds, it is preferable to use peat pots rather than reusable containers. This is due to the fact that the crop does not like replanting when its root system is disturbed.
Soil for filling seed containers can be purchased in specialized stores and departments. This soil mixture will be disinfected and has a special composition suitable specifically for growing cucumbers.
The second option for obtaining soil for planting seeds is to prepare it yourself. To do this, take the following ingredients and mix them thoroughly:
- turf - 1 part;
- compost - 2 parts;
- peat - 1 part;
- sand - 1 part.
Such a soil mixture should be subjected to a disinfection procedure before use. To do this, you can use one of the options:
- heat it in the oven at a temperature of 170-180 degrees for 20 minutes;
- process in a special steam generator for half an hour;
- dilute 15 ml of Fitosporin in 10 liters of water and pour over the soil.
After processing, it is necessary to add fertilizer to the planting mixture to enrich it with nutrients and elements. For 10 kg of soil add:
- wood ash - 200 g;
- phosphorus fertilizers - 50 g;
- potassium sulphide - 35 g.
After thoroughly mixing the mixture, it must be moistened. High-quality soil is ready for sowing cucumber seeds.
Properly preparing seeds for sowing
Seed material purchased in factory packaging does not require additional preparation. If the seeds are collected independently or purchased in another way, then the following preparatory procedures must be carried out:
- Selection. From the total mass, select the largest and most identical in shape. Prepare a saline solution from 1 tsp. salt and a glass of water. Dip the selected seeds into it. Remove those that remain on the surface. The rest - rinse with clean water and dry until flowability is restored.
- Disinfection. Prepare a slightly pink solution of manganese and dip cucumber seeds in it for 15-20 minutes. You should not make a more concentrated solution or keep the seeds in it for longer than the prescribed time. This will lead to burns of the seed and render it unusable.
Instead of manganese solution, you can use Fitosporin-M or Gamair-SP.
After processing, rinse the seeds with running water and dry.
- Impact of temperature. To speed up germination, place the seeds in a bag and warm them near a heating device. The reverse method is also good - place the seeds in the refrigerator for a day.
- Germination. Line a shallow plate with several layers of gauze. Distribute cucumber seeds over its surface and moisten well. Cover the top with a wet cloth. Make sure that the lower and upper material does not dry out.
Preparatory activities
Preparation for planting cucumber seedlings consists of the following steps:
- Preparation of the greenhouse itself.
- Soil preparation.
- Seed selection.
- Preparing seeds for planting.
Greenhouse preparation
The greenhouse itself must undergo preparatory measures every year before planting seedlings. It must be disinfected with a solution of copper sulfate or potassium permanganate. In the fall, all lower parts of the building are wiped with a bleach solution to destroy harmful fungi and microorganisms.
Soil preparation
For a good harvest, it is recommended to change the soil in the greenhouse every 5 years . To do this, it is enough to mix the turf soil with peat, humus, superphosphate, potassium sulfate, and ammonium nitrate.
Advice! To make the soil looser, you can add sawdust to it.
After preparing the soil substrate in the greenhouse, the top layer 30 cm deep is removed, and the prepared composition is filled in instead.
Preparing the seeds correctly
Preparing seeds for planting is a long and responsible process. The quality and number of sprouted seedlings depends on the preparation:
- The seed material is disinfected in a weak solution of potassium permanganate and washed with water.
- The seeds are placed in gauze or fabric bags and soaked for 12 hours in a solution of: 1 liter of water, 1 tsp. nitrophoska, 1 tsp. wood ash.
- Then the seeds are washed again with water and laid out on a damp cloth for several days to swell.
- They are then placed in the refrigerator for 24 hours.
Attention! When laying seeds on a damp cloth for a day, it is important to ensure that they only swell and do not germinate.
Growing seedlings
After preparing the seeds, they are planted in the ground with their nose up to a depth of 1-1.5 cm . Small cups are selected for seedlings. After sowing the seeds, they should be sprinkled with water from a spray bottle and covered with polyethylene.
When the first shoots appear, the film is removed and the plants are watered with warm water. The seedlings are grown for a month at home and then planted in a greenhouse.
Growing seedlings
After selecting the container, preparing the soil and seeds, you can begin directly planting the seed material for seedlings. To do this, follow the work algorithm:
- Place a drainage layer on the bottom of the peat pots and fill 3/4 of the pot with prepared soil on top. Place the container in the tray and moisten.
- Make a hole in the middle of the pot, about 1cm deep, and place a couple of seeds in it. Cover them with soil, slightly compacting it.
- Using a sprayer, moisten the soil surface with water and cover with glass or plastic film.
- Transfer the pots to a sunny windowsill or other place with a temperature range of 25-28 degrees.
Remove glass or film daily, moistening and ventilating the crops. This will prevent mold from appearing on the surface of the soil.
Moisten the soil not by watering, but by spraying water using a spray bottle.
Correct temperature conditions are important for seed germination. Shoots appear after 5-6 days at a temperature of 27-28 degrees. When leaves appear, you should adhere to a daytime temperature of 19-22 °C, and at night - 15-17 °C.
When the first leaf forms on the seedlings, fertilize with a solution of complex fertilizer.
Make sure that the plants do not stretch towards the light source. To do this, rotate the containers periodically. As the plants grow, move them away from each other so that the shadow created does not interfere with their quality development.
How and when to plant cucumber seedlings is described in more detail here.
Sorting and germination of seeds
Many people practice warming the seeds before growing them. But it makes sense to do this only for pollinated varieties, since the procedure affects the number of female flowers. For self-pollinating varieties, this procedure is useless.
Important! For a good harvest, you need to know everything from “A” to “Z” about cucumbers.
Many manufacturers sell seeds that have been treated with thiram, a special fungicide. There is always a note about this on the label, and the seeds are easy to recognize by their rich green color. Such grains are not processed in any way; they are sown even without germination.
Regular light seeds are prepared for planting as follows:
- Sorted, choosing the largest ones, without blackening and any signs of damage or defects. The strongest specimens will grow from them.
- Skinny grains are rejected. In 100 ml of water you need to dissolve 3 g of salt (less than a teaspoon). Pour the seeds into it, stir and leave for 15 minutes. Skinny seeds unsuitable for germination will float to the surface. Those that settle to the bottom must be washed in clean water to remove any remaining saline solution.
- Disinfection is carried out. For this, ordinary potassium permanganate is useful. Prepare a pink solution and pickle the grains in it for 20-30 minutes. After this, the seeds are rinsed with water. Treatment of cucumber seeds with Fitosporin also gives good results. The seeds are kept in its solution for about an hour.
- Sprout on a wet cloth, covered with gauze or cotton. The material must be damp all the time.
Sprouting seeds is also a good way to cull. Those that hatch can be used to produce seedlings.
Preparing soil in a greenhouse
Cucumbers grow well on loose and fertile soil, which retains moisture and is breathable. This is why fruits cannot be obtained on clay or sandy soils. The former are not able to allow the necessary air to pass inside, and the latter soils dry out too quickly, conducting water into deeper layers.
Things to consider:
- If the predecessors of cucumbers in the greenhouse were melons or pumpkins, then it is better to replace the soil with a new one, because it is depleted in nutrition and there is a high probability of common diseases and pests. It is advisable to plant cucumbers after cabbage, carrots, potatoes, onions, and peppers.
- It is necessary to prepare greenhouse beds in the fall. Remove all plant debris and dig up the soil, adding humus or compost 1 bucket per square meter. m. With this option, you can forget about organic fertilizing for 2-3 years, using only mineral fertilizers.
- Another solution to replenish nutrients when digging up beds in the fall is to distribute them per square meter. m of land 2 tbsp. l. superphosphate and 1 tbsp. dolomite flour (can be replaced with wood ash). In the spring, 2 weeks before planting seedlings, add peat, sawdust, humus to the soil, and dig shallowly again.
- To prevent cucumber diseases, be sure to treat the surface of the beds with a solution of copper sulfate. To prepare it, dissolve 1 tbsp in 10 liters of water. l. drug. Consumption rate - 1 liter per 1 sq. m.
- A good solution is to plant green manure in the fall, such as leaf mustard. Before frost, dig up the beds along with the plants. Over the winter they will undergo decomposition, enriching the soil with nutrition and disinfecting it.
An important nuance for growing cucumbers is warming up the soil. If there is a warm base of the beds, seedlings can be planted at any time of the year. If there is no such equipment in the greenhouse, then there are 2 solutions: wait for the soil to naturally warm up or insulate it with organic matter:
- To do this, remove the top soil layer to a depth of 15-20 cm, lay down straw, spread humus and compost on top, and fill the soil layer back.
- Spray the beds with hot water and cover with dark film. As organic matter decomposes, it releases not only nutrients, but also the heat the seedlings need. These events are carried out several days before planting the seedlings.
Raised beds
In order to create beds with high sides, it is necessary to lay 15 cm of manure on top of the straw. To avoid spillage of fertilizer, board fences 25 cm high are installed.
After compacting the manure, the excavated soil is poured on top. Its excess is removed and collected in piles in the center of the beds. In order to increase soil fertility, the soil is mixed with peat.
All these actions will not only form a layer of humus to release thermal energy, but will also enrich the soil with various nutrients.
Transplanting
In greenhouses, without additional heating, plant seedlings no earlier than the end of May, when the soil temperature inside reaches 14-16 degrees, so that the weak roots do not freeze, but can adapt to new conditions. To measure the level of soil warming, lower the thermometer into the soil to a depth of 20 cm for 30 minutes in the morning.
Cucumbers can be planted in heated shelters as soon as 4 leaves have formed on the seedlings. This occurs approximately 35 days after sowing the seeds.
The most commonly used scheme for planting cucumbers in a greenhouse is:
- two rows of cucumbers are placed in a longitudinal bed;
- the distance between neighboring bushes in a row is maintained at 30-40 cm;
- seedlings in one bed, but in adjacent rows are planted in a parallel or staggered order, keeping a distance between them of at least 50 cm;
- the hole should be strictly under the trellis, or stretch a cucumber net between the rows.
Algorithm for planting seedlings in a greenhouse:
- Moisten the soil in the beds with hot water.
- Make holes and distribute peat pots with seedlings over them. The recess should be such that the upper edge of the container protrudes above the surface of the ground. Lightly compact the soil.
- Sprinkle a 2-centimeter layer of peat with sawdust on top, mulching the root part of the plants.
- Do not water the planted seedlings for 2 days.
Watch a video about planting cucumber seedlings in a greenhouse:
Landing rules
The timing of ripening, as well as the quantity and quality of the future harvest, depend on how correctly the cucumbers were planted in the greenhouse. Here it is important to plant the seedlings correctly, choose the optimal planting scheme, and so on.
Transplanting
Since not all regions of our country can boast a warm climate suitable for planting cucumbers without seedlings, most summer residents grow seedlings at home. This allows you to get high-quality plants that will begin to bear fruit quite early.
Cucumbers are planted in greenhouses at a distance of 35 cm from other plants. They cannot tolerate thickening, and because of this they suffer from various diseases and the cessation of ovary formation.
It is worth noting that transplanting grown seedlings is a complex matter. It is important here not to damage the fragile root system of plants. Seedlings are planted in a greenhouse from the moment 4-5 leaves appear on it. At this time, the plants will already have formed a strong root system.
How and when to plant
Fully cucumber sprouts grown in the house on the windowsill are ready for transplanting into the greenhouse on the 28th day after germination. The main thing is that by this time a stable soil temperature has already been established in the greenhouse. For cucumbers it should be at least +15 degrees.
The process of transplanting seedlings is quite simple:
- The wells are prepared (spilled with a solution of manganese or phytosporin). This will eliminate the possibility of the plant becoming infected with various diseases.
- Compost or rotted manure is added to the holes and mixed thoroughly with the soil.
- The seedlings are transplanted carefully so that their roots are not damaged. It is better to soak the pots with seedlings in water in advance so that they can be easily removed along with a lump of earth.
- The subcotyledon is left above the soil surface, as it does not tolerate contact with the ground, and is subject to root rot.
- After planting, the bushes are watered and the soil is mulched.
At what distance to plant
The main rule when planting cucumbers is not to thicken the beds. The minimum distance between plants should be at least 35 cm , and between rows - 90 cm . If these distances are not maintained, the plants will simply compete with each other for lighting and food. And this will negatively affect their growth and fruiting.
Planting patterns for narrow beds
An incorrect planting pattern for cucumber seedlings will lead to:
- outbreak of infections and diseases;
- reducing plant resistance to pests;
- the appearance of numerous barren flowers.
There are several ways to plant cucumbers both in open and closed ground.
When planting in narrow beds, the vertical method is suitable, since the minimum interval between plants is only 30 cm .
Two-line
Suitable for creeping small-fruited varieties that do not need to remove stepsons. With this scheme, the distances between plants should be as follows:
- 40 cm in rows;
- 60 - between the rows.
This method prevents the development of various root diseases of plants and provides free access to plants.
Chess
Ideal for growing early ripening hybrids. With this scheme, the vines do not intertwine with each other, and convenient access to plants for caring for them and harvesting is provided.
The landing scheme itself :
- In a bed 1 m holes are made in two rows.
- Cucumbers are planted in the center in holes at a distance of 70 cm .
- The holes are made in a checkerboard pattern with a diameter of up to 30 cm .
- With a bed width of up to 85 cm, the distance between bushes is maintained at 40 cm .
Advice! The checkerboard planting pattern is suitable for vertical planting of plants in pots tied to trellises.
Single row
This scheme is suitable for highly branched hybrids, and is convenient for glazed and film greenhouses. In this case, the plants are placed in one row. Here the distance between plants is 30-40 cm 1 m between rows . This will provide the plants with good ventilation, light and heat . In addition, having a large space near the bushes will make it easier for owners to harvest.
Sowing seeds in the ground
The seedless method of growing vegetable crops is in demand among summer residents. Seeds are sown in the greenhouse at the end of April . No more than 4 seedlings are placed per square meter.
Attention! If you are not sure about the quality of the seed, it is better to put two seeds per hole. At least one of them will germinate. Next, the weaker seedling can be removed.
If the soil in the greenhouse has been well fertilized with manure since the fall, the seeds do not need to be pre-soaked before planting. Simply water the holes well, place the seeds in them, and lightly sprinkle soil on top. For faster germination, it is better to cover the bed with polyethylene. Summer residents also use plastic bottles, covering each hole with them.
Optimal conditions for the growth of cucumbers
For high-quality growing season of cucumbers, it is necessary to create and maintain a microclimate with certain conditions, as well as carry out agrotechnical work in a timely manner.
Watering
Cucumbers need regular watering of the beds, but make sure they do not become waterlogged. Warm the water for the procedure in the sun or take it from containers located inside the greenhouse. If you water with cold water, the crop will become infected with rot and spots.
If the temperature of the irrigation water is too low, a narrowing of the middle part is noticed on the fruits, and the cucumbers become deformed.
After watering, loosen the soil to prevent the formation of a crust on the surface. It will become an obstacle to the path of air to the root system and will serve to more quickly lower moisture into the lower soil layers. This procedure will also help cover the roots washed out as a result of moisture with soil. Mulching helps to retain moisture in the beds for a long time.
Sprinkling is very important for the crop. It consists of generously spraying the green part of the plant with water. Thus, the liquid flows slowly to the root system, allowing the cucumbers to better saturate themselves with moisture. In addition, the humidity inside the greenhouse increases, which has a beneficial effect on the plants.
Feeding
Be especially careful when fertilizing the soil in a greenhouse, since the formation of ovaries and the ripening of fruits directly depends on this. Keep in mind that an excess of mineral components in the soil is just as undesirable as their deficiency. Calculate the total volume of fertilizer applied per season, including limiting substances and mineral supplements. The number of procedures for adding nutrition to the soil for cucumbers should not exceed 5.
With a lack of nitrogen on the fruit, a narrowing of the tip and a change in its color to yellow are noticeable. If there is a deficiency of potassium in the soil, pear-shaped cucumbers are formed.
Cucumbers respond especially well to the addition of infusions of chicken manure, humus and mullein. To prepare food, mix 150-200 g of organic matter and 10 liters of water. Leave in a warm place to ferment for 2-3 days, stirring the mixture occasionally. Add 30 g of superphosphate. The distribution rate of the infusion is 1 liter per 1 sq. m of beds or for 4-5 plants.
During flowering, add 30 g of potassium salt to this infusion.
The amount of mineral nutrition per 10 liters of water (per 1 sq. m) in different phases of cucumber growth is slightly different:
- before fruiting: ammonium nitrate - 5-10 g;
- superphosphate - 20 g;
- potash fertilizers - 10 g.
- ammonium nitrate - 20-25 g;
Fertilizers can be applied by root and foliar methods. It is advisable to carry them out in the evening or in cloudy weather.
Light mode
A 10-hour daylight hours is sufficient for the growth and development of cucumbers. When the amount of light decreases, the growth rate decreases significantly. Therefore, in the absence of sunlight, due to weather conditions, it is impossible to do without the use of phytolamps or other sources of artificial lighting.
Temperature
Cucumbers are very dependent on the temperature in the greenhouse. So, in different phases of growth it is necessary to maintain different levels of heat:
- planting seedlings - 20-22 degrees;
- flowering - 25-28 degrees;
- fruiting - 25-30 degrees.
At temperatures from 17 to 19 degrees and from 35 to 40 degrees, the formation of ovaries does not occur.
Critical temperatures for cucumbers:
- growth cessation - 15 degrees;
- cessation of growth - 10 degrees;
- death - 7-8 degrees.
Humidity
Cucumbers are very demanding on the level of air humidity, so it should be maintained between 90 and 95%. When this indicator decreases, the ovaries stop forming and the cucumbers slow down their development.
Ventilation
The ventilation procedure is necessary to prevent the spread of diseases, especially rot, which develop in a humid, warm environment. In addition, this provides additional access to clean air into the greenhouse. Ventilation helps reduce the air temperature on hot days to the required level.
Bush formation
Shaping helps to avoid bush thickening and optimize its productive qualities. Cucumber plantings become not only beautiful, but also evenly illuminated by the sun, accessible for aeration, and convenient for various agricultural work. This procedure involves pinching the shoots and tying them with the further direction of the head lash.
It is important to remember that all manipulations to form a cucumber bush are carried out strictly before the onset of the flowering period. When the first flowers appear, any work related to moving the lashes is prohibited.
The need to form a bush is explained by the following arguments:
- If there is excessive branching, the root system cannot cope with saturating the entire plant. As a result, the fruits become deformed and their taste deteriorates.
- Dense vegetation does not allow air to penetrate through the greenery. This negatively affects fruiting and creates a favorable environment for pathogens of various diseases.
- Weeding, loosening, spraying and watering are more convenient when cucumber bushes are formed.
Pinching (pinching)
Pinching helps reduce leaf mass for a more active and longer fruiting period. Removing canes with male flowers that do not bear fruit stimulates the development of female fruiting inflorescences. The quantity of harvest and its quality increases.
To perform the procedure correctly, you need to be able to distinguish male and female flowers from each other:
- female inflorescences are formed in pairs, and barren flowers are formed in 6 pieces;
- the stem of the female flower is longer than that of the male;
- ovaries are present only on female inflorescences.
Pinching is not carried out only on specially bred hybrids that have a single-wattle development or do not produce an excessive amount of barren flowers.
For self-pollinating varieties, leave enough male flowers so that their number with female ones is approximately equal. For parthenocarpic varieties, the presence of male inflorescences is not required.
The pinching procedure after tying cucumbers goes like this:
- When forming the 5th leaf, all shoots and tendrils located below it are removed.
- When 7-8 leaves appear, a pair of shoots are left from the central stem.
- After the 11th leaf, the tips of the shoots are pinched, provoking their peripheral development and ovaries. On each shoot, 3 leaves and 3 ovaries are left.
- Parthenocarpic varieties are formed, leaving one stem. When it grows to 50 cm, the tendrils, flowers and branches are removed, and the lateral shoots are pinched down to 1 leaf.
Pinching forms the bush in the form of an inverted pyramid.
Tying up
Tying cucumbers is done to:
- the lashes did not interlock with each other using whiskers;
- the process of plant care and harvesting was simplified;
- the bush had enough sunlight for the entire plant part.
These measures make it possible to horizontally grow cucumbers and form a bush. Mechanical damage to vines and fruits and their rotting on the ground are prevented. You should start tying when the seedlings in the greenhouse grow to 30-40 cm. At this time, the vine is still flexible and does not break when its position changes.
To carry out garter work you will need:
- wooden or iron supports;
- strong, taut wire;
- trellis net for cucumbers;
- garters made of long strips of cotton or nylon fabric about 3 cm wide.
You should not use thin laces or wire to tie cucumbers, as they will pinch the stem as they grow. Disinfect all garter material by boiling or bleach before use.
You can purchase special plastic garters. Their clamping is adjustable with notches and can be used repeatedly.
Planting cucumbers in a greenhouse, arranging beds
Scheme for arranging a bed for a greenhouse
Where there are cold regions, growing cucumbers cannot be done without setting up compost and manure beds, which are done in the spring. How to plant cucumbers in a greenhouse, what are manure beds and how to lay them:
- For these purposes, it is best to use fresh cow manure and add a little horse manure.
Note. This composition will be ideal, since it contains the necessary fertilizing and natural fuel.
- Fresh manure is placed in a specially elongated high bed 100 cm wide.
- Fertile soil, at least 250 mm, is laid on top of the manure layer and everything is watered abundantly.
- Next, the cucumber seeds are sown and distributed evenly, 4 pieces per square meter.
Attention. Seeds do not need to be soaked or germinated in a hot manure heap before sowing.
- How to plant cucumbers in a greenhouse? It is best to put 2 grains in each hole, so that later you can cut off the root of a weaker crop.
- It is not recommended to thicken the planting any more, as this can reduce the yield.
- After the bed is sown, you can cover it with plastic film or light material, which must be stretched over the arcs. Then you will get a small mobile greenhouse in a greenhouse, see photo.
Mobile bed for cucumbers
- Non-professionals will be interested to know that the temperature in a manure bed can rise so high that you can burn your hand.
- This is due to the decomposition process, thanks to which the first shoots appear very quickly.
- In the daytime, young plantings can be carefully ventilated. Under an additional canopy on hot beds, young cucumbers receive all the necessary moisture and warmth.
Note. It is very important to take temperature changes and weather conditions into account. If the outside temperature is low enough and the sun is bright, then the seedlings under the film may simply burn.
- Therefore, the presence of thermometers to measure the temperature of the air and the soil base is mandatory. The optimal temperature for seedlings should be from +18 to + 30 degrees.
- The burning of the manure bed usually lasts for a month, after which the temperature gradually decreases.
Greenhouse and planting cucumbers on compost beds
The problem is that not everyone has the opportunity to purchase fresh manure, and many have no desire to deal with it. In this case, you will need instructions for arranging a warm sawdust bed. For this you will need:
- Sawdust.
- Last year's foliage.
- Shavings.
- Tops.
- Any organic material.
Note. The more green waste there is, the warmer the garden bed will become. You can also add the same manure or other components here to speed up and process everything organic.
Steps to creating a compost bed with your own hands:
This is what a compost bed looks like
- Before planting cucumbers in a greenhouse, you need to create a compost bed. The principle of creating the device is exactly the same as the previous one.
- You must first lay down what will rot, and fill 200 mm of soil on top, after which you can plant cucumber seeds.
Note. For a compost bed, it is best to plant pre-sprouted shoots in peat tablets or cups.
- Caring for cucumbers in a greenhouse is exactly the same, under film, but the temperature will be slightly lower.
- This method is more suitable for warm regions. How to plant cucumbers in a greenhouse using the compost method in cold regions. If there is no other way out, then it is best to do this already in the spring warming.
After harvesting, do not rush to get rid of the manure and compost beds; they will still serve you. You can subsequently fill in new layers of organic raw materials without digging. By choosing one of the methods, it is possible to plant cucumbers even in cold regions. For more detailed information, you can watch the training video.
Diseases and pests
It is reckless to assume that closed soil protects cucumber plantings from pests and various diseases. This means you need to know what dangers threaten the harvest and how to deal with them. The following diseases are common:
- White rot. A fungal disease characterized by the presence of a light, almost white, coating not only on the fruit, but also over the entire surface of the bush. It spreads quickly, destroying plants. The fungus persists in the soil. Control measures involve destroying affected plants and changing the soil.
- Gray rot. Identified by slippery gray spots on the surface of fruits, flowers and ovaries. At the first stage of infection, spraying with a solution of copper sulfate 1 tsp is carried out. and 1 tbsp. ash per 5 liters of water. The drug "Barrier" is effective. When the disease is in an advanced state, only radical methods can help.
- Root rot. Drying leaves, changing the color of the plant, and the appearance of cracks on the stems are all signs of infection. Rot can be caused by planting seedlings too deeply, excessive watering, or cold water when moistening. Sprinkle the areas affected by the fungus with crushed chalk or wood ash and dry. Do not allow moisture to enter the plant when watering. Dead plants are destroyed by fire, and soil is removed from the holes by spilling a solution of manganese or copper sulfate. Afterwards, the hole is filled with new soil.
- Powdery mildew. It is characterized by the appearance of a white coating, first on the leaves of cucumbers, and then on the stems. The fungus actively spreads in warm and humid conditions, so if it is detected, treat the cucumbers as soon as possible. The preparations “Topaz” and “Zaslon” have an effect against powdery mildew. Their use when preparing the solution must be in accordance with the instructions.
- Downy mildew. It is determined by the appearance of spots on the leaves of cucumbers that resemble burns. In a couple of days the sheet dries completely. To stop the spread of the disease and destroy it, spray with Quadris (5 g per 10 liters of water). You should stop watering and ventilate the greenhouse more often, avoiding excessive air humidity.
- Brown spot. When infected, fruits develop wine-brown spots oozing from the inside. Then the rot spreads to the entire plant. Spots of the same color are seen on leaves and stems. Within a week the plants die. Control measures come down to the destruction of diseased plants and reducing the level of soil and air moisture in the greenhouse.
- Black mold. Manifestations of the fungus are noted in the appearance of spots on the leaves, which over time merge into one and become covered with black spider mold. Preventive measures include the use of treated seeds and disinfection of the soil and premises.
In addition to diseases, insect pests can attack the greenhouse crop. Some of the most common are:
- Melon aphid. The negative impact of aphids is manifested in twisting and wrinkling of leaves on the vines. If you turn them over, you will notice a cluster of small insects on the underside of the leaf blade. They feed on plant sap, which leads to a lack of nutrients, stunting of development and drying out of the crop. In small areas, it is recommended to use traditional methods of control against aphids. This can be an infusion of onion peels or an ash solution with laundry soap. Large greenhouse farms use chemicals.
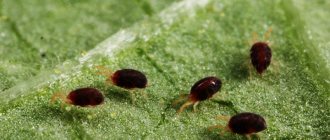
- Greenhouse spider mite. It is difficult to detect due to its small size, but cobwebs on the plant are a sign of the presence of a mite.
The appearance of insects is associated with the presence of weeds in the greenhouse and conditions suitable for the parasite. It is recommended to fight it only using chemicals, so as not to waste valuable time. The following drugs can be used: “Plant-pin”, “Aktellik”, “Fitoverm”, etc. They must be processed strictly in accordance with the instructions for the drug.
Problems and their solutions
It happens that infection with diseases is excluded, but some problems still arise on the plantation. Let's look at some of them.
No ovaries
Reasons for the problem of ovary formation on cucumbers:
- insufficient ventilation;
- deficiency of minerals in the soil;
- impossibility of pollination (on pollinated varieties);
- unfavorable temperature conditions, or microclimate in general.
The lower branches dry out
Such manifestations are possible for several reasons:
- scorching sun rays;
- contact with leaves of mineral root fertilizers;
- waterlogging or moisture deficiency in the soil;
- deficiency or surplus of nutrients;
- lack of light and air.
Fruits grow slowly
Slow fruit growth is due to:
- low-quality seed material;
- failure to comply with the deadlines for planting seeds or planting seedlings;
- microclimatic disturbances;
- lack or excess of nutrition;
- dense planting without bush formation.
Cucumbers are bitter
A bitter taste (exceeding the cucurbitacin level) in cucumbers can be observed due to plant stress for several reasons:
- too bright scorching sun rays;
- sudden changes in temperature;
- violations of the temperature regime necessary for fruiting;
- lack of nitrogen and phosphorus in the soil;
- interruptions in watering or cold water;
- plants interfere with each other due to their close proximity.
Growing cucumbers in greenhouse conditions is not easy. The quality of the harvest and its quantity depends on many factors that need to be considered from the preparation stage to the fruit harvesting stage. By following all agricultural techniques and creating the necessary conditions for the crop, you will enjoy growing, and cucumbers will delight you with fragrant fruits for a long time at any time of the year.
0
0
Copy link
Landing dates
Some summer residents prefer to grow cucumber seedlings first on the windowsill, and then transplant them into a greenhouse. In this case, the seeds are sown in February. When growing seedlings in containers, it is recommended to choose peat, then it is easier to remove them from the cups for transplanting.
Before sowing, seeds are disinfected in a weak solution of potassium permanganate, and then soaked in water for a couple of hours. Transplantation of grown seedlings into greenhouse conditions is carried out when 4-5 leaves appear on it, and it has undergone two weeks of hardening.
