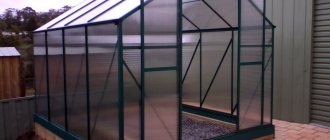
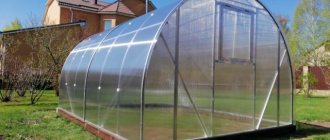
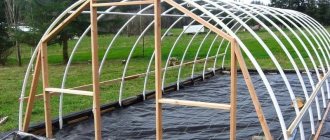
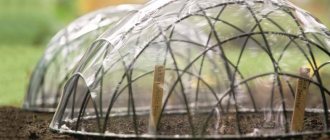
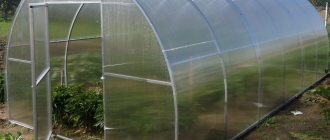
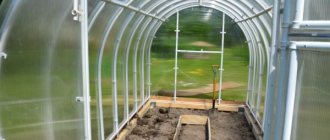
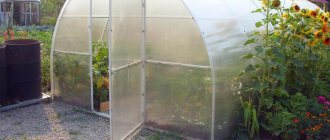
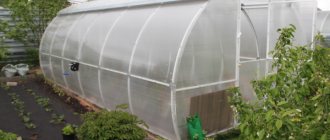
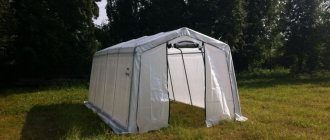
A “house” greenhouse made of glass, film or polycarbonate can often be seen in summer cottages. This type of greenhouse is not without its drawbacks: it is more difficult to build than a lean-to or arched greenhouse; it requires a lot of material and a rigid frame. Why does a greenhouse with a gable roof appear so often on our sites?
- This is a durable, rigid structure.
- Water does not linger on the roof, it drains easily and does not create additional load on the frame.
- The design allows you to grow plants of different heights, from small to tall.
- You can build a year-round option with heating and lighting.
- You can make vents in the greenhouse for effective ventilation.
- You can build a greenhouse according to Mittleider with a special ventilation system.
Pros and cons of a gable greenhouse
The features of greenhouses with a gable roof are such that the design has a large number of advantages. Many of them are decisive when choosing a specific type of structure:
- Rainwater drains easily from the gable roof.
- The snow is distributed as evenly as possible, which reduces the load on the roof.
- The high altitude makes it possible to cultivate tall plants.
- The rigid frame allows the building to be used year-round if electricity and heating are provided.
- The ability to create a microclimate for growing garden crops, the growth of which is impossible in the open ground of a certain region.
- The design performs protective functions from scorching sun rays and precipitation.
- Long service life - 10-15 years.
Despite the large number of positive aspects and the obvious benefits of a polycarbonate greenhouse, the design has disadvantages:
- Lack of natural pollination of the plant by insects.
- Expensive design.
- Polycarbonate cracks and scratches easily.
- Do-it-yourself construction requires skill. In an improperly constructed greenhouse, condensation may occur.
Advice! You cannot sow the same crop for 2 or more years in a row. Each plant has specific pests, the population of which will destroy the crop. With the annual change of vegetable varieties, insects die.
Possible options for gable greenhouses
The presence of different types of materials that can be used to build a greenhouse allows everyone to make the most appropriate choice for themselves.
To cover gable greenhouses, the following materials are used:
- polyethylene;
- glass;
- polycarbonate
The main advantage of film coating is the affordable price of the material. The film also has a good ability to transmit and diffuse light. However, polyethylene also has serious disadvantages.
This coating needs periodic replacement (about 2-3 times a year - it depends on the quality of the polyethylene). As a result of the influence of ultraviolet rays, the film loses its transmission capacity and is often covered with condensation from the inside.
Glazing is a traditional way of covering greenhouses. Glass transmits light well and reduces heat loss, resulting in a favorable temperature regime inside the greenhouse.
Disadvantages include the inability to withstand strong impacts, as well as the complexity of installation, which entails considerable labor costs.
Information: Nowadays, farming enthusiasts are increasingly giving preference to cellular polycarbonate, which, due to its characteristics, is the most practical and reliable material, 200 times stronger than glass.
Thus, gable polycarbonate greenhouses are the most popular option.
To build the greenhouse frame use:
- metal;
- tree;
- plastic.
Many people prefer a metal frame. Greenhouses made from a profile pipe with a house are popular because such structures, despite their relatively low weight, are highly durable .
But it also has a disadvantage - it is susceptible to corrosion.
Wood is an environmentally friendly material, but a frame constructed from such material requires special care.
A wooden structure must be tinted from time to time or treated with special means to protect the wood from rotting.
The installation of a plastic frame is very easy and simple, but such a structure is not particularly durable and can break under the influence of additional load, such as heavy snowfall.
Whatever material is used to construct the greenhouse-house, this will in no way affect the presence of a number of features inherent in this structure:
- during heavy rains, water does not stagnate on the pitched roof , flowing freely along it;
- This design allows for good ventilation of the room , thanks to the presence of vents through which hot air escapes and accumulates under the ceiling;
- You can grow tall plants in a greenhouse , planting them even along the walls.
Among gable greenhouse buildings, it is worth highlighting such a unique design as the Mittlaider greenhouse . Thanks to the original roof structure, in which one slope rises above the other, this structure is distinguished by a high-quality ventilation system.
Due to the opening at the top of the structure and located from end to end of the greenhouse, the internal space of the building is provided with intense air exchange, which has a beneficial effect on plant growth.
Varieties
The basis for the construction of the greenhouse is polycarbonate. It comes in several types:
- Monolithic. It has a dense structure without an air gap inside.
- Cellular, has partitions inside the leaf.
Based on the type of leaf, the following types are distinguished:
- 2H – two-layer panels with internal rectangular honeycombs. They bend easily, but are also fragile and susceptible to mechanical damage.
- 3N – three-layer material with straight stiffeners.
- 3X is a three-layer material with combined stiffening ribs, some of which are located vertically and others obliquely, which increases the strength of polycarbonate.
- 5W is a material consisting of 5 layers fastened with straight stiffeners. The sheet thickness is 16-20 mm.
- 5X is the most durable type of polycarbonate. It has combined stiffening ribs and a large thickness of 25 mm.
The choice of the type of main building material depends on the climate and the purpose of using the greenhouse. For example, for structures that operate year-round in northern latitudes, the most dense and durable polycarbonate is used. Thin sheets are suitable for seasonal greenhouses in the southern regions.
Main stages of construction
Winter gable greenhouses are capital buildings with serious weight.
The work plan will have the following description:
- First the foundation is built;
Strip foundation types or a rubble stone base are the minimum requirements for such structures. A section of up to 40 by 40 cm is used along the entire perimeter.
- The timber frame goes on top of the foundation. The frame is subsequently mounted on it;
For beams, additional treatment is important, using primers and antiseptics. Wooden products are always at risk of rotting.
- One of the options is when the installation of the frame sheathing is carried out entirely. There is no need to immediately attach the elements of the product. The entire structure is assembled at the construction site, close to the foundation. All that remains is to move this part into place and secure the harness. Metal corners and screws are used for fastening;
- There is a second option - when vertical posts are placed around the entire perimeter, every meter. This must be done before the foundation is poured. Then, when the foundation is poured, the base of the sheathing is already ready. Then the transverse beams are installed and secured with self-tapping screws. The gable greenhouse is not finished yet;
The frame must be planned in such a way that the cell size does not exceed 50 by 50 cm. Then the entire structure will remain stable and the roofing material will not deteriorate.
- The roof is taken care of after finishing the sheathing work. The cross beam is screwed with self-tapping screws or welded in the center of the greenhouse;
- Rafters and racks are installed at an angle provided for by the created project;
- Cutting and securing polycarbonate sheets are one of the final stages. The resulting seams are sealed using aluminum tape;
The frame is sheathed from top to bottom. Openings for windows and doors are approached at the end.
- It is not recommended to install the greenhouse at temperatures below 10 degrees above zero. Otherwise, the polycarbonate sheets will warp during the cutting process. Cutting involves the use of special construction scissors and an electric jigsaw. Low quality cutting destroys the material.
Choosing a location for a gable greenhouse
It is advisable to place a polycarbonate greenhouse on the site in such a way that it is illuminated throughout the day. If this is not possible for some reason, then the greenhouse should be placed in a place where the sun's rays fall in the morning. The side of the building should be located from east to west. If there are several greenhouses on the site, then they should not block each other’s sunlight.
Warning! When choosing a shaded location, the need for artificial lighting increases, which increases the cost of operating the structure.
Which polycarbonate to choose
The main characteristics for a greenhouse are good light transmission, reliable heat retention and strength. To obtain a structure with optimal performance, polycarbonate sheets with a thickness of 4 to 10 mm should be used.
The thinner the material, the more expensive and heavier it is. Some conscientious manufacturers use polycarbonate of different thicknesses to create one design. Thus, arched elements are subject to more severe loads during strong winds and precipitation, so they are made of thicker material. Straight and side walls can be constructed from thinner polycarbonate.
Polycarbonate sheets are available in a standard width of 210 cm. Sheets can be 6 or 12 meters long. These parameters are taken into account when drawing up a drawing of the future greenhouse.
It is worth noting that the quality of the finished greenhouse directly depends on the characteristics of the polycarbonate. At the same time, there is a large amount of counterfeit material on the market today that does not have the declared properties. This means that you should purchase finished construction or material for it only from reliable suppliers with extensive experience and an impeccable reputation.
Preparation of materials and tools
To install the greenhouse, it is recommended to prepare the necessary materials and tools in advance. The amount of consumables is determined by the size of the structure and its features. Small elements, such as fasteners, must be purchased in excess. Necessary materials for building a polycarbonate greenhouse:
- profile pipes with a square cross-section or wooden beams for the frame;
- polycarbonate sheets;
- galvanized steel corners;
- fastening elements - screws, washers;
- cement grade M300 and river sand for the foundation.
During construction the following tools will be used:
- rule or building level;
- roulette;
- a circular saw or construction knife with replaceable blades for cutting polycarbonate sheets;
- a vacuum cleaner to remove chips after cutting material for greenhouse cladding;
- drill;
- screwdriver;
- screwdriver;
- carpenter's and rubber hammers.
To cover the roof you will need a stepladder. Also, to perform some work, especially cutting polycarbonate sheets, protective elements may be required, such as goggles or a mask, gloves. It is important to work in comfortable clothes and shoes that will not hinder movement.
The greenhouse frame can be made of
- profiled pipes,
- galvanized metal profile.
- wooden beam,
- plastic profile.
The last option is suitable if you plan to build a summer greenhouse from film. For a more durable structure, profiled steel pipes, metal profiles or wooden beams are used.
Profiled pipes
They are made of stainless or galvanized steel. If the pipes are stainless, then there is no need to cover them with anything, otherwise they need to be painted. The pipes are connected to each other by welding or using tees and bolted connections. This is the most reliable option, especially if you are using thick greenhouse polycarbonate. The disadvantage of this material is its high price and heavy weight.
Metallic profile
You can also use a galvanized M-shaped, U-shaped or V-shaped profile. It weighs less than pipes and costs less. A gable greenhouse made of profile and thin polycarbonate can do without a foundation, which also reduces costs. To do this, simply take a profile 80 cm longer than the height of the greenhouse and drive it into the ground.
Wooden beam
This is a less durable material than metal pipes. The tree must be protected from moisture and pests by impregnating it with appropriate agents, but in the special conditions of the greenhouse they will be ineffective, and if effective, they can be poisonous.
Important! It is better to choose a wooden frame if it is possible to regularly care for it.
Drawing and design of a gable roof
Drawing up preliminary drawings is necessary to calculate the required amount of materials, as well as to understand the structure of the structure. The preliminary draft must contain the following information:
- Greenhouse location.
- Drawing of the form with dimensions.
- Calculation of ventilation windows and doorways.
- Indication of materials for construction and their quantity.
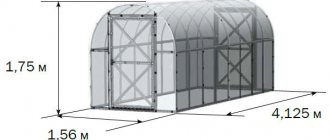
The drawing of a typical greenhouse with a gable roof made of polycarbonate assumes the following dimensions: width - 3 m, length 6-8 m, height - 2.5 m. Standard doorways - 180x80 cm. Windows can be made in full size 120x80 cm or replaced with small windows in the top of the walls.
Important! To ensure the drainage of water and snow, the angle of inclination of the gable roof should be 30 °. A more sloping roof can trap snow.
What materials are used for the greenhouse
Installation of a greenhouse involves the use of the following set of devices:
- Fasteners. Conventional self-tapping screws are excellent for solving this problem;
- Pipe made of aluminum or profile, galvanized;
- Angle made of steel, also galvanized;
- Profiled timber with a cross-section of at least 50 to 50.
Polycarbonate panels are now sold in a variety of sizes. The standard width is 2.1 meters, the length varies - 12 meters or 2.6 meters minimum. Specific numbers are selected depending on the intended project on the basis of which the gable greenhouse is being built.
How to make a gable greenhouse with your own hands
The construction of a greenhouse involves the implementation of a certain construction algorithm.
Laying the foundation
A do-it-yourself drawing of a gable polycarbonate greenhouse indicates the need to build a foundation to avoid subsidence of the soil under the weight of the structure. The most convenient base is a tape base. To fill it, you need to dig a trench around the perimeter of the greenhouse and build formwork from wooden boards. A plastic film is placed at the bottom of the pit as waterproofing, then it is covered with gravel. Concrete solution is poured on top. To avoid cracking as it dries, it must be moistened with water from a spray bottle. Work on the installation of structures can be continued only after the concrete foundation has completely dried. This may take from 2 to 5 weeks.
The function of the base is not only to make the greenhouse structure stronger and more stable, but also to extend its service life. A high-quality foundation also serves as protection against frost and significantly insulates the greenhouse. In areas with high groundwater levels, it is recommended to build a solid foundation. It should be much deeper than the strip one, since fertile soil for plants is poured on top of it.
Frame installation
The metal frame of a gable greenhouse can be made independently or purchased ready-made, according to the dimensions indicated in the drawing. The first option is expensive, but its quality is guaranteed by the manufacturer. While independent production is impossible without skills and the availability of specific tools.
The frame is installed on the foundation and fixed using anchor bolts into pre-drilled holes in the concrete. At the stage of pouring the base, you can provide metal studs on which the frame is attached.
Roof arrangement
When a frame structure is made to order, the roof is also delivered disassembled. It is installed on the frame using anchor bolts. It is more difficult to make the roof frame yourself, for example, if the greenhouse structure is wooden. In this case, it is necessary to calculate the gable roof for the greenhouse so that the distance between the rafters is equal to the width of the polycarbonate sheet.
Polycarbonate fastening
Attaching polycarbonate to a gable greenhouse must begin from the roof. Installation of the casing is carried out using self-tapping screws. If the frame is metal, then it should have pre-drilled holes.
Important! It is recommended to place a metal washer between the self-tapping screw and the polycarbonate sheet. It will reduce the pressure of the screw head on the sheathing and maintain the integrity of the sheet.
Working with polycarbonate must be done carefully, since, despite its flexibility, the material is fragile. Avoid chipping and cracking. It is difficult to cover a gable greenhouse with polycarbonate, so it is recommended to do the work with an assistant.
Foundation for a greenhouse
Next, you need to choose the type of foundation for the greenhouse structure. For a wooden greenhouse-house (this type of frame will be discussed below) a columnar foundation is suitable, which will be enough to support the weight of the building that is not too heavy. The diameter of the pillars should be 120 mm, length - 3 meters. Quantity – 6 pieces.
The pillars are dug into the ground to a depth of 0.5 m. In this case, four pillars are installed in the corners of the future structure, two in the middle. The installed support is poured with concrete and left untouched until completely hardened - this period is several days.
Attention: when pouring the foundation in hot weather, it should be moistened with water until completely hardened, otherwise cracks may form on it.
Irrigation system
With the help of a modern soil moisture system, the greenhouse can be made almost autonomous. For automatic watering, the greenhouse must be equipped with systems for measuring temperature and humidity levels. When it decreases, the irrigation system is turned on. Humidification occurs as follows:
- Sprinkling. Water pipes are installed above the beds under the roof. They are equipped with sprayers through which watering is carried out.
- Drip irrigation is considered one of the simplest methods. Its essence is to install a special hose with holes in the beds through which a small amount of water flows. This type of watering is controlled manually.
The irrigation system can be connected to a central water supply or to a tank that is installed near the greenhouse.
Important! If you use a water storage tank, it is necessary to install a pump to pump water into the irrigation system.
How to attach cellular polycarbonate?
Manufacturers of cellular polycarbonate offer to do this using ridge polycarbonate profiles. It is convenient, cheap, but not always durable. The polycarbonate ridge profile allows you to design the ridge at almost any angle.
When installing polycarbonate using polycarbonate ridge profiles, some features should be taken into account. For example, sheets cannot be mounted flush against the edge of a ridge, since the ridge profile has a wide space between the sheets, at least 40 mm. If polycarbonate sheets are mounted without taking this gap into account, then the profile will simply have nowhere to insert it. The edges of the sheets closest to the ridge must be left free, without fastenings, because the ridge profile will need to be fastened together with the sheets.
The ridge is mounted last, after the sheets themselves are mounted. It is better to attach a perforated tape to the edges of cellular polycarbonate, which will allow moisture vapor to pass through, but will trap dust. The ridge profile must be secured using roofing screws together with polycarbonate sheets through and through to the supporting structure.
It is better to fasten the profile so that its middle part, free of sheets, does not touch the supporting structure. This is necessary so that thermal expansion and contraction of the profile does not lead to deformation of the profile in places where it touches the supporting structure and, ultimately, to its destruction from constant friction and bending.
Mounting a ridge using a polycarbonate ridge profile:
1. Polycarbonate sheets are mounted, taking into account the necessary clearances for attaching the profile.
2. The upper edges of the sheets are left free, without fastenings.
3. The ends of the cellular polycarbonate are covered with perforated tape.
4. The ridge profile is mounted on sheets of cellular polycarbonate and leveled along its entire length.
5. The actual resulting gaps of the profile from the supporting structure are checked, the depth of insertion of the sheets into the profile is adjusted to prevent contact between the ridge profile and the supporting structure in the middle part of the profile.
6. The ridge profile is attached to the supporting structure along with the upper edge of the polycarbonate sheets using roofing screws.
In this case, the connecting profiles, with the help of which the sheets are connected to each other along the length of the roof, are best inserted inside the ridge profile, if possible. If this is not possible, then the connecting profiles are trimmed. It is not recommended to trim the ridge profile and/or plastic. The places of such joints must be filled with transparent silicone sealant of a neutral curing method (look for instructions on the packaging for this curing method before purchasing the sealant!)
Heating and lighting
Year-round operation of the greenhouse requires heating and lighting for plants. The greenhouse can be heated using hot water or solid fuel. The best option is to connect the greenhouse to the heating system of a residential building. It is recommended to use phytolamps as lighting devices. They not only illuminate the greenhouse, but also provide some heat and kill fungus.
Fluorescent, LED or metal halide lamps are also ideal for plants. The optimal daylight hours for plants is about 8-10 hours. It is important to set up automatic lighting in the greenhouse, which is activated when the brightness of natural light decreases.
Benefits of creating a rooftop greenhouse
Many owners of suburban areas want to use their land more efficiently. Greenhouses also fall under this goal. Such buildings can have a fairly large area. Therefore, many gardeners decide to arrange them on the roofs of various buildings - garages and sheds.
Important! When choosing such a solution, some features of the operation of such structures are taken into account - loads on the foundation, maintenance features, waterproofing.
Installation of greenhouses on the roof of a house can be carried out using the following technologies:
- Use of pots. This method is one of the simplest. By choosing it, you can significantly reduce the area of the greenhouse. The design in this case is multi-tiered. A similar technology is used for ornamental plants. It can be used to grow peppers, herbs and tomatoes. The disadvantages of this method include the fact that when dividing the soil with pots, its structure is disrupted.
- Application of fertile soil. Thanks to this solution, conditions are created that are very similar to natural ones. However, such a layer of soil must have a height of at least 20 cm. In this case, it is important to carry out thermal and waterproofing work, as well as calculate the load and create a drainage layer.
- Hydroponics. This method is also not difficult. In this case, minimal plant care is required. However, there are also some disadvantages: quite a lot of mineral fertilizers are used, so the environmental friendliness of the technology is reduced to nothing.
When choosing such technologies, you can set up a greenhouse on the roof as simply as possible.
Inspiring photos of gable greenhouses
conclusions
The features of creating greenhouses with a gable roof must be taken into account before constructing such a structure. This requires the correct choice of materials and taking into account some subtleties. For example, it is important to think through the parameters of the foundation and calculate the load on it. The lighting and heating features of the structure should be taken into account.
When choosing a roof type, you need to decide on the material and supports on which it will be installed. Typically, wooden beams are chosen as pillars. You can also install a reinforced frame made of metal profiles. Polycarbonate is a convenient material in terms of installation and operation. Therefore, it is often chosen when constructing greenhouses with a gable roof.
Design and installation
Scheme of a gable greenhouse in the figure
The most common greenhouse is the gable one. It has a fairly simple drawing - two planes converging upward and end walls. Often, gable greenhouses are made with your own hands as free-standing ones, not attached to the structure. The disadvantage of this type will be the small area, and in the cold season there will also be insufficient heating of the plants, since all the warm air will collect under the roof.
You can build ordinary vertical walls from polycarbonate with your own hands, and make the roof in the shape of a triangle. The advantage of the latest design is the spacious arrangement of your plants. Some lovers of fresh nature set up recreation areas in such greenhouses where they plant beautiful rose gardens.
When choosing a location for a greenhouse, there are three factors to consider:
- light mode (install the greenhouse from west to east along its length);
- wind directions (think about wind protection);
- wide and convenient passage (to facilitate construction and future operation).
Drawing of the greenhouse frame in the picture
We begin to draw a drawing with our own hands, prepare the necessary materials, and carry out calculations. We will choose the size of the greenhouse based on the size of a standard polycarbonate sheet - 2.1X6.0 m. So, from two sheets you can get 8 pieces of 2100X1500 mm each. And build a greenhouse with a straight wall size of 4200x1500 mm. The width of the room depends on the slope of the roof slope. The height of the greenhouse, if we use one cut sheet, will be 1.5 m. But if we build a foundation 20 cm high, the height of the wall will be 1.7 m.
For the frame frames, we take a profile steel pipe, for example, 40x20 mm. It is easier to attach polycarbonate sheets and frame elements to the profile pipe. The piece of pipe at the metal warehouse is 6.05 m. Consider the option of making a frame with your own hands from one steel pipe (see drawing below).
Frame drawing without measurements. With a height of 1.7 m, a gable greenhouse will require 3.4 m of pipe. From the remaining piece of 2.65 m and with a roof at an angle of 30%, we make the frame width 2.24 m. With these calculations, we will cover the greenhouse with one sheet of polycarbonate with protruding side overhangs of 10 cm (for water drainage).
We make a foundation with our own hands, 40 cm deep, lay anchors around the entire perimeter to fasten the profile pipe, and fill it with concrete. After drying, we begin installing the frame.
Frames and trusses for the greenhouse must be welded with your own hands on the ground, and only then the entire structure must be installed. There must be a door on the front elements, and a window on the other side. All elements are welded together and attached to the foundation (see drawing).
We can lay polycarbonate sheets with our own hands, overlapping layers or using connecting profiles; they are installed between the sheets. Special thermal washers are used for fastening. The thermal washer additionally protects the material from dust and dirt getting inside and seals the connection.
Arched or house
By and large, the choice of a greenhouse is a matter of taste; visually, some people like it with a house, others with an arch. But the gardener is more concerned about the issue of reliability, and this depends on how much money you are willing to invest in the greenhouse.
It is important what material the structure is made of, how correctly its rigidity, profile and coating thickness are taken into account. Pay attention to the number of transverse elements of the frame, the distance between the arches or posts, the presence of additional ties or reinforcement of the arches.
In a greenhouse with a house, pay attention to the angle of the slope; if it is not sharp enough, the snow will not slide off.
Covering material of the greenhouse: regular glass or tempered glass - this is not a significant difference; replacing the glass in the frame is not difficult. But the thermoplastic covering material needs to be chosen more carefully; very often polypropylene is sold under the guise of polycarbonate. It is cheaper than polycarbonate by an average of 15-20%, but this is where its advantages end: the strength is 10 times less than that of PC, and at temperatures below minus 25 the material cracks. In order not to be deceived in expectations and not to overpay, ask for a certificate. You also need to make sure that the powder coating on the metal frame is weather-resistant.
