Tips for finishing and interior arrangement
Most often, 2 beds are made in a greenhouse - 80 and 100 cm wide. The width of the path should be such that a small wheelbarrow can pass.
Wide path in the greenhouse
If you plan to make 3 beds, then the middle one should be wider than the others. The recommended height of the beds is 40–60 cm. In this case, the soil will quickly warm up in winter. Also, the side walls of the beds will be thoroughly warmed by the sun and blown by a warm wind.
The only disadvantage of raised beds is the need for fairly frequent watering due to good drainage. Therefore, in the process of internal arrangement, it is recommended to provide a stationary water supply for irrigation.
The path in the greenhouse must be durable and comfortable for movement. The minimum width is 0.5 m. Smooth tiles are not allowed for installation, as it is difficult to move on them in high humidity. The path must be made with a slope so that the liquid does not stagnate.
Additionally, curbs can be installed.
Border for a path in a greenhouse
The elements are needed to ensure that the soil from the beds does not fall onto the paths. The height of the fence should be 30–50 mm above the soil level. It can be made from edge stone, board or tile. If you plan to use wood, it should be impregnated with a product to protect against fungus and rot.
To save space inside the greenhouse, it is recommended to install shelves and racks. They can be made of metal or wood. Upper racks are used for plants, and lower racks are used for storing equipment and containers:
Wooden shelving in a greenhouse
It is best to place water pipes under the roof. It is recommended to install an automatic irrigation system
However, it is important to consider that different vegetables require different microclimates: tomatoes need a dry atmosphere and moist soil in the depths, cucumbers need high air humidity and cyclic spraying of leaves
In hot summers, it is necessary to remove excess heat from the greenhouse. If this is not done, the plants will overheat. The beds can be used as heat accumulators, since the soil is always colder than the air. On hot days, only automatic windows can save you.
Automatic vents in a greenhouse
It is important to provide a place for their installation in advance. Increased humidity and temperature not only have a positive effect on the growth of plantings, but also help the formation of various diseases
There is a high concentration of various pests in the soil. For this reason, it is necessary to regularly disinfect the ground, equipment and all structures with copper sulfate:
High humidity and temperature not only have a positive effect on the growth of plantings, but also help the formation of various diseases. There is a high concentration of various pests in the soil. For this reason, it is necessary to regularly disinfect the ground, equipment and all structures with copper sulfate:
Copper sulfate for plant protection
You can protect yourself from late blight in a small greenhouse with several buckets of hot boiled water.
Finishing with these products should be done in the fall, after harvesting.
Video: making a polycarbonate greenhouse
In the video you can clearly see the process of manufacturing a polycarbonate structure.
To build such a greenhouse will not require much time and significant costs for materials. You can build a high-quality structure with your own hands, which will be an excellent help in gardening.
Fastening polycarbonate to the frame
Plastic is a fragile material, so they should be handled with care. They can only be bent in one direction.
- 1 step. The polymer is laid face down on the end. Before installation, remove the protective film. The polycarbonate should extend beyond the edge of the end by 5 or 6 centimeters.
- Step 2. Covering the walls. The sheet is fastened with self-tapping screws, first on one side of the frame, then stretched and screwed on the other side. Polycarbonate should be laid overlapping to avoid the formation of cracks. To reduce the impact of atmospheric phenomena on the wooden beam, the plastic should be lowered to the soil, completely covering the foundation. The polymer can be secured using galvanized tape, screwing it in with screws. The greenhouse is ready.
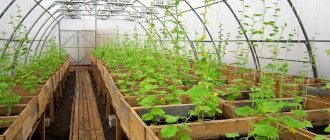
After installing the greenhouse, you can begin the internal layout. With proper markings, it will be possible to place 3 rows of beds and two paths in an indoor garden. The normal width of the bed is 50 - 70 cm, the paths will take up 90 cm. A quite spacious room for growing your favorite plants.
The beds should contain loose soil 60 cm deep, so they can be fenced off to prevent them from crumbling. The most varied material is suitable: from wooden boards to old window sills. Don't forget about aesthetics. Paths can be covered with gravel or laid with paving slabs, stones, or bricks.
To store garden tools, you can make racks so as not to take up useful space.
You can think about further arrangement of the greenhouse. After installing one of the irrigation systems, installing lighting and heating, the greenhouse will produce a rich harvest several times a year. Growing vegetables and herbs will turn from a chore into a pleasure.
What type of foundation to choose
Standard (“factory”) greenhouses are supplied without a foundation or on a weak foundation. Therefore, even if you order a ready-made structure, take care of the foundation yourself.
When designing the foundation, consider:
- terrain features of the site. If you have large differences in soil or shallow groundwater, you will have to prepare the area well. In the most difficult cases, a solid concrete base is poured;
- dimensions of the greenhouse building. A small greenhouse can be installed on bricks and strengthened with strong metal crutches - this is usually quite enough. But starting from a shelter size of 3x5 or more, you cannot do without a reliable foundation. The larger the building, the more serious the foundation needs to be installed. Therefore, sometimes it makes more sense to build two small greenhouses rather than one giant one.
A correctly selected and installed foundation not only makes the greenhouse structure stable and durable. It will help reduce heat loss by 10%, protect the soil from washing out, and plants from spring frosts.
When installing greenhouses, the following types of foundation are most often used:
- Tape. An extremely labor-intensive type of foundation that requires a lot of effort and time. First, they dig a trench according to the size of the future structure. Depth - the level of soil freezing in your region. In central Russia this is about a meter, in the southern regions a little less, in the north - more. The minimum depth, regardless of natural conditions, is 70 cm. Then formwork is placed in the trench and concrete is poured. According to all the rules, the strip foundation must “settle” for at least several months. After this, you can install the greenhouse frame.
- Columnar. Durable and less labor-intensive variation of the strip base. Instead of continuous concreting, several points are poured according to predetermined dimensions. For this it is convenient to use hollow asbestos-cement pipes.
- Wood. For a wooden building, a base made of impregnated timber is best suited. It is usually placed on brick or concrete posts for added strength.
How to properly heat
Greenhouse door
Now it is important to take care of the insulation and heating system of the greenhouse. Modern technologies involve the use of transparent or bubble plastic to insulate the greenhouse from the inside and outside
The benefit of this solution is that this material does not absorb sunlight and looks decent.
Heating methods:
- Stove heating - for this purpose, a stove or barbecue is built, and ventilation is installed to ventilate the room. The disadvantage of this method is that the heat is distributed unevenly over the area of the greenhouse.
- Electric heating is carried out using a convector and heating elements. In this case, ventilation is not needed.
- Water heating is carried out by installing pipes to which hot water is supplied using a pump from a boiler, which is heated by electricity, gas or coal. Ventilation is required when using gas and solid fuels. This method is also labor-intensive and expensive.
- Gas heating is produced using catalyst burners. This requires constant ventilation and ventilation throughout the greenhouse.
Heating in a greenhouse may not be entirely economical, but, as they say, the goal, and in our case, to reap a rich harvest, justifies the means.
Vertical beds
Many summer residents have moved away from standard ground beds and are setting up shelving structures. In a 3x6 m greenhouse, with this approach all free space will work. However, this method of planting has its own characteristics.
Plants on the racks need to be arranged so that the upper tiers do not shade the lower ones, and there is enough warmth and light for everyone. There are some tricks here:
- On the lower shelves they place pots with mature crops that are not so demanding of light.
- The upper shelves are occupied by young plants and seedlings that need increased lighting.
- The rack is made no more than 50 cm deep so that the shelves do not shade each other.
Racks can be standard, with the same width of shelves along the entire height, or others. They are made according to the pyramid principle, so that the bottom shelf is wider than the rest.
Making a polycarbonate greenhouse with your own hands
Before starting construction, make a detailed drawing of the future structure indicating the dimensions. This will help you calculate how much pipe profile or wood is needed to assemble the frame and the amount of polycarbonate sheet.
Choosing a location
A greenhouse made of cellular polycarbonate can be erected anywhere in a summer cottage. You should not choose areas near buildings, fences, or in the shade of large trees. It is better to choose a flat, dry area. The construction of a structure on a slope is fraught with the impact of water and melting snow on the walls of the structure. It is also possible that the plants will experience a lack of sunlight.
Attention!
Consider the location of the cardinal directions. It is necessary that the longitudinal walls are parallel to the south.
The quality of the soil does not matter. You can fill the greenhouse with soil prepared for growing crops. Make a mixture of:
- 60% garden land;
- 25% rotted manure;
- 5% wood ash;
- 10% peat.
Mix all the ingredients and pour into the greenhouse. As a result, you will receive nutritious soil in which the crops will receive all the substances necessary for growth and fruiting.
What tools and materials will be needed
To build it yourself, you will need cellular polycarbonate in the amount necessary to sew up the frame. To install the frame, you need to prepare a pipe profile or a wooden block. The metal pipe profile must have a cross-section of at least 20 x 20 mm. The bars should be purchased at least 30 x 30 mm in size. Also prepare the fasteners.
Tools you will need:
- shovel for leveling the area and deepening the frame;
- hacksaw for cutting polycarbonate;
- construction tape for precise cuts;
- grinder or metal scissors for cutting pipe profiles;
- screwdriver for fastening sheets.
Useful!
To install polycarbonate, you should select self-tapping screws with rubber washers or attach hardware through homemade rubber gaskets.
Work should be carried out on a dry day after the snow has melted. Already in April-May you will be able to plant seedlings in a reliable modern greenhouse that will serve you for at least 15 years.
Main assembly steps
The construction of a polycarbonate greenhouse with your own hands is carried out in the following order:
- Clearing the site and constructing the foundation if necessary. Make markings using rope and pegs.
- Cut pieces of a metal profile or wooden block into the required lengths for the frame. Use a construction tape, a grinder, iron scissors or a hacksaw.
- Assembly of the frame with stiffeners. Use your sketch. Attach all elements to hardware and corners. To install a structure made of steel pipe profile, welding is possible. Start from the end wall. Finish by installing the roof.
- Strengthen the base of the frame into the ground. To do this, drill holes into which place studs or pipes buried into the ground to a depth of at least 20-30 cm.
- Install frames for doors and windows on the frame.
- Prepare the polycarbonate pieces according to your prepared project.
- Sew up the constructed frame with polycarbonate pieces.
- Make doors and windows, attach fittings.
If gaps have formed between the bottom of the greenhouse and the ground surface, they must be filled with soil.
Rules for working with polycarbonate and profiles
The basic rule for working with polycarbonate is to take into account the location of the air cells. It is necessary that the honeycombs be positioned vertically to the surface of the earth. The position of the honeycombs at an angle is allowed. If pieces of covering material are placed horizontally, moisture may enter them. Between the polycarbonate sheets, strips should be installed that will prevent the penetration of cool air and heat leakage.
It is better to cut the profile using an angle grinder (grinder). Cutting with scissors can lead to the formation of nicks and bending of the profile ribs. When working with metal profiles, use gloves and safety glasses. Make sure you are wearing clothing made from non-flammable materials. Do not work near flammable liquids, children, or animals.
The construction of a polycarbonate greenhouse will make it possible to create ideal conditions for growing various vegetables, flowers, and herbs. In one season, you can plant several types of plants in the structure. In the fall, it is necessary to remove the tops, dig up the beds, and add organic matter. In winter, depending on the design, it is necessary to ensure that large amounts of snow do not accumulate on the roof of the structure.
Choosing polycarbonate
Polycarbonate is a sheet of plastic with a cellular or monolithic structure, depending on the additives it has different light transmittance. Strength and resistance to static and dynamic loads depends on the structure and thickness of the sheet. From a chemical point of view, it is a thermoplastic, a polyester of carbonic acid and dihydric alcohols. For the operation and use of polycarbonate in construction, the properties given in Tables 1 and 2 are important.
Table 1. User characteristics of cellular polycarbonate.
Table 2. Parameters of monolithic polycarbonate that differ from similar properties of cellular panels.
The difference between cellular and monolithic polycarbonate lies not only in the presence or absence of voids in the panels. Also different:
- the minimum permissible bending radius - for panels with a thickness of 10 mm Rmin is 1500 mm for monolithic and 1750 mm for cellular;
- sound insulation - for sheets of 8 mm monolithic type the standard is 28...31 dB, for cellular - only 18 dB;
- the heat transfer coefficient of monolithic thermoplastic is 1.5 times higher than that of cellular plastic;
- There is also a difference in the permissible impact load - cellular plastic is more fragile.
Due to the design features of the panels, the range of thicknesses of cellular polycarbonate panels for 80% of manufacturers begins with 4 mm; for monolithic sheets, the minimum thickness is 1.5...2 mm.
The construction of greenhouses involves the use of the following properties of thermoplastics:
- high level of translucency, the possibility of shading to the required parameters when growing shade-loving plants;
- low thermal conductivity coefficient, providing good thermal insulation properties of the structure without the use of additional thermal insulation;
- lightness of structures, low load on the base. This allows for the use of simplified foundations or, under suitable conditions, their absence;
- the possibility of using thermal molding of panels (bending to a given frame radius), which increases the variability of the geometric shape of greenhouses;
- the speed of construction of the structure due to the ease of fastening the panels and the low specific weight of the sheets - you don’t have to use construction equipment.
Since lightness and low thermal conductivity are an important part of the required characteristics of the material, when deciding the question “which polycarbonate is best for a greenhouse?” preference should be given to cellular panels. Monolithic sheets are more suitable for structures that are at risk of impact loads on translucent structures.
Parameters for selecting honeycomb panels for greenhouse buildings:
- The thickness of the panels depends on the pitch of the frame sheathing and the type of frame. The geometry of the building and the minimum bending angles of the structures should also be taken into account. An additional factor is snow and wind loads in the construction area;
- when choosing the color of the panels, one should take into account the intensity of solar radiation in the region and the illumination required for the planned type of vegetation;
- additional characteristics of the material - the ability to absorb ultraviolet radiation by the coating - affect the service life of the thermoplastic.
Scheme of exposure to sunlight on a sheet of cellular polycarbonate
Snow load in different regions of Russia
Taking into account the above data, it is worth choosing cellular polycarbonate with a thickness of 4...8 mm, protected from the destructive effects of ultraviolet radiation, transparent (for 80% of agricultural crops in the middle and northern part of the Russian Federation). In this case, it is reasonable to take the shape of the greenhouse teardrop-shaped or arched - this will help reduce the influence of snow load on the roofing structures and will allow the use of thinner (and cheaper) sheets of cellular polycarbonate.
Comments2 comments
- Vadim: 03/22/2017 at 11:36
I agree with the author of the article that welding is the best option for a structure made of profiles in terms of reliability, but it is impossible to foresee everything. Nine years ago, on a summer cottage, I installed a stationary greenhouse made of profiles, concreted the vertical posts, and made all the connections using welding. Three to five meters from the greenhouse, along the fence, blue spruce seedlings grew, which during this time grew into trees. The shadow of the fir trees falls on the greenhouse, there has been no harvest in the last two years, and it is a pity to cut down the trees. You will have to dismantle the greenhouse, cut the structure from the profiles with a grinder, and reassemble everything in another place. - Valery:
06.08.2018 at 19:58The article is really useful. Which doesn't happen often these days. Usually articles are spanked according to the principle of blunder, blunder, quickly. And the benefits from them are the same. And here everything is quite detailed and various practically useful nuances are discussed in great detail. I even added a link to the home screen. Thank you.
Making a drawing of a 3x6 m greenhouse
When a gardener sees beautiful and reliable greenhouse structures in photographs, he should know that not all of them were purchased ready-made.
A greenhouse drawing can be made by hand or using a special program on a computer.
You can create a greenhouse structure with your own hands, for this you need:
- Be patient;
- Calculate the dimensions for the location of the future greenhouse structure;
- Purchase everything you need;
- To make a plan.
Drawing - what to consider
When drawing a drawing, you must take into account that the profile pipe is usually sold in standard sizes: 3, 4, 6, 12 m. Having clarified this point with the seller, you need to build on it. This will save on material. More precisely, reduce the amount of trim and excess. For example, you can make a greenhouse 6 m long and 4 m wide. By choosing a height of 2 m, the pipe can be cut without excess and for vertical posts.
Attention! Metal thickness and internal diameter play a significant role. For racks and main parts it is better to choose 20*40 mm, and for connecting parts - 20*20 mm
The drawing will be formed from the following frame components:
- base;
- vertical racks;
- top trim;
- roof;
- door, windows;
- additional reinforcements (struts).
In the drawing, it is necessary to take into account at what distance the vertical posts will need to be placed. According to the standards, it is recommended to choose a parameter of 1 m. If you plan to cover it with film, it is permissible to reduce it to 60 cm. This will reduce the load on the material and extend its service life.
If there is a need to leave a larger distance, for example, when drawing the front part, you will need to further strengthen the pipes. This can be done by inserting a pipe diagonally between the vertical struts.
Drawing of a greenhouse with a gable roof
The roof frame is formed using standard construction technology, so the drawing will need to reflect:
- two equal beams from each wall at a distance equal to the gap between the posts;
- the beams on each slope will need to be connected to each other in the plane of the slope;
- connect opposite beams. It turns out to be a kind of “farm”.
When drawing up a drawing, it is necessary to take into account the future joints of the polycarbonate.
A slightly different approach would be if the greenhouse is arched. In view of the need to bend the pipe at the desired angle, you need to clearly understand what height will be obtained in the highest place, so as not to waste space or so that it is sufficient for caring for plants. For example, to get a height of about 2 m in the center of the greenhouse, you will need a 12 m profile (or two 6 m each, connected in the center). They need to be installed at a distance of about 4 m (the width of the greenhouse). The number of arcs should be drawn based on the cladding option and the expected load. On average, a distance of 0.6 - 1 m will be sufficient.
Drawing of an arched greenhouse from a profile pipe
Each pair of arcs will be connected to each other, and profiles will also be required on each side to secure the structure. On the gables, taking into account the doors and windows, you also need to draw additional spacers.
Do not forget that the profile pipe can be cut into any parts and folded into the required structure. If desired, for example, you can make a triangular, lean-to, even spherical greenhouse.
Layout
The most common design has become a greenhouse measuring 3 by 6 m in a rectangular format. This structure is popular not only due to its compactness and efficient use of space, but also due to the simplicity of its design. In it, the ridges are usually located lengthwise. To ensure maximum sunlight, you need to position the greenhouse correctly.
Based on the height of the crops, the structure is located along a parallel (east-west) or along a meridian (north-south). For low-growing plants, the most successful option is east-west. This way they will be illuminated by direct sunlight penetrating through the southern side of the translucent fence throughout the day. The location is also suitable for low-growing plants on the south side and tall plants on the north.
When growing tall plants, this arrangement of beds in a 6x3 greenhouse is not suitable, since crops planted on the south side will shade those growing on the north. When planning a greenhouse from north to south, natural lighting will be alternating. Until noon, the eastern ridges will be illuminated by direct rays, and the western ones by diffused light. In the afternoon, on the contrary, the sun will illuminate the western side of the structure.
When planning a greenhouse, the light-loving nature of the crops is also taken into account, so the first option (east-west) can be used for growing tall, light-loving plants on the south side and crops that need to be shaded on the north side. Video tips for planning beds in a 3x6 greenhouse
DIY drawings of a polycarbonate greenhouse from a profile pipe
With the choice of location and construction of the base over, it’s time to directly develop a drawing of a greenhouse with your own hands, using a profile pipe.
Drawing diagram of a polycarbonate greenhouse
How to create an arched polycarbonate greenhouse with your own hands, diagrams and drawings, photos.
Using the arched model, you can build both a small greenhouse and a huge permanent greenhouse. To make a polycarbonate greenhouse with your own hands, from a profile pipe, you need to make competent drawings and calculations. If we talk about the arched shape, then you need to know some of the distinctive features of this design. The most important thing to consider is, of course, the height of the greenhouse itself, and how this fits with the size of sheets of standard forms. Long sheets are only 6 meters long, which in itself affects the correction of future construction.
How can we get an arched shape? The sheet must be placed in a transverse position, and the radius of the coating will be 190 centimeters. Width 380 centimeters. Based on this, it can be understood that the height of the building will be 190 centimeters.
This is what an arched polycarbonate greenhouse looks like inside
If 190 centimeters is not enough for your needs, you can try to make it higher by installing a base. If you make the height of the base 100 centimeters, you can expand the building itself to 240 centimeters.
Drawings of a greenhouse, arched type made of polycarbonate from a profile pipe
You can also bend the profile pipe to adapt it to your needs, but as we said earlier, for this you need to use special tools, or buy a profile in the form of arcs.
Scheme of a polycarbonate greenhouse
If you are developing drawings of a polycarbonate greenhouse with your own hands, you can use only two arc-shaped frames from a small profile pipe, about 5 meters. If the greenhouse is more than 6 meters, you will need to make additional calculations.
The next step will be to develop drawings of a polycarbonate greenhouse with your own hands, from a profile pipe; you will need to indicate the fastening step. When building an arched greenhouse, the ribs of the fastenings must be placed along the arcs. Check your ideas with the technical data sheet of the product, because your manipulations should not be anything unexpected for this material.
DIY drawing of a polycarbonate greenhouse, made from a gable-type profile pipe.
For such a construction, you need to take a profile pipe measuring 40 by 20 millimeters.
Drawing of a gable greenhouse
Using this drawing you can assemble a good, gable greenhouse with ventilation holes.
Example of a greenhouse with a gable roof
When tilted, the rafters create an angle of up to 30 degrees, which in turn will have a beneficial effect on the drainage of precipitation from the surface of the greenhouse.
Greenhouse project made of polycarbonate and profile pipe, with a gable roof
To build such a building, most often a strong profile of at least 20 by 40 is used; for the main load-bearing parts, rafters and beams, for less important parts, you can use a 20 by 20 profile. If you decide to cover the greenhouse with polycarbonate sheets, consider the fact that The joining places of the slabs must be located on the profile. The distance between the rafters is no more than 1 meter.
Seasonal greenhouses, projects and drawings.
When creating greenhouses for one season, there are no special strict requirements for the design, because they do not need to withstand snow pressure. The main thing is to ensure ventilation of the space. The sheets must be connected with fastening profiles.
Greenhouse bread box, drawings.
This design is distinguished by its original design, which has a number of advantages:
- Unusual design;
- There is no need for a large number of connecting lines;
- It is easy to carry out the ventilation procedure;
- Ease of building a greenhouse.
Two half-arches are fixed on special retractable hinges; these will be sliding elements; the frame itself must be made using a profile pipe with a small cross-section.
Greenhouse bread box, photo
How to make a polycarbonate greenhouse with your own hands, video:
Result:
Do-it-yourself polycarbonate greenhouse drawings from a profile pipe will help you build the kind of greenhouse or hotbed that you need. This way you can provide yourself with vegetables at any time of the year, the main thing is to make the right plans and count the amount of consumables, this way you can avoid unnecessary costs. With this we say goodbye to you, wish you all the best and see you on our website about gardening without hassle!
Tips for choosing building materials
Most often, cellular polycarbonate is used to make greenhouses.
Cellular polycarbonate sheets
Such sheets are durable and transmit about 90% of light. The material practically does not transmit ultraviolet radiation. Sheets can have the following structure:
Structure of cellular polycarbonate
Instructions on how to choose the right polycarbonate for a greenhouse:
- First of all, you need to select the thickness of the sheets. The parameter should be selected based on wind load, bending and number of posts. For outdoor use, the minimum material thickness is 8 mm.
- Sheets of thinner thickness are cheaper, but you won’t be able to save money. If you use thin polycarbonate, you will need to make more frequent lathing steps, which entails additional costs.
For different purposes, material of different thicknesses should be used:
- 4 mm sheets are used for the construction of canopies and small greenhouses;
- 6 mm thick polycarbonate can be used to make small greenhouses;
- thickness 8 mm is suitable for medium-sized greenhouses;
- using 10 mm sheets you can perform continuous processing of large vertical bases;
- material with a thickness of 16 mm makes it possible to process roofs over large spans and is used in large complexes.
During the selection process, it is worth considering that the optimal density for installing a greenhouse is 800 g/m2. Density is the weight of the material per 1 m2 of sheet. The value affects strength. It can also be analyzed by visual inspection: if the material is packaged, then it should be placed evenly, and there should be no waves or bends on the sheets. If the foot is deformed, then it is better not to use the material.
Before purchasing, you need to study the inscriptions on the film. Sellers often offer lightweight and budget-friendly polycarbonate under the brands of global manufacturers. The labeling must be appropriate.
Recommendations to help you purchase quality material:
You can find a lot of low-quality polycarbonate on sale. It is recommended to give preference to well-known brands. Lightweight polycarbonate can be used in countries with warm climates
The material can hardly withstand temperature changes and has a short service life. It is worth paying attention to production standards. If the packaging says that the material has a thickness of 4 mm, but in fact the thickness is 3.5 mm, then you should not buy such a product. The weight of ordinary sheets is 10 kg. High-quality sheets have markings on the base that indicate the application of a special film to protect against sunlight.
When bent, high-quality material should not crack.
Experts advise checking documents for polycarbonate. The packaging must be of high quality. The sheets are placed in plastic film. There should be no unevenness on the polyethylene.
Choosing a 3m by 6m greenhouse with protection
How do greenhouse structures made of polycarbonate material differ from each other, what determines their price, and is it worth buying a 6x3 m greenhouse if it is inexpensive? We will try to answer these questions that concern every gardener who is planning to buy a greenhouse.
A greenhouse with a metal frame has a long service life and good strength.
The price directly depends on what building material the frame is made of. Inexpensive greenhouses are made of PE pipes, the most expensive ones are made of durable galvanized metal profiles.
It is better to buy a model with a metal frame. Plastic is short-lived, so the frame becomes deformed after the first winter, and as a result, the coating breaks.
Repairing a greenhouse is a useless exercise; you will have to purchase a new greenhouse structure. Greenhouse structures vary in coating thickness. In a number of greenhouses it is 4 mm. This coating material has high thermal conductivity and is also easy to deform. It is better to give preference to models with a coating of 6-8 mm. It is better if it is 2-layer.
Inside, such material is protected from condensation, outside – from:
- Wind;
- Precipitation;
- Ultraviolet.
Another point that affects the price and quality of the finished greenhouse is the presence of seals. You can save money, but then you can’t think about the tightness of the joints. Natural ventilation may not do any harm, but the temperature in the greenhouse will drop significantly, and the plantings will suffer. But we install a greenhouse precisely in order to please ourselves with an early harvest. So is it worth saving?
In expensive products, as reviews have shown, there are 2 doors and several transoms. The higher the average daily summer temperature, the more attention should be paid to the number of ventilation sources, otherwise the seedlings will simply wither. But for territories, for example, the center and east of Siberia, models with one door are quite comfortable. When the thermometer does not rise above +20˚С, and it is often not warm rain, it is difficult to destroy the plants.
Choosing the type of greenhouse construction from a profile pipe
When starting to make a greenhouse from a profile pipe with your own hands, drawings are developed for a tent or arched structure. An arched greenhouse requires special production, since it is difficult to give the required shape yourself. The advantages of such designs include ease of assembly in the presence of curved parts. The disadvantages are limited functionality due to the inability to plant tall plants near the walls.
Making arcs yourself is quite difficult.
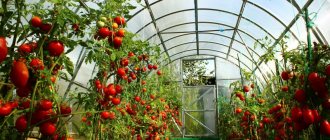
Tent greenhouses have a simple design. They do not contain curved elements, which greatly simplifies the manufacturing process. Despite the availability of ready-made products for sale, many people strive to make tent greenhouses from profile pipes on their own. In this type of structure you can plant plants of various heights.
A more expensive option compared to arched greenhouses
Marking the area for a greenhouse 3 by 6
The greenhouse should be installed in a sunny place. Do not place it on a hill (wind) or in a low place (frost). In addition, the structure must have a stable position.
It is better to find a place closer to buildings on the sunny side. Having chosen the installation location, you need to mark the area using a string and pegs, driving them around the perimeter of the rectangle.
Before starting all manipulations for the construction of a greenhouse, it is advisable to complete a detailed drawing with all dimensions.
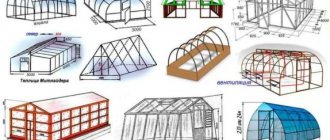
Greenhouses can have any shape. Arched greenhouses are the most widespread. This is due to:
- Durability;
- Appearance
- Cost-effective and easy to assemble;
- Snow does not accumulate in winter.
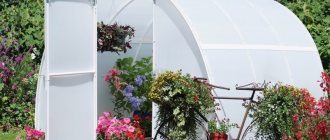
Alternatively, greenhouses can be shaped like a house, breadbox, or dome. The latter looks very original, but it is quite difficult to install.
Let's take a closer look at the installation of an arched greenhouse.
DIY greenhouse construction
Where to begin?
Material size matters
First, we will need, to construct a polycarbonate greenhouse with our own hands, drawings and all the necessary materials and tools.
To make a drawing of a greenhouse, you first need to decide on its size. When determining the size, keep in mind that a standard polycarbonate sheet has a size of 2100x6000 mm. When drawing up a drawing, it is important to take this fact into account; this way you will avoid unnecessary trimming.
Given this size, what can you do?
- You can get 4 sheets with a size of 2100X1500 mm.
- As a result, you can build a greenhouse with a straight wall size of 4200x1500 mm.
- Or 2100X1500, there are many options.
- The width of the structure will directly depend on the slope of the roof slope, provided that one cut sheet is used to cover it.
As for the height.
- In this case it is 1500mm.
- If you raise the foundation by 200 mm, the height of the straight wall will already be 1700 mm, this does not take into account the height to the ridge.
Interior layout is a top priority
We did not try to offer you a specific size for arranging a greenhouse.
We simply examined the general principle of the device with the production, during installation, of a minimum amount of polycarbonate sheet waste.
We think the principle is clear.
- When designing a polycarbonate greenhouse, the layout of the internal plant layout is also important.
- Therefore, first distribute your crops inside, and only after that can you complete the drawing of the entire structure.
- When setting up a greenhouse, take care of its orientation relative to the position of the sun in your region.
- The more light, and therefore heat, you receive from the sun, the lower the cost of maintaining the desired temperature inside the greenhouse, and this also has a positive effect on plant growth and maturation.
Choice of frame material
All the main issues have been resolved, it’s time for the material.
- It is best to use a metal profile for the frame.
- Using wooden beams is also possible, but it will require additional treatment against dampness and will not last as long as a metal profile.
- Sometimes a metal corner and pipes are used for the frame.
- Working with this material requires the use of welding.
- Not everyone can do welding work, and not every household has a welding machine, but assembling a greenhouse frame from this material using fasteners is quite a long and tedious task.
The choice is made
Therefore, we suggest that you use a metal profile, which is usually used for installing gypsum board sheets.
- The advantage of this profile is lightness and durability.
- Working with him is easy and simple.
Many may wonder whether a greenhouse made from this profile can withstand a large snow load?
We are not saying that this greenhouse can withstand a layer of snow over 500 mm thick, but if you are going to grow plants all year round, this assumes that you will clear the roof of snow. Otherwise, your plants will not see the sun.
Features of a greenhouse on a frame made of profile pipes
Profile pipes are an industrial product with a cross-section of a different shape rather than a round one. When assembling a frame, the most popular products are those with square and rectangular cross-sectional geometry. They are made of steel. Professional builders agree that such pipes are very convenient to use.
The shape of the corrugated pipe resembles a block of wood. However, profile pipe is much more profitable to use in construction - it is lightweight, reliable, durable, and protected from corrosion. The modern market offers a large selection of pipes with anti-corrosion coating. All you have to do is paint the cut areas. Use “rust enamel” primer for this.
Profiled pipes are interesting because they guarantee the necessary strength of the frame despite their low weight. Sufficient rigidity of the greenhouse structure is ensured by four pipe ribs. As for how much the product will cost you, a profile greenhouse built with your own efforts is not too expensive. It will be much cheaper than a ready-made industrial product purchased in a store. And the wear resistance of polycarbonate is significantly superior to ordinary glass or polyethylene.
Thus, the advantages of a profile frame are undeniable:
- it can be easily assembled and disassembled;
- with low weight, the finished structure is characterized by high strength;
- All elements are universal and easy to transport.
Important! During the winter months, the frame may not withstand the pressure of snow masses, and the greenhouse will collapse. The problem can be solved by strengthening the supporting structure or installing a removable roof.
Deciding on the sizes
To better imagine how to make a greenhouse from a profile with your own hands, you must first decide on the dimensions. And in order not to encounter excessive consumption of material and a large amount of waste, it is advisable to correlate these dimensions with the standard dimensions of corrugated pipes and polycarbonate sheets.
In construction markets and metal depots, profile pipes are sold in 6-meter lengths. In stores you can find a different length - 2 or 3 meters. It is more convenient for independent transportation, but it is more difficult to assemble an arched structure from short sections: there is a need to make additional joints.
It would seem that the length of the arch can be increased without problems by welding the required section of pipe. But the length of cellular polycarbonate sheets is also 6 or 12 meters, and such an increase will lead to overuse of this expensive coating, the need for its joining and a decrease in reliability.
For example, the height of the side walls of a pitched structure should be 1.5-2 meters for ease of work. These dimensions correlate perfectly with the dimensions of corrugated pipes and sheet material, which are cut without waste.
Advantages of professional pipes for greenhouses, choice of type, size
Structures of various types are erected from this material, it all depends on the wishes and needs of the owner of the personal plot.
Advantages of metal profile greenhouses
Considerable strength of a homemade greenhouse made from a profile pipe with relatively low weight. This effect is achieved due to the geometry of the section - square or rectangular. Four ribs provide sufficient rigidity of the structural elements. An ordinary round pipe of comparable strength with approximately the same cross-section (for example, 30 mm) will weigh much more. A greenhouse made of galvanized pipe 25x25 mm is able to withstand high snow/wind loads, regardless of what it is covered with. During installation, the planes of the elements have a large contact area. The result is high strength of connecting nodes
This is especially important if you plan to build a greenhouse from a profile pipe with your own hands - the structure turns out to be very durable. There are different ways to connect greenhouse parts to each other. This is welding, self-tapping screws, crab clamps
They can be used alone or in combination with each other. The profile pipe is sold already with an anti-corrosion coating. After completing the construction of the greenhouse, only the cut/joint areas of the parts will have to be processed. Greenhouses made from corrugated pipes can be mounted on a foundation or without it.
Greenhouse with a house made of a square profile pipe, covered with polycarbonate. Please note: the listed advantages of a profile pipe allow it to be used for the construction of greenhouses of any size and geometry. There are no restrictions, you just need to choose the right type of section and size of profiles
How to choose a profile pipe for a greenhouse
- Material of manufacture. There are painted and galvanized steel pipes on sale. The former are cheaper, but the coating deteriorates over time, and the exposed steel will begin to rust. Galvanized profile pipes for greenhouses do not face these problems; a structure made from it will last about 20 years. The highest quality material must be marked GOST 14918-80.
- Section, wall thickness. If a small greenhouse is being built, the material is selected, as they say, by eye. For example, a small greenhouse made of a 20x40 mm profile pipe, wall thickness - 3 mm. The values here can vary up or down. To select pipes for large-sized buildings, you should look at SNiP, namely sections P-23-81 and 2.01.07-85.
Please note: greenhouses with an area of 10 m2 or more cannot be built without preliminary calculations using SNiP. An improperly designed structure may deform or collapse under its own weight or snow/wind loads.
To make a greenhouse from metal pipes with your own hands, you need to choose the right section of profiles
Pipe for a greenhouse. Advantages and disadvantages of plastic pipes
Every day, polymers are increasingly replacing wood, glass and other materials from the industrial sector. The plastic is durable and lightweight and is not corroded by mold. The material is not afraid of fumes, chemicals and moisture.
Greenhouse made of plastic pipes
Plastic structures last longer than products made from other materials, as they can easily withstand negative environmental influences.
The disadvantage is the cost of greenhouses from manufacturers, as well as the sizes, which do not in all cases meet the needs of summer residents. However, there is no need to be upset, since you can build a high-quality greenhouse yourself.
The highest quality and most affordable greenhouses are those with a frame structure made of profile pipes. However, if the budget is limited or there is no desire to overpay for the installation of such a greenhouse on the site, then you can build a structure from plastic tubes. This product has a number of advantages over more expensive analogues. The main advantages of the material include:
- Low cost. Aluminum buildings will cost much more.
- Easy to install and dismantle. This makes it possible not only to independently choose the dimensions of the structure, but also to dismantle it and store it in a garage in the winter. Without special skills, you can build a greenhouse from pipes in one day.
- Light weight. This quality is often mistaken by experts as the main drawback of the product.
- Mobility. The building can be easily moved from one place to another.
- Versatility of production. During the construction and design process, it is possible to choose any parameters and dimensions, taking into account the characteristics of the estate.
- Resistance to negative atmospheric influences.
- Long service period.
- Great looks. You can build a structure yourself, the appearance of which will not be inferior to the factory product.
- Environmental friendliness. Plastic is a safe and environmentally friendly material. Accordingly, nothing will threaten the crop and soil.
The only drawback of plastic buildings is that factory-made structures are not always suitable for the available site. If you want to build a product of complex shape, then you should know that the structure will be unstable in gusts of wind.