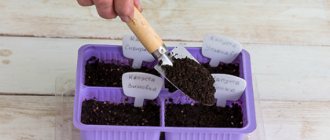
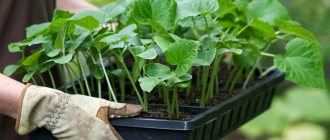
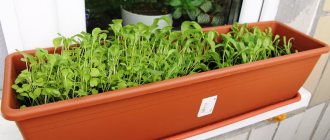
For seedlings, the soil in which they will be grown is important.
But the soil, even purchased in a store, must be properly prepared before planting.
This is the key to good seedling growth and, in the future, a bountiful harvest. Which soil is better to choose, which one will be the best, and which one is better not to take at all? Let's figure it out together!
Soil requirements
The main requirement is that the soil must contain all the elements necessary for the development of seedlings.
The soil should be:
- Loose.
- It is good to allow moisture and air to pass through.
- Have sufficient, but not excessive amounts of nutrients.
- Have neutral or weak acidity.
- It should not contain toxic substances, harmful microorganisms, weed seeds, fungal spores, eggs or larvae of insect pests.
You cannot use soil from the garden where tomatoes, peppers, eggplants, and potatoes were grown. They also do not take soil from a greenhouse or greenhouse.
Sowing time for seedlings
Specific numbers are chosen in accordance with the climatic conditions of the region:
| Territory | Approximate sowing period | |
| for planting in a greenhouse | for open ground | |
| Southern regions | End of January | First ten days of February |
| Volga region, Tatarstan | Early March | Mid March |
| Central region, including the Moscow region, as well as the Leningrad region | Mid March | Last ten days of March |
| Ural, Bashkiria | Third ten days of March | Early April |
| Siberia and Far East | End of March – beginning of April | First half of April |
When determining suitable dates, long-term weather forecasts and the duration of the growing season are also taken into account: late-ripening varieties are sown 1-2 weeks earlier than mid-season and early varieties.
It’s better to be a little late than to sow too early - small but healthy plants will subsequently take root more easily than elongated, weakened overgrowths
Tomatoes are very life-loving. In the south, they are often planted by seeds in open ground. Some varieties even sprout by self-sowing.
Many gardeners rely on the recommendations of the lunar calendar both when sowing seeds and when planting finished seedlings. They simply choose favorable days in the desired decade, calculated in advance by astrologers. In their opinion, it is correct to sow tomatoes for seedlings during the waxing Moon.
Components that should be included in the soil and which should not be
It is impossible to determine exactly which soil will be the best for tomato seedlings. Different varieties may like the presence of a certain component in the soil or, conversely, its absence. Much depends on the growing region.
Soil mixtures containing:
- Sod land.
- Meadow land.
- Peat.
- Rotted leaf humus (not from all types of deciduous trees).
- Rotted and frozen manure from cattle.
- Sphagnum moss.
- Garden land.
- Fallen pine needles.
- Coconut fiber.
- Rotten sawdust.
- Also included in the soil mixture is the presence of:
- Sand.
- Perlite.
- Hydrogel.
- Vermiculite.
- Some gardeners use substances such as:
- Wood ash.
- Chalk
- Dolomite flour.
- Lime.
Ash can protect against diseases, insect pests, and acts as a fertilizer and soil deoxidizer. But the usefulness of ash and its chemical composition depend on the type of wood being burned.
Should not be present in the soil:
- Fresh manure.
- Not rotted leaf humus.
- Insects, worms or weeds.
- Hay dust.
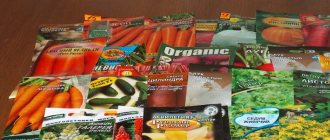
Choosing seeds
Navigating the huge assortment of tomatoes is not an easy task. What a beginner needs to pay attention to:
- Expiration date on the package. Expired seeds may not germinate.
- Ripening and planting dates. Early varieties are sown later, mid-season varieties - earlier.
- Manufacturer.
Information about seed manufacturers can be found in advance by looking at their websites or reading reviews on forums. It is better to find out data on the zoning and main characteristics of the varieties and hybrids of interest in the State Register of the Russian Federation.
The term determinant/indeterminate is often found on packages - it refers to the characteristics of shoot growth and further formation of bushes
Determinate varieties are more unpretentious and are better suited for open ground. They have natural limitations in the growth of green mass, are relatively resistant to diseases, ripen earlier and more quickly, managing to produce the main harvest before seasonal outbreaks of late blight. Accordingly, they need less space and care. However, their productivity is usually lower. Among the popular varieties, which are described in detail in articles on our website: tall “Bull's Heart”, low-growing “Sanka”, “Lyubasha F1”, “Siberian early ripening”.
Indeterminate tomatoes often exceed 2 meters in height and require intensive care: they need a garter, regular watering and fertilizing, protection from diseases and pests. They ripen later, but bear fruit until the cold weather, allowing you to get a bountiful harvest. The choice of varieties is very wide: “De Barao”, “Pink (Orange, Pepper, etc.) Giant”, “Honey Spas”, “Miracle of the Earth”, “Grandma’s Secret”, “Red Red F1” and many others. This group also includes most representatives of the cherry variety, loved by many gardeners. They bear fruit well in greenhouses and in unprotected beds, and are often grown as balcony vegetables.
How to prepare substrate at home
Purchased soil does not always turn out to be of high quality and suitable in all respects.
Therefore, experienced summer residents prefer soil made by themselves.
To do this, you need polyethylene or tarpaulin, onto which the necessary components are poured in exact proportions, and then mixed.
First way:
- Soddy soil, peat and river sand are mixed in equal parts.
- A nutrient solution is prepared (10 l - water, 25-30 g - superphosphate and potassium sulfate, 10 g - urea).
- Water the soil mixture with this solution and let it dry.
Second way:
- Mix equal parts of turf soil, peat and humus.
- Pour two matchboxes of superphosphate and half a liter of wood ash into a 10-12 liter bucket.
- Mix everything thoroughly again.
Preparing the soil for planting yourself has its pros and cons.
Advantages:
- The necessary proportions are observed;
- saving money.
Flaws:
- Cooking takes time;
- If there is an error in the proportions, you will have to start all over again with new soil.
- It is not always possible to find all the necessary elements for a soil mixture.
- Harmful microorganisms may be present in the soil.
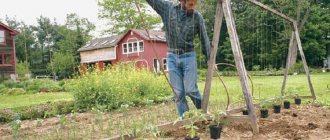
Choosing a place to plant tomatoes
Experienced summer residents know that it is strictly not recommended to plant the same crops in the same place every year. From the outside, of course, it looks beautiful: the entire plot is divided into zones, here there are beds with herbs, there there is a greenhouse with tomatoes, and behind them there is a plot with potatoes, and so on from year to year. With this system, you shouldn’t be surprised that the harvest will become worse and worse, but the plants will start to get sick more often. Spores of pathogens of dangerous diseases tend to accumulate in the top layer of soil and remain viable for a long time. In order to protect the future harvest, crops in one area must be swapped. This process is called crop rotation.
Legumes are ideal as predecessors for tomatoes; you can plant tomatoes after onions, zucchini, carrots, cucumbers, and cabbage. But after nightshades - potatoes, eggplants, tomatoes should not be planted, they have similar diseases.
- After the predecessor crop has been removed from the plot of land allocated for tomatoes, the soil is peeled - the surface of the soil is loosened;
- Then the land is plowed, and in the spring it is harrowed.
Basic conditions that must be observed in the area prepared for planting tomatoes:
- moderate amount of organic fertilizers;
- sufficient lighting;
- moderately moist soil;
- the distance between bushes is 40 cm or more.
What soil mixture is better to buy in the store?
To choose soil for tomato seedlings you need:
- Decide which primer is best suited for use, universal or special. For beginning gardeners, a soil mixture marked “universal” is suitable .
- Check the package with soil for a label with instructions for use, chemical and mechanical composition and information about the manufacturer. If this information is not available, then it is better not to purchase such a soil mixture.
- Good soil should consist of 3-4 elements : two types of peat, vermiculite or sand, mineral fertilizer. The amount of chemicals such as phosphorus, nitrogen, potassium should not exceed 300-400 mg/l.
- The soil purchased should be loose, without large lumps and not greasy. Water should drain well through such soil.
Benefits of Store Soil:
- The soil is almost ready for use.
- You can purchase the necessary packaging (from 1 to 50 liters).
- The composition is rich in all necessary elements.
Flaws:
- The amount of microelements is not always indicated correctly.
- Acidity is indicated approximately.
- Instead of peat, the manufacturer can add peat dust, which is not suitable for growing seedlings.
- You may get contaminated soil or with insect larvae.
Next, you can watch a video on how to analyze finished soil:
Is it possible to use soil from the garden?
Vegetable growers have different opinions regarding the use of garden soil for growing tomato seedlings. Some summer residents are sure that ordinary soil from the garden is not suitable for tomato seedlings. It has a too rough structure, which is not designed for delicate and fragile tomato seedlings.
The soil from the beds where peas and nightshade vegetable crops – tomatoes, bell peppers, eggplants and potatoes – were previously grown is especially dangerous for seedlings.
Also, garden soil often has a low content of mineral elements and cannot meet all the needs of growing tomato seedlings.
Other vegetable growers use soil from the garden, believing that this will help the grown seedlings quickly adapt to the conditions of open ground after transplanting. In this case, it is best to use soil from the beds where carrots, corn, zucchini, cucumbers, parsley and other greens were grown. The soil dug up by moles around the holes is also considered a good option.
How to prepare a substrate for planting at home
In order for the seedlings to develop well, the soil mixture must be prepared before planting.
Actions:
- Sift the soil . This removes large particles, enriches the soil with oxygen, and makes it light, which is good for the roots of the seedlings.
- Treat with cold . This treatment kills insect larvae and reduces the likelihood of further diseases to a minimum. It is best to stock up on soil in the fall, and freeze it outdoors and thaw it indoors several times during the winter.
- Before planting, add urea, rotted manure or compost to the warmed soil . If desired, wood ash and superphosphate are added. You can also add lime (15 grams per 1 kg of soil).
The treatment involves soil purchased in a store and prepared independently.
Checking the acidity level
You need to check the soil for acidity! How well the seedlings will feel depends on this. There are several ways to determine acidity:
Testing with litmus paper
A set of litmus strips with a color scale can be purchased at a specialty store.
You need to take some soil from several areas of the garden, from different depths. Wrap it in gauze and place in a vessel with distilled water for 5 minutes. There should be 4-5 times more water than the amount of soil.
Remove the gauze with soil from the container and place a litmus indicator there for 2-3 seconds. Compare the color of the strip with the pH values on the color scale.
Using vinegar
You need to dig a hole 20-25 cm deep, from below which take the required amount of soil. Roll the soil into a ball and place it on a plate. Pour vinegar onto the earth ball.
If there is lime in the soil, whitish bubbles will appear on the ball and a hissing sound will be heard. If the reaction is weak, then the soil has neutral pH values. If the reaction is strong, then the acidity of the soil is weak. A complete lack of reaction indicates that the soil is acidic.
Using grape juice
To determine the acidity of the soil, only natural grape juice is suitable.
Pour 50 mg of juice into a transparent container. Add some soil taken from the depths there. Monitor the reaction. If there is no reaction, then the soil is acidic. If the sap changes color slightly, bubbles slightly, and has a little foam on the surface, then the soil has a neutral pH value. A violent reaction indicates a low acidity level.
With chalk
Pour 2 tbsp of soil, 5 tbsp of water and 1 tsp of chalk into the bottle. Wrap the bottle in paper so that heat from your hands does not transfer to the water and the experiment is more accurate.
Attach a medical latex fingertip to the neck of the bottle. If the soil is acidic, the fingertip will fill with carbon dioxide and straighten out. With neutral acidity, it will not straighten completely. If the soil is slightly acidic, then the fingertip will remain in its original position.
Disinfection
By disinfecting the soil, gardeners destroy various pathogens. There are several ways to disinfect soil:
- Potassium permanganate . Prepare a weak solution of potassium permanganate (3 grams per 10 liters of water) and treat the soil with it.
- Steaming . Cover the top of the pan with water with a thick cloth and tie it so that it does not sag. Soil is poured onto the fabric. The pan is placed on a heating surface. When water boils, the soil begins to be treated with steam. This procedure must be carried out within half an hour.
- Calcination . Add boiling water to the soil and mix. Place a layer 5 cm thick on a baking sheet. Preheat the oven to 90-100 degrees. Place a baking tray with soil in it for half an hour.
Expert opinion
Ulanin Konstantin Grigorievich
Agronomist, work experience in the specialty - 12 years
Before planting, it is necessary to add bacterial fertilizer to the soil treated by calcination, since heat treatment kills not only harmful, but also beneficial microorganisms.
Pre-sowing preparation
Preliminary preparation is required primarily for seeds collected independently.
Own planting material is obtained from fully ripened fruits of varietal plants
It makes no sense to take hybrid (F1) ones, since their characteristics are not passed on to the offspring.
The preparation of tomato seeds for planting is carried out in several stages:
- Disinfection - the required number of seeds is wrapped in cloth (gauze) and placed for half an hour in a potassium permanganate solution of medium intensity at room temperature.
- Germination - seeds are laid out on the surface of the fabric at a short distance from each other. Cover with the free edge of the same material. Additionally, moisten the cloth from a spray bottle and wrap it in cling film (a regular plastic bag or plastic container with a lid). Leave it in a warm place (on a sunny windowsill, next to a radiator, etc.), avoiding both drying out and waterlogging of the fabric. High-quality seeds will hatch within 1-2 days and should be planted immediately.
The best compositions for tomatoes
The stores have a large selection of soil mixtures from different manufacturers. Often gardeners are faced with the question of which soil is best. Here are just some popular types:
- Soil mixture “Living Earth” . The basis of the mixture is peat. Suitable for planting seeds and seedlings for all types of plants. Can be used as fertilizer. Available in universal, special and floral types. Cost from 300 to 400 rubles per 15 kg.
- Soil mixture “Microgreenhouse” . A universal soil, time-tested. Suitable for growing any plants. With such soil, germination increases and productivity increases. Cost from 45 to 120 rubles per 10 kg.
- Agricola soil mixture . A universal soil that accumulates and partially releases nutrition to seedlings. Contains high-moor peat, which facilitates easy access of oxygen to the root system and retains moisture in the soil. The composition includes all the minerals necessary for plant seedlings. Cost from 70 to 100 rubles per 6 kg.
conclusions
- The soil for a garden bed in a greenhouse is quickly depleted. This problem can be solved either by replacing the soil with new soil, or by enriching and processing the old one.
- Preparation includes not only enriching the composition, but also changing the structure. To do this, dig up the soil and sift it if necessary.
- Land enrichment can be done in different ways: adding manure, humus, adding ash, sowing cereals or legumes.
- A mandatory element of preparation is soil disinfection. You can use special antiseptic solutions or sow white mustard along with cereals.
- Treatment with low temperatures - the greenhouse is left open and the covering is partially dismantled in order to allow the soil to freeze, and only then cover it with snow.
- Depending on the type of soil, additional procedures are carried out in the greenhouse: liming, adding peat to increase acidity, additional loosening for clay soils.
Also read about high-yielding tomato varieties at this link.