Sowing seeds for seedlings is a matter that requires preparation, but it is not at all necessary to go to a store or market and spend money on special containers. All you have to do is use our tips and make your own cups for seedlings.
Most of the homemade pots for seedlings described below can be made from natural materials, which means they are useful for the development of plants. The undoubted advantage of each of these methods is the opportunity to save money once again.
Citrus peel
If you like to squeeze juice from citrus fruits (orange, grapefruit, lemon, pomelo, etc.) using a juicer, then you probably have a lot of halves of the peel of these fruits left over. Why not use them as seedling cups?
Make a small hole in half of the pulp-peeled fruit (in the bottom) for moisture to drain out, then fill the peel with soil for seedlings and sow 1-2 seeds per “pot”, depending on the “dimensions” of the future plant and the size of the citrus peel. Subsequently, the seedling can be planted in open ground directly from the “pot”.
An original version of making newspaper cups
Here you will need the same newspapers, as well as cuttings of a building profile. If necessary, the latter can be easily found among construction waste, so you don’t have to buy anything. In our example, two sections of profiles are used, each approximately 20 cm long. The width may vary depending on the specific crop (peppers, for example, need wider cups).
Step 1. First, take a newspaper and cut it lengthwise and crosswise.
First you need to cut the newspaper
Step 2. In one hand we take a piece of the profile, in the second - a newspaper bent in half (i.e. two layers). We wrap the form with newspaper as shown in the image below.
Profile wrapped in newspaper
Step 3. Where the bottom of the cup will be, bend the corners one by one.
Forming the bottom of the cup
Step 4. We do not remove the profile yet - it is much more convenient to fill the cup with soil mixture.
Filling a cup with soil
Step 5. When the cup is filled, carefully pull out a piece of the profile.
The profile is stretched
The profile is elongated
Step 6. Place the filled cups in a box pre-lined with polyethylene.
Cups are placed in a drawer
The result should be something like this.
Box with cups for seedlings
Eggshell
Egg shells are an excellent option for a homemade container for small seedlings or for growing seedlings before transferring them to larger containers.
Take the shell and make a hole at the bottom. To do this, you can use a pushpin or a thick needle. Fill each shell halfway with soil and sow the seeds. Place the egg “pots” with seedlings in a plastic egg container. To create a greenhouse effect, close the lid of the container. When the time comes for transplanting or transshipment, plant the grown seedlings along with the shells.
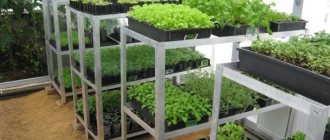
Which is better, a pot or a box for seedlings?
There are two main options for growing seedlings at home:
- Pots . This method allows you to do without picking seedlings of flowers and vegetables - during transplantation, move the earthen ball from the pot directly into the ground. Thanks to this, the likelihood of damage to fragile roots is reduced to zero, so there is a greater chance that the plant will take root. It will not be possible to place a large amount of containers on a windowsill or other suitable surface.
Tomatoes in pots
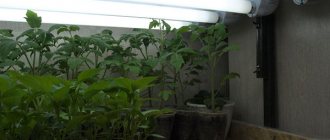
- Boxes . The main advantages are space saving and ease of plant care. The box can be selected to match the size of the window sill made of plastic or wood, bought or made at home. It is advisable to plant the grown seedlings in a separate cup. During transplantation from the box, young roots are injured, so the chances of successful rooting of the plant are reduced.
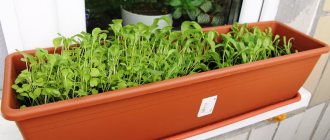
Seedlings in a container
Newspaper pots
Old newspapers can be an excellent material for making a container for seedlings. To do this, you will need newspaper sheets (it is better to give preference to black and white pages), a cylindrical object (a bottle, a narrow tin can), flour and water.
We invite you to visit the page with our master class on making cups for seedlings from old newspapers or paper.
- How to make cups for seedlings with your own hands from ordinary newspapers
You won't spend a single ruble on these seedling pots!
You can plant seedlings in a greenhouse or open ground directly in cups, but if you wish, you can cut or tear the “pot”.
Making cups for seedlings from film
There will always be old unnecessary film in the gardener's household. It has served its purpose as a shelter - it will also work as a pot for seedlings.
The process of creating such a film bag is similar to the previous one, from a newspaper. It is necessary to cut the film into rectangles of approximately 25x40 centimeters. You can also prepare tape in advance: several long strips (20 centimeters) and several short ones (5 centimeters).
Just like a newspaper, we wrap the film around a bottle, jar or tube, not forgetting to leave five to seven centimeters for the bottom. We glue the edge with a long strip of tape.
Without removing the cylinder, fold the bottom of the future cup (also with an envelope). And glue it together with a small piece of adhesive tape. In this case, there is no need to press hard and be zealous - then the excess water can then easily drain through the bottom. To guarantee, you can pierce the bottom with an awl in several places.
All that remains is to remove the film cup from the cylinder, fill it halfway with earth, bend the edge and place it in the tray.
While the seedlings are small, plastic containers for meat products, cakes or prepared foods can be placed on a pallet.
By the way, film can be replaced by ordinary store bags for loose products. Containers made from them, of course, are not so stable, but when installed in a common box with high sides this is not a problem.
The main advantage of such film containers is the ability to add soil as the seedlings grow. To gradually increase the volume of the pot, just unfold the folded edge. An ideal option for tomatoes that are able to grow additional roots when the stem is deepened.
Plastic bottles
From a plastic bottle you can make not just a container for seedlings, but a functional pot with an automatic watering system and a greenhouse effect. Cut a clean plastic bottle in half, do not remove the cap, but make several holes in it using the same heated awl, needle or nail. Pull a synthetic cord through the bottom hole (this will be the wick).
Turn the top part with the neck over and insert it into the second half of the bottle. Add soil and sow seeds. Remove half of the bottle with soil from the tray, pour water into the bottom of the “pot”, then insert the half with the plant back into the tray. Take another bottle of the same size, cut half of it and use it as a lid for such a seedling “pot”.
You can do it another way: cut off the side of the bottle (a square-shaped plastic bottle with a capacity of 5 liters, for example, for drinking water) is perfect, and use the remaining large part as a container for seedlings.
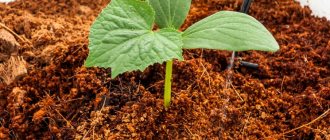
An alternative option is to make nutritional cubes
To make such cubes we prepare:
- 1 turf soil;
- 5 - humus.
There is another option:
- 1 part humus;
- 3 - peat.
How to make peat cubes
Mix the prepared ingredients, and add ammonium nitrate (15 g per 1 kg), potassium sulfate, superphosphate (50 g per 1 kg) to the resulting mixture. In addition, add water - such an amount that the finished mixture has a creamy consistency. We place all this in a tray in a layer 80-100 mm thick, and then cut it into cubes of the required sizes. You can move the cubes a little away from each other to make it easier to work with. At the end we sow the seeds.
Prices for humus
humus
Video - How to make seedling cubes yourself
As a result, we note that regardless of what kind of cups you use, they must be rigid, spacious enough, with low thermal conductivity and opaque walls. In addition, you should take care of drainage - it will protect the plants from excess moisture. If all these requirements are taken into account, the seedlings will grow healthy and strong, and adult plants will definitely delight you with a rich harvest or abundant flowering!
Plastic cups
Excellent containers for seedlings are made from yogurt or sour cream cups, disposable plastic and paper coffee cups. To make pots, first wash the containers thoroughly and then cut a hole in the bottom to drain excess water. If the hole is too large in diameter, place a cardboard circle at the bottom of the glass. For convenience, you can write on the cup with a felt-tip pen or marker the name of the crop and variety that you are going to grow.
- DIY seedling markers: 22 original ideas
A selection of bright markers, labels and tags for seedlings.
Place containers with seeds sown in them in a box or on a tray - it’s more convenient to store them this way. The advantage of such homemade pots is the convenient removal of the earthen lump when planting seedlings in open ground - just lightly press on the bottom of the cup and the lump can be easily removed, remaining intact.
Seedlings in a bucket of mayonnaise, sauerkraut, etc.
Finally, for seedlings of large plants, which require a decent feeding area, it is easy to adapt plastic buckets for various products.
In which, we will not tire of repeating this, it is imperative to make drainage holes using a hot awl, knitting needle or nail. In fact, our resourceful gardeners can make their own cups for seedlings from anything. Some sew bags from spunbond, while others save tea bags (yes, they can also be filled with soil and sown). Some people are interested in trying to plant a seed in an eggshell, while others want to make a pot using the papier-mâché technique.
We love all the options! For the simple reason that using your head and working with your hands is useful for every person. And the money saved on seedling containers will have somewhere to spend.
We wish you success and great harvests!
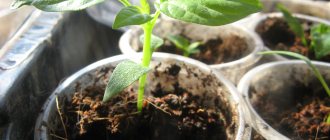
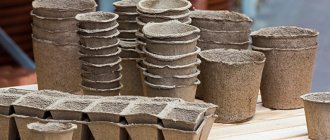
Toilet paper rolls
Cardboard tubes left over from toilet paper rolls can be easily converted into biodegradable planting cups. You can also use paper towel rolls.
If you need a short glass, cut the sleeve crosswise into two parts. Next, do the following with each part: fold it lengthwise and use scissors to make cuts approximately 1/3 of the height of the tube so that you get 4 blades. Then straighten the workpiece and fold the blades one on top of the other, bending them, as they do with cardboard boxes, to form the bottom.
Seedlings can be planted in a permanent place without removing them from the cups, since paper and cardboard are biodegradable materials.
The first home for seedlings - what should it be like?
The use of the seedling method is due to the climate in the temperate zone. When the February snowstorms are still howling through the city streets, the seedlings of future garden residents are already touchingly green on the window. They will have to survive a long journey to the dacha and transplantation into the ground without breaking their fragile stems and keeping the root system intact. This is exactly why seedling cups were invented.
Cups for seedlings can be purchased ready-made or made by yourself
The right glass must meet basic requirements:
- “excellently” protect the roots of seedlings during their growth and during transplantation;
- it is easy to release the earthen lump when it needs to be removed;
- do not fall apart in your hands when moving;
- ideally decompose, turning into humus;
- do not burden the vegetable grower’s budget, which is already spent on seed, fertilizers, covering film and plant protection products.
It is this last property - the low cost of homemade cups - that makes them so attractive to lovers of greenhouses and garden beds. They can be built from any waste materials: film scraps, waste paper deposits, laminate backing.
Important! When working with transparent materials, you need to think about how to block the roots from light so that the plants do not lag behind in growth.
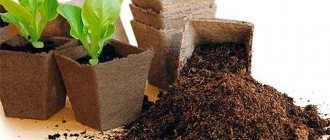
Waste paper and cardboard
To make such pots, you need to mentally return to your school years and remember the familiar, but slightly forgotten papier-mâché technology. So, you will need paper or cardboard, water and a mold. You can use glass glasses as a mold, but it’s most convenient if you have a metal muffin tin with several cells.
Tear the paper into small pieces and place in a container with water, leave to soak. Then stick the resulting mixture onto the mold: if you have glasses, then on the outside, if you have a baking dish, on the inside. The workpiece should be left to dry for a day, after which it should be used as a regular glass for seedlings.
Pros and cons of cups
Individual cups for seedlings, homemade and purchased, have their own advantages and disadvantages. In plastic ones, the roots can begin to rot, in iron ones they can overheat, in cardboard ones they can become damp and the bottom will fall off... but if you snag one, the whole battery of seedlings will fly to the floor.
So to plant or not to plant seedlings in cups?
| pros | Minuses |
| Easy and safe to replant Eco-friendly (cardboard or peat) Saving Variety of sizes and shapes | Short-lived Take up a lot of space fragile Unstable |
As a result, there are approximately equal numbers of pros and cons, and for whom the advantages outweigh the disadvantages, read on.
Ice containers
An unnecessary tray (mold) for ice can become an excellent container for growing seedlings before picking and serve in this role for more than one year. Make a drainage hole in each cell (if the plastic is durable, use a drill), take a suitable tray and place the container in it.
Next, fill the cells with soil and sow the seeds. After some time, plant the seedlings in a larger container. Just as in the case of eggshells, it is better to grow plants with a small root system in such a container, since they may become cramped in small cells.
Growing seedlings in milk bags
If you buy milk or kefir in bags, you don’t need to think about the issue of seedling containers at all.
After all, a milk carton is a ready-made pot. Exactly the same as described above. Only even better. Because it is opaque, it is black from the inside, which means it will not allow light that is completely unnecessary for them to pass through to the roots. Your job comes down to washing and storing used packaging until spring, and at the beginning of seedling season, making several drainage holes in the bottom of each bag. It couldn't be simpler, could it?
Tetra Pak packages
Probably one of the most popular options among hand-made containers for seedlings is Tetra Pak bags. This multi-component material is distinguished from paper and cardboard bags by its increased strength and durability.
Tetra Pak is used for packaging juice and dairy products; in addition to cardboard, it contains foil and polyethylene. It is very simple to prepare such bags for sowing seedlings - cut them into 2 parts and the cups are ready! You can also make a tray for seedlings by cutting the bag lengthwise rather than crosswise.
Be sure to wash containers thoroughly before use.
Seedlings in coffee cups
Coffee lovers who often buy takeaway drinks have no problems with containers for seedlings.
Paper coffee cups only look like cardboard. On the inside (and sometimes on the outside) they are covered with polypropylene film. Not very good for the environment, but just right for seedlings. And again... don't forget about the holes to drain excess liquid.
Glasses from a sleeve
I have in my hands a 12 cm wide reel of seedling sleeve, from which I can make 5000 glasses. Of course, it is not free, but just think about this figure! Moreover, there are sleeves of different widths on sale, therefore, you can make glasses of different sizes. I wrap the sleeve tightly around a 10 cm wide plate several times, and then cut it on both sides. The result is soft cylinders.
All that remains is to fill each cup with soil, bend the top edge so that the soil does not spill out, turn the cup over and place it on the pallet. After a few days, the cup will take shape, and the polyethylene folded underneath will cake, stop unfolding, and you can safely move the cup: the soil will not spill out of it. Convenient, inexpensive and technologically advanced.
DIY seedling cups
No matter how large the selection of store-bought containers is, there is nothing more pleasant for the soul and wallet than making cups for seedlings with your own hands. And at the same time for nature, which is suffocating in piles of discarded plastic, foil paper and other garbage that could be recycled a hundred times and used for a good cause.
From plastic or metal jars
In this case, any container that has a bottom and walls is suitable.
It is still advisable to choose packaging that previously contained food products - there is less chance that the plastic or metal from which it is made will be toxic to the soil
Best suited:
- tin cans (durable and reusable, but not much better in convenience than boxes);
- drink cans (much better);
- jars of yogurt (they do not need to be separated from each other for greater stability, although the yogurt itself will have to be transferred to another container);
- mayonnaise jars (for large seedlings or planting several for further thinning).
Boxes of cakes (fragile, but in those with partitions it is very convenient to sow several sprouts)
Making containers for seedlings out of them is as easy as shelling pears: you need to make several holes in the bottom with an awl or a heated screwdriver, fill them with substrate or garden soil and plant the seeds or plant seedlings in jars.
In order not to damage the plants later, when planting in open ground, the jars will have to be broken or cut with scissors; or make a round hole in advance and cover it with a piece of cardboard, and when removing the sprout, simply press on this hole, pushing the clod of earth along with the roots out.
The latter is not recommended for pumpkin and squash sprouts - their indecently fragile root system requires extremely gentle handling.
From citrus peels
A method for aesthetes and lovers of fresh orange juice. From one large orange, grapefruit or pomelo (lemons and limes are small and difficult to separate from the peel, but if you want something more sophisticated...) you will get two seedling pots.
Seedlings in citrus peel
A hole is made in the peel and filled with earth, peat or coconut substrate. One pot will fit 1, maximum 2 plants, but later they can be planted in the ground without removing the sprouts.
This method is environmentally friendly and looks beautiful, but it is quite expensive - a good garden of oranges will require at least a box - and the peel is not a very durable material.
You can always plant one or two sprouts for Instagram, and place the rest of the seedlings in more budget-friendly containers.
From eggshell
Another aesthetic and environmentally friendly method is suitable for quickly germinating seeds.
Seedlings in eggshells
The main thing is to break off only the top of eggs whose shells will be used, so that most of the shell remains intact. In the bottom of the shell you need to make a hole with a gypsy needle or a thin awl to allow air to flow in, fill the shell with soil and insert 1-2 seeds.
The egg carton can be saved and used as a stand and - if you need a greenhouse effect - then keep it closed for a couple of days. Later, there is no need to remove the sprouts from the shell - just crush it or even stick it into the ground just like that, the roots of a stronger plant will break the dried and thinned shell on their own.
Film pots
Not as eco-friendly as shells or orange peels, but a hygienic and easy way. Its main advantage is that the film pot can take almost any shape, so they can be carefully placed in any box that fits the width of the window sill, and the size can be adjusted to suit the needs of a particular sprout.
The manufacturing method will depend on what kind of film you get into your hands.
- Garden sleeve: sold in rolls of twenty meters in large gardening stores and construction stores. Unwind the sleeve to the desired length, bend the bottom, fill it with soil and place it in a box. These pots are stronger than simple plastic ones and can be used for several seasons in a row.
- Plastic film: wrap the base (a jar or glass, depending on the size you need) with polyethylene, secure the shape with a stapler, and remove it from the base. The glass is ready.
- Plastic film “with smoke”: roll the film into a “tube” and seal the edges with an iron through the paper.
- Packages of cereals, cereals or kefir and milk: wash and use as is.
Making film cups To adjust the size of the “pot” as the seedling bush grows, you can bend the side of the bag in advance and secure it with tape. If necessary, release the edge, adding more soil. Or release it when the time comes to replant the plant in the ground: then it can be easily and gently shaken into the planting hole without disturbing the roots again.
From filter bags for coffee machines
The principle is the same as with pots made from cereal bags: fill the bags about halfway with soil for seedlings, put them in a box and sow the seeds.
Paper filters for coffee makers
The bags are made of breathable material, the leftover coffee grounds are sour, but a good fertilizer (in the West, eco-farmers make mulch and compost from the leftover coffee grounds, which you can ask your barista friend in a coffee shop).
The paper will partially dissolve from the water by the time the seedlings need to be planted in the ground; It is non-toxic, so it is not necessary to extract the sprouts from it.
Foil containers and tetrapacks
Another old-fashioned method, one of the most popular.
You need to cut off the top of milk, kefir or juice packages and thoroughly wash the inside so that there are no lactic acid bacteria or dye residues left. Fill with soil and plants.
When “evicting” seedlings, the Tetra Pak seedling pot can be cut, or you can leave it as is: they are strong enough to survive several planting seasons.
Tomato seedlings in plastic bags
Tetra Pak seedling pots are waterproof and very durable. In addition, there is some variability in shape - you can cut off not the top, but the side of the future pot, and get a seedling tray, or cut two from one bag - low and wide.
Egg trays
In egg containers it is convenient to germinate those seeds that do not like picking: the seedling, when it has thoroughly entwined its roots around the earthen ball, will be easy to remove with a fork without consequences for the root system.
Or, if the container is made of papier-mâché or cardboard, don’t dive at all - just cut or tear off the cells one by one and carefully place them in the ground, fortunately, by then the box will become limp from regular watering.
Seedlings in an egg box
Egg containers are also suitable for growing greens on the windowsill, especially onions and not too lush parsley and dill bushes.
Containers for seedlings from a plastic bottle
Years ago, the Crazy Hands program taught us that a plastic bottle is a universal material for home creativity. Likewise, when growing seedlings, a plastic bottle has at least a couple of uses.
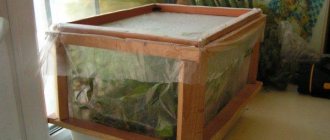
Mini-greenhouse: cut the bottle in half, place soil and seeds in the lower part, put the halves back together. Open for watering as needed. Lift the sprouts using a fork.
Mini greenhouse from a bottle
Pot with automatic watering: for those whose mother is an engineer. Cut the bottle in half, pour 2 fingers of water into the lower half. At the top one, close the neck with a lid, and use an awl to make a couple of holes in the lid. Thread a thick woolen cord into one of them (you can twist a couple of woolen threads together) about 10 cm long, tying a knot at the upper end so that the thread does not fall through.
Fill half a bottle with soil and seeds or plant a picked sprout and place everything in half a bottle of water. Such a pot will not require frequent watering - water will flow through the cord due to the capillary effect - and to make a mini-greenhouse, you just need to cover the structure with half of another bottle.
Toilet paper rolls
Another universal material for home crafts, life hacks and creativity. It’s not for nothing that parents of first-graders and gardeners sometimes even buy these bushings through Avito and advertisements on social networks.
Those from paper towels will also work if you cut them into two pieces. It is better not to use washable bushings: they will become limp much earlier than regular ones.
A pot made from a toilet paper roll is made like this:
- 2 cuts are made at the “lower” end of the cylinder so that 4 identical “blades” are made, approximately one third of the total length of the sleeve;
- the “blades” fold over each other like the lid of a cardboard box;
- Soil and seeds are placed in the resulting cardboard cup.
Cups for seedlings from a sleeve
In open ground, such seedlings can be buried along with a glass - the cardboard will sooner or later decompose in the ground. If there are concerns about the roots of the plant, the bushings can be torn off; but most often such containers are used for tubers or tulip bulbs or gladioli, which a layer of cardboard, even glued, will not stop.
Using the same principle, cups for seedlings are made from newspaper: a newspaper folded in half is rolled into a tube, and the lower part of the tube is folded or crumpled so as to form a dense bottom. Do-it-yourself seedling cups made from newspaper decompose very quickly, and the amount of lead in the paint will not be critical for the quality of plants and soil - a completely environmentally friendly option.
Cups for seedlings made from newspaper
How to plant plants
I use a standard algorithm of actions: I fill the pots I have made with compost, place seedlings or seeds there, and then water it all with water.
In order to ensure that paper pots last as long as possible, I place them in convenient plastic containers - several in one.
If I need thicker pots, I use strong paper, leaving newspaper aside. The choice of material is largely determined by the final goal.
As a result, making pots from newspaper allowed me to conveniently place all the seedlings and get significant cost savings.
Found a violation? Report content
How to make pots
To make a flower container, I take one of the newspaper halves and fold it in half.
Then I place the jar on the left extreme part of this folded newsprint and do this so that the glass bottom protrudes 1.5 cm beyond the bottom line. This is necessary for easy removal of the container after the process is completed.
Next, I move the can so that the paper wraps around it. Once all the newspaper is wrapped around the glass jar, I wrap the excess paper into the inside of the jar.
Reading forums: things that young mothers waste time and energy on
Oatmeal-honey pie with glaze: both prepared and eaten very quickly
Why natural sounds not only lift your mood, but also relieve stress
I press the newspaper tightly, with force.
Next, I take out the jar and turn over the newspaper form. The part that has been crushed becomes the base of the pot.
To make the paper bottom more durable, I place the pan on the table and press the inside bottom, thereby compacting it. As a result, the paper is compressed even more strongly and fixed in this position.
I make these paper pots in an average of 30 seconds.
What you will need
The advantage of the method is that I do not need to prepare more materials at hand. You can get by with a minimal set.
If we talk about large pots, then all I need is newspaper and a glass jar of the required diameter. I could do it using any glass containers. The main thing is that they have straight sides - without narrowing at the top.
As for newspapers, for ease of use I cut them along the fold line. As a result, I don't have to deal with a large unfolded sheet of paper.
How durable is newspaper?
Sometimes I encountered such a problem as the appearance of mold on the sides of a newspaper pot. This fact may confuse some people, but there is no need to worry.
I managed to make sure that this mold feeds only on paper (non-living organic matter) and has no effect on the flowers. For books, such bacteria may be a problem, but for vegetation - not.
In my experience, newspaper pots are quite resistant to wear and tear if handled carefully.
Differences between methods
I don't choose just one method for making newspaper pots because they are both useful.
Personally, I find it easier to make a large pot using newspaper and a jar. This method allows you to get the desired result in about 30 seconds. A demonstration of how to do this will be in the video at the very bottom.
When I need something more decorative and less bulky, I choose the second option - a square pot made using the origami technique. It is better to plant seeds or small plants in such a container.
Using newspaper pots is also good because it allows you to reduce the consumption of plastic, which causes significant harm to the environment.
Recycled paper, in turn, is an environmentally friendly material. In addition to the fact that newspaper pots are not harmful and are much cheaper than standard ones, they are also durable.
Hand training helps: causes and prevention of “mouse” hand
Vertical flower bed made of PET bottles: a great idea for a small summer cottage
Daughters know who they treat better: the unusual upbringing of a father with many children
To make them, I use newspaper supplies that I have accumulated at home. As a last resort, I buy it at a low price at a recycling center.