Author of the article
Daria Vorontsova
Reading time: 13 minutes
AA
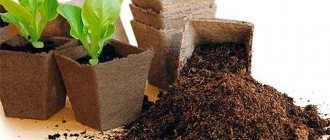
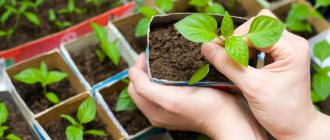
Plants often do not tolerate moving to a new place of residence well. They may get sick and be delayed in growth and development. To minimize the stress of replanting, peat pots were created. With their help, seedlings can be placed in a permanent place without removing the plant from the container and without damaging the roots. In addition, when a peat pot gets into a humid environment, it decomposes, turning into additional organic fertilizer.
What are peat pots made of?
Peat pots appeared 50 years ago.
Their basis was pressed peat mixed with cellulose. Today, manufacturers include coconut fiber and even sunflower cake in their composition to improve air circulation. Such containers are much stronger than classic peat-cellulose flowerpots and are protected from the development of fungus. Most brands offer consumers pots consisting of:
- peat;
- humus;
- wood ash;
- oily soil.
Cups made of 50% cardboard are also sold on the market. They do not allow air to pass through well, which is why the roots of the seedlings begin to rot during the process of growing seedlings. You can visually distinguish them from high-quality peat containers by their walls: the cardboard is smoother than pure peat.
How to use peat pots
Peat cups are prepared in advance for sowing seeds. First, the inner and outer surfaces of the flowerpot are treated with a fungicide, and then the pot is completely soaked in a mixture of organic and mineral fertilizers. Next, it is dried and small holes are made in the walls. You can use a stationery hole punch for this.
Pre-preparation will allow the roots of the seedlings to break through the dense walls of the pot.
The soil for growing seedlings in peat pots is loose and only with a neutral pH level, since the walls of the flowerpot initially have high acidity. If the crop being grown requires a low level of acidity, eggshells are placed on the bottom before filling the peat container with soil.
Sowing seeds in pots
- Pour soil into the pot, not reaching the edge 7-15 mm.
- Do not compact the soil, maintain its natural airiness.
- Place 1-2 seeds in each glass and deepen them 1 cm.
- Place the pots in a tray on a layer of gravel or sand.
- Flowerpots should be close to each other, but not touching the walls, to avoid mold.
Seedling care
- After sowing the seeds, carry out abundant watering with settled water at room temperature.
- The containers are covered with film or glass until shoots appear.
- Germination is carried out at a temperature of +20…+22°C, regardless of the crop.
- The soil should not be allowed to dry out. Watering is indicated as the soil dries out.
- Be sure to carry out regular ventilation.
- After emergence of seedlings, the film is removed and the seedlings are provided with temperature conditions in accordance with the recommendations for a particular plant species.
Watering
The high peat content ensures the accumulation of moisture, so seedlings grown in such containers are watered only when the soil dries out. The soil should always be slightly moist.
Water temperature for irrigation – +25°С. It is recommended to spray the seedlings with a spray bottle to avoid waterlogging in the area of the developing root system. Drip irrigation is also acceptable.
Attention: overmoistening leads to the appearance of mold on the walls of the pot. In this case, drying will not correct the situation, and you will have to throw away the plant.
Landing in the ground
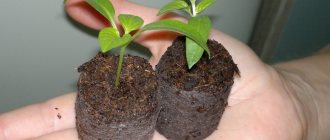
Seedlings in peat cups are ready for planting in the ground when the plant roots grow through the walls of the containers.
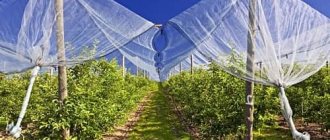
- Before planting, seedlings are hardened outdoors.
- The beds are prepared taking into account the depth of the furrows 2 cm greater than the height of the pot.
- Plants are planted together with the pot.
- To provide the roots with free space to grow, the walls of the peat containers are cut or the bottom of the cup is completely cut off.
- After the seedlings in peat are placed in the hole, soil is added on top and watered with a weak solution of manganese.
- If the containers are large, then before transplanting into the ground they are soaked for 10-15 minutes in water at room temperature.
Features of use depending on culture
The use of peat cups has its own characteristics, taking into account the plants grown in them.
Due to the fragility of the root system, it is recommended to remove pepper seedlings from the pots before planting them in the ground, since the root hairs may become damaged as they grow into the walls and the plant will die.
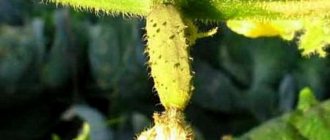
Plants with a strong root system, which include pumpkin, zucchini, and eggplant, are planted together with the pot, since even before the seedlings are transferred to the soil, their root hairs manage to break through the walls of the container.
Preparation
It is recommended to buy peat pots in specialized agricultural stores . The average price of one container is 3 rubles, and the cost of a set depends on the number of pots and varies from 120 to 180 rubles. You can make them yourself at home.
To do this, mix:
- garden, humus, compost and turf soil;
- sand;
- stale straw cuttings or sawdust.
To prevent the resulting cube from falling apart, you need to add water and mullein until it reaches the consistency of thick sour cream.
- After thorough mixing, the mixture is poured into a greenhouse or box covered with film. The thickness of the poured layer is 7-9 cm.
- After drying, cut lengthwise and crosswise with a knife.
The ideal size of a peat pot for tomatoes is 8x8 cm . To start planting tomato seedlings in peat pots, you need to prepare the soil.
To do this, mix in equal proportions:
- turf land;
- humus;
- sawdust;
- sand;
- vermiculite
The composition needs to be disinfected. To do this, you can heat it in the oven or pour it with a solution of potassium permanganate.
Glasses
At the bottom of the peat cups, you need to make small holes with an awl to allow excess water to drain. This will also allow the roots to emerge more easily. To prevent the pots from drying out, experienced gardeners advise wrapping each pot with plastic wrap. Otherwise, the salt contained in the soil will crystallize and harm the tender tomato seedlings. You need to remove it right before planting the bushes in a permanent place.
Seeds for germination
Preparation of tomato seeds consists of the following steps:
- rejection;
- disinfection;
- soak;
- stratification.
During culling, empty, overdried and broken seeds are removed. They are left in a solution of table salt for 5-10 minutes. Those that float are thrown away because they are not suitable for planting.
During the process of disinfection in 3% hydrogen peroxide or 1% solution of potassium permanganate, the seeds become resistant to various diseases. The soaking procedure helps the seed material to germinate faster .
The seeds are placed on a damp cloth or cotton wool, which is covered with a lid. All this is placed in a warm place, thanks to swelling they begin to germinate.
The stratification procedure involves placing the hatched tomato shoots in the refrigerator overnight, and during the day they are placed in a room where the temperature reaches +18°C...+20°C. This must be done several times. As a result of the stratification, the seedlings become resistant to temperature changes.
In the case when old seeds are used for planting tomatoes, they are advised to be treated with phytohormone compounds that stimulate the growth of seedlings.
Important! It must be taken into account that if seeds from fruits that are deficient in manganese and potassium are used, their germination rate will be low. To prevent such seedlings from stopping their growth, before sowing they need to be soaked in a solution of complex fertilizer for 24 hours and dried before planting.
How to choose peat pots
Peat pots come in round and square shapes. This does not affect the process of growing seedlings in any way. The choice depends only on the availability of free space in the place where the containers will stand before transplanting the plants into the ground.
On the bottom of each pot it is usually written for which plants peat containers can be used. Standard cups come in five sizes:
- 10×10 cm volume 500 ml. Suitable for cucumbers, peppers, tomatoes, eggplants, fuchsias, cyclamens, gerberas;
- 9×9 cm volume 350-400 ml. Recommended for seedlings of cucumbers, peppers, tomatoes, zucchini, all annual flowers, strawberries;
- 7×7 cm volume 250-200 ml. They grow cabbage, zucchini, melon, watermelons, annual flowers, strawberries and strawberries;
- 6x6 cm for 150-100 ml. Suitable for small flowers such as asters, dahlias;
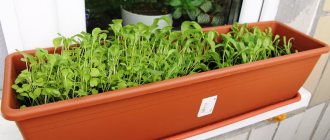
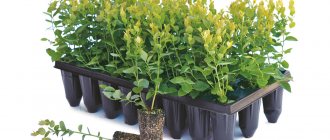
- 5x5 cm per 50 ml. These are the optimal containers for sprouting table greens.
Pros and cons of peat pots
The positive aspects of using peat containers for seedlings include:
- environmental friendliness and biological sterility: high-quality peat containers are made from perennial organic matter;
- the optimal structure of the material, which allows air to pass through well and prevents moisture from stagnating at the roots;
- no need for additional feeding of seedlings. The gradual decomposition of the containers ensures a dosed supply of useful elements to the roots;
- the possibility of planting seedlings in the ground without additional handling, which reduces the risk of stress for plants;
- rotting of the pot after it is placed in the ground.
Flaws:
- cups containing cardboard do not decompose in the soil, which increases the risk of mold appearing on the roots after transplanting seedlings;
- the need for strict adherence to the irrigation regime: due to the increased porosity of the peat walls, moisture quickly evaporates and the roots located near the walls dry out and freeze;
- not suitable for plants that are contraindicated in acidic soil: peat increases the acidity of the soil mixture;
- impossibility of reuse.
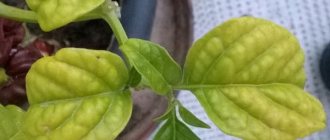
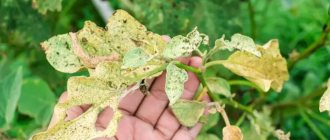
If mold appears
Fungus infection is one of the factors due to which some vegetable growers refuse to use peat containers. The main cause of mold is increased soil moisture and improper watering. Also, fungus can develop due to the use of undisinfected soil. Before planting the seedlings, the pots themselves can also be treated with fungicides.
To prevent mold from occurring, you need to regularly ventilate the room where the seedlings are kept, and also expose them to sunlight. All water that collects in the pan must be poured out. You can practice watering not from above, but into the pan with small portions of water, this will help avoid overflow.
When mold appears, it and the top layer of soil are removed and replaced with a new portion. The surface of moldy pots is treated with a solution of soda, vinegar or alcohol.
How to make peat pots yourself
Making peat containers for growing seedlings begins with preparing the mixture for pouring into molds. To do this, peat, turf soil and mullein are mixed in a ratio of 7:2:1.
Another option is peat and humus soil (60 to 20%), turf soil (15%) and mullein (5%). Mix the ingredients well and add water to them to get a thick consistency.
Then take two glasses. It is more convenient to use metal molds. One is filled approximately 1/3 with the prepared mixture. A second glass is inserted inside, pressing it firmly to the bottom to squeeze the cup shape out of the ground. When such a workpiece has dried, carefully remove the glasses.
Alternative to peat cups
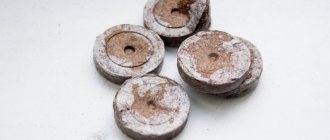
A type of peat containers are briquettes and tablets made from tightly compressed substrate. When wet, it swells to form tall peat cylinders into which the seeds are sown.
Peat tablets are small round pucks covered with mesh. Sowing of seeds occurs with preliminary soaking of the tablet. The washers are suitable for growing seedlings of almost all vegetable crops. The difficulty of using them is their high acidity and the impossibility of forced liming.
An important point is that the tablets cannot be placed close to each other, as mold and rot quickly appear in them.
The distance between the swollen washers is filled with pebbles, hydrogel or sawdust.
Peat briquettes work on the principle of tablets. Their main difference from other peat containers for seedlings is the presence of coconut shavings and a complex of microelements, thanks to which it provides the plant with all the necessary nutrients for 30-35 days.
The main advantage of briquettes over pots and tablets is their use not only for germinating seeds, but also for feeding plants, as well as for preparing soil mixtures.
Usage
Peat containers differ from each other in many ways. To germinate seedlings, it is very important to choose the right one that can ensure good development and allow the plants to feel comfortable.
Sizing
The main differences that deserve attention are the size and thickness of the walls. They also come in different shapes, but it has only aesthetic significance.
Plants with strong roots are best planted in pots with thick walls. For example, a pumpkin can easily penetrate peat up to 2.5 mm. And for cucumbers or eggplants, cups with thin walls are suitable - no more than 1.5 mm, since the roots may not be able to cope with thicker layers.