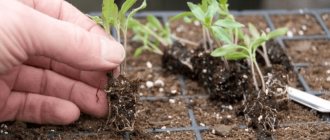
Thanks to home seedlings, you can get a really good harvest. Plants grown with your own hands can be controlled at all stages of development, but in order for the seedlings to turn out strong enough and healthy, everything needs to be adjusted as much as possible in advance. It will be of great importance what exactly you plan to grow tomatoes, peppers, eggplants, other vegetable crops or garden flowers. It will be great if you can make seedling boxes with your own hands. You will learn how this can be done and from what materials from this article.
DIY seedling boxes
Basic requirements for seedling boxes
The most important thing is that the boxes are suitable for the crop that you intend to grow in them. And if the containers are too large/small, they will most likely interfere with the normal development of the seedlings.
Requirements for a seedling box
Boxes sold in specialized stores have the following disadvantages:
- high price;
- thermal conductivity unsuitable for home use;
- the need to wash after each use;
- transparent walls (the roots are not protected from ultraviolet radiation);
- the bottom “walks” at the slightest careless movement and breaks off thin seedling roots (if the root is damaged, the sprout will simply die);
- drainage holes are too large or absent as such.
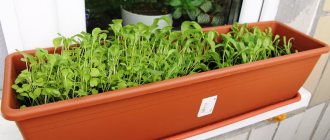
Homemade seedling boxes are much better in quality than store-bought ones
And if we take into account all these negative qualities, it becomes obvious why gardeners today still make seedling boxes with their own hands. Despite the fact that the times of shortages are a thing of the past.
Advantages and disadvantages of individual potties
Individual packaging has its advantages. For example, when transplanting seedlings, it is enough to dump the contents of the pot on the ground, which ensures the integrity of the root system. However, with a large number of seeds, using pots is difficult due to the inconvenience of their location in the apartment and subsequent transportation. Individual packaging requires a lot of space.
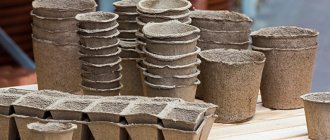
Small simple boxes made from scrap materials
There are many ways to make seedling boxes and pots. Some gardeners prefer disposable containers, while others prefer containers that can be used for several seasons.
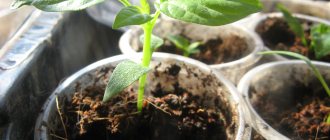
We use plastic bottles
Simple pots can be made from plastic bottles with a volume of 1 liter or 1.5 liters, for which you need to cut off the top part with the neck, leaving about 10 cm. Instead of bottles, you can also use plastic jars for fermented milk products. Such containers are inexpensive, lightweight and convenient. In the bottom of each jar, two or three holes should be made with an awl for drainage. Another option is to use disposable plastic cups, but compared to sour cream jars, they require careful rearrangement and watering due to their low shape stability and the fragility of the plastic.
Using plastic bottles for seedlings
Note! You can also make a kind of mini-greenhouses from plastic bottles. To do this, you need to cut off the top of one bottle and insert it into the bottom of the second, cut in the middle, with the neck down.
Growing seedlings in bottles
Seedlings in five-liter bottles
We use homemade peat cubes
To plant seeds, it is not at all necessary to have boxes at all - a moist nutrient soil mixture placed in any tray of the required size is suitable for this.
How to make peat cubes for seedlings
To prepare such a soil mixture, you will need:
- humus;
- peat;
- soil (cleaned and calcined in the oven).
All these components should be taken in equal proportions and mixed thoroughly, adding mineral fertilizers. The finished mixture is placed in a tray in a layer of about 3-5 cm. When the soil mixture dries, it needs to be cut into cubes, into which the germinated seeds will be placed.
Soil blocks for growing seedlings
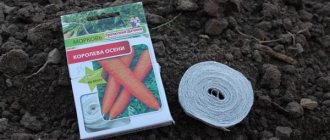
Peat prices
peat
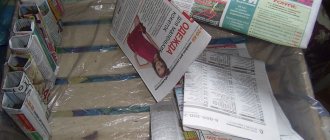
We use tetrapacks
Another good option is to use tetrapacks with an internal foil coating. These can be paper bags for juice, dairy products, baby food and other things. Such bags should be cut as in the image below, and several drainage holes should be made in the bottom.
Growing seedlings in cardboard milk and juice bags
Homemade seedling box
We use plywood scraps
You can use strips of plywood to make a small seedling box. To do this, you will need strips 6-7 cm wide, in which you need to make slits, as in the diagram below. From the strips it is necessary to assemble a square-shaped structure with cells. The plywood cells are placed on a pallet and the prepared soil mixture is poured into them. The result is a kind of cassette that can be easily disassembled if necessary. And the cost will be minimal.
Box for growing seedlings
Collapsible box for seedlings
We use metal cans
Metal cans for bulk products are a good option for reusable seedling pots. They will not rust, and there will be no difficulties with transportation. Let us only note that it is most convenient to make drainage holes using a thin screwdriver or an awl heated on gas.
Seedlings in tins
We use egg cartons
For small seedlings, you can even use eggshells, which in the future will become an excellent fertilizer for the soil. You just need to carefully remove the egg from the shell and boil it to get rid of organic residues. A small drainage hole should also be made at the bottom of each shell. These “egg” seedlings will hold up well in cardboard egg boxes.
Seedlings in eggshells
Egg boxes are suitable for growing seedlings
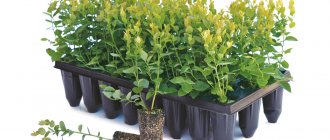
Plastic cassettes
Plastic cassettes are small containers fastened together with drainage holes of varying lengths and widths. If desired, there will probably be a cassette for the entire width of your window sill.
In Russian stores, plastic cassettes are usually sold without pallets. In this case, you will have to make the pallet yourself. Otherwise, they are very easy to use: you just need to fill each cell with soil mixture and boldly plant the seeds.
Pros: Easy to adjust to the desired size by cutting with scissors; are inexpensive and last a long time; cassettes are light and compact; already have holes for good drainage; seedlings are easily removed from the cells.
Cons: “Large format” cassettes are inconvenient for transportation, because they are very flimsy and can crack under the weight of soil and plants; due to the fact that the cells are fastened together, when removing one seedling, you can accidentally disturb the earthen lump of another; not free; Not every crop has enough space in a small cell (for example, the roots of peppers and eggplants may not have enough “depth” of the cassette).
Wooden box for seedlings - step by step instructions
A fairly simple design that you can build yourself with a minimum of tools and consumables. It can probably be considered a full-fledged mini-greenhouse for seedlings.
How to make a seedling box
First, let's prepare:
- plastic film;
- wood protective compounds;
- boards 200x120x20 mm (LxWxH) with a selected quarter - 9 pcs.;
- window retainer;
- block 5x5 cm;
- wood screws;
- slats 3.5x2 cm – 4 pcs.;
- window hinges – 2 pcs.;
- Duralumin corners – 8 pcs.
Sampling "quarter"
In addition, you will need the following equipment:
- furniture stapler;
- hacksaw;
- screwdriver (alternatively, you can use a Phillips screwdriver);
- roulette;
- saw with longitudinal blade.
After preparing everything necessary, we proceed directly to the manufacturing process.
Table No1. Instructions for making a wooden seedling box.
| Steps, illustrations | Description of actions |
| Step 1 | First, we take the bars and cut a couple of pieces 36 cm long and two more 30 cm long. Then we take 6 boards and saw them to a 2-meter length (for the long wall of the structure), and then another 6 meters (for the short one). |
| Step 2 | We construct a shield from three boards, after which we draw a line strictly parallel with a pencil approximately 20 cm from the edge. We do the same with the second end of the shield. We lay a block 36 cm long along each line. |
| Step 3 | We screw the bars to the boards using self-tapping screws. We get a long wall of the structure. We build the second wall in the same way, but the top board in this case should be cut down with a hacksaw with a longitudinal blade of about 6 cm. As a result, one wall will be higher than the other, so we can get an inclined lid. |
| Step 4 | Now we take short boards and screw them to the bars that were previously secured to the boards. As a result, we should have a rectangular box. |
| Step 5 | We cut the top boards at a slope in order to connect the high wall of the structure with the low one in a straight line. Then we proceed to the next step. |
| Step 6 | We take the slats and make a frame out of them according to the size of the box (this is necessary for the lid). |
| Step 7 | Using metal corners we connect the frame elements together. We use hinges to attach the frame to the box. |
| Step 8 | We strengthen the frame using two transverse ties. This can be done before the frame is hinged. |
| Step 9 | We screw the window clips prepared first to the short sides of the lid. This way we can fix it in the open position. |
| Step 10 | We take a piece of plastic film, place it on the lid and secure it with a furniture stapler. |
| Step 11 | We cut off the excess film with ordinary scissors. |
| Step 12 | We cover all wooden elements with a protective compound that protects them from rotting. That's it, the box is ready - after the composition has dried, you can plant seedlings there. |
Pots for seedlings
Choosing the right pots for seedlings is a science. Especially now, when all sorts of variations of these simple, but important and necessary garden devices have appeared on the market. An experienced summer resident knows perfectly well what is the best way to grow this or that variety of fruit crop, but what should a newcomer to the world of gardening do?
Cassettes for seedlings step by step using the papier-mâché technique using a muffin tin
Look into your kitchen. Housewives whose family members have a sweet tooth probably have cupcake molds at their disposal. They can be anything - metal, silicone or others. The most important thing is the presence of cells. Using the papier-mâché technique, you can easily turn these shapes into mini pots for seedlings. You will need:
- plain paper (many summer residents choose colored paper for beauty) or newspaper;
- muffin pan;
- water;
- flour (one glass);
- fine salt;
- scissors;
- brush;
- deep bowl;
- small saucepan;
- spoon.
First you need to prepare the paste:
- Fill the container with flour. Take one glass of warm water. Slowly pour in a thin stream, constantly stirring with a spoon to prevent the appearance of lumps.
- Add salt (1/2 teaspoon).
- Now pour in two more glasses of warm water. Mix thoroughly with a spoon.
- Turn on the stove. Place a saucepan filled with liquid on the fire. Stir regularly. After waiting 10 minutes, remove the pan from the stove. Wait until it cools down completely. The paste is ready!
After preparing the paste, cut the paper/newspaper into small pieces (not necessarily equal). Cover the top of the muffin tin with pieces of paper, layering them with paste using a brush. After finishing the painstaking work, dry the craft. After a day, carefully separate the mold from the workpiece. Cured paper cells can be used to grow seedlings!
Photo by ru.depositphotos: You can make cells from paper.
“Advanced” box – compact mini-greenhouse
This design will be mobile and compact. Its peculiarity is that we will be able to regulate the temperature inside the box, as well as limit the intensity of lighting of the seedlings. The mobility of the structure is also ensured by small rotating wheels.
How to make a mobile greenhouse for seedlings with your own hands
Note! The design is small but cheap, so if necessary, several copies can be built at once.
The list of everything you need is small:
- box (or materials from which it can be built);
- rotating wheels – 4 pcs.;
- glass (sheet dimensions must correspond to the dimensions of the box);
- screws – 8 pcs.;
- rubber washers;
- small wood screws – 6 pcs.;
- thin wooden strip (the thickness should be the same as that of glass).
For production you will need a wooden box
First, we disassemble the bottom of the box. If it is on screws (and often it is), then we use a screwdriver or screwdriver. For nails we use a nail puller. In the absence of a suitable box, we assemble a rectangular box from boards. By the way, you shouldn’t throw away the bottom, because it will be useful in the future.
Removing the bottom of the drawer
We take a couple of screws with rubber washers and screw them into one of the boards of the box. Subsequently, we will lay the glass on these washers. When ventilating, the glass itself should be at a slight slope, so such washers and screws will not be required for the second wall.
Screws with rubber washers
We attach the thin strips necessary for fixing the glass to a pair of side walls. We lay and fix two more on these slats - thanks to them, the glass will be held in a vertical plane. We attach the upper strips only in one corner so that they can rotate along the axis of the screw.
Thin strips are cut
We install the glass on the frame and check how securely it is attached. We install the resulting structure in a pre-selected place for it.
Glass installed on top of the frame
To make the glass at an angle, we can make a mound of earth under the wall.
You can make a mound of soil under one of the walls.
We use the remaining bottom (if any) to construct mobile platforms, with the help of which it will be convenient to move both the structure itself and the seedlings.
If you have box bottoms left over, you can use them to make mobile platforms
We screw 4 rotating wheels to the bottom.
The rotating wheel is screwed to the bottom
Ready mobile platform
The structure is almost ready. Now that spring comes, you can start growing vegetables and other crops.
Video - Making seedling cassettes
Small table with seating box
Let's consider another option - this time we are talking about a table, compact and very convenient. As the weather warms up, this table can be placed on the veranda. The manufacturing process itself is not complicated. If you look at the images below, you will understand everything yourself.
Table with box for seedlings
Making a table
Diagram of the seedling box itself
Assembling the box
The box is ready, now it needs to be placed on the table
Master Class. Paper cups for seedlings
If you are looking for square paper cups, then the step by step instructions below will be very helpful. A fairly simple method with minimal cost.
Table No2. Instructions for making seedling cups.
| Steps, photo | Description of actions |
| Step 1 | To create such cups we use a special device, which is a kind of tin sleeve. It fits freely onto the bar. |
| Step 2 | To make such a sleeve we use a tin can. Such cans, by the way, are tinned with food-grade tin, so you just need to heat the joint with a soldering iron. The insulating tape here serves as a mark along which the newspaper should be wound (so that the cups are the same height). |
| Step 3 | We cover the end of the block with an oil-soaked leather patch. This will prevent the wet soil from sticking. |
| Step 4 | We lift the sleeve, as in the image, and pour the prepared soil mixture into it. |
| Step 5 | We cut out a strip of newspaper and then wrap the sleeve. |
| Step 6 | Fold the edges of the paper to form the bottom of the cup. |
| Step 7 | We pull off the sleeve, and at the same time hold the soil mixture with the end of the block from spilling out. |
| Step 8 | We place the finished cups with the soil mixture in a box. |
| Step 9 | The advantage of this method is that the containers are already filled with soil mixture. You can sow, for example, leaf parsley in them or plant seedlings. As for the size of the device, they depend on the dimensions of the seedling box. The optimal option is from 2x2 cm to 4x4 cm. |
| Step 10 | You can plant seedlings in open ground along with cups. |
| Step 11 | To do this, we make depressions in the soil the same size as cups. First water the bed with water. |
| Step 12 | Immediately before planting, we pick out the bottom of the cup - this way the seedlings will immediately “feel” the soil. |
| Step 13 | After this, we plant the seedlings in the garden bed. |
Wooden box for seedlings
As a result, we note that ready-made boxes can also be used for seedlings - for example, from an old chest of drawers. In this case, you must first unscrew the lid with handles and cover the bottom with cellophane. But such boxes weigh quite a lot.
But such a rack can be made from an old table and a hanging shelf. If you accurately guess the dimensions, it will be difficult to distinguish the product from the factory one
Peat tablets
In recent years, special peat tablets have been gaining popularity - compressed fine peat with nutritional additives in a durable mesh shell. They are placed in a tray and filled with water. The tablets swell and increase in height several times, after which seeds are planted in the recesses on top.
Pros: Picking without unnecessary movements: the tablet is simply buried in the ground; excellent air and moisture permeability, which is important for the development of a powerful root system; there is no need to prepare or buy seedling soil, at least at the first stage of growing seedlings.
Cons: Expensive; as in the case of peat pots, constant control of humidity is necessary - it is very easy to dry out the roots of seedlings.
However, resourceful gardeners will always find a way out. For example, to solve a moisture problem, peat tablets with seedlings are placed in a plastic container for sushi, pastries or cake. The container is filled with water to the brim, and the tablets themselves take as much moisture as needed.