Considering that we most often start planting sprouts in January, when daylight hours are especially short, additional lighting is rule No. 1. It is necessary in the morning and evening hours. Pay especially attention to this issue if your windows face north or you live on the ground floor. But modern phyto-lamps are so expensive that, combined with the costs of a greenhouse, such vegetables then turn out to be “golden”. Haven’t you really been able to cope without modern technical innovations before? And what can you build in your home workshop? In fact - a lot, but it’s important to first understand such concepts as “spectrum”, “cone” and “LEDs”. So, let’s make lighting for seedlings with our own hands!
- 2 About the “necessary” and “unnecessary” spectrum
- 3 Which type of lamps should you prefer?
- 4 We design LED backlighting ourselves
- 5 How to check if the light is correct?
Optimal choice of lighting fixtures
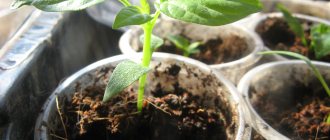
On cloudy February days, when a thin, weak stem of a small seedling desperately makes its way to the light, we simply have to help it. It is necessary to install an additional “sun”. That is, place lighting fixtures above the seedlings so that the daylight hours for the “kids” increase, and they climb upward more actively.
Additional lighting for seedlings can be provided using a fluorescent lamp
So, what can we offer young seedlings?
- Incandescent lamps. This is not the best option because they provide more heat than light. Such lighting will dry out the green parts of the plants, and also consume a lot of electricity. The only plus is that the lamp itself is inexpensive.
- Fluorescent lamps. The thermal radiation of fluorescent lamps is low, which means they can be placed directly above the plants. The lamps are economical and have a long service life. The only negative is that they are low-power, so for high-quality illumination you will need to use 2-3 lamps at the same time.
- Mercury-fluorescent lamps. They have good light characteristics and work for about 5 years. But if they are accidentally broken, the mercury vapor contained there will harm not only the greenery, but also people. Such lamps must be recycled after use.
- Phytolamps. These are the same fluorescent lamps, only they emit color in a certain light range. It is believed that a plant is actively developing if the light falling on it consists of blue-violet and red-pink rays. The phytolamp produces just such a spectrum, but it is harmful to people, so it must be covered with special reflectors.
- LED lamps and strips. They are rapidly gaining popularity among vegetable growers. Their features are the red spectrum of illumination, long service life, low heating temperature and efficiency.
Phytolamp for seedlings
Supplementary lighting with lamps: choosing a light source
When choosing lamps for illuminating seedlings, you need to consider how close the light they generate is to the natural solar spectrum. The most important “shades” in it are red and blue-violet. The first activates the process of chlorophyll synthesis, seeds germinate faster, seedlings develop better. The second “inhibits” the growth of the stem, while simultaneously accelerating cell division. The seedlings do not stretch and are powerful and strong.
For harmonious development, seedlings need light from the red and blue-violet regions of the spectrum
As for lighting power, seedlings require about 8000 lux. The lamps provide about 6,000 lux, the rest is natural light.
Phytolamps
Ideal for plants that are very suited to their violet-pink-blue spectrum. Among their other advantages are compactness, long service life, and energy efficiency. The disadvantage is the high price.
For humans, such lighting is unnatural and even harmful. The eyes get tired quickly, and some may even develop a persistent migraine. Therefore, lamps require special reflectors.
Phytolamps are specially designed for illuminating seedlings, but this shade of light is not very useful for humans
By the way, they are useful for any additional illumination. And it would be better if they were matte screens. Light is scattered and “absorbed” by plants much better than direct rays. The phytolamp screen can be metal or plastic. The first is more durable - when turned on for a long time, the plastic often does not have time to remove excess heat and melts.
Video: advantages and disadvantages of phytolamps
Light Emitting Diodes (LED)
One of the best options for plants along with phytolamps. The service life is almost a record - 50,000–100,000 hours. LEDs are sold in different colors; you can buy blue and red. Their price is quite high. Such light bulbs consume minimal energy and do not heat up during operation. At the same time, the lighting intensity (about 6000 lux) is quite sufficient for the harmonious development of seedlings.
LED lamps are available in different colors - you can choose only the ones that are most useful for seedlings
Practice shows that additional illumination with LEDs reduces the rate of moisture evaporation from the soil; accordingly, it is possible to increase the intervals between waterings.
Over time, LED lamps dim and begin to flicker. Due to their small size, they produce a narrow beam of light. This allows you to focus them on a specific plant, but with a large number of seedlings you need a lot of LEDs.
Video: which is better for seedlings: LEDs or fluorescent lamps
High pressure sodium lamps
They produce stable “warm” light of the red-orange spectrum of the required intensity, close to natural. But because of the brightness, it hurts the eyes a lot. The lamps are not cheap, although they last a long time. For an ordinary amateur gardener who does not grow seedlings on an industrial scale, such a supplementary lighting system simply will not pay for itself.
High-pressure sodium lamps are used mainly by professionals growing seedlings, vegetables, herbs and berries in large greenhouses and on an industrial scale
During operation they noticeably heat up and hum; in cold rooms the light intensity decreases. Another drawback is bulkiness. The lamps themselves are small, but they come with additional equipment - special chokes, starters. It is problematic to place a structure with such lamps on a standard window sill. They cannot be plugged into a regular outlet. Failed lamps due to the presence of sodium and mercury vapor require special disposal.
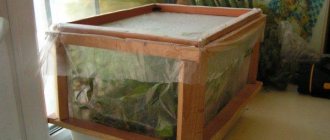
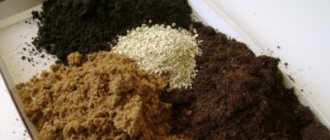
Additional lighting from a cardboard box
While you are choosing the best option, it would be useful to get acquainted with the simplest and most economical way to illuminate seedlings.
Tip: Before you “fence your garden,” find out whether your seedlings really need additional light. Point the light at half of the seedling box. If there is no difference between the illuminated and unlit parts, then there is enough light. If the difference is significant, then the plants really need an additional lighting system.
- First you need to measure the size of the container with seedlings.
- Choose a cardboard box so that it is slightly larger than your seedling box.
- Cut off the top and sides of the box so that the sides remain 1 cm high.
- Cover the bottom and sides with foil. Secure it to the sides with a stapler, so that the foil is higher than the sides.
- Place the box with seedlings in a box on the windowsill, closer to the light.
- As a result, the seedlings will receive additional light reflected from the foil.
Foil to enhance backlighting
The method is good, but if you grow a lot of seedlings, then you cannot do without lamps.
Phytolights
It is easy to grow high-quality seedlings using phytolights specially designed for this purpose for illumination. They are designed for long-term operation, including 24-hour operation. Effective for the accelerated production of seedlings of vegetable, flower, berry, and ornamental crops, and for growing vitamin-rich greens all year round.
Gardening stores offer phytolights from different manufacturers. They differ in price and materials used. Lighting devices with linear fluorescent lamps are still on sale, but are in less demand, since they are inferior in their performance and consumer qualities to phytolights with LEDs.
The design includes:
• panel with LED lamps;
• stands 2 pieces;
• support panel;
• adjustable power cord with lock.
Using a panel with LEDs eliminates burns. It is installed and secured on stands in such a way as to prevent contact with the tops of the plants, and raised as the seedlings grow.
The light source is located above the seedlings. Uniform lighting is ensured by the use of reflectors. Reflective surfaces made of foil, white paper, mirrors are fixed on the sides. For tall plants, you can organize side lighting by placing a panel with LEDs vertically on the side.
LED lamps are selected with an optimal spectrum for seedlings from 400 to 800 nm; LEDs with a solar spectrum are included, which ensures enhanced production of biologically active substances by the plant. The pinkish spectrum has a beneficial effect on photosynthesis and enhances the vegetative growth of green leaves. The intensity of the luminous flux depends on the power and number of LEDs.
How many “luxes” does a seedling need?
Illumination from 6 to 8 lux is considered optimal for the development of seedlings of tomatoes, peppers and eggplants. And more light-loving exotic plants require from 10 to 12 lux. For comparison: at the end of February, when the sun pleases us with light for a maximum of 8 hours a day, the illumination in sunny weather is 2 thousand lux. And on cloudy days - 500 lux.
In order to maximally meet the needs of seedlings, daylight hours should be about 15 hours in bright light. This means that the lamps should be lit not just in the morning and evening, but throughout the day.
How to position the backlight
In order for the seedlings to grow normally and not burn out, the lighting must be positioned in a special way:
- The optimal location of lighting fixtures is at least 10 cm from the tops of plants. When the seedlings grow, the lamps will need to be moved. We will consider 2 design options with the ability to change the distance from plants below.
- For any lighting, it is better to use regular foil as an additional option. It is better to cover any surface on which containers with seedlings are located. The rays of the lighting fixtures, in this case, will be reflected and illuminate the seedlings from below.
- For any type of additional lighting you need to select reflectors. They will increase the efficiency of the backlight and protect people from constant bright light.
Reflectors enhance lighting efficiency
About the “necessary” and “unnecessary” spectrum
As for the “usefulness” of the spectrum, the biggest misconception is that seedlings do not need green light at all - after all, they reflect it. In fact, it is needed in another way - for many important processes. Don't experiment with it!
The fullest spectrum is that of sunlight. These are full of different colors and different lengths. So,
- Blue and purple are designed to regulate cell growth so that the shoots are short and strong.
- Red influences seed germination and stimulates flowering.
- Yellow and green - reflected from the leaf plate, but necessary.
Of course, artificial light sources, with all the achievements of modern science, are still far from the sun - they still have shifts in one direction or another of some colors. Therefore, it is better to use a matte screen as a reflector - it not only increases the efficiency of the backlight, but also makes the light “diffuse” - scattered. This is much better absorbed by plants than straight and hot.
Options for installing lighting at home
Whatever lamp you choose, you need to think about how to install it. You can make lighting with your own hands on a windowsill, on a table, on a rack you built yourself. Some people place seedlings on open cabinet shelves and attach a lamp above them.
Tip: If your seedlings are far from the window, then the lighting system should work around the clock!
Let's consider the option of creating a special holder for phyto or fluorescent lamps. It can be placed above a table or any other flat surface.
Holder for phytolamp
You will need:
- wooden blocks measuring 2 by 4 cm, 1 m long;
- 12 short bars;
- two lamps;
- wire with switch;
- 2 screws of 6 cm, and 2 of 4 cm.
Stages of work:
- The lamp is fixed on a board 1 m long.
- Legs are attached to this board on both sides. For this, 6 bars are used.
- You need to install the second lamp in the same way. This time the configuration of the legs is slightly different, for greater stability and the ability to change the height of the structure.
- Two spacers with lamps need to be placed crosswise, one above the other. Place seedlings under them.
You can make such a thing in 3-4 hours. The advantage of this mechanism is its durability, the fact that you can change its height, and it is also easy to carry if necessary.
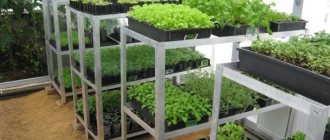
Seedling rack with lighting
Seedling rack with lighting
You will need:
- boards;
- metal corners;
- wood treatment product;
- bolts or screws.
Stages of work:
- Determine the required length and width of the rack. It will be convenient if it has three compartments.
- We build open shelves.
- Each compartment will be illuminated by a light attached to the bottom of the upper compartment.
The convenience of such a rack is obvious. Shelves for seedlings are located one above the other, which saves space. You can place such a bookcase anywhere, not necessarily near a window. The disadvantage of the design is that you cannot change the distance from the lamp to the plant.
Popular ready-made solutions
There are ready-made phytolights for seedlings on sale:
- Reflex Sunshine. Design power up to 150 W. Sodium lamps are used. The device is convenient for use in small spaces. Illuminated area up to 2 m2. The power is adjusted according to the type of crop. The device requires compliance with the rule: do not turn off less than five minutes after turning on. Lighting with this device fully provides lighting for healthy growth. The package contains special fasteners for shelves, tables, and windowsills.
- Alamak - lighting in apartments. Compact, easy to install. LED bulbs are used for illumination. The supplied light completely replaces natural light. The maximum height of the device is up to 48 cm. The distance from the sheets is from 5 to 20 cm.
- Khatisa - desktop bicolor lighting. Manufactured using LED lamps. Height up to 50 cm, luminous flux power up to 800 lux. Works up to 100,000 hours. The kit includes an adapter and electrical wires.
- Vasat is an LED device for installation on a windowsill. Easy to use, significant energy savings. Aluminum surface, 30 W LED bulbs. The length of the device is from 80 to 120 cm. The height is adjustable in three levels. The package includes a power supply with a cable up to 1 m 20 cm.
We hang the lighting fixture with our own hands
Attention! How to understand at what distance it is better to hang a lighting fixture? Place your hand under the surface illuminated by the lamp. If you feel warmth, then the light source needs to be moved.
Let's figure out how to hang any purchased lamp if it does not have its own mounting system. You will need:
- 2 threaded hooks;
- 2 chains;
- fluorescent, LED or phytolamp.
Lamp for illuminating seedlings
Stages of work:
- You need to insert two dowels into the special holes in the lamp.
- Screw threaded hooks into them.
- We hang two chains on the rings.
- Now we can use this hanging structure on any shelves, bedside tables and windows. You just need to hang the chains on some ledge. By adjusting the length of the chain, you can raise the lamp higher as the seedlings grow.
Regardless of the type and lighting method you choose, your seedlings will receive the maximum amount of light. This means that they will develop well even in cold and cloudy months. This means you can enjoy an early harvest.
Is it possible to assemble a phytolamp yourself?
On gardening forums you can come across topics describing the creation of phytolamps with your own hands using LED strips or individual LEDs fixed on a metal profile. But in order to create such lighting for seedlings, you need to have a good understanding of electrical engineering. The main difficulty is assembling a current source from a resistor and a stabilizer (instead, you can purchase a special driver, but then the cost of the design will be significantly higher). It’s easier to assemble a phytolamp with your own hands using a simplified scheme from ready-made LED lamps, which can be bought at any lighting store.
Materials and tools for assembly:
- LED lamps of scarlet and blue color with 3 LEDs;
- rectangular chipboard fragment;
- sockets for LED lamps (the number must correspond to the number of lamps);
- drill;
- screwdriver;
- soldering iron;
- fasteners;
- cord with plug.