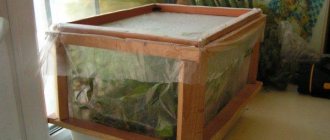
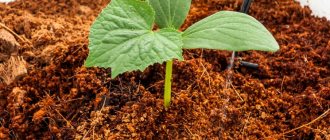
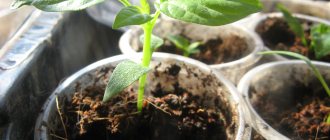
Growing seedlings is one of the most responsible and complex procedures that owners of private or country houses have to perform annually. It begins to be carried out in February, when it is very difficult to create the right conditions for plant growth.
The quality of the seedlings largely determines what the harvest will be this year. Therefore, it is necessary to use special lighting and create optimal conditions for seedlings. To do this, you need to compactly place the seedlings and ensure uniform lighting, temperature and humidity for all varieties and types of plants.
The most practical and convenient way of placement is a rack that takes up minimal space and can accommodate all the seedlings. At the same time, it is unlikely that you will be able to buy a finished product - as a rule, factory racks are not suitable for the size or height of the shelves. Therefore, most gardeners make racks with their own hands.
Let's take a closer look at this issue.
Why use shelving
Before arranging a window sill, you need to understand for what purpose the rack or shelf is used to place pots and other containers with seedlings on it.
If you are an avid gardener or summer resident, then you know how and where to grow seedlings.
The main condition for good growth is the optimal amount of light, humidity and temperature.
It is not for nothing that window sills turn out to be the most practical and functional place for such tasks.
Basic requirements for racking
A rack for seedlings can be made from various materials, but in any case it should be:
- durable;
- suitable for repeated use;
- convenient, i.e. provide comfortable conditions for caring for plants (it is important to have quick access to seedlings for watering, inspection and loosening);
- having an aesthetically attractive appearance.
The dimensions of the structure can be completely different, but racks with the following parameters are considered universal:
- number of shelves – from 3 to 6;
- the length of the shelves is sufficient to accommodate standard fluorescent lamps (i.e., from 50 cm);
- height between shelves – from 40 to 50 cm;
- the distance from the floor to the bottom shelf is from 10 cm.
Often the bottom shelf is used to store various garden tools or household items.
If you do not plan to keep seedlings on the last shelf, the top of the rack can be left open by installing front and rear horizontal supports instead of the top shelf. They will not only support the entire structure, but will also be an excellent place for attaching lighting elements.
Types of racks for seedlings
Based on location, racks are divided into:
- window, installed on the window sill;
- floor
The first type is used for installation on windows facing south. The downside is that such stands do not allow for growing tall seedlings on them. But for small specimens it will be possible to arrange 3 or 4 floors.
Rack for seedlings on the windowsill
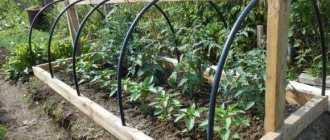
Floor options are universal; they can be placed in front of a window, against a wall, on a loggia, and even, if desired, in the middle of the room. Equipped with a lighting source, they will solve the problem of providing the required duration of daylight for seedlings.
Floor rack for seedlings
Their height is presented in stores in different sizes.
The advantage is that in most designs you can remove some of the shelves if they interfere with the placement of tall plants.
Suitable materials
Particular attention should be paid to the materials from which the structure will be made. Traditionally they use:
- tree;
- metal;
- plastic.
The choice depends on your desire and financial capabilities, but you should keep in mind that the rack should serve you as long as possible, while being reliable and practical. For load-bearing racks, take wooden beams, plastic pipes or metal tubes with perforations, and for shelves - metal sheets, wooden lining, plastic panels or plexiglass.
Please note that shelves made of metal and wood (plywood, chipboard) can be seriously damaged by moisture. Therefore, in the first case they will have to be painted, and in the second case they will have to be covered with polyethylene.
Recently, racks made of metal corners with perforations are increasingly appearing. They are stable, reliable, and very easy to use due to the fact that you can change the location of the shelves at any time without much difficulty.
Varieties
Racks for seedlings are primarily distinguished by the number of tiers and the material used in assembly. The number of shelves depends on ease of use and the number of seedlings.
Standard models are made of 3 tiers, but a homemade rack can consist of more shelves. Here they are based on necessity and ease of use - not everyone can freely and safely reach the upper tiers.
The materials for making shelving can be:
wood
This is the most common manufacturing method, since the principles of working with wood are familiar to almost all home craftsmen;
metal
As a rule, guides for drywall and perforated profiles are used for finishing corners;
plastic
The most convenient and high-quality method is polypropylene water pipes and fittings.
In addition, combined models using different materials are popular. For example, wooden shelves are mounted on metal or plastic supports.
This option is even more common than others, since it is most convenient to use sheet materials for the manufacture of horizontal planes.
In addition, racks are distinguished by installation method:
floor
Installed directly on the floor, can be firmly fixed or be able to move to other areas of the room;
wall
The structure is hung on a vertical surface like shelves. It is necessary that the walls are strong and can support the weight of the rack and seedlings;
window spacer option
The side walls of the window opening are used as load-bearing planes.
Finally, a distinction is made between collapsible and solid racks. The former are convenient in city apartments, the latter are most often used in private houses, where, in addition to placing seedlings, they perform various household tasks.
Material selection
The material is selected so as to create a reliable and durable rack for seedlings. Let's look at some of them and find out the advantages and disadvantages.
- Metal: durable, reliable. Profiles or pipes are suitable for racks, and shelves are made of mesh or sheet metal. Disadvantages: high cost, special skills, devices and tools for manufacturing will be required. Corrosion may occur, so stainless steel is recommended.
- Wood: environmental friendliness, beauty, strength. To improve the latter quality and protect it from moisture, the rack is coated with impregnation, which protects the wood from getting wet. Hardwood materials absorb liquid the least: maple, oak, ash.
- Plastic: affordability, durability, easy to clean, resistance to external influences (light, water). To assemble the racks, plastic sheets and pipes are taken.
- Plexiglas: strength. An original stylish shelving unit is made from this material. The transparent design will fit into any interior. In addition, you can use plexiglass of different colors.
- Plywood: easy to work with. But not the most suitable material. The shelves swell quickly when exposed to water. To prevent this from happening, you will have to additionally use film.
Plywood seedling rack
Of the listed materials, plastic and plexiglass are considered the most suitable. Racks made from them are immediately ready for use. And there is no need to impregnate them with protective agents against pests, moisture, and corrosion.
If you decide to make a rack for seedlings with your own hands, in addition to the material you will need the following tools:
- saw,
- drill,
- screwdriver,
- screwdriver and others.
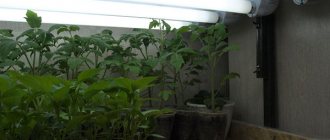
Do you need lighting?
When assembling a rack for seedlings with their own hands, some gardeners think that they can do without additional lighting. It is worth noting that even for a structure that was mounted on a window, it is necessary to provide for the presence of lamps of the appropriate type.
In winter, daylight hours are quite short. Due to lack of natural light, seedlings may not develop well. Photosynthesis processes will proceed slowly. Because of this, biomass growth will not occur at the required pace. In order for plants to develop normally, it is necessary to install additional lighting on the rack. This will provide normal conditions for the seedlings and allow the seedlings to gain strength before transplanting them to the site
It is important to choose the right lamp that will meet all requirements
Types of structures
Racks according to their design are divided into stationary, collapsible and window.
- Stationary racks are installed in a permanent place and fixed in several places for reliability. They are distinguished by their strength and durability. They are installed in rooms where plants are supposed to be grown for more than one season.
- Collapsible racks for seedlings are convenient for limited space spaces. This rack can be easily and quickly disassembled and moved to another location. When the seedlings are planted, the stand is dismantled and put away.
Window racks are installed on the windowsill. They are suitable for planting a small number of seedlings. These devices allow you to grow greens all year round
The advantages of using each type of structure are confirmed by many years of experience of gardeners and gardeners.
DIY drawings of racks for seedlings
The simplest version of the design with shelves can be assembled with your own hands from ready-made parts used in arranging storage areas in warehouses. For example, you can make a rack from profiled steel racks, in which the shelves are assembled from ready-made metal cassettes.
Since the frame is assembled from standardized parts, it is possible to make shelves of unlimited sizes and number of places for arranging seedlings. The second advantage of using ready-made cassettes and racks is the ease and speed of assembly.
Designs made from ready-made parts are convenient and easy to assemble. Important! As the shelves with trays and pots with seedlings are filled, the rigidity of the frame can be increased using cable braces stretched from the back.
If you plan to make a stationary rack of maximum strength, then the best option would be a project from a 25x25 mm profile pipe, with a wall thickness of 2 mm.
Shelves measuring 50x150 cm can be made of waterproof plywood or metal if the seedlings are planned to be grown not on the ground, but in hydroponics.
If you make the shelves not from a pipe, but from a corner, then the supporting plane can be made of glass or thick monolithic polycarbonate.
Glass shelf cover improves illumination
One of the options for making a rack for seedlings with your own hands is shown in the video:
It is clear that wood remains the most affordable material for shelves. To make a window version, you can use the design of a U-shaped shelf installed on the window sill.
A more spacious rack for three full-fledged shelves from lining can be made according to the universal scheme given below.
In general, the design turns out to be quite reliable and convenient, but transporting it in an apartment or even a country house is not very convenient.
Metal wall shelf "vine"
This is the author’s version of the flower shelf, but we also chose it for consideration in the master classes. For work we will need:
- Sheet iron or fittings.
- Paint, brushes.
- Parts for fastening the shelf.
Step-by-step diagram-instructions for the master:
- The main difficulty with this model is the required blacksmithing skills. If you do not have such practical skills, contact a specialist to make just the frame for you. You can arrange the rest of the details yourself.
- The frame should be in the form of a weaving vine.
- Prepare the leaves-stands. These are wide platforms with sufficient thickness of material. We need to weld the blank leaves to the branches of the vine.
- We cover our product with paint and varnish for additional shine.
- We form the fastening elements and hang the decorative shelf on the wall.
- For additional fixation of flower pots, you can slightly bend the edges of the leaf pads to make small border borders.
Such work will not be difficult for those craftsmen who have already had experience working with metal decorative products. For beginners, this variation will require some financial costs. However, beauty and unique style will decorate your home and transform the interior.
Today there are a huge variety of designer models for home decoration. Much of the work is done online, allowing you to learn creative skills in real time under the guidance of experienced mentors. If you want to make adjustments to the interior of your own apartment, successfully arrange your home flowers and organize your own mini-garden, start learning right now. And the results of fruitful work will not keep you waiting!
https://youtube.com/watch?v=etDbFsrltK4
Making a shelving unit for the windowsill
Having initially calculated the number of floors of the rack (in our case there will be 4) and its parameters, we proceed to construction. For simplicity and convenience, we take ready-made furniture panels in the size of the window sill, 1200 mm by 200 mm long. For the side racks we install furniture panels 1500 by 200 mm long. We fix it using the format. The height of the shelf in our case is 350 mm. If desired, for greater stability, the structure can be additionally secured to the slope or frame. You can make a rack for seedlings with lighting by attaching lighting to a ready-made structure.
Why do seedlings need lighting?
In winter, plants especially lack natural light. As a result, photosynthesis proceeds sluggishly, normal development and biomass growth slows down. The lack of light is compensated by installing artificial lighting. In stores you can buy lamps of various designs and powers. But how many lamps and what power is suitable for growing plants? First, let's decide which lamps are suitable for lighting.
Choosing the right lamp for seedlings
Suitable for illuminating seedlings:
- Incandescent lamps (17 Lm/W) are a simple, affordable, but not the most effective way of lighting. They provide little light and heat up a lot.
- Fluorescent lamps (70 - 100 Lm/W) type LBT or LB daylight with low power. Provide cold light. Have a low proportion of red light.
- LED (80 – 110 Lm/W) – durable, economical lamps. With them it is easy to select the required spectrum and intensity.
- Sodium metal halide lamps (up to 100 Lm/W) are easy to use, economical, efficient, but they lack the blue spectrum.
- Domestic sodium gas-discharge lamps (200 lumens per watt) emit a yellow-orange glow that does not cause eye irritation. Requires additional installation of a control device.
- Mercury . They have the largest “cross section” in the area of daylight.
- Phytolamps are economical, environmentally friendly, efficient, compact and durable. The most popular for lighting seedlings. Even close proximity of such lighting will not lead to leaf burns.
- Others : halogen (25 Lm/W), linear (47 – 93 Lm/W), xenon gas-discharge lamps (100 Lm/W), neodymium.
In order to illuminate a shelf 50 cm wide and 140 cm long, it will be enough to install a “warm” lamp and a “cold” spectrum lamp with a power of 36 W. And it is best to make up for the lack of sunlight with fluorescent lamps or special phytolamps. Reliable and efficient sodium gas-discharge lamps will also help illuminate racks for growing seedlings.
When choosing a lamp with throttles, take into account the strong heating of the throttle and the shelf above it. To reduce heating, the gap between the shelf and the lamp is 4–6 cm. If you use a lamp with electronic ballast, there will be no problems with heating.
Recommendations for organizing lighting
Regardless of the type of lighting chosen, try to place the seedlings on a south-facing window. For greater effect, you can install additional reflective screens on the sides and back of the seedlings. The lighting intensity is selected individually for each plant. Depending on the requirements of the plant, the intensity can be adjusted by increasing or decreasing the distance from the lamps to the plant.
Let's take stock
Having selected the necessary material and calculated the parameters of the shelves, you can easily make a rack for seedlings with your own hands. Do not forget about the need for additional lighting for plants.
Having decided on the choice of lamp (phytolamps, fluorescent, sodium lamps are considered optimal), you can make a rack for seedlings with lighting.
Lighting organization
If there is not enough lighting for flowers during the day, it can, and even needs to be created artificially. To do this, you can use ice lamps, fluorescent lamps and other devices.
Flowers need additional lighting mainly in the autumn-winter period, when daylight hours are reduced.
This is especially true for violets, since lack of lighting affects their development almost immediately. But sources of artificial light have a beneficial effect on them, since Saintpaulias have no intolerance.
If the flowers have wilted leaves or peduncles have stretched out, artificial additional lighting will also be very useful.
How to choose the right lamps?
Ideally, plants should be illuminated with lamps and fluorescent lights. The lighting should be white or slightly yellowish. Also, instead of conventional lamps, you can use lighting units that are recharged from the mains and last much longer.
The problem of lack of lighting for saintpaulias on glass shelves can be easily solved by attaching an LED strip to the bottom of the shelf.
Calculation of required lighting
The lighting required for violets is calculated based on the length of daylight hours. Usually it is direct sunlight from the morning until 10.00, as well as from 16.00 until sunset. The rest of the time, diffused light is recommended for violets.
When it is difficult to comply with natural lighting conditions, artificial light sources are used.
Examples of location and mounting of lamps
Lamps for additional lighting are best mounted in twos, maximum three on one shelf. Metal structures are most suitable for mounting such lamps.
In this case, the distance between the shelves should be at least 20-22 centimeters so that the heat from artificial lighting does not harm the plants.
Lamps placed too close can burn the violets.
LED strips are also often used to illuminate violets that are on glass shelves. Such a device not only provides the necessary lighting to flowers, but is also an interesting decorative solution for any room.
Wooden rack for seedlings
If you are planning to make a shelving unit from wood, you will first need to draw a sketch of it so that you do not forget what dimensions to adhere to. Here is an example of a suitable diagram:
It is better to make shelves from timber in the form of a longitudinal lattice. They will be stronger than plywood shelves, although the structure will be more bulky and heavy.
After preparing the sketch, you need to collect the following materials and tools:
- wooden beams for racks with a section of 45x60 mm (2 pieces of 3 m each, you can immediately ask to cut them into 1.5 m sections);
- wooden beams for crossbars with a cross-section of 20x60 mm (2 pieces, 2 m each, you can immediately ask to cut them into 50 cm pieces);
- wooden board for shelves with a section of 22x100 mm (one shelf takes 5 pieces 75 cm long, then for all 4 shelves you need 4-5 boards of 3 m each);
You can save on boards for shelves if you lay them not end-to-end, but at a short distance from each other. There will be a shelf in the form of a wooden lattice.
- saw;
- screws, nails;
- chisel;
- hammer;
- wood glue;
- roulette;
- pencil.
After preparing all the necessary materials and tools, you can proceed directly to the construction of the rack. This process essentially consists of two main stages - cutting parts and assembling them. We will consider each stage separately.
Cutting parts
The timber purchased from a hardware store must be cut taking into account the following parameters:
- the length of the bars for the manufacture of supporting parts of the rack (racks) is 1.5 m each;
- the length of the bar for the crossbars is 50 cm;
- the length of the shelf boards is 75 cm.
On each beam you will need to measure the required length, draw a line and cut along it using a miter saw or a regular saw. To save overall time, it is advisable to use a circular saw or jigsaw. Based on the cutting results, you need to obtain the following elements of the future design:
- 4 supports 1.5 m long;
- 8 short timber crossbars;
- 15-20 boards for shelves.
To further strengthen the rack, you can prepare bars that will need to be screwed to the finished structure diagonally at the back wall.
Assembly
The prepared boards need to be connected like a construction set to get the finished product. You must act in this order:
- Mark with a pencil where the groove for the crossbar will be located, attaching it to the support block:
The first crossbar should be located at a distance of 23-24 cm from the edge of the support beam, and the subsequent ones - 40 cm from each other. Measurements should be taken from the end of the support beam, which is in contact with the floor. This will ensure that the shelves are at the same height. - At the marking sites, first make cuts taking into account the thickness of the crossbar, and then cut out the grooves using a hammer and chisel.
Please note that the crossbar must be recessed into the groove. - Secure the first cross member between the two support bars by driving it into the groove with a hammer (dimensions in mm in the photo).
It is recommended to pre-treat the fastening points with wood glue and additionally secure them with self-tapping screws.
- After 40 cm, fix another crossbar, and behind it two more (the last crossbar will be at the very top edge). The result should be a kind of staircase.
- Prepare the second side of the structure as described above.
- Lay the boards that will make up the shelves between the two support posts. Secure them to the crossbars using self-tapping screws or nails.
- Cut corners in the end boards so that the support beams fit into them.
- Create the two top shelves in the same way.
- The top shelf can be made longer.
The finished structure will look like this:
If the joints were not treated with glue during assembly, such a rack can be easily disassembled by simply unscrewing the screws. In order not to waste time on disassembly, after growing seedlings, the rack can be moved to another place and used to store books, tools, jars with preparations, etc.
Shelf made of plywood (MDF) for flowers or souvenirs. Scheme drawing
A flower shelf made of plywood for the wall, which you can easily make with your own hands according to the drawings given below.
1) Cut out 5 shelf blanks from plywood (See drawing). To do this, it is convenient to make a template from hardboard or durable cardboard and trace it on plywood, then cut out the parts.
2) On the vertical posts at the back, we mark the location of the hinges and, using a groove cutter (chisel, etc.), carefully cut out grooves for them, all the time checking the accuracy of their location and compliance with the metal hinges.
3) We cover the outer ends of the plywood with veneer edge tape.
4) We assemble the entire structure using PVA glue and self-tapping screws, first check whether the angle is 90 degrees. 5) We cover our wall shelves with stain or varnish and screw in the hinges.
This shelf would also look great if it was made of solid pine or another type of wood. The main thing is interest and desire.
Photo from Woodmaster magazine
Homemade pallet rack
If the seedlings will be grown in a small apartment, the problem of placing containers with plants can be solved using a narrow vertical pallet structure mounted on one of the walls. To make it you will need:
- pallet (cargo box);
- wooden beams (4 pieces, 3 m each);
- wooden slats;
- hammer;
- nails;
- pencil;
- roulette.
You can assemble the rack according to the following instructions:
- We are making a three-bay rack. Cut the timber 1.5 m long. You will get 8 parts.
- Cut 18 slats as long as the width of the pallet.
- Take two bars and place them parallel to each other. Step back from the top as much as the thickness of the pallet (about 10 cm). Fasten the slats to the bars with nails so that you get a structure similar to a ladder. Pallets will be installed on these slats as shelves. The distance between the shelves should be about 40 cm.
- Place the pallets on the slats. You can secure them with nails or put them on wood glue.
Manufacturing
Classical
First of all, let's look at how to create a classic design on a carved leg.
To do this you will need the following tools:
- Hacksaw;
- Jigsaw;
- Electric drill;
- Pencil;
- Roulette;
- Sandpaper;
- Wood files, etc.
When starting work, first of all you should make a sketch and drawing of the future product. You can also use ready-made drawings. Below, as an example, we give one of the drawing options.
Drawing of the main elements of the stand
The instructions for making this design look like this:
The main and most complex element that shapes the appearance of the product is the vestment leg. This part is turned on a lathe.
If you do not have such equipment, you can order a leg from your nearest carpentry shop. The only thing you need to provide is a sketch of this part.
Next, use a jigsaw to cut out a round tabletop. The material for it can be plywood of suitable thickness or even chipboard.
Sawing a round piece with a jigsaw
- Then the base circle is cut out, as well as other round parts indicated in the drawing.
- Before you begin assembly, you must carefully sand all parts with sandpaper.
- Next, a support disk is attached to the center of the base using self-tapping screws.
- After this, you need to attach the border to the tabletop. To fix it, you can use PVA glue or special wood glue.
- The legs should be attached to the underside of the base. They can be carved from wood or purchased ready-made at a furniture store.
- Then you need to glue the base and tabletop to the leg.
- At the end of the work, the finished wood product should be varnished and polished.
This completes the manufacturing process.
Flower stand made from branches
Backlight
Seedlings are grown in February-March, and this is not the sunniest time of the year. Plants may absolutely lack the light necessary for photosynthesis and mass growth. To solve this problem, additional lighting is installed on the racks. There are several types of lamps suitable specifically for growing seedlings.
- The most affordable and simplest option is incandescent lamps (17 Lm/W). They are ineffective because they provide little light and at the same time generate a lot of heat, which can harm the seedlings.
- Low-power fluorescent lamps, such as LB or LBT daylight (70–100 Lm/W). They produce cool light with a low proportion of red radiation.
Shelving illuminated with fluorescent lamps
- Long-lasting and economical LED lamps (80–110 Lm/W). Their advantage is the ability to select the desired intensity and suitable spectrum.
LED lamps are easy to use and efficient
- Metal halide sodium lamps (up to 100 Lm/W) are efficient and economical, and are also easy to use. The downside is that they do not contain a portion of the blue spectrum.
- Gas-discharge sodium lamps (200 Lm/W). Their yellow-orange glow is not irritating to the eyes, but they will require a regulating device.
- The glow of mercury lamps is as close as possible to the level of daylight.
- Phytolamps are very popular among gardeners, including for lighting seedlings. They are compact, environmentally friendly, economical and durable. Even if the seedlings are located close to such a lamp, burns will not form on the leaves.
Phytolamps for lighting seedlings
- Also used are xenon gas-discharge lamps (100 Lm/W), halogen (25 Lm/W), linear (47 - 93 Lm/W), and neodymium.
When choosing a lighting device, pay attention to the presence of a choke. It gets very hot and heats up the shelf on top. Therefore, leave a gap of 4–6 mm between the shelf and the device. Lamps with electronic ballast do not have heating problems.
Whatever type of lighting you choose, keep in mind that seedlings will do better on the south side. To improve lighting efficiency, install reflective foil screens on the sides and back of the rack. Do not forget that each plant has its own level of illumination. You can adjust the intensity by changing the height of the lamps above the plants.
Installation of LED lighting
Due to their ease of installation and operation, LED lamps have become the most common among gardeners growing seedlings. You will need:
- red and blue LEDs;
- hot glue or thermal paste;
- a base for placing strips of LEDs (can be made of any material);
- a power supply that will provide the required voltage and current stability;
- electrical wire and plug.
To provide the required number of rays of a certain spectrum, alternate the LEDs on the strip: 1 blue, 2 red, and so on until the end of the strip.
Alternate red and blue LEDs to provide plants with the right spectrum of light
- Solder the diodes together using paste and lead them to the driver.
- Connect the driver to the switch and plug.
- Attach the LED strips to the prepared base.
- Collect everything into a single chain.
You can also use an automatic timer and set it to 14 hours of lighting. This is very convenient if you do not have the ability to control the illumination of seedlings in the evening and at night.
Illumination from fluorescent lamps
If you plan to install fluorescent lamps on the rack, then take into account their length when calculating the size of the rack. In order to pass the electrical wiring, you will need to drill additional holes in the metal corner. Or you can carefully distribute the wire along the metal elements.
- Attach 2 lamps under each shelf - at the front and rear crossbars. Leave a gap of at least 1.5 cm between the shelf and the lamp.
- For fastening, it is recommended to use cut tin tape or metal wire.
Install two lamps above each shelf
Remember to follow safety precautions when working with electricity. Exposed wires should not be in the public domain. All work must be done with the power off.
Lighting organization
If there is not enough lighting for flowers during the day, it can, and even needs to be created artificially.
To do this, you can use ice lamps, fluorescent lamps and other devices. Flowers need additional lighting mainly in the autumn-winter period, when daylight hours are reduced.
This is especially true for violets, since lack of lighting affects their development almost immediately. But sources of artificial light have a beneficial effect on them, since Saintpaulias have no intolerance.
If the flowers have wilted leaves or peduncles have stretched out, artificial additional lighting will also be very useful.
How to choose the right lamps?
Ideally, plants should be illuminated with lamps and fluorescent lights. The lighting should be white or slightly yellowish. Also, instead of conventional lamps, you can use lighting units that are recharged from the mains and last much longer.
The problem of lack of lighting for saintpaulias on glass shelves can be easily solved by attaching an LED strip to the bottom of the shelf.
Calculation of required lighting
The lighting required for violets is calculated based on the length of daylight hours. Usually it is direct sunlight from the morning until 10.00, as well as from 16.00 until sunset. The rest of the time, diffused light is recommended for violets.
When it is difficult to comply with natural lighting conditions, artificial light sources are used.
Examples of location and mounting of lamps
Lamps for additional lighting are best mounted in twos, maximum three on one shelf. Metal structures are most suitable for mounting such lamps.
In this case, the distance between the shelves should be at least 20-22 centimeters so that the heat from artificial lighting does not harm the plants.
Lamps placed too close can burn the violets.
LED strips are also often used to illuminate violets that are on glass shelves. Such a device not only provides the necessary lighting to flowers, but is also an interesting decorative solution for any room.
Useful tips
LED lamps are not suitable for illuminating seedlings; they do not provide the range of luminescence necessary for plants. Fluorescent lamps are suitable for already mature seedlings. They are less safe to use due to the long glass body. Therefore, the lighting on the housekeeper should be done on flexible hangers and under no circumstances should it be rigidly attached to the surface of the shelf. Otherwise, under load due to the weight of the seedlings, the surface may bend and break the glass.
Halogen lights work well, they give a full spectrum, but they are installed above the seedlings in reflectors and at a distance of at least a meter from the seedlings